Table of Contents >> Show >> Hide
- Tip 1: Start With the Right Tree (and the Right Matchmaking)
- Tip 2: Give Your Tree a Sunlight “Upgrade” With Training and Pruning
- Tip 3: Thin Fruit on Purpose (Yes, You Have to Remove Some)
- Tip 4: Feed Your Tree Based on Evidence, Not Vibes
- Tip 5: Water Like a Pro (Consistency Beats Drama)
- Tip 6: Win the “Weed War” Under the Canopy
- Tip 7: Use IPM: Scout, Sanitize, and Target the Real Problem
- Tip 8: Add Physical Protection (Because Wildlife Loves Free Fruit)
- Tip 9: Harvest at Peak Maturity (Not Just “When It Looks Good”)
- Tip 10: Treat “After Harvest” as Next Year’s Setup
- Conclusion: Bigger Harvests Come From Better Habits (Not More Luck)
- Real-World Experiences: What Backyard Growers Learn the Hard Way (Plus a Few Laughs)
If you’ve ever stared at your fruit tree in July like it owes you money, you’re not alone. Fruit trees can be wildly generous
one year, strangely stingy the next, and occasionally dramatic enough to drop half their crop the moment you brag about it.
The good news: you don’t need a commercial orchard (or a degree in interpretive pruning) to boost your backyard yield.
What you do need is a game plan that focuses on the big “yield levers”: sunlight, pollination, crop load, water, nutrition,
and pest pressure. Nail those, and your harvest gets bigger, better, and way less chaotic. Below are 10 smart, research-backed
tipswritten for real humansso you can maximize your fruit tree harvest without turning your weekends into an orchard hostage situation.
Tip 1: Start With the Right Tree (and the Right Matchmaking)
Harvest starts long before the first blossom. If your tree isn’t well-suited to your climate, you’re basically asking it to
perform a Broadway show in a rainstorm. Choose varieties that match your region’s winter chill needs and summer heat, and pay
attention to disease resistanceespecially for apples (apple scab is a classic party-crasher).
Plan pollination like it’s a group project
Many fruit trees need a compatible partner to set heavy crops. Apples, pears, most sweet cherries, and many Japanese plums
typically need cross-pollination from another compatible variety nearby. Even “self-fruitful” types often produce more reliably
with a pollinizing buddy.
- Keep pollinizers close: Plant compatible varieties within a practical bee travel range (think: same yard, not “across the neighborhood”).
- Match bloom time: Two trees can’t help each other if one blooms early and the other shows up late like it missed the memo.
- Choose manageable size: Dwarf or semi-dwarf rootstocks can make pruning, spraying (if needed), and harvesting dramatically easier.
Tip 2: Give Your Tree a Sunlight “Upgrade” With Training and Pruning
Fruit is basically the tree’s way of converting sunlight into snacks. If the inside of your canopy is dark and crowded, you’ll
get fewer flowers, more disease, and fruit that never quite sweetens up. Training and pruning are how you turn a leafy jungle
into a light-filled fruit factory.
Use proven shapes: central leader or open center
Apples and pears often do well trained to a central leader (a strong main trunk with well-spaced scaffold branches),
while peaches and other stone fruits frequently shine with an open center (a vase shape that lets sunlight into the middle).
Either way, your goal is the same: strong branch angles, good airflow, and light reaching fruiting wood.
Prune at the right time (and for the right wood)
For many fruit trees, late winter into early spring is a prime pruning window because the tree is dormant and branch structure is easy to see.
You’re also setting up productive fruiting woodoften on 2–3 year old wood for applesso you’re not just “making it pretty,” you’re building future crops.
- Remove dead, diseased, broken, or rubbing branches first.
- Thin crowded areas to let in light (think “space,” not “haircut”).
- Avoid constant topping: harsh heading cuts can trigger a burst of upright water sprouts that shade the tree and steal energy.
- Spread narrow-angled limbs: wider angles tend to be stronger and more fruitful over time.
Tip 3: Thin Fruit on Purpose (Yes, You Have to Remove Some)
Thinning feels wrong the first timelike returning groceries because your cart is “too full.” But fruit trees often set more fruit
than they can size up properly. If you leave everything, you’ll often get small fruit, stressed branches, and the dreaded “on year/off year”
cycle (alternate bearing).
How thinning boosts harvest quality
- Bigger fruit: fewer fruit means more resources per fruit.
- Better color and flavor: less crowding helps sunlight reach fruit surfaces.
- Fewer broken limbs: heavy clusters can snap branches as fruit gains weight.
- More consistent crops: balanced crop load helps the tree set next year’s buds.
A practical thinning rule for apples and pears
A common home-orchard approach is thinning to one fruit per spur and aiming for roughly one fruit about every 6 inches
along the branch. Start when fruit are small (often around marble size), and keep the healthiest, best-shaped fruit in each cluster.
Tip 4: Feed Your Tree Based on Evidence, Not Vibes
More fertilizer does not automatically mean more fruit. In fact, too much nitrogen can create a gorgeous leafy tree that produces
the harvest equivalent of a shrug. Smart feeding is about balance: enough nutrients to support growth and fruiting, not so much
that the tree stays stuck in “teenage growth spurt” mode.
Test your soil (and stop guessing)
Soil testing is the foundation of good nutrition. For perennials like orchards, testing every few years is often enough unless
you’re troubleshooting a problem. A soil test can guide pH adjustments and reveal whether you actually need things like potassium
or magnesium.
Use growth as your “fertilizer speedometer”
Many extension-style recommendations tie nitrogen to how much new growth you got last season. If growth is weak, you may need
more nutrition. If growth is excessive, ease upespecially on pears, where too much vigor can raise disease risk.
- Timing: early spring is a common fertilizing window for many fruit trees.
- Placement: broadcast under the canopy area; don’t pile fertilizer against the trunk.
- Example approach: for some home orchards, a guideline is about 1/10 lb of actual nitrogen per year of tree age (with a cap for older trees).
Tip 5: Water Like a Pro (Consistency Beats Drama)
Fruit trees don’t want constant sogginess, and they don’t want surprise droughts either. They want consistent moisture in the root zone,
especially during flowering, fruit set, and sizing. Water stress can trigger fruit drop, smaller fruit, and weaker bud formation for next year.
Start the season with moisture where roots live
In drier winters or when rainfall is low, trees may need irrigation before bloom to support root growth and spring demand. Through summer,
watering frequency depends heavily on soil type: sandy soils dry faster; heavier loams and clay loams hold moisture longer.
Reduce waste and help roots drink deeply
- Avoid runoff: slow, steady watering that penetrates beats quick watering that escapes sideways.
- Water the root zone, not the trunk: roots are typically spread under the canopy, not hugging the bark.
- Adjust for heat waves: extreme heat may require closer monitoring even if your “calendar schedule” says you’re fine.
Bonus: in regions with a sharp fall freeze, some guidance suggests easing off watering in early fall so new growth can “harden off.”
(Your local climate decides thisask your local extension office what makes sense where you live.)
Tip 6: Win the “Weed War” Under the Canopy
Grass and weeds aren’t just messythey compete with your tree for water and nutrients. If your fruit tree looks like it’s “working hard”
but you’re still harvesting lightly, check the orchard floor. A tree forced to share resources with a thick lawn may never reach its potential.
Mulch the smart way: donut, not volcano
A ring of mulch helps suppress weeds and retain moisture. Keep it like a donutmulch around the tree, but not piled against the trunk.
Piling mulch directly on the trunk can cause rot problems and can even mess with dwarfing rootstocks if the scion roots into the mulch.
- Maintain a vegetation-free zone under the canopy where practical.
- Refresh mulch as it breaks down.
- Keep the trunk area dry and clear for long-term tree health.
Tip 7: Use IPM: Scout, Sanitize, and Target the Real Problem
“Pest control” isn’t one thingit’s a strategy. Integrated Pest Management (IPM) focuses on prevention, observation, and targeted action,
so you’re not spraying randomly and hoping for the best. (Trees appreciate science. Also, your budget will.)
Sanitation is the unglamorous MVP
- Apple scab: fallen leaves can carry disease into the next seasoncleaning up in fall can reduce future pressure.
- Brown rot (stone fruits): remove “mummified” fruit and infected twigs; prune for airflow so foliage dries faster.
- Codling moth: remove and destroy infested fruitdropping it on the ground doesn’t end the problem, it continues the lifecycle.
Sprays, if used, should be careful and label-driven
If you choose to use pesticides (including organic-approved options), follow the label exactly and consider talking with your county extension
office about what’s appropriate for your region and the pest you’ve actually identified. If you’re a teen, get an adult to helpthese products
can be hazardous if misused.
Tip 8: Add Physical Protection (Because Wildlife Loves Free Fruit)
You’re not the only one excited about your harvest. Deer, birds, raccoons, rabbits, and voles all read your orchard like a buffet menu.
The most reliable solutions are usually physical barriers.
Use fences, guards, and netting strategically
- Deer: fencing is often the most dependable long-term solution.
- Voles/rabbits: trunk guards (mesh/hardware cloth) help protect bark; keep tall grass down near trunks.
- Birds: netting can be the best long-term protection when fruit is coloring and ripening.
Try fruit bagging for apples (a low-spray favorite)
Bagging individual apples can reduce damage from insects and some diseases. A common approach is to thin clusters to one apple,
then bag fruit when apples are around 1/2 to 3/4 inch in diameter (often a couple weeks after petal fall). Simple zip-type bags
can work if you add a small drainage hole and secure them well. Bags are often removed a few weeks before harvest so fruit can color properly.
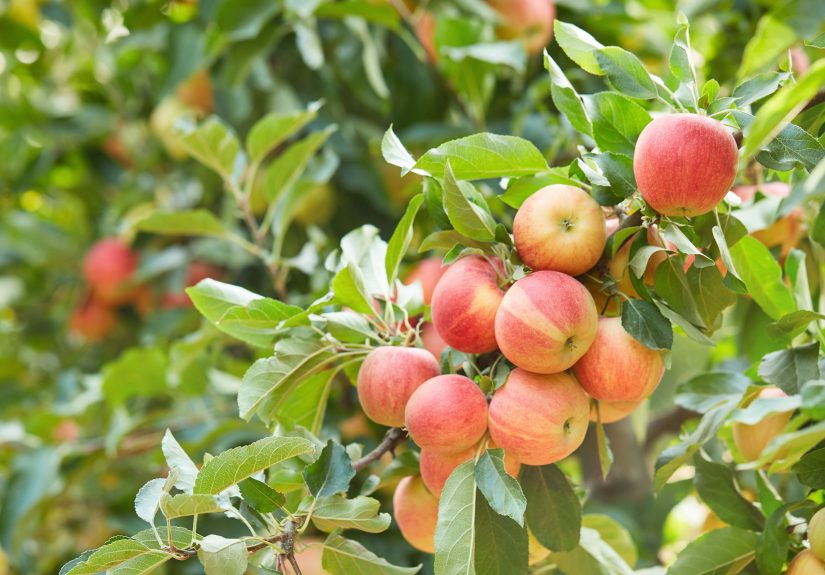
Tip 9: Harvest at Peak Maturity (Not Just “When It Looks Good”)
Timing harvest is a skillpart science, part experience, part “why is this peach perfect for exactly 30 minutes?” Harvesting too early
can mean bland fruit. Too late can mean soft fruit that bruises easily, doesn’t store well, or becomes critter bait.
Use simple maturity cues
- Apples: color change (background color), firmness, and starch conversion are key maturity indicators; serious growers start checking weeks before harvest.
- Stone fruits: aroma, slight softening, and color shift are often better cues than “size.”
- Pears: many are picked mature-but-firm and ripened off the tree depending on variety.
Harvest gently. Lift and twist fruit rather than yanking. Use a picking bag or a padded bucket if you’re harvesting a lot. One bruised apple
can turn a storage box into a science experiment.
Tip 10: Treat “After Harvest” as Next Year’s Setup
The harvest isn’t the finish lineit’s halftime. In late summer and early fall, many fruit trees are still building fruit buds for next season and
storing energy for winter. Keeping leaves healthy and the tree moderately stress-free can help you avoid a weak crop next year.
Simple post-harvest moves that pay off
- Keep up sanitation: remove fallen fruit (“drops”) and obvious disease sources.
- Don’t over-fertilize late: pushing late soft growth can increase winter injury risk in some climates.
- Plan succession: plant or graft early-, mid-, and late-season varieties so you’re not drowning in fruit all at once.
- Preserve the surplus: freeze berries, dehydrate slices, can sauces, or share fruityour neighbors will forgive many things for a bag of peaches.
Conclusion: Bigger Harvests Come From Better Habits (Not More Luck)
Maximizing your fruit tree harvest isn’t about a single miracle product. It’s about stacking small, smart habits: choose the right varieties,
plan pollination, prune for light, thin for quality, water consistently, feed based on soil and growth, and keep pests under control with IPM and
physical protection. Do those things, and your tree will reward you with fruit that’s bigger, sweeter, and far more predictable.
And if you have an “off year”? Don’t panic. Fruit trees are long-term relationships. Show up consistently, keep notes (seriouslywrite down bloom time,
thinning date, and harvest date), and you’ll get better every season. Your future self will thank you… while eating an apple the size of a softball.
Real-World Experiences: What Backyard Growers Learn the Hard Way (Plus a Few Laughs)
Ask a group of home orchardists about “maximizing harvest,” and you’ll hear two kinds of stories: the triumphant ones (“I filled three crates!”)
and the cautionary ones (“The squirrels filled three crates.”). Here are a few common, very real experiences that tend to show up again and again
and what they teach about getting a bigger, better fruit tree harvest.
1) The Year of 800 Tiny Apples
A classic first-time mistake is letting the tree keep every fruitlet because “more fruit = more harvest.” What many growers discover in September is a
tree packed with apples the size of ping-pong balls. The tree did produce a lotjust not the kind of fruit you dreamed about.
The lesson: thinning feels like sabotage in spring, but it’s actually quality control. Leaving fewer apples lets the remaining fruit grow larger,
color better, and taste sweeter. Many growers who start thinning never go back, because it’s the difference between “cute snack” and “wow, that’s an apple.”
2) The Broken Limb Heartbreak
Another very common story: a heavy crop year, a sudden windstorm (or even a calm daygravity is consistent), and a major limb snaps under the weight.
It’s a double hit: you lose fruit now, and you lose fruiting wood for the future.
The lesson: thinning reduces weight, and so does simple support. Propping overloaded branches or using ties can save a limb during peak sizing.
Growers often say the best time to notice overload is earlywhen clusters are formingso you can thin before fruit becomes a wrecking ball.
3) “My Tree Is So Healthy!” (It’s All Leaves.)
Some growers get excited about fertilizing and end up with a tree that looks like it could audition as a shade tree in a park. It’s lush, tall,
and leafyand it sets disappointing fruit. Sometimes the fruit it does set is slow to color because the canopy is too dense.
The lesson: nutrition is about balance. Soil tests and growth-based feeding prevent the “all leaves, no fruit” scenario. Smart growers learn to watch
shoot growth and adjust fertilizer accordingly, and they prioritize pruning that opens the canopy to light.
4) The “I Picked Too Early” Regret
There’s a moment every season when fruit looks ready but isn’t. Apples may be colored but still starchy. Peaches may be blushing but still firm and bland.
Many growers pick early to “beat the birds,” then realize the flavor never fully develops.
The lesson: harvest timing is a skill. The more you track your dates and learn maturity cues, the better your fruit gets. Some growers start doing quick
taste tests on a schedulesampling a fruit every few days as harvest approachesso they learn what “almost” tastes like versus “perfect.”
5) The Bagging Experiment That Actually Worked
Gardeners who dislike spraying often try bagging apples. The first attempt can be clumsybags fall off, condensation happens, and you learn why drainage holes matter.
But many growers report that once they get the timing right (bagging after thinning, using healthy fruit, securing bags well), the payoff is impressive:
cleaner fruit with less insect damage. The lesson: physical protection can be surprisingly effective, especially when paired with sanitation and good pruning.
It’s not “set it and forget it,” but it can be a game-changer for small trees.
The bigger takeaway from all these experiences is encouraging: better harvests usually come from a handful of repeatable actions, not rare luck.
Keep your trees open to sunlight, don’t overload them, protect blossoms and fruit at the right times, and stay consistent with water and sanitation.
Over a couple of seasons, most growers go from “random fruit surprises” to “reliable harvest routines”and that’s when the backyard orchard really starts to shine.