Table of Contents >> Show >> Hide
- Before You Organize: A 10-Minute Setup That Makes Everything Easier
- 15 Clever Storage Ideas for Silverware and Utensils
- 1) Use an Expandable Flatware Tray (The “Fits Now, Fits Later” Move)
- 2) Go Side-by-Side Instead of Stacked (More Space, Less Rattle)
- 3) Add Adjustable Drawer Dividers for Long Utensils
- 4) Try Modular Bins for Custom Layouts (Like LEGO, but for Adults)
- 5) Use a Pegged Drawer System to Stop Sliding and Piling
- 6) Add a Second Tier Inside the Drawer (Double-Decker, No Construction)
- 7) Use a Compact, Stacked Cutlery Organizer for Narrow Drawers
- 8) Store Knives in an In-Drawer Knife Insert (Safer, Cleaner Counters)
- 9) Make a “Daily Utensil Kit” in a Countertop Crock
- 10) Separate Utensils by Task Using Multiple Crocks or Jars
- 11) Install a Peg Rail or Hanging Bar Under Cabinets
- 12) Use a Wall-Mounted Pegboard for Flexible Tool Storage
- 13) Mount a Magnetic Strip for Metal Tools (Not Just Knives)
- 14) Use Inside-Cabinet Door Storage for Overflow Tools
- 15) Create a Portable “Set-and-Serve” Caddy for Entertaining
- How to Choose the Best Utensil Storage Setup for Your Kitchen
- Make It Stick: The 3-Minute Maintenance Routine
- Conclusion
- Real-Life Experiences That Make These Ideas Click (About )
If your utensil drawer sounds like a wind chime every time it opens, congratulations: you’ve invented percussion storage. The good news is you don’t need a bigger kitchen to fix ityou need a smarter system. The best silverware storage ideas do three things at once: keep everyday tools easy to grab, stop “the spatula avalanche,” and make cleanup feel less like a treasure hunt and more like a smooth, one-motion habit.
This guide shares 15 clever, real-world utensil storage ideasfrom classic drawer dividers to vertical tricks for small kitchensplus practical examples so you can choose what fits your cooking style (and your drawer’s personality).
Before You Organize: A 10-Minute Setup That Makes Everything Easier
A fancy organizer can’t save a drawer that’s trying to store 47 random gadgets, three duplicate peelers, and a mystery chopstick that’s clearly on a solo journey. Do this first:
- Empty the drawer completely. Yes, even the rogue corn holders.
- Sort by job: eating (flatware), cooking (spatulas, tongs), measuring, serving, and “rarely used.”
- Measure the inside of the drawer (width, depth, and height). Many “it should fit” moments are actually “it absolutely will not.”
- Use the 80/20 rule: aim to leave a little breathing room so items don’t wedge, snag, and multiply into chaos again.
- Assign a “prime zone.” Put daily tools closest to where you prep or cook. The best system is the one you’ll use while hungry and in a hurry.
15 Clever Storage Ideas for Silverware and Utensils
1) Use an Expandable Flatware Tray (The “Fits Now, Fits Later” Move)
An expandable cutlery tray adapts to different drawer widths, which is perfect if you’re working with a slightly odd cabinet sizeor if you move and your next kitchen plays by different rules. Use the narrow section for forks, spoons, and knives, then expand for chopsticks, steak knives, or serving pieces. This is one of the simplest silverware organizer upgrades because it creates instant categories without a renovation.
2) Go Side-by-Side Instead of Stacked (More Space, Less Rattle)
Stacking flatware in piles looks efficient… until you need the bottom spoon and accidentally pick up every spoon like a magic trick. Storing flatware side-by-side keeps everything visible, neat, and easier to grab one-handed. If your drawer is shallow, this can also reduce tangling and the “clink-clink” soundtrack.
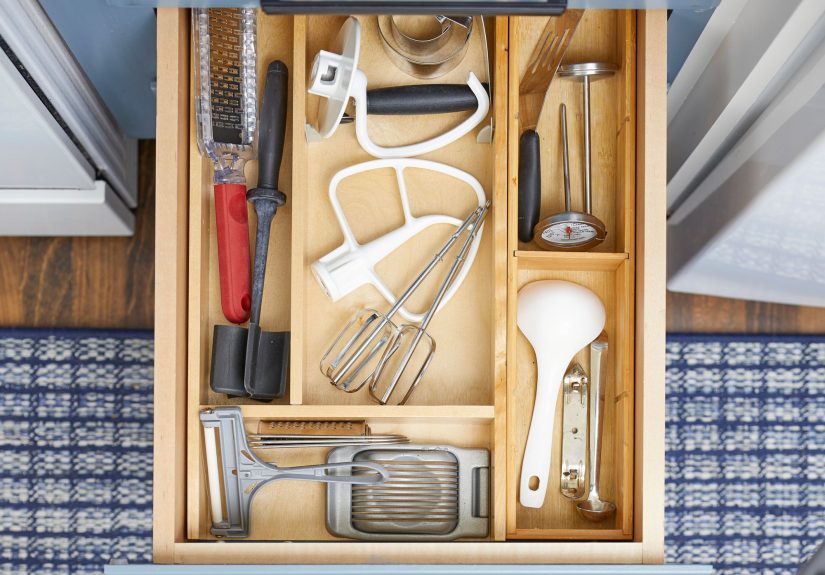
3) Add Adjustable Drawer Dividers for Long Utensils
Cooking tools don’t behave like flatware. Tongs are lanky. Whisks are chaotic. Ladles are basically tiny boats. Adjustable dividers let you create long lanes for these oddly shaped tools. Set up two or three sections: one for heat tools (spatulas, turners), one for grabbers (tongs, pasta server), and one for prep tools (peeler, zester, garlic press). This turns a messy utensil drawer into “zones,” not “surprises.”
4) Try Modular Bins for Custom Layouts (Like LEGO, but for Adults)
Modular bins work best when your drawer needs a non-standard layoutlike mixing measuring spoons, short tools, bag clips, and small gadgets. Instead of one big tray that doesn’t match your stuff, use several small bins you can rearrange. Bonus: you can lift out one bin (say, “baking tools”) and carry it to the counter like a portable kit.
5) Use a Pegged Drawer System to Stop Sliding and Piling
Deep drawers are great until everything slides into one giant utensil traffic jam. A pegged drawer insert (or a pegboard-style base with movable pegs) creates snug compartments so utensils stay put when the drawer opens and closes. It’s especially helpful for larger serving utensils, awkward tools, and anything that tends to drift into the “why is this here?” corner.
6) Add a Second Tier Inside the Drawer (Double-Decker, No Construction)
If your flatware collection is large or you share a kitchen with people who love collecting spoons like souvenirs, consider a two-tier insert. The lower level handles everyday forks/spoons/knives, while a shallow upper tray slides or lifts for specialty piecesthink seafood forks, serving spoons, or backup sets. This is a high-impact idea when you need more storage without sacrificing the drawer below.
7) Use a Compact, Stacked Cutlery Organizer for Narrow Drawers
Some kitchens come with drawers that are basically confident they’re wide enough. If yours is narrow, a compact organizer with stacked compartments can store flatware vertically at an angle. You’ll still separate forks from spoons, but in a slimmer footprintleaving room beside it for cooking tools or a small gadget bin. It’s a smart fix for apartments, tiny kitchens, or “why is this drawer 4 inches wide?” situations.
8) Store Knives in an In-Drawer Knife Insert (Safer, Cleaner Counters)
Knife blocks hog counter space, and loose knives in a drawer are a bad idea for fingers and blades. An in-drawer knife insert keeps knives organized with slots that shield cutting edges. Choose one that fits your drawer depth, and place it in a separate zone from mixing bowls or random tools. This is one of the most practical upgrades for kitchen drawer organization because it adds safety and frees up work space.
9) Make a “Daily Utensil Kit” in a Countertop Crock
If you cook often, the tools you grab daily shouldn’t be buried under the waffle iron manual. A utensil crock on the counter can hold your top essentialsspatula, tongs, wooden spoon, whiskright next to the stove. For a tidier look, group by type (silicone tools together, wood together) or use two smaller crocks instead of one crowded one. You’re aiming for “grab-and-go,” not “utensil bouquet.”
10) Separate Utensils by Task Using Multiple Crocks or Jars
One giant crock can become a sinkhole of tools. Instead, use multiple containers: one for stirring tools, one for baking tools, one for small prep tools. This works especially well if you bake and cook oftenyour measuring spoons and spatulas stay accessible without fighting for space with a pasta server the size of a canoe paddle. Matching containers can also make the counter look intentional instead of improvised.
11) Install a Peg Rail or Hanging Bar Under Cabinets
If counter space is limited, go vertical. A simple rail with hooks under an upper cabinet (or along a backsplash zone) can hold frequently used utensils. Choose sturdy hooks, keep the most-used items at hand level, and avoid overloading. This can be a surprisingly elegant storage upgrade in small kitchensplus it makes your tools look “chef-y,” even if your signature dish is toast.
12) Use a Wall-Mounted Pegboard for Flexible Tool Storage
A pegboard is like giving your utensils a customizable home with endless rearranging possibilities. Hang measuring cups, ladles, and even small baskets for odds and ends. The biggest benefit is flexibility: when your tool collection changes, the storage changes with it. Keep heavier items on stronger hooks and group tools by station (prep, cooking, baking) so your wall storage stays functional, not decorative clutter.
13) Mount a Magnetic Strip for Metal Tools (Not Just Knives)
Magnetic strips aren’t only for knives. If you have metal measuring spoons, small metal whisks, or steel tools with magnetic-friendly handles, a strip can keep them visible and easy to grab. This is best for lightweight items and households that prefer tools off the counter. Place it away from high-traffic bump zonesno one needs a surprise spoon attack.
14) Use Inside-Cabinet Door Storage for Overflow Tools
Cabinet doors are underrated real estate. Add an inside-door rack or slim organizer for items you use often but don’t want in the main drawer: long chopsticks, specialty serving utensils, or grilling tools. This keeps the utensil drawer focused on everyday use while still keeping “secondary tools” within reach. It’s a clean way to prevent drawer overcrowding without banishing tools to the back of a random shelf.
15) Create a Portable “Set-and-Serve” Caddy for Entertaining
If you host, stop rebuilding your serving setup from scratch each time. Use a portable caddy or divided bin to store napkins, serving spoons, tongs, steak knives, or reusable cutlery. Keep it in a cabinet, and pull it out when guests arrive. This keeps entertaining items together and prevents your everyday flatware drawer from turning into a party supply warehouse.
How to Choose the Best Utensil Storage Setup for Your Kitchen
Match storage to your cooking habits
Cook nightly? Prioritize quick-access options: drawer zones near the stove, a small crock for daily tools, and a separate lane for prep tools. Bake often? Build a “baking drawer” with modular bins for measuring spoons, piping tips, and small tools so they don’t mingle with dinner utensils.
Use frequency as your organizing “secret sauce”
Everyday tools get prime space. Weekly tools get a secondary section. Rarely used gadgets go higher up or farther back. This one idea prevents the classic problem: a drawer full of tools you never touch, with the one spatula you need buried underneath everything.
Don’t ignore cleaning and maintenance
Choose organizers you’ll actually wipe down. Plastic bins are easy to wash. Bamboo looks great but appreciates a quick dry after cleaning. Whatever you pick, keep a little extra space so crumbs don’t turn into a long-term “drawer ecosystem.”
Make It Stick: The 3-Minute Maintenance Routine
- Weekly: Quick shake-out or wipe of crumbs and dust.
- Monthly: Pull everything out, re-sort, and donate or recycle duplicates you don’t use.
- Seasonally: Re-zoning check: does your setup still match how you cook right now?
Think of it like brushing your teeth. You don’t need a full dental documentary every dayjust a small habit that prevents chaos from coming back with a megaphone.
Conclusion
The best utensil storage isn’t the fanciestit’s the one that makes your kitchen feel calmer at 6 p.m. on a busy weeknight. Start by measuring and sorting, then pick two or three upgrades that match your space. An expandable flatware tray plus dividers for cooking tools solves most drawer problems immediately. Add a peg rail, crock, or door storage if you need extra breathing room. Your utensils will finally stop acting like they’re auditioning for a drawer-based reality show.
Real-Life Experiences That Make These Ideas Click (About )
Most people don’t notice utensil storage until something goes wronglike when you’re stirring pasta and the one wooden spoon you like is missing, or when you open the drawer and a whisk springs out like it’s late for an appointment. That’s usually the moment the “I need a better system” thought appears… right before you shove the drawer closed and pretend you didn’t see the chaos.
A common experience is the “duplicate spiral”: you can’t find your tongs, so you buy another. Then you can’t find your new tongs, so now you own three. The drawer isn’t just messyit’s hiding your inventory from you like a tiny, stainless-steel magician. Once you separate tools into zones (even with two simple dividers), the spiral stops because you can actually see what you have. Suddenly you’re not shopping for a peeler every time you peel a carrot.
Another real-world issue is the “mid-cook scramble”. You’re flipping chicken, the pan is hot, and you need a spatula now. If your spatulas live under ladles, measuring cups, and that one novelty spoon shaped like a guitar, you end up pawing through the drawer with one hand while the other hand tries to keep dinner from turning into an unplanned science experiment. That’s why countertop crocks and stove-side drawers feel so life-improving: they reduce the number of steps between “I need it” and “I have it.”
Small kitchens have their own special storyline: limited drawer space forces you to get creative, and that’s where vertical storage feels like a superpower. Hanging bars, pegboards, and inside-door racks aren’t just cutethey create breathing room when your cabinets are already full. People often discover that once a few utensils move to the wall, the drawer becomes instantly calmer without buying a bigger anything.
Entertaining adds another layer. If you’ve ever hosted friends and realized your serving spoon is in the sink, your steak knives are scattered, and you’re using a spatula to serve salad (no judgment), you’ve experienced the “serving scramble.” A dedicated caddy for entertaining tools changes that. It’s oddly satisfying to pull out one container and have napkins, serving utensils, and extras readylike you planned the party instead of improvising it in real time.
The most consistent experience people report after organizing is this: the kitchen feels lighter. Not because it’s perfect, but because it’s predictable. You open the drawer and your forks are where forks live. Your tongs are where tongs live. And the drawer stops being a stress point that steals small bits of time and attention every day. That’s the quiet win of good utensil storageless searching, fewer duplicates, and more cooking with less chaos.