Table of Contents >> Show >> Hide
- What Cold Porcelain Is (And What It Definitely Isn’t)
- Quick Ingredient Guide (So You Don’t Accidentally Invent Pancake Batter)
- Tools You’ll Want (Minimal, Not “Buy a Pottery Studio”)
- Method 1: Classic Stovetop Cold Porcelain (Most Control, Best Consistency)
- Method 2: Microwave Cold Porcelain (Fast, Convenient, Surprisingly Good)
- Method 3: No-Cook Cold Porcelain (When You Want “Instant Dough”)
- How to Color Cold Porcelain (Without Turning It Into Sad Gray Gum)
- Drying & Curing: The Secret to Fewer Cracks
- Sealing Cold Porcelain: Make It Last (And Survive Humidity)
- Troubleshooting: Fix the Most Common Cold Porcelain Problems
- Which Method Should You Choose?
- Conclusion
- Maker Notes: Real-World Experiences & Lessons (About )
Cold porcelain (a.k.a. porcelana fría) is the crafty loophole that lets you sculpt “porcelain-looking” flowers, miniatures, charms, and figurines without owning a kiln, a studio, or a medieval relationship with fire. It’s an air-dry modeling paste made primarily from cornstarch and white PVA glue, plus a few pantry-friendly helpers that make it smoother, less crack-prone, and easier to work with.
In this guide, you’ll learn three reliable ways to make cold porcelain (stovetop, microwave, and no-cook), how to troubleshoot common issues like sticky dough and cracking, and how to get that clean, professional finish that makes people ask, “Wait… you made that at home?”
What Cold Porcelain Is (And What It Definitely Isn’t)
Cold porcelain is non-edible, glue-based, air-dry clay. It’s called “porcelain” because it can dry with a smooth, slightly translucent look and can be painted or sealed to mimic ceramic-like finishes. It’s called “cold” because it air dries (no kiln firing), even though two of the most popular recipes involve a little heat to cook the starch into a workable dough. Yes, the name is mildly confusing. Welcome to crafting.
Why makers love it
- Fine detail: Great for thin petals, tiny textures, and miniature sculpting.
- Affordable: Cornstarch + glue is cheaper than most specialty clays.
- Paint-friendly: Once cured and sealed, it takes acrylics beautifully.
- Air-dry convenience: No baking schedules, no oven drama.
What to expect
- Some shrinkage: Especially on thicker pieces.
- Moisture sensitivity: Unsealed cold porcelain can soften with humidity or water.
- Timing matters: It starts drying from the outside in, so uneven drying can cause cracks.
Quick Ingredient Guide (So You Don’t Accidentally Invent Pancake Batter)
Cold porcelain recipes vary, but most versions use the same core ingredients. Here’s what each one does:
- Cornstarch: The body of the clay; it thickens and forms the structure.
- White PVA glue: The binder; gives strength, flexibility, and that “vinyl-ish” sculptability.
- Oil (baby oil, mineral oil, or light vegetable oil): Helps reduce sticking and improves smoothness.
- Acid (white vinegar or lemon juice): Helps with preservation and can reduce mold risk.
- Optional softeners: A tiny bit of lotion/cold cream/glycerin can increase elasticity and work time.
- Optional whiteners: White acrylic paint or titanium white pigment boosts opacity and “porcelain” look.
Tools You’ll Want (Minimal, Not “Buy a Pottery Studio”)
- Microwave-safe bowl or nonstick saucepan (depending on method)
- Silicone spatula or wooden spoon
- Measuring cups/spoons
- Plastic wrap + zip-top bag (or airtight container)
- Cornstarch for dusting
- Optional: disposable gloves (especially if tinting with paint or pigments)
Method 1: Classic Stovetop Cold Porcelain (Most Control, Best Consistency)
If you want the smoothest, most predictable cold porcelain clay, stovetop is the move. It takes a few minutes longer than microwave, but the heat is more evenand you can see exactly when the dough “turns the corner” from glue soup into sculptable magic.
Best for
- Flowers (thin petals)
- Miniatures
- Projects where consistency matters
Ingredients (standard 1:1 base)
- 1 cup cornstarch
- 1 cup white PVA glue (school glue or craft glue)
- 1 tablespoon baby oil or mineral oil
- 1 tablespoon white vinegar or lemon juice
- Optional: 1 teaspoon lotion/cold cream/glycerin
- Optional: 1 tablespoon white acrylic paint (for a whiter, more opaque clay)
Step-by-step
- Mix cold: In a nonstick saucepan (heat OFF), mix glue + oil + vinegar/lemon juice until smooth. Add the cornstarch and stir until mostly lump-free. (Small lumps are fine; they’ll surrender later.)
- Cook low and slow: Turn heat to low. Stir constantly, scraping the bottom and sides. The mixture will go from glossy to thicker to “mashed potatoes that mean business.”
- Watch for the dough stage: When it starts pulling away from the pan and forming one mass, keep stirring for about 30–60 seconds to cook out excess moisture.
- Cool slightly, then knead: Transfer to a lightly oiled surface. Let it cool until you can handle it, then knead until smooth. If it’s sticky, dust with a little cornstarch. If it’s dry or cracking while kneading, add a tiny dab of lotion or oil.
- Rest it: Wrap tightly in plastic wrap, then put it in a zip-top bag. Let it rest 1–2 hours (or overnight) for best texture.
Consistency check
Your finished cold porcelain should feel like a smooth, elastic dough. It should stretch a bit before tearing, and it should hold crisp details without slumping like a sad pancake.
Pro tips
- Use low heat: High heat can cause scorching or uneven cooking.
- Stir like you mean it: Constant stirring prevents lumps and cooked patches.
- Don’t over-dust: Too much cornstarch can make the clay dry and crumbly later.
Method 2: Microwave Cold Porcelain (Fast, Convenient, Surprisingly Good)
Microwave cold porcelain is the “I want clay in under 10 minutes” method. It’s excellent for casual crafting, small batches, and people who prefer the speed of science over the romance of stirring a saucepan.
Best for
- Quick projects
- Small batches
- Beginners who want a simple workflow
Ingredients (classic microwave version)
- 1 cup cornstarch
- 1 cup white glue
- 1 tablespoon baby oil (or mineral oil)
- 1 tablespoon vinegar or lemon/lime juice
- Optional: 1 teaspoon lotion/cold cream
- Optional: 1 tablespoon white acrylic paint
Step-by-step
- Mix thoroughly: In a microwave-safe bowl, stir everything until smooth and mostly lump-free.
- Microwave in short bursts: Heat for 15–30 seconds, then stir. Repeat in short intervals until the mixture thickens and starts clumping into a dough.
- Stop at “sticky dough,” not “rubber brick”: It should look like thick mashed potatoes and begin pulling away from the bowl. If you microwave too long, it can turn stiff and difficult to knead.
- Knead while warm: Lightly oil your hands and knead until smooth. Dust with cornstarch only as needed to control stickiness.
- Wrap and rest: Plastic wrap + airtight bag/container. Rest at least 1 hour for best texture.
Microwave-specific “don’t panic” notes
- Microwaves vary: Power differences change timing. Start short and build up.
- Stir between bursts: This evens out heat and prevents cooked lumps.
- Use a bowl you can dedicate: Glue-based mixtures are not a vibe you want in your soup bowl later.
Method 3: No-Cook Cold Porcelain (When You Want “Instant Dough”)
No-cook cold porcelain is the rebel method: no heat, no stovetop, no microwave. Instead, you mix and knead until the cornstarch absorbs and the dough comes together. The tradeoff? It may be slightly less consistent (and sometimes a touch more prone to softness), but it’s great for casual crafts and people who want the simplest setup.
Best for
- Kid-friendly crafting (with supervisionstill not edible)
- Quick sculpting sessions
- Small decorative projects
Ingredients (no-cook style)
- 1 1/2 cups cornstarch
- 1 cup white glue
- 1 tablespoon vinegar
- 1 teaspoon lotion (any basic body lotion works)
- 1 tablespoon oil (baby oil or light cooking oil)
Step-by-step
- Mix wet ingredients: Stir glue + vinegar + lotion + oil until smooth.
- Add cornstarch gradually: Add in portions, stirring until it becomes too thick to mix.
- Knead it out: Turn onto a surface dusted with cornstarch and knead until smooth. Add tiny amounts of cornstarch if sticky.
- Rest it longer: Wrap airtight and let it rest 4–12 hours. No-cook dough improves with a longer rest.
When no-cook goes wrong (and how to fix it)
- Too sticky: Add cornstarch slowly and knead thoroughlydon’t dump in a snowstorm at once.
- Too soft: Rest it longer; the starch needs time to hydrate and firm up.
- Crumbly: You added too much starchknead in a pea-sized amount of lotion or a few drops of oil.
How to Color Cold Porcelain (Without Turning It Into Sad Gray Gum)
Option A: Color the clay itself
Knead in a small amount of acrylic paint, oil paint (sparingly), chalk pastel dust, or pigment powder. Start tinycolor builds fast. For a more opaque, “porcelain” look, add a little white acrylic paint or titanium white pigment.
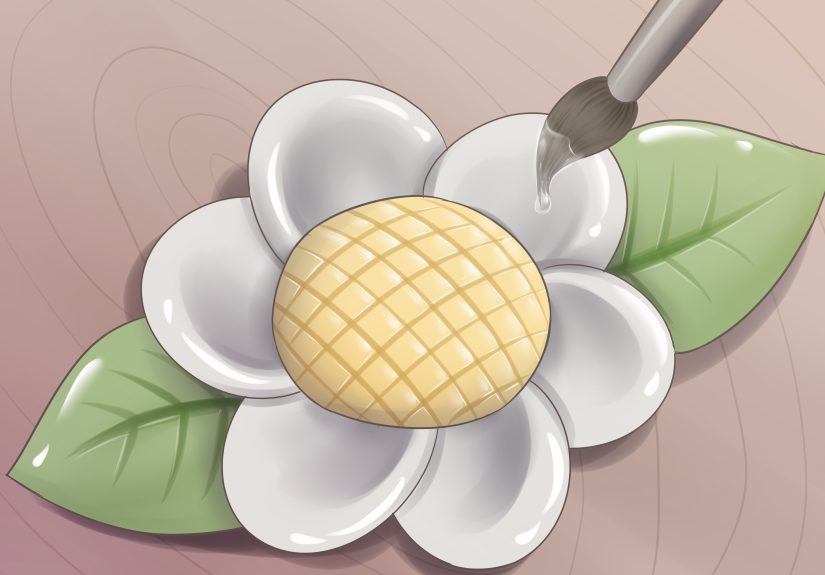
Option B: Paint after drying
Acrylic paint is the usual go-to. Let the piece dry completely before painting (especially thick pieces), then seal it to protect against moisture.
Drying & Curing: The Secret to Fewer Cracks
Cold porcelain doesn’t dry like a cookie in an oven. It dries from the outside in. If the outside dries too fast (drafts, heat vents, low humidity), it can shrink and crack while the inside is still soft.
Better drying habits
- Dry slowly: Keep pieces out of direct sun and away from fans/heaters.
- Protect from drafts: A loose paper towel “tent” can slow surface drying.
- Use thin layers wisely: Very thick sculptures may benefit from an armature (foil/wire) to reduce bulk and drying stress.
- Wait before sealing: Seal only after the piece is fully cured and no longer cool to the touch.
Sealing Cold Porcelain: Make It Last (And Survive Humidity)
Unsealed cold porcelain can absorb moisture, get tacky, or soften over timeespecially in humid environments. Sealing is the “adulting” step that turns a cute craft into a durable finished piece.
Common sealers
- Mod Podge: Easy, accessible, brush-on sealer for indoor decor.
- Acrylic varnish: Available in matte/satin/gloss; good general protection.
- Polyurethane: Durable option; test first to ensure it doesn’t yellow or react with paint.
Sealing tips
- Apply thin coats; let each coat dry fully.
- Seal all sides (yes, even the bottom) to reduce moisture absorption.
- Test on a scrap piece firstdifferent recipes can react differently to finishes.
Troubleshooting: Fix the Most Common Cold Porcelain Problems
1) My clay is sticky and won’t behave
- Likely cause: Under-cooked (in cooked methods) or not enough starch absorption (no-cook).
- Fix: Knead longer. Dust with cornstarch gradually. For microwave/stovetop, you may need a tiny bit more cooking next time.
2) My clay is stiff or rubbery
- Likely cause: Overcooked or too much cornstarch added during kneading.
- Fix: Knead in a small dab of lotion/cold cream or a few drops of oil. Rest wrapped overnight.
3) Cracks appear while drying
- Likely cause: Drying too fast, piece too thick, or clay too dry.
- Fix: Slow the drying, use armatures for thick pieces, and consider slightly more oil/softener in your next batch.
4) My finished piece feels tacky
- Likely cause: Humidity + unsealed surface (or sealer not fully cured).
- Fix: Let it dry longer, then seal fully with an appropriate varnish.
Which Method Should You Choose?
- Want best consistency and control? Choose stovetop.
- Want fast and convenient? Choose microwave.
- Want no heat, simplest setup? Choose no-cook.
Conclusion
Cold porcelain is one of those rare DIY wins that’s actually worth the hype: low cost, high detail, and endlessly customizable. Whether you go stovetop for consistency, microwave for speed, or no-cook for convenience, the real secret is learning the “feel” of good doughsmooth, elastic, and wrapped airtight like it’s being protected by a tiny plastic force field.
Make a small test batch first, take notes, and don’t be discouraged by a weird first attempt. Cold porcelain is like bread dough: it rewards practice, patience, and a willingness to knead your way through mild chaos.
Maker Notes: Real-World Experiences & Lessons (About )
Here’s the funny thing about cold porcelain: the recipe is simple, but the experience is where you earn your crafting stripes. A lot of makers start out thinking the measurements are the whole storythen the clay comes out sticky, stiff, or somewhere in between, and suddenly you’re bargaining with cornstarch like it’s a magical ingredient that might grant wishes if you use the correct sprinkle.
One of the most common “aha” moments people report is realizing that glue choice matters. Some white glues behave like champions: smooth, strong, and friendly. Others act like they’re holding a grudge. If your clay cracks constantly or feels oddly rubbery, it’s not always your technique. Sometimes it’s the glue formula, and switching brands (or choosing a thicker PVA craft/wood glue) can be the difference between “perfect petals” and “why is this crumbling like a cookie?”
Another universal experience: the kneading stage is where good batches become great. People often stop kneading too early because the dough looks “done,” but the texture still has micro-lumps or uneven moisture. A few extra minutes of kneading (with a tiny bit of oil on your hands) can turn a decent batch into a silky, sculptable clay that holds detail like it’s proud of itself. And if you ever overdo the cornstarch while kneading, you’ll learn the classic rescue move: a pea-sized dot of lotion, kneaded in slowly, bringing the dough back from the brink.
Drying teaches its own set of lessons. Many crafters discover the hard way that air-dry doesn’t mean “fast-dry”. Put a fresh sculpture near a sunny window or a fan and you might get cracks that look like tiny lightning bolts. Slow dryingout of drafts, away from heat ventsoften produces a smoother, stronger cure. Thin items like petals can dry beautifully in hours, but thicker pieces may need days. Patience is not optional; it’s part of the material.
Then there’s finishingwhere beginners sometimes skip sealing because the piece “feels dry.” In humid climates especially, unsealed cold porcelain can absorb moisture and become slightly tacky over time. The experience most makers end up sharing is: seal it like you mean it. Multiple thin coats of a compatible varnish or sealer (tested on a scrap first) can keep your work looking clean and lasting longer.
Finally, cold porcelain has a quirky emotional arc: the first batch is curiosity, the second is confidence, and the third is where you start making “just one more flower” at midnight like a wholesome crafting gremlin. If that happens to you, congratulationsyou’re doing it right.