Table of Contents >> Show >> Hide
- Why Make Your Own Sewing Patterns?
- Before You Start: A Few Patternmaking Basics
- Method 1: Copy a Garment You Already Love
- Method 2: Draft a Pattern from Your Measurements
- Method 3: Hack or Drape an Existing Pattern
- Which Method Should You Choose?
- Common Mistakes to Avoid
- Extra Experience and Lessons Learned from Making My Own Sewing Patterns
- Final Thoughts
There comes a moment in every sewist’s life when a pattern envelope just isn’t enough. Maybe the dress in your head does not exist in any catalog. Maybe your favorite shirt is one wash away from retirement. Or maybe you are simply tired of buying a pattern, adjusting it, sighing dramatically, and then adjusting it again. That is when learning to make your own sewing patterns stops feeling fancy and starts feeling practical.
The good news is that you do not need a fashion degree, a Paris atelier, or a dramatic tape measure necklace to get started. You just need a solid method. In fact, most home sewers can begin with one of three approachable routes: copying a garment you already love, drafting a basic block from your measurements, or hacking and draping an existing pattern into something new. Each method teaches different patternmaking skills, and each one can lead to custom clothing that fits better than most ready-to-wear pieces ever will.
In this guide, you will learn the pros, cons, tools, and step-by-step logic behind all three approaches. Along the way, we will cover pattern markings, seam allowances, ease, muslins, and the kind of practical patternmaking wisdom that saves both fabric and feelings.
Why Make Your Own Sewing Patterns?
Making your own sewing patterns gives you more than creative bragging rights. It gives you control. Instead of squeezing yourself into someone else’s idea of a “standard” body, you can build clothing around your real measurements, your favorite silhouettes, and your daily life. Want deeper pockets? Add them. Need more room in the hip, less at the waist, and a sleeve that does not fight your upper arm? Welcome home.
Custom patterns also make sewing more efficient over time. Once you have a reliable base pattern, or a well-tested pattern hack, you can reuse it again and again. That means fewer fitting surprises, fewer abandoned projects, and a much lower chance of whispering “why is this armhole angry at me?” at midnight.
Before You Start: A Few Patternmaking Basics
Before diving into the three methods, it helps to understand a few sewing pattern essentials. First, body measurements and finished garment measurements are not the same thing. Your body measurement is your actual bust, waist, hip, and related measurements. Finished garment measurements include ease, which is the extra room built into a garment so you can breathe, sit down, and reach the top shelf without turning your blouse into performance art.
Second, many patternmakers work from a block or sloper. Think of it as a simple, close-fitting template with minimal design details. It is not glamorous, but it is the pattern equivalent of a really reliable friend. From that base, you can add collars, flare, pleats, gathers, sleeves, and style lines.
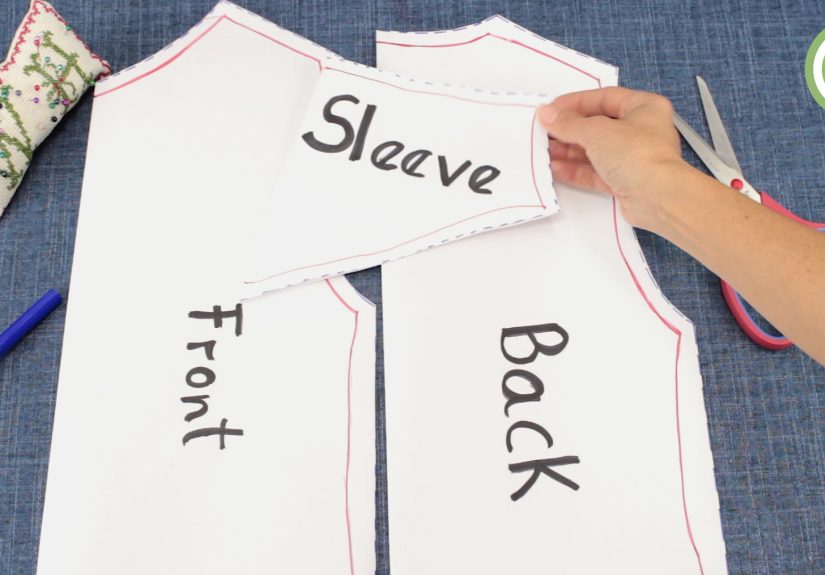
Third, always label your pattern pieces clearly. Include the grainline, name of the piece, cut quantity, fold placement if needed, notches, darts, and seam allowances. Future you will be deeply grateful. Current you may also be grateful, especially if you are sewing after coffee but before reason.
Method 1: Copy a Garment You Already Love
Best for: Re-creating a favorite T-shirt, skirt, dress, or pair of pants
This is the gateway method for many home sewers, and for good reason. If you already own a garment that fits beautifully, why not use it as a blueprint? This method is especially handy for simple shapes, knit tops, straight skirts, and relaxed garments. It also works for more complex pieces if you are patient and willing to mark carefully.
What You Will Need
- Pattern paper, tracing paper, or freezer paper
- A pencil or fine marker
- A ruler and French curve
- A tracing wheel or pins for the pin-through method
- Scissors
- A measuring tape
How It Works
Lay the garment as flat as possible and trace one section at a time. With simple knit items, you can often trace around seam lines directly. With more structured garments, you may need to use a pin-through technique to mark seam paths without taking the garment apart. If the fabric is cooperative, freezer paper can also be pressed lightly onto the garment to help capture the shape.
The key is to trace the seam lines, not just the outside edges. Then add seam allowances afterward. This small detail makes a big difference. The outer edge of a garment can lie to you. Seam lines are the truth.
Tips for Better Results
Start with something forgiving, like a knit T-shirt. Stable knits are easier to copy than tailored jackets with facings, collars, and enough internal structure to qualify as architecture. Match the original fabric type as closely as possible when sewing your copy. A drapey rayon blouse and a stiff quilting cotton blouse may share a shape on paper, but on the body they are very different personalities.
Transfer every useful marking you can see: center front, grainline, dart points, pocket placement, button spacing, sleeve notches, and seam intersections. A copied pattern with weak markings is like a map with no street names. You will still get somewhere, but probably not where you meant to go.
When This Method Shines
Use this approach when you have a beloved garment that is nearly perfect and you want a pattern from it before time, laundry, and life win the battle. It is also excellent for cloning practical basics: pajama pants, pull-on skirts, woven tanks, and simple dresses.
Method 2: Draft a Pattern from Your Measurements
Best for: Building custom-fit basics and learning true patternmaking
If copying a garment is like tracing a treasure map, drafting from measurements is like learning cartography. This method takes more effort up front, but it gives you a powerful foundation for future sewing. You start by measuring your body accurately, then use those measurements to draft a sloper or block. From there, you can transform that basic shape into many different styles.
Measurements That Matter
At minimum, take accurate bust, high bust, waist, hip, back waist length, and height measurements. Measure over the undergarments you would normally wear with the finished garment, and keep the tape snug but not tight. Write everything down. Then write it down somewhere you will not lose it under a pile of fabric scraps and old rotary cutter blades.
One reason this method works so well is that it helps you choose shape and size based on real proportions, not ready-to-wear labels. If your bust and hip fall into different sizes, that is normal. If your high bust suggests one size and your full bust suggests another, that is also normal. Sewing patterns do not care about the number on your jeans, and honestly, neither should you.
What Is a Sloper?
A sloper is a close-fitting basic pattern with minimal wearing ease and no design extras. No dramatic sleeve. No trendy collar. No cute little flutter anything. Just the essential shape of your body translated into paper. Once tested and adjusted, a sloper becomes a powerful tool for creating shirts, dresses, skirts, and pants that are based on your fit rather than a generic chart.
Many sewists draft a bodice sloper first, then expand into sleeves, skirts, and pants. If you want the most custom fit possible, you can go even further and create a moulage, which is an even closer body map used as a fitting reference.
How to Draft from Measurements
Begin with a simple garment category, such as a skirt or bodice. Draw vertical and horizontal reference lines on large paper. Plot key points using your measurements, connect them with straight and curved lines, and establish darts where needed for shaping. Then add grainlines, labels, and seam allowances only after the fit of the base pattern is confirmed.
Your first draft should not go directly onto your expensive fabric. Make a muslin, also called a toile, from inexpensive test fabric. This is the patternmaking version of checking your math before turning in the test. The muslin will show where you need more length, less width, smoother curves, or better dart placement.
Why This Method Is Worth It
Once your sloper works, you can use it for nearly everything. Want a button-front blouse? Start with the bodice block. Want a fit-and-flare dress? Start with the bodice and skirt blocks. Want a sleeveless shell, a new neckline, or a roomier pant? Start with your fitted base and make deliberate changes. This method takes patience, but it pays you back every time you sew.
Method 3: Hack or Drape an Existing Pattern
Best for: Creative design changes without starting from scratch
This method sits in the sweet spot between beginner-friendly and highly creative. Instead of making a pattern from zero, you begin with a pattern that already fits reasonably well, then change it. Maybe you add fullness to a sleeve, create a trapeze hem, draft a new collar, build a deeper pocket, or drape style lines directly on a dress form. This is where patternmaking starts to feel like magic, except the magic is mostly rulers and tape.
Pattern Hacking with Slash-and-Spread
One of the most useful techniques here is slash-and-spread. You trace your original pattern so you preserve the master copy, mark where you want fullness or shape changes to begin, slash the pattern along planned lines, and spread the sections apart to add volume. Then you tape the pieces down, redraw the hem and side seams, and true the shape.
This technique can add sweep to a hem, fullness to a sleeve, flare below the waist, gathers at the cuff, or even a flutter sleeve. It is simple, flexible, and much less scary than it sounds. If you can cut paper and resist the urge to eyeball everything, you can do it.
Small Drafting Changes That Make a Big Difference
Not every custom pattern needs to begin with a full garment. You can draft individual elements too. Pockets are a great example. If your favorite skirt pattern forgot the existence of hands, you can draft an in-seam pocket by tracing around your hand, shaping the curve, and aligning one straight edge to the side seam. Sleeves are another easy win. Trace the original sleeve, divide it into sections, slash, spread, and redraw the hem to create bishop sleeves or other fuller shapes.
Draping for Visual Thinkers
If you love seeing ideas in three dimensions, draping may become your favorite method. Instead of drawing first, you pin and shape fabric on a dress form to explore silhouette, balance, and style lines. Draping teaches you how fabric behaves on grain, on bias, and around curves. It is especially useful for soft garments, asymmetrical details, cowls, unusual necklines, and original design work.
Draping does not require a fancy custom form, but it does reward patience and observation. Mark design lines carefully, transfer them back to paper, and true the resulting pattern pieces so they sew together cleanly. A beautiful drape can become a very rude paper pattern if you skip that step.
Which Method Should You Choose?
The best method depends on your goal.
- Choose Method 1 if you want to re-create a garment you already know fits and feels great.
- Choose Method 2 if you want a long-term fitting foundation and plan to sew garments regularly.
- Choose Method 3 if you already have a solid base pattern and want to design, customize, or experiment.
Many experienced sewists eventually use all three. They copy a favorite pair of pants, draft a bodice sloper for fit, and hack sleeves, collars, and hems when inspiration strikes. That combination is where sewing starts to feel deeply personal.
Common Mistakes to Avoid
- Skipping the muslin: This saves time the way ignoring a smoke alarm saves peace and quiet.
- Forgetting grainlines: A gorgeous shape can still hang terribly if the grain is off.
- Not labeling pieces: Front bodice and back bodice can look suspiciously similar at 11 p.m.
- Adding seam allowances too early: Fit the pattern first, then add them.
- Using the wrong fabric for testing: Test in a fabric with similar weight and behavior whenever possible.
- Ignoring ease: Fitted is good. Cutting off circulation is not.
Extra Experience and Lessons Learned from Making My Own Sewing Patterns
The biggest surprise when I first started making my own sewing patterns was how much better my sewing got, even before my patterns were perfect. I expected custom patternmaking to be mostly about fit, but it also sharpened my eye. I began noticing where garments pulled, where hems tilted, where a sleeve twisted because the grainline was slightly off, and where a neckline looked fine on paper but a little confused on a real human body. In other words, patternmaking taught me to see.
I also learned that the first version is rarely the final version, and that is not failure. It is the process. The first copied shirt I traced looked promising on paper and mildly chaotic in fabric. One shoulder was off, the hem dipped strangely, and I had forgotten to transfer a key notch. Very humbling. Very educational. After that, I stopped treating the first draft like a final answer and started treating it like a conversation. The pattern says one thing, the muslin says another, and your job is to negotiate peace.
Drafting from measurements taught me even more patience. Taking measurements sounds easy until you realize that “waist” is apparently a location humans can debate for centuries. Once I started measuring carefully and consistently, I saw how much better my garments behaved. I learned to trust high bust measurements, to respect finished garment measurements, and to stop expecting sewing pattern sizes to match store sizing. That mental shift alone made sewing less frustrating. The paper was not insulting me. It was just using a different system.
Pattern hacking became my favorite once I understood the basics. There is something incredibly satisfying about taking a simple base pattern and turning it into three or four different garments. One bodice can become a tank, a blouse, a dress, or a dramatic statement sleeve situation depending on how brave you feel and how much coffee you have had. I started by adding practical changes, like pockets and length adjustments, and then moved into design details like fuller sleeves and altered necklines. Each change made the pattern feel more like mine.
Draping taught me the emotional side of sewing. Paper is logical, but fabric is honest. When you pin muslin onto a form and watch it fall, pull, twist, and settle, you understand design in a much more physical way. Some ideas that seem brilliant in your head become awkward instantly in fabric. Other ideas that looked plain on paper suddenly come alive. That feedback is priceless.
Most of all, making my own sewing patterns changed the way I think about clothing. I became less interested in chasing the “perfect pattern” from somewhere else and more interested in building a system that works for me. A reliable skirt block, a trusted bodice base, a copied pair of pants that fits just right, and a folder full of tested hacks can take you a very long way. Once you have that, you are not just sewing clothes. You are designing a wardrobe with intention, skill, and a very healthy respect for seam allowances.
Final Thoughts
If you have ever wished a sewing pattern were just a little more you, this is your sign to start making your own. Begin with the method that feels most doable. Copy a favorite garment. Draft a basic sloper. Hack a simple pattern into something fresh. Do not wait until you feel like an expert. Most experts became experts by tracing, testing, fixing, and trying again while surrounded by paper scraps.
The truth is that custom sewing patterns are not only for advanced sewists. They are for curious sewists. And once you understand how to shape a pattern around your body and your style, sewing becomes far more creative, far more practical, and much more fun.