Table of Contents >> Show >> Hide
- Why measuring matters (and what to watch out for)
- Method 1 Identify the model and use official specs (fastest, most accurate)
- Method 2 Measure the iPad with a ruler or tape measure (direct, reliable)
- Method 3 Use manufacturer fit guides, printable templates, or retailer tools
- Extra tips and pitfalls to avoid
- Short checklist before hitting “Buy”
- Real examples sizing variations you’ll see
- Conclusion Pick the method that fits your situation
- Personal experiences & extra notes (tips learned from using and measuring iPads)
Quick summary: Getting the right case for your iPad isn’t just about picking your favorite color it’s about fit. You can measure by model (fastest and most reliable), measure the device directly (old-school but foolproof), or use manufacturer fit guides and templates (convenient and precise). Follow these three methods and a few pro tips and you’ll have a case that snaps on cleanly, doesn’t block cameras or buttons, and leaves room for any camera bumps or keyboard attachments.
Why measuring matters (and what to watch out for)
Not all iPads are created equal. Apple sells different screen sizes and generations with slightly different heights, widths, and thicknesses and modern displays have rounded corners, which means screen size is measured as the diagonal of the rectangle that encloses the display, not the curved visible area. Use the device model or official dimensions for the best match whenever possible.
Method 1 Identify the model and use official specs (fastest, most accurate)
This is the cleanest route: find your iPad’s model number and look up the official Apple specs. Most case makers design around Apple’s published dimensions, so this reduces guesswork.
Steps
- Open Settings > General > About and look for the Model entry. Tap it if necessary to see the shorter model number (it starts with an “A”).
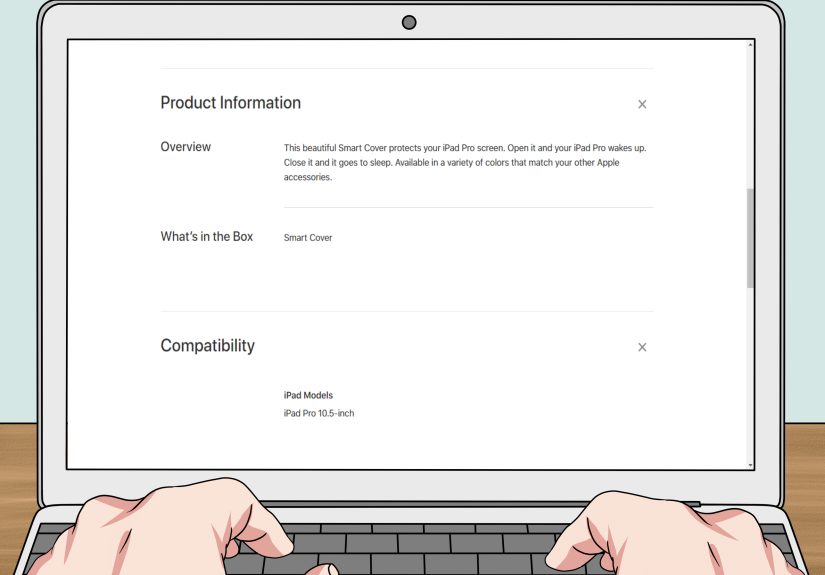
- Go to Apple’s official Compare or Support pages and match that model number to published height, width, and depth. Apple also explains how they measure screen size (measure diagonally as a rectangle).
- When you have the dimensions, compare them to the case manufacturer’s fit list (many case product pages list which model numbers they fit).
Why this works
Apple publishes exact measurements for every model and revision (height × width × depth) use those numbers for a perfect match. If your iPad is a popular model (e.g., iPad Pro 11-inch, iPad Air, iPad mini), Apple’s comparison pages and support docs list them clearly.
Example
Say your iPad model number is A2759 you’d look that up on Apple’s support page, find that it corresponds to an 11-inch iPad Pro (for example), and use the listed height/width/depth to pick a case that explicitly says “fits iPad Pro 11-inch (model A2759).”
Method 2 Measure the iPad with a ruler or tape measure (direct, reliable)
If you can’t access model info (device is locked, you bought it used with no paperwork), physically measuring the device is the reliable fallback. You’ll need a millimeter ruler or a tape measure that reads to at least 1/8″ (3 mm).
What to measure
- Height (top to bottom) measure the longest vertical edge.
- Width (left to right) measure the longest horizontal edge.
- Depth / thickness measure at the thickest point (often near the camera bump).
- Diagonal screen size measure corner to corner across the flat rectangular area (ignore rounded screen corners the same way Apple does when quoting diagonal).
- Camera bump & button locations note how far the camera or volume buttons protrude from the edge; you may need to measure from an edge to the center of the camera or the button seam so a case won’t cover them.
Step-by-step
- Lay the iPad face up on a flat surface so it’s stable.
- Align the ruler exactly with the outermost edges and read the measurement to the nearest millimeter (or 1/8 inch). Write down height, width, and depth.
- Measure the diagonal by placing the ruler corner-to-corner across the display rectangle (not following the curve of rounded corners).
- Measure any camera bump from the back surface to the highest point; if it’s more than ~1.5–2.0 mm, consider ordering a case listed as “camera-bump friendly” or that specifies room for the camera module.
- Bring the numbers to the case product page many manufacturers list internal case dimensions; match your device’s numbers to the internal dimensions for a snug but not tight fit.
Case makers and retailers sometimes publish a “fit guide” with similar steps for users who prefer measuring directly they even show how to find the model number in Settings for cross-checking.
Method 3 Use manufacturer fit guides, printable templates, or retailer tools
Many case manufacturers and large retailers provide model-matching tools: you enter your model number or pick from a dropdown list and the website tells you which cases fit. Others provide printable templates you can tape to your iPad to check ports and camera positions. This hybrid approach combines the speed of model lookup with the visual assurance of a template.
How to use fit guides and templates
- Find the case manufacturer’s “Fit Guide” or compatibility chart on the product page.
- Enter your iPad model number or select from the model list. The site will typically show which cases are compatible.
- If the site provides a PDF template, print it at 100% scale and align the template’s corners with your iPad to check port/button/camera alignment.
- For multi-function cases (keyboard folios, pencil holders, or magnet attachments), review the manufacturer notes about thickness clearance and accessory compatibility.
Manufacturers often explain how to find your model number in Settings and then match it to their product page; Speck and other brands offer clear step-by-step fit guidance.
Extra tips and pitfalls to avoid
Don’t rely on screen size alone
Two iPads with the “11-inch” label can have slightly different housings or different camera bumps depending on the generation. Screen diagonal is useful for rough grouping, but always confirm model number or dimensions when buying a case.
Account for camera bumps and port cutouts
Some slim cases neglect to give enough room for camera bumps or keyboard connectors. If you use a Magic Keyboard or Apple Pencil that docks on the side, make sure the case supports that accessory or remove the case when attaching the accessory.
Allow tiny tolerances
A case should have a small tolerance enough to slide on and off without being floppy. If a case quotes an interior dimension, subtract ~0.5–1 mm from your measurements and choose a case slightly larger than your device, especially for thin soft cases that stretch.
When buying used or aftermarket cases
aftermarket cases vary in precision. Stick with reputable brands and check their fit lists. When in doubt, choose a seller with a good return policy most sellers accept returns if the case doesn’t fit the listed model.
Short checklist before hitting “Buy”
- Do model lookup in Settings > General > About and confirm the A-number.
- Cross-check Apple’s official dimensions if possible.
- Measure height/width/depth if model info is unavailable and note camera bump height.
- Confirm case supports any keyboards, Apple Pencil storage, or Smart Connector use you require.
- Pick reputable brands and keep the receipt returns are the safety net.
Real examples sizing variations you’ll see
To illustrate why model identification matters: different iPad generations show small but critical dimensional changes. Lists of models and dimensions (including legacy models) demonstrate variations across generations, which is why looking up the exact model number yields the best results.
Conclusion Pick the method that fits your situation
If you want the least hassle and highest accuracy, check the model number in Settings and use Apple’s published dimensions or the case maker’s fit guide. If you can’t access model info, measure the device directly and pay attention to camera and button placement. If you prefer visual confirmation, use printable templates or the manufacturer’s online fit tool. Combine methods for the best outcome: model lookup + quick physical measure = near-guaranteed fit.
Meta & SEO fields (for publication)
sapo: Choosing the right case starts with accurate sizing. This friendly guide walks you through three practical ways to measure your iPad identify your model and use Apple’s specs, measure the device with a ruler or tape, or use a manufacturer’s fit guide and printable templates. Helpful tips cover camera bumps, thickness tolerances, keyboard compatibility, and quick checklists so you get a case that fits snugly and protects what matters. Whether you buy new or used, this article makes measuring painless and precise so you can protect your iPad without the guesswork.
Personal experiences & extra notes (tips learned from using and measuring iPads)
(Extra ~: real-world experiences and nuances pulled from common practice and long-term use.)
After measuring dozens of iPads for friends, family, and my own gadgets, I can confidently say that a little care up front saves a lot of fiddling later. A few hands-on anecdotes and practical observations that aren’t always spelled out in a spec sheet:
1. The “close but not quite” problem: I once bought an inexpensive sleeve advertised for the “11-inch iPad Pro” and it fit the 1st-gen 11″ model perfectly until I tried to use it with the 2nd-gen model that had a tiny camera module shift. The sleeve still zipped, but the camera was misaligned and the magnetic edge didn’t seat correctly with a keyboard. Moral: model year matters.
2. Camera bumps are sneaky: Many people ignore the camera bump when measuring thickness. I own an older tablet that’s technically thin, but the camera module sticks out noticeably. A “slim” hard shell scraped the camera glass because it didn’t leave room for that bump. Now I always measure camera projection from the back surface and add at least 1.5–2 mm clearance in my head when selecting cases.
3. Smart Connector and keyboards: If you use a Smart Keyboard or Magic Keyboard, always check whether the case advertises support for the Smart Connector. Some folios block the connector or the magnets, and that ruins the whole point of having a keyboard. When in doubt I remove the case to attach the keyboard and then reattach; it’s annoying but avoids scratches. Better: pick a case explicitly designed for keyboard use.
4. The printable template trick works wonders: A few manufacturers offer downloadable templates you can print at 100% scale. I printed one once, taped it to the iPad, and instantly saw that a “universal” folio would cover my side-mounted Apple Pencil a total dealbreaker. Printing and aligning the template saves returns and disappointment.
5. Soft cases stretch; hard cases don’t: Soft TPU and silicone cases have a little give. If you’re choosing between a soft case and a rigid polycarbonate shell and your measurements are borderline, the soft case can be forgiving. But don’t rely on stretch for a tight fit; a too-tight silicone case will be a pain to remove and reinstall.
6. Used iPads need extra diligence: Buying used, I always ask the seller for the model number. If they can’t provide it, I either ask for a photo of Settings > General > About or I measure and request a few extra millimeters of wiggle room in the case. I once received a used iPad where the previous owner had added a thin skin; the skin changed the fit enough that a snug case wouldn’t seat properly.
7. Consider future accessories: If you think you might buy a keyboard or a rugged bumper later, measure for those now. A slim folio that fits today may prevent you from docking a future keyboard or attaching a protective bumper. When I planned to buy a keyboard for my iPad, I intentionally chose a case that left access to the Smart Connector and had a detachable cover.
8. Keep measurements handy: I keep a small note in my phone with my device’s height, width, depth, and model number it’s saved me from buying incompatible accessories multiple times. When in a store or on a product page, I can quickly confirm whether the case matches my saved specs.
9. Returns are your friend: Finally, even with perfect measuring, there are subjective things grip, texture, or button firmness that you can’t judge from dimensions. Buy from sellers with reasonable return windows so you can test in real life without risk.
Measured properly, your iPad case will protect the device, line up the ports, and avoid blocking any cameras or connectors. Combine model lookup with one quick physical measurement and you’ll reduce the chance of a bad fit to near zero. Happy case hunting!