Table of Contents >> Show >> Hide
- Why Glitter Sticks to Clothes So Well
- Method 1: Use Tape or a Lint Roller for the Fastest Fix
- Method 2: Try a Damp Microfiber Cloth or Rubber Glove
- Method 3: Wash and Dry Strategically for Full-Garment Cleanup
- How to Choose the Right Method for Your Fabric
- Mistakes That Make Glitter Removal Harder
- Extra Tips to Prevent Future Glitter Chaos
- Real-World Experiences With Glitter on Clothes
- Final Thoughts
- SEO Tags
Glitter is basically confetti with a grudge. It shows up to the party looking cute, then refuses to leave your sweater, your socks, your laundry basket, and somehow the back seat of your car. If you have ever put on a black shirt and realized it now looks like a low-budget disco ball, you are not alone.
The good news is that loose glitter can usually be removed without ruining your clothes. The trick is using the right method for the fabric, the amount of glitter, and whether you are dealing with dry loose sparkle or an actual glitter glue stain. Below are three practical, fabric-friendly ways to get glitter off clothing, plus the mistakes that make the mess worse, tips for delicate garments, and real-life lessons from craft disasters, holiday outfits, and costumes that shed like they are being paid per sparkle.
Why Glitter Sticks to Clothes So Well
Before you go full detective on your cardigan, it helps to know why glitter is so stubborn. Tiny glitter particles cling to fabric because of texture, friction, and static electricity. Soft knits, fleece, velvet, and synthetic fabrics tend to hold onto glitter more than smooth cotton or tightly woven materials. That is why one swipe is sometimes enough on a T-shirt, while a fuzzy sweater can hang on to glitter like it is preserving a family heirloom.
There is also an important difference between loose glitter and glitter glue. Loose glitter usually sits on the surface and can often be lifted, brushed, or washed away. Glitter glue is a stain problem, because the adhesive has bonded with the fibers. If you see a crusty patch, stiffness, or visible glue residue, treat it like a glue stain after removing the loose sparkles.
Method 1: Use Tape or a Lint Roller for the Fastest Fix
Best for
Fresh glitter on everyday clothes, small glitter spills, and quick emergency cleanup before leaving the house.
What you need
- A lint roller, or
- Wide tape such as masking tape or packing tape
How to do it
- Take the garment outside or over a trash can and give it a gentle shake.
- Lay the item flat so the fabric is not bunched up.
- Roll a lint roller over the glittery area using short, firm strokes.
- If you do not have a lint roller, wrap tape around your hand with the sticky side facing out and press, lift, and repeat.
- Replace the roller sheet or freshen the tape often. Once it is covered, it stops being helpful and starts just looking tired.
This is usually the easiest way to remove glitter from clothes because adhesive picks up particles from the surface without grinding them deeper into the fabric. It is especially useful for cotton T-shirts, denim, casual dresses, jackets, and most school or work clothes. If the glitter is concentrated in one area, start there and work outward so you do not spread it around like holiday cheer gone wrong.
When this method works best
Tape and lint rollers shine when the glitter is dry, loose, and sitting on the outside of the garment. They are also great when you only need to clean one section, such as a sleeve that brushed against a glittery decoration or a pair of pants that survived a craft project gone terribly right.
Use caution on delicate fabrics
Not every fabric loves sticky tools. Very delicate, loosely woven, sheer, vintage, beaded, or embellished items can snag or lose fibers if you press too hard. For those garments, test a hidden spot first or skip ahead to the gentler methods below. Your blouse should lose glitter, not dignity.
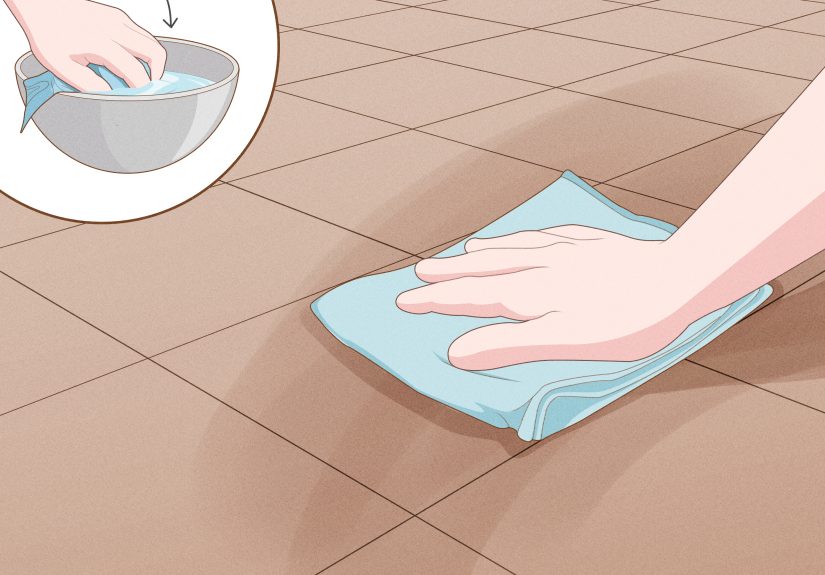
Method 2: Try a Damp Microfiber Cloth or Rubber Glove
Best for
Stubborn specks on textured fabrics, static-heavy materials, and clothing that still sparkles after the tape method.
What you need
- A slightly damp microfiber cloth, or
- A clean rubber glove lightly dampened with water
How to do it
- Shake off as much loose glitter as possible first.
- Lightly dampen the cloth or glove. It should be barely moist, not wet.
- Gently wipe or rub in one direction over the glittery area.
- Rinse the cloth or glove often so you do not redeposit glitter.
- Let the garment air dry if needed, then check for remaining specks.
This method works because a little moisture helps reduce static and gives the glitter somewhere else to cling. A microfiber cloth is especially handy because it grabs fine particles instead of simply pushing them around. A rubber glove can also help on fabrics where glitter seems electrically attached to your outfit. It is not glamorous, but neither is showing up to lunch looking like a craft store exploded.
Why this method is underrated
People often jump straight to washing, but a damp cloth or glove can save time and prevent extra glitter from ending up inside your washer or dryer. It is also a smart option for garments that cannot handle aggressive rolling or sticky tape, such as certain sweaters, costume pieces, or lightly embellished tops.
Good uses for this method
Think fleece joggers, sweaters, scarves, synthetic workout wear, and textured costumes. It is also useful when glitter is spread lightly across a larger area and you want a more controlled cleanup than tape alone can provide.
Method 3: Wash and Dry Strategically for Full-Garment Cleanup
Best for
Clothes covered in a fine layer of glitter, washable fabrics, and post-party laundry that needs more than spot treatment.
What you need
- Laundry detergent
- Your garment care label
- Optional wool dryer balls or a dryer sheet
How to do it
- Take the garment outside and brush or shake off as much glitter as possible.
- Read the care label before washing. This matters more than optimism.
- Wash the item according to the label, choosing a gentle or cold cycle for delicates or dyed fabrics.
- After washing, dry according to the label. For machine-dry items, dryer balls or a dryer sheet may help reduce static and encourage debris to collect in the lint filter.
- Clean the lint screen after the cycle so the glitter does not reappear in a future load like a sparkly horror movie sequel.
If you are washing a washable garment with glitter all over it, prep work matters. Shaking and brushing first removes the worst of the mess. That keeps the washing machine from becoming a glitter redistribution system. The dryer can also help by loosening particles and pulling some of them toward the lint screen, especially when static is under control.
Important warning for embellished clothing
If the garment itself is decorated with glitter, sequins, beads, or glued-on trim, do not assume it belongs in the washing machine. Many embellished items are safer to hand wash or spot clean because heat, agitation, and soaking can loosen the decorative finish or damage the adhesive. In other words, if your top came pre-bedazzled, treat it gently unless the care label clearly says machine washable.
What about glitter glue?
If the sparkle is part of a dried glue stain, remove any loose particles first, then treat the residue like glue. That may mean soaking, spot treating, or using a method appropriate for the fabric and adhesive. Do not toss a glue-stained item straight into a hot dryer, because heat can make the residue harder to remove.
How to Choose the Right Method for Your Fabric
Cotton and denim
These fabrics are usually the easiest. Start with a lint roller or tape, then wash if needed.
Knitwear and fleece
Use a lint roller gently, then switch to a damp microfiber cloth or glove for clingy specks. Avoid rough scrubbing.
Silk, lace, sheer fabrics, and vintage pieces
Skip aggressive tape unless you test it first. Use the gentlest possible touch, and favor hand care methods over machine washing.
Sequined or embellished garments
Treat these as high-maintenance celebrities. Hand wash or spot clean when needed, avoid high heat, and do not assume the washing machine is your friend.
Mistakes That Make Glitter Removal Harder
- Rubbing too hard: This can grind glitter deeper into the fibers.
- Using soaking-wet cloths: Too much water can spread mess or stress delicate fabrics.
- Ignoring the care label: The fastest route is not helpful if it ruins the garment.
- Throwing embellished clothes straight into the washer: This can damage decoration and create a bigger cleanup job.
- Forgetting the lint screen: Glitter can transfer later if you leave it there.
- Confusing loose glitter with glitter glue: One is debris; the other is a stain with attitude.
Extra Tips to Prevent Future Glitter Chaos
If you deal with glitter often, whether because of crafts, costumes, dancewear, party decor, or holiday everything, prevention saves a lot of cleanup. Dress in smoother fabrics when handling glitter-heavy items. Keep a lint roller near your closet, laundry room, or front door. Shake out costumes and party clothes outside before tossing them in the hamper. And if you have children doing craft projects, consider a designated “glitter shirt” so your favorite clothes do not become unwilling art supplies.
Also, separate very glittery items from the rest of your laundry until you have removed as much surface sparkle as possible. Nobody wants their plain black leggings to come out dressed for New Year’s Eve.
Real-World Experiences With Glitter on Clothes
One of the most common experiences people have with glitter on clothing is the “I did not even touch the glitter” mystery. You sit on a sofa with a holiday pillow, hug someone wearing a sparkling top, or carry a craft bag for thirty seconds, and suddenly your sleeves look festive against your will. In those situations, the fastest solution is almost always a lint roller or tape. People tend to waste time trying to brush glitter off with their hands, but that usually just relocates the problem instead of solving it. It is the cleaning version of moving your mess from one chair to another and calling the room organized.
Another familiar scenario involves school events, dance recitals, and costume parties. A child comes home wearing a shirt that appears to have gone through a blizzard made of sequins. Parents often assume washing is the first step, but experience shows that a few minutes of shaking, brushing, and rolling before the wash makes a huge difference. Skipping that step often leads to glitter in the laundry basket, on the washer seal, inside the dryer drum, and somehow on the family dog. Glitter has range.
Sweaters are their own category of drama. On smooth fabrics, glitter tends to sit on the surface. On fuzzy knits, it settles in like it signed a lease. Many people discover that tape works at first, but not completely, especially on static-prone materials. That is where the damp microfiber cloth or slightly damp rubber glove becomes the hero. It picks up the tiny leftover flecks that keep catching the light and mocking you from three feet away.
Holiday clothing also teaches an important lesson: not all sparkle is meant to survive rough laundering. Some tops, scarves, and costume pieces are designed to look glamorous for a short season, not to endure a hot wash and aggressive dry cycle. Real-life experience says the care label wins every argument. People who ignore it often end up with half the embellishment missing, loose threads, or a garment that looks less “party ready” and more “post-party evidence.”
There is also the classic emergency cleanup right before heading out the door. You put on black pants, notice glitter everywhere, and suddenly you are negotiating with time. In that moment, perfection is not the goal. The goal is “good enough that nobody thinks I lost a fight with a craft drawer.” A lint roller, a strip of tape, or even a quick swipe with a dryer sheet for static can rescue the situation fast. Then later, when you are not standing in your hallway wearing one shoe, you can do a fuller cleanup.
The biggest lesson from all these experiences is simple: glitter removal works best in layers. First remove what is loose. Then reduce what is clinging. Then wash only if the fabric and care label allow it. That order saves time, protects fabric, and keeps the sparkle from spreading to every other item you own. Glitter may be determined, but with the right approach, it does not get to win.
Final Thoughts
If you need to remove glitter from your clothes, start simple and stay strategic. A lint roller or tape is the quickest fix for most everyday fabrics. A damp microfiber cloth or rubber glove helps when static and texture are keeping glitter in place. Washing and drying can finish the job for washable garments, as long as you follow the care label and avoid being reckless with embellished pieces.
In other words, do not panic, do not scrub like you are sanding a deck, and do not underestimate the power of a sticky roller. Your clothes can absolutely recover from their accidental red-carpet era.