Table of Contents >> Show >> Hide
- Before You Start: Safety + Reality Check
- How a Homemade Battery Works (In Plain English)
- Way 1: The Lemon (or Potato) Battery
- Way 2: The Coin Battery Stack (Voltaic Pile Style)
- Way 3: The Saltwater Battery (Single Cell → Multi-Cell “Pentacell”)
- Way 4: The Aluminum-Air Style Battery (Metal + Saltwater + Oxygen)
- Series vs. Parallel: How to Get More Power
- What Can a Homemade Battery Actually Power?
- Common Mistakes (AKA “Why Isn’t This Working?!”)
- Mini Experiments to Make It More Interesting
- Lab Notes: What It’s Like to Build These (Realistic “Experience” Section)
- Conclusion
Want to turn your kitchen into a tiny power plantwithout summoning the fire department? A homemade battery
is one of the easiest (and most satisfying) ways to see chemistry turn into electricity right in front of your eyes.
The secret is simple: use two different metals (electrodes) and a conductive liquid or gel (the electrolyte),
then give electrons a path to travel through a wire.
This guide walks through four classic DIY battery builds you can make with everyday items: a fruit battery,
a coin stack “voltaic pile,” a saltwater multi-cell battery, and an aluminum-air style setup that shows off how oxygen can be
part of the reaction. Along the way, you’ll get real expectations (spoiler: you’re not powering your fridge) plus troubleshooting
tips so you don’t end up staring at a stubborn LED like it owes you money.
Before You Start: Safety + Reality Check
- These batteries are low-voltage and low-currentsafe for basic experiments, not for charging phones or running appliances.
- Never short-circuit your battery (connecting the two electrodes directly). It wastes energy and can heat wires.
- Use gloves or wash hands after handling wet coins, salty solutions, or metals (especially if you sand pennies or cut foil).
- Adult supervision is smart if kids are involved (knives, sandpaper, sharp metal edges).
- A multimeter makes this 10× easier and less “guess-and-pray.”
How a Homemade Battery Works (In Plain English)
A battery is basically a controlled chemical reaction. One metal is more willing to give up electrons (it becomes the
anode), while the other is happier to accept electrons (the cathode). The electrolyte lets ions move
so the reaction can keep going. When you connect a wire, electrons flow through the wireboom: current.
In most beginner builds, zinc acts as the “electron donor” (anode) and copper as the “electron receiver” (cathode).
That’s why galvanized nails (zinc-coated) and copper coins/wire show up again and again. Each setup is usually a single cell
that produces roughly 0.5–1.1 volts depending on materials and conditions. To get more voltage, you connect cells
in series (positive of one to negative of the next).
Way 1: The Lemon (or Potato) Battery
This is the celebrity of science-fair batteries. It’s easy, it’s dramatic, and it makes you feel like you just invented electricity.
Lemons are great because their juice is acidic and conducts ions well; potatoes also work because they contain salts and moisture.
What You’ll Need
- 1 lemon (or potato). For more power, use 2–4 lemons.
- 1 galvanized nail (zinc-coated) or a strip/washer of zinc
- 1 copper coin (clean) or copper wire
- 2 alligator clip leads or copper wire
- Optional: multimeter; small LED (a low-current LED works best)
Steps
- Prep the fruit: Roll the lemon on a table with your palm to loosen juice inside (don’t break the skin).
- Insert electrodes: Push the galvanized nail into the lemon. Push the copper coin/wire into the lemon about 1–2 inches away.
- Important: The metals should not touch inside the lemon, or the cell won’t work properly.
- Connect wires: Clip one wire to the zinc (nail) and one wire to the copper.
- Test voltage: Use a multimeter, or connect to an LED (note: LEDs only light one wayflip it if it stays dark).
- Need more voltage? Make more fruit cells and connect them in series: copper of lemon #1 to zinc of lemon #2, and so on.
What to Expect
- One lemon cell often reads around 0.7–1.1V at first, then may drop as the reaction slows.
- To light a typical LED (often ~2V or more), you’ll likely need 2–4 lemons in seriessometimes more.
- It’s better at showing voltage than delivering strong current.
Troubleshooting
- Dim/no LED: Try a different LED, add more cells in series, or use a multimeter first.
- Bad contact: Clean metal surfaces with sandpaper. Oxidation is the enemy of good electrical contact.
- Wrong nail: Make sure it’s galvanized (zinc-coated). Plain steel won’t perform the same way.
Way 2: The Coin Battery Stack (Voltaic Pile Style)
This method feels like building a snack-sized skyscraper that pays you in electrons. You stack repeating layers of metal and electrolyte-soaked paper.
With enough layers, you can power a small LED. It’s also great for learning why “more cells” increases voltage.
What You’ll Need
- 10–20 copper pennies (older pennies are copper-rich; modern pennies are copper-plated zinceither can work depending on design)
- 10–20 zinc washers or aluminum foil pieces (zinc works very well)
- Paper towel, coffee filter paper, or cardboard (cut into coin-sized discs/squares)
- Vinegar + salt (electrolyte solution)
- Optional: tape, multimeter, LED
Steps
- Make electrolyte: Mix vinegar with a pinch of salt. Stir until dissolved.
- Cut separators: Cut paper towel/filter into discs about the size of your coins.
- Soak paper: Dip the paper discs in the vinegar-salt solution, then blot lightly so they’re wet but not dripping.
- Stack your cells: Use a repeating pattern like:
copper coin → wet paper → zinc washer (or foil), then repeat that same trio many times. - Keep layers aligned: You want good contact, but avoid sloppy overhangs that can cause accidental short paths.
- Test: Touch multimeter probes to the top and bottom metal layers (not the wet paper). Or carefully connect an LED.
What to Expect
- Each layer trio is roughly one “cell.” More layers = more voltage.
- LEDs usually need several layers (often 6–10+ cells) depending on your parts and contact quality.
- If the stack dries out, voltage dropsrewet the separators if needed.
Troubleshooting
- Nothing happens: Check that metal layers actually touch through the stack (firm pressure helps).
- LED won’t light: Flip the LED polarity. Also test voltage firstyour stack may not have enough.
- Messy stack: Use tape around the outside (not across the top/bottom) to keep it aligned.
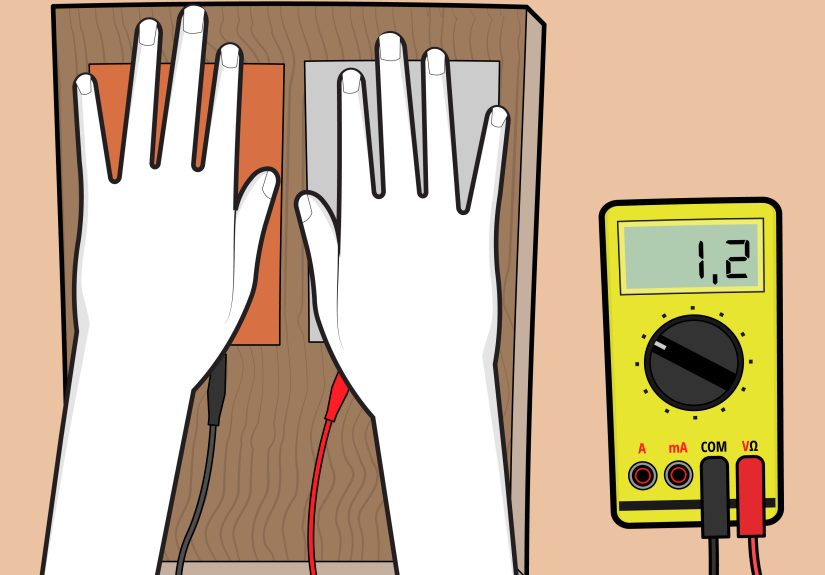
Way 3: The Saltwater Battery (Single Cell → Multi-Cell “Pentacell”)
Saltwater batteries are perfect for experimenting because you can scale them. One cell is fun. Five cells in series?
That’s the “okay now we’re cooking” versionoften enough to light a small LED when built carefully.
What You’ll Need
- 1–5 cups or small containers
- Salt + water (electrolyte)
- Aluminum foil strips (one electrode)
- Copper wire (bare) or copper strip (other electrode)
- Alligator clips/wires
- Optional: activated charcoal (improves some builds), multimeter, LED
Steps (Single Cell)
- Mix saltwater: Warm water helps dissolve salt. Make it noticeably salty (but you don’t need ocean reenactment levels).
- Prepare electrodes: Use a strip of aluminum foil and a piece of bare copper wire/strip.
- Place electrodes: Put both into the saltwater on opposite sides of the cup.
- Critical: Keep them from touching. If they touch, the cell effectively short-circuits.
- Connect wires: Clip one lead to aluminum, one to copper, and test with a multimeter.
Steps (Multi-Cell, Series Connection)
- Build 5 identical cups (same saltiness, similar electrode sizes).
- Connect copper of cup #1 to your device’s positive lead, and aluminum of cup #5 to negative.
- Between cups, connect aluminum of cup #1 → copper of cup #2, and repeat down the line.
- Test voltage across the whole chain before attaching an LED.
What to Expect
- One cell may give under a volt depending on design and surface area.
- Multiple cells in series add voltage, making LEDs more realistic.
- Electrode size and clean contact matter a lotbigger and cleaner usually performs better.
Troubleshooting
- Voltage is weirdly low: Scrape oxidation off copper; replace wrinkled foil; try fresh saltwater.
- Works then fades: Reactions change surface chemistry; swapping electrodes often restores performance.
- LED won’t light but voltage looks okay: The battery may lack current. Try a very low-current LED and shorten wires.
Way 4: The Aluminum-Air Style Battery (Metal + Saltwater + Oxygen)
This one feels like science class leveled up. A metal-air battery uses oxygen from air as part of the cathode reaction.
You can demonstrate the idea at home with safe materialsespecially if you add a carbon/graphite element (like activated charcoal)
to help the cathode side.
What You’ll Need
- 1 container or cup
- Saltwater (electrolyte)
- Aluminum (anode): foil or an aluminum strip
- Cathode option A (simple): copper wire/strip
- Cathode option B (more “air battery” flavored): activated charcoal packed in a porous material + a wire contact
- Wires/alligator clips; multimeter
Steps (Simple Version)
- Fill a container with saltwater.
- Insert an aluminum strip/foil on one side and copper on the other side (don’t let them touch).
- Connect leads and test voltage/current.
- Try gently stirring the solution or increasing electrode surface area to see changes.
Steps (Charcoal “Air Cathode” Twist)
- Put activated charcoal in a porous pouch (coffee filter paper works if you keep it secure).
- Insert a wire into the charcoal so it makes solid contact. Keep part of the charcoal structure exposed to air if possible.
- Place the charcoal pouch so it touches the saltwater but isn’t fully sealed away from oxygen.
- Use aluminum as the other electrode, connect leads, and test.
What to Expect
- This build is less “plug-and-play” than lemons or coin stacks, but it’s excellent for experimentation.
- Performance depends heavily on surface area, oxygen access, and electrode cleanliness.
- You’ll learn fast that batteries are not magicthey’re chemistry plus engineering.
Series vs. Parallel: How to Get More Power
If one cell doesn’t give you enough voltage, connect in series to add voltage.
If you have enough voltage but want more current (rare with these DIY builds), parallel can helpbut it’s trickier and requires matched cells.
- Series: copper(+) of cell 1 → zinc/aluminum(−) of cell 2 → … (voltages add)
- Parallel: all positives together and all negatives together (currents add, voltage stays similar)
What Can a Homemade Battery Actually Power?
Keep expectations realistic and you’ll have more fun. Most homemade batteries are best for:
- Measuring voltage on a multimeter
- Lighting a small low-current LED (often with multiple cells in series)
- Running a tiny buzzer or micro-motor in some setups (again, usually with multiple cells)
- Learning core concepts: oxidation/reduction, electrodes, electrolytes, internal resistance
Common Mistakes (AKA “Why Isn’t This Working?!”)
- Electrodes touching: This is the #1 failure. No separation = no useful battery behavior.
- Dirty/oxidized metal: Clean contact points with sandpaper. Shiny metal is happy metal.
- Enameled wire: Some copper wire has a clear coating that blocks conduction unless stripped.
- Wrong LED direction: Flip it. LEDs are picky like that.
- Expecting high power: These are teaching tools, not power tools.
Mini Experiments to Make It More Interesting
Experiment 1: Distance Between Electrodes
In fruit and saltwater cells, try moving electrodes closer and farther apart (without letting them touch).
Measure voltage and note changes. You’re exploring internal resistance and ion flow paths.
Experiment 2: Surface Area Challenge
Use bigger electrodes (wider foil, thicker copper strip) and compare. More area often improves current delivery.
Experiment 3: Electrolyte Swap
Compare lemon juice vs. vinegar vs. saltwater (in similar containers) using the same electrode metals.
Record what changes most: voltage, current, or how long the battery stays “awake.”
Lab Notes: What It’s Like to Build These (Realistic “Experience” Section)
Here’s the part most instructions skip: the emotional journey. Because a homemade battery is rarely a one-and-done miracle.
The first time you push a nail and a copper coin into a lemon, you’ll probably feel like a genius… right up until your LED
doesn’t light and you begin bargaining with the laws of physics.
In practice, the multimeter becomes your best friend. The moment you clip on the probes and see any non-zero reading,
you get that “oh wow, it’s alive” sparkeven if it’s only 0.82 volts. That number tells you the chemistry is working, and it shifts
your mindset from “why won’t this light?” to “how do I optimize it?” That’s the whole point: you’re thinking like an experimenter.
You’ll also notice how much tiny details matter. A lemon that’s a little dry performs like it’s taking a nap.
A slightly corroded nail or a dull penny can drop performance enough to make you doubt everything. Then you sand the metal,
squeeze the lemon gently, re-clip your wires, and suddenly the voltage bumps up. It feels less like magic and more like tuning
a finicky instrumentwhich is exactly what real engineering is.
Coin batteries have their own personality. Stacking the layers is oddly satisfying, but it also teaches patience. If the wet paper
separators are too soggy, the stack gets sloppy and shorts are more likely. Too dry, and the electrolyte can’t do its job.
The “sweet spot” is damp, not dripping. When you finally press the stack firmly and the LED gives even a faint glow, it’s a small victory
that feels disproportionately awesome for something made of pocket change and vinegar.
Saltwater multi-cell builds are where you start to feel like you’re building a real system. You line up cups, keep electrode pairs from touching,
and connect them in series like a tiny power station. This is also where you learn that voltage is not the whole story.
You might measure enough volts across the chain but still struggle to light an LED because the setup can’t deliver much current.
Shorter wires, cleaner contacts, and larger electrode surfaces often help more than simply adding another cup and hoping for the best.
The aluminum-air style attempt is the most “science lab” of the four. It’s normal to try two or three variations:
different salt concentrations, different electrode sizes, repositioning the charcoal or copper so oxygen exposure changes.
It’s also normal to scribble notes like: “worked for 2 minutes, then dropped,” or “better after cleaning copper.”
By the end, you’re not just making a batteryyou’re learning how real batteries are developed: test, measure, tweak, repeat.
Conclusion
Making a homemade battery is one of the fastest ways to see chemistry become electricity with your own hands. Whether you start with
a lemon cell, build a coin stack, chain saltwater cups into a mini power grid, or experiment with aluminum-air ideas, you’ll learn the same
core lesson: batteries are controlled chemical reactions. And once you can build a working cell from household materials,
you’ll never look at a store-bought battery the same way again.