Table of Contents >> Show >> Hide
- Before You Pick a Layout: Two Design “Laws” That Keep Kitchens Working
- The 5 Kitchen Floor Plans
- 1) The One-Wall Kitchen: Small Space, Big Potential
- 2) The Galley Kitchen: The Efficiency Champion
- 3) The L-Shaped Kitchen: The Crowd-Pleaser
- 4) The U-Shaped Kitchen: Maximum Work Surface, Minimal Running Around
- 5) The Island-Centered Kitchen: The Social Hub (Done Right)
- Spacing Rules That Apply to Every Kitchen Floor Plan
- How to Choose the Right Kitchen Layout for Your Remodel
- Common Remodel Mistakes (So You Can Skip Them)
- Wrap-Up: Pick a Plan, Then Make It Yours
- From the Remodel Trenches: 7 Experience-Based Lessons (The Stuff People Learn the Hard Way)
- 1) The island is not a personality trait
- 2) Put the trash where the action is
- 3) Landing space is the unsung hero of calm kitchens
- 4) Don’t make the dishwasher a roadblock
- 5) Choose your “social boundary” on purpose
- 6) A dedicated coffee or beverage nook prevents kitchen traffic jams
- 7) The best layout is the one that matches your routines, not your fantasy schedule
- SEO Tags
Kitchen remodels are thrilling in the same way roller coasters are thrilling: you’re excited, you’re terrified,
and you’re about to learn new words like “lead time” and “backorder.” The fastest way to feel calm again is to
anchor your decisions in something solidyour kitchen floor plan.
A good layout doesn’t just look pretty in a rendering. It controls traffic, prevents door-dance collisions, and
helps you cook without doing a marathon between the fridge and the stove. Below are five classic (and still
wildly relevant) kitchen layoutsplus the spacing rules, real-world examples, and planning tricks
that make the whole remodel feel less like guesswork and more like a confident “we’ve got this.”
Before You Pick a Layout: Two Design “Laws” That Keep Kitchens Working
1) Protect your workflow: triangle or zones (or both)
You’ve probably heard of the kitchen work trianglesink, cooktop, fridgebecause it’s a simple way
to reduce unnecessary steps. Modern kitchens, however, often work better when you also think in kitchen zones:
prep, cooking, cleaning, storage, and serving/entertaining. Why? Because many households have multiple cooks, extra
appliances, and a snack-seeking audience that appears the moment you turn on a burner.
The confidence move is to use the triangle as a sanity check (are we walking a mile to make pasta?) and zones to
design for real life (where do backpacks land, where do friends hover, where does the mess hide?).
2) Respect clearances (your future shins will thank you)
Layout decisions become dramatically easier when you follow a few proven spacing guidelines. Keep your primary work
aisles roomy enough for actual humans, plan walkways so people can pass, and give yourself “landing zones” next to
key appliances and the sink so you’re not balancing hot pans like a circus act.
The 5 Kitchen Floor Plans
1) The One-Wall Kitchen: Small Space, Big Potential
The one-wall kitchen layout puts cabinets, appliances, and the sink along a single wall. It’s common
in condos, lofts, and open-concept living areas where the kitchen shares space with everything elsedining, living,
your dog’s toy collection, and your kid’s latest “science project.”
Best for
- Studios, apartments, and narrow rooms where a second run of cabinets would squeeze circulation
- Open-plan spaces where you want the kitchen to feel integrated, not boxed in
- Budget-conscious remodels (fewer cabinets and shorter plumbing runs can help)
How to make it work (and not feel like a kitchenette)
The challenge is obvious: everything is in a line. So your win is to create “mini zones” along that line:
food storage on one end, sink + prep in the middle, cooking on the other end. Try to keep the fridge, sink, and
cooktop grouped so you’re not taking 14 steps to rinse a strawberry.
If you have the space, add a slim island or a mobile cart to create extra prep surface and a “landing strip” for
groceries. A small, well-placed secondary surface can turn a one-wall plan from “barely functional” into “surprisingly
great for weeknight cooking.”
Specific example
Imagine a 10-foot wall in a city condo: a 24-inch pantry cabinet, 36-inch fridge, 24-inch counter, 30-inch range,
and a 24-inch sink base with a generous prep counter beside it. Add a 18-inch-deep rolling cart opposite the main run
(if clearance allows), and suddenly you have a prep zone that doesn’t require balancing a cutting board over the sink.
Confidence checklist
- Plan at least one continuous prep area (not a patchwork of 6-inch slivers)
- Use vertical storage: tall pantry cabinets, wall shelves, and appliance garages to reduce counter clutter
- Don’t forget task lightingone-wall kitchens live or die by good illumination
2) The Galley Kitchen: The Efficiency Champion
The galley kitchen is two parallel runs of cabinets and appliances, often with a walkway between.
Some people call it “tight.” Chefs often call it “efficient.” (Both can be true.)
Best for
- Narrow homes, older houses, and layouts where the kitchen is a corridor between rooms
- Serious cookinggalley kitchens can be incredibly fast once dialed in
- Remodels where you want lots of counter space without needing a giant footprint
How to keep it from feeling cramped
A galley succeeds or fails on one thing: aisle width. If your walkway is too tight, two people can’t
pass, dishwasher doors start arguments, and you’ll develop an involuntary side-step technique.
Keep the main work aisle generous, and be intentional about where doors open (dishwasher, oven, fridge). Also consider
whether you want a “walk-through” galley (open at both ends) or a “dead-end” galley (one end closed). Walk-through
galleys need traffic management so people aren’t cutting through your cooking zone like it’s a shortcut to the sofa.
Specific example
In a 7-by-14-foot kitchen, put the fridge and pantry at one end, sink centered on the opposite run, and range near the
middle with landing space on both sides. If you can’t expand the footprint, swap bulky swinging doors for a pocket door
to reclaim inches where it matters.
Confidence checklist
- Place the sink and range on opposite runs so you can pivot between prep and cooking
- Add a small “landing zone” near the fridge for unloading groceries
- Use light finishes and reflective surfaces to visually widen the corridor
3) The L-Shaped Kitchen: The Crowd-Pleaser
The L-shaped kitchen uses two connected walls. It’s popular because it’s flexible: it can be compact
for smaller homes or expanded to include an island in larger spaces. It also naturally opens the kitchen to an adjacent
dining or living area, which is great for conversationless great if you hate anyone seeing your counter chaos.
Best for
- Small-to-medium kitchens that need openness without sacrificing work surface
- Homes where the kitchen connects to dining or family spaces
- Remodels where adding an island is a “maybe” depending on final clearances
How to prevent the dreaded dead corner
Corner storage is where kitchen items go to retire. Fix it with smart corner solutions: a lazy Susan, pull-out trays,
or a corner drawer system. Also consider how you’ll handle the workflow: many L-shaped kitchens do best with the sink
near the corner (for shared prep/cook access) and the fridge on an end with a landing counter beside it.
Specific example
In a 12-by-12-foot kitchen, run cabinets along two walls: place the sink centered on one wall, the range on the other,
and the fridge at an outer end. If you have clearance, a small island (think 24 by 48 inches) can become your prep
“command center” without turning the kitchen into a bumper-car arena.
Confidence checklist
- Keep your primary prep surface close to the sink
- Make sure the fridge has a nearby landing area (even 15 inches helps in real life)
- If adding an island, verify aisle widths before you commit (see the spacing tips below)
4) The U-Shaped Kitchen: Maximum Work Surface, Minimal Running Around
The U-shaped kitchen wraps three walls (or two walls plus a peninsula), creating a super functional
“cockpit” for cooking. You get lots of counter space, strong zone separation, and a layout that’s naturally efficient.
Best for
- Avid cooks who want defined stations for prep, cooking, and cleanup
- Kitchens where you need storage and counter space more than you need an open feel
- Homes that can support adequate clearance between opposing runs
How to avoid feeling boxed in
U-shaped kitchens can feel cozy or claustrophobic depending on openness and aisle width. If the room is larger,
consider leaving one side partially open with a pass-through, open shelving, or a peninsula that transitions to a
dining area. If the room is smaller, prioritize clearances so you can move and work comfortablyespecially with
appliance doors open.
Specific example
In an 11-by-13-foot kitchen, keep the sink centered on the back wall, place the range on one side run, and the fridge
on the opposite run near the entry. Add a shallow beverage station or coffee nook on the “quiet” end so guests can grab
drinks without wandering into the hot zone where you’re wielding boiling water.
Confidence checklist
- Ensure enough clearance between opposing counters so two people can work without shoulder-checking
- Use the third side to create a dedicated prep stretch near the sink
- Consider under-cabinet lighting and lighter finishes to keep it from feeling cave-like
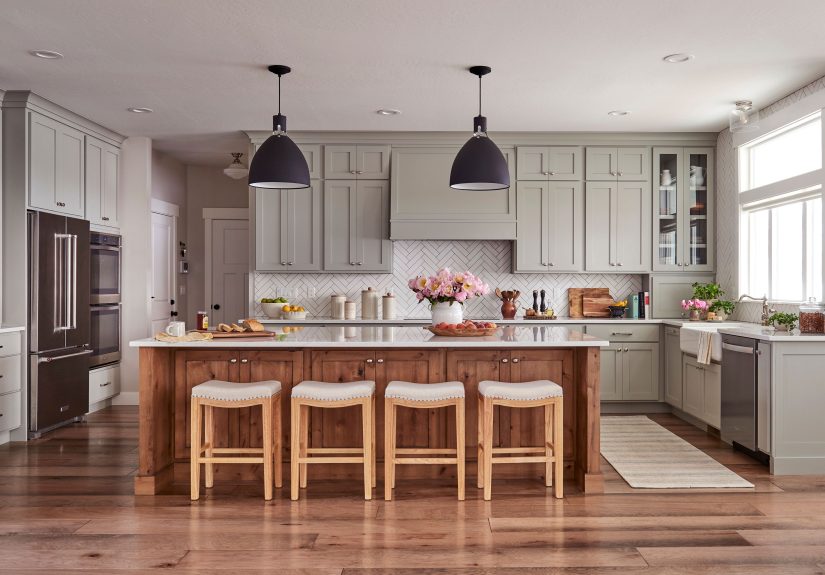
5) The Island-Centered Kitchen: The Social Hub (Done Right)
The island kitchen layout isn’t a separate geometry as much as a power-up for L-shaped, U-shaped, or
open-concept plans. A good island adds prep space, storage, seating, and a place for people to gather. A bad island is
a very expensive obstacle you’ll navigate like it’s furniture in a crowded elevator.
Best for
- Medium-to-large kitchens where you can maintain comfortable circulation around the island
- Households that entertain, snack, or do homework in the kitchen
- Layouts where you want zones: prep on the island, cooking on the perimeter, cleanup near the sink
Island decisions that make (or break) confidence
First: be honest about what your island is for. Prep-only? Seating? Sink? Cooktop? A “drop zone” for mail and feelings?
The more functions you stack, the more you must protect clearance and workflow.
Second: plan seating like you actually know humans. People need knee space, elbow room, and clearance behind them if
traffic passes through. If you want a family-friendly island, prioritize comfort over squeezing in “just one more stool”
that no one will use because it’s wedged into a corner like an afterthought.
Specific example
In a 15-by-18-foot kitchen, use an L-shape perimeter with the sink on one wall and the range on the other, then center
a 36-by-84-inch island with seating for three on the living-room side. Put the prep zone (cutting, mixing, small
appliances) on the island and keep the cooking zone against the wall to reduce splatter and keep kids out of the heat.
Confidence checklist
- Verify work-aisle widths on all sides of the island before finalizing size
- Include outlets and plan where countertop appliances live (so cords aren’t doing parkour)
- If you add a sink or cooktop, make sure you still have landing space and safe traffic flow
Spacing Rules That Apply to Every Kitchen Floor Plan
If you want “remodel confidence” in one sentence, here it is: measure first, design second, fall in love last.
These spacing guidelines will help you pressure-test any layout before it becomes drywall and regret.
Work aisles and walkways
- Work aisle: Aim for at least 42 inches for one cook, and 48 inches for multiple cooks.
- Walkway: Plan at least 36 inches for general walkways.
- U-shaped clearance: If you have opposing runs, you’ll often need wider clearances so doors and people can coexist peacefully.
Landing space and prep space
- Sink landing: Give yourself landing room on both sides so dishes and ingredients have somewhere to go.
- Primary prep area: A continuous prep stretch near the sink is one of the best “quality of life” upgrades you can build in.
Traffic flow (aka: stop making the kitchen a hallway)
Keep major traffic from cutting through the main work zone. If people must pass through, steer them behind seating or
along the perimeteranywhere that doesn’t intersect the hot-and-sharp activities.
How to Choose the Right Kitchen Layout for Your Remodel
Step 1: Choose your “non-negotiable” use case
Are you a daily cook, an entertainer, a meal-prepper, or someone whose kitchen mainly exists to house coffee and
cereal? Your layout should reflect realitynot the version of you who makes fresh pasta on weeknights.
Step 2: Map your zones with sticky notes
Do a low-tech exercise: label sticky notes “Fridge,” “Sink,” “Range,” “Prep,” “Trash,” “Coffee,” “Pantry,” and “Seating.”
Place them on a printed floor plan (or painter’s tape on the floor). Walk the routes. Open imaginary doors. Pretend
you’re unloading groceries while someone else is “just grabbing a spoon.” Your body will spot problems your brain won’t.
Step 3: Audit what you’re keeping vs. changing
Moving plumbing and gas lines can raise costs. That doesn’t mean you can’t move thembut it means you should move them
for a clear payoff: better workflow, improved storage, or a layout that fixes a daily frustration.
Common Remodel Mistakes (So You Can Skip Them)
- Designing for photos instead of cooking: Gorgeous, but where does the toaster live?
- Oversizing the island: If people can’t pass when the dishwasher is open, it’s too big.
- Forgetting landing zones: Hot pans and wet dishes need somewhere safe to land.
- Creating a traffic tunnel through the work zone: Your kitchen isn’t a shortcut; it’s a workspace.
- Ignoring the “second user” problem: If two people can’t function at once, the layout will feel stressful.
Wrap-Up: Pick a Plan, Then Make It Yours
The right kitchen floor plan is the one that supports your daily rhythmcoffee, lunches, weeknight dinners, weekend
chaosand does it with fewer steps, fewer collisions, and more “this just works” moments. Choose one of these five
layouts as your foundation, then fine-tune with zones, clearances, and storage that match how your household actually
lives.
Confidence doesn’t come from having the fanciest appliances. It comes from a layout that behaves like a helpful
teammate instead of a prankster.
From the Remodel Trenches: 7 Experience-Based Lessons (The Stuff People Learn the Hard Way)
I’ve read a lot of kitchen advice over the years, and there’s a hilarious pattern: everyone starts with lofty goals
(“We’ll cook together every night!”) and ends with one surprisingly specific regret (“Why did we put the trash can
across the room from the prep area?”). So here are experience-driven lessons that consistently show up in real remodel
storiesthings homeowners swear they’d do again, and the things they swear they’d never do again, even if bribed with
marble countertops.
1) The island is not a personality trait
People fall in love with islands like they’re adopting a golden retriever. But an island only improves your life if you
can still move around it. One homeowner I know downsized their “dream island” after taping it out on the floor and
realizing the fridge door would open into a high-traffic lane. That tape exercise saved them from a permanent daily
shuffle. The punchline: the slightly smaller island ended up more useful because it was easier to live with.
2) Put the trash where the action is
Almost all kitchen mess happens in the prep zonepeels, packaging, paper towels, questionable broccoli stems. If your
trash and compost are far from where you chop and unpack, you’ll do constant mini-trips, and those trips will feel
annoying forever. The “smart” move is to locate waste pull-outs near the primary prep surface, not wherever a cabinet
happened to be available.
3) Landing space is the unsung hero of calm kitchens
Remodels often prioritize the big-ticket itemsappliances, counters, cabinetsand forget the micro-moments:
where groceries get set down, where a hot pan goes, where a mixing bowl rests while you answer the door. People who add
generous landing space near the fridge, sink, and cooking surface routinely report the kitchen feels “bigger,” even if
the square footage didn’t change. Translation: landing zones reduce clutter, and clutter is what makes kitchens feel
stressful.
4) Don’t make the dishwasher a roadblock
If the dishwasher opens into the only path through the kitchen, you’ve just created a daily standoff: someone loads,
someone else tries to pass, and everyone sighs like it’s a family tradition. A common win is to place the dishwasher so
it opens into a work aisle that’s wide enough to pass, or into an area that isn’t the main circulation route. Bonus:
storing plates and cups near the dishwasher makes unloading feel like a quick task instead of an endurance sport.
5) Choose your “social boundary” on purpose
Open kitchens can be funpeople gather, conversations flow, and the cook doesn’t feel banished. But open kitchens also
put your mess on stage. Many homeowners end up happiest with a “soft boundary”: an island, a peninsula, or a partial
wall that lets you chat while hiding the chaos zone. It’s not anti-social; it’s pro-sanity.
6) A dedicated coffee or beverage nook prevents kitchen traffic jams
This is one of those upgrades that sounds indulgent until you live with it. A small beverage stationcoffee machine,
mugs, maybe a mini fridgekeeps guests and family members from clustering in the main prep/cook area. It’s especially
helpful in island-centered kitchens where the island becomes the default hangout spot. The best beverage nooks are
intentionally “out of the way” of the hot zone but still easy to access.
7) The best layout is the one that matches your routines, not your fantasy schedule
The most confident remodelers aren’t the ones who copy a showroom kitchen perfectly. They’re the ones who pay attention
to their habits: where backpacks land, how many people cook at once, whether they bake, whether they host, whether they
meal-prep, whether they hate visual clutter. When your layout supports your real routines, your kitchen feels easier to
use every single daylike it’s quietly doing its job in the background. And that’s the whole point.