Table of Contents >> Show >> Hide
- Before You Start: Two Rules That Save Marriages and Drywall
- 1) Swap Cabinet Hardware for “I Meant to Do That” Style
- 2) Replace a Basic Light Fixture (AKA: The “Ceiling Boob Light” Retirement Plan)
- 3) Install a Dimmer Switch for Instant “Ambience” (and Fewer Overhead-Light Regrets)
- 4) Upgrade a Bathroom Faucet (Small Fixture, Big “New Bathroom” Energy)
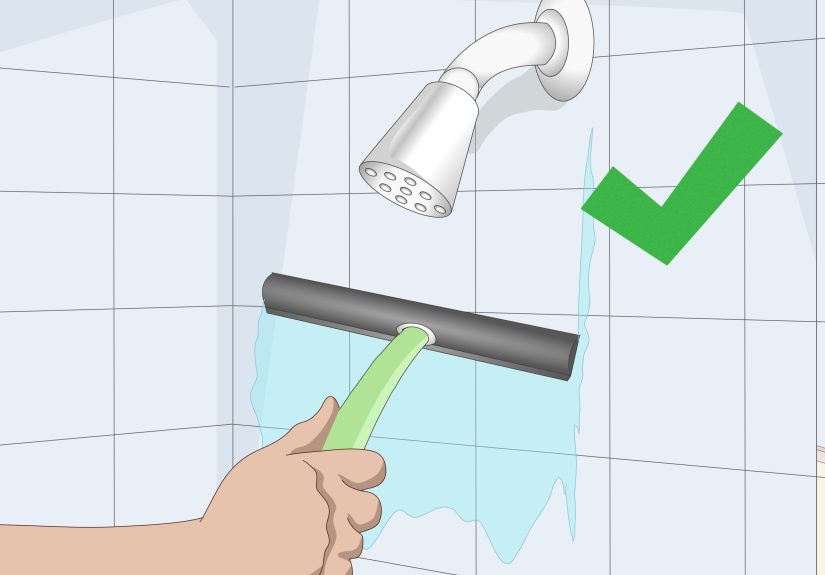
- 5) Swap the Showerhead for a Better Shower (and Lower Water Use)
- 6) Add a Peel-and-Stick Backsplash (Fast Style, Minimal Commitment)
- 7) Paint the Front Door for Instant Curb Appeal
- 8) Add Under-Cabinet Lighting (Your Kitchen’s Glow-Up)
- Conclusion: Your Home, But Make It Personal
- DIY Upgrade Experience Notes (The Stuff You Learn the Hard Way)
Builder-grade homes are like plain bagels: totally fine, technically food, and begging for a little “cream cheese energy.”
The good news is you don’t need a full renovation (or a second mortgage) to make your place feel custom.
With a few strategic DIY movesmost of them weekend-friendlyyou can swap “standard issue” for “did you hire a designer?”
Below are eight builder-grade home upgrades you can do yourself, with practical steps, realistic tips, and a few laughs to
keep you company while you wrestle with a cabinet hinge that suddenly has opinions.
Before You Start: Two Rules That Save Marriages and Drywall
- Rule #1: Turn off the power and test anyway. If you’re touching switches or fixtures, kill the breaker and use a tester. “Probably off” is not a safety plan.
- Rule #2: Measure twice, drill once, snack after. Drilling while hungry is how you end up with “custom” hardware placement… on accident.
1) Swap Cabinet Hardware for “I Meant to Do That” Style
Nothing screams builder-grade like identical tiny knobs on every cabinet, installed with all the personality of a barcode.
Upgrading cabinet pulls and knobs is one of the fastest DIY kitchen upgradesand it’s equally great for bathrooms.
Why it works
Hardware is basically jewelry for your cabinets. Matte black, brushed nickel, champagne bronzepick a finish and suddenly your kitchen looks intentional.
Bonus: it’s the rare project where you can see results while still standing in the aisle of your local hardware store.
Tools & materials
- Screwdriver (manual or drill/driver on low torque)
- Measuring tape + pencil
- Hardware installation template/jig (optional but sanity-saving)
- New knobs/pulls + correct-length screws
How to do it
- Decide on knob vs. pull placement (consistent placement reads more “custom”).
- Remove old hardware and clean the cabinet surface (you’ll be shocked by the outline of old grime).
- If your new pulls use the same hole spacing, congratsthis is basically a victory lap.
- If not, use a template/jig and drill new holes carefully.
- Install hardware snugly (not “gorilla tight,” which can strip screws or crack wood).
Pro tips
- Order one extra pull/knob. Hardware goes out of stock the moment you fall in love with it.
- If you’re drilling new holes, painter’s tape on the surface helps reduce splintering.
- For a more upscale look, use longer pulls on drawers and smaller knobs on doorsbut keep finishes consistent.
DIY level: Easy • Time: 1–2 hours • Impact: High
2) Replace a Basic Light Fixture (AKA: The “Ceiling Boob Light” Retirement Plan)
Lighting is the fastest way to make a room feel updatedbecause builder-grade fixtures are designed to be unnoticed.
Replacing a dated flush-mount or a tiny pendant can shift the whole vibe from “rental energy” to “grown-up home.”
Why it works
Your eye goes up. If what it sees is a frosted dome that looks like it came free with a cereal box, your ceiling becomes the main characterin a bad way.
A modern fixture adds shape, warmth, and style.
Tools & materials
- Screwdriver + wire stripper (sometimes)
- Non-contact voltage tester
- Wire nuts + electrical tape
- New fixture (and possibly a new mounting bracket)
How to do it (safely)
- Turn off the breaker to the circuit and confirm with a tester.
- Remove the old fixture and take a photo of the wiring before disconnecting.
- Install the new bracket if needed.
- Connect wires (typically black-to-black, white-to-white, ground-to-ground).
- Mount the fixture, restore power, and do a small victory dance.
Pro tips
- If your wiring looks unfamiliar (or crispy), stop and call a licensed electrician.
- Choose bulbs intentionally. Warm white often feels more “custom home” than harsh cool white.
- When in doubt, go slightly larger than builder-grade. Undersized fixtures feel cheap fast.
DIY level: Moderate • Time: 1–2 hours • Impact: Very high
3) Install a Dimmer Switch for Instant “Ambience” (and Fewer Overhead-Light Regrets)
Dimmer switches are a small change that makes your home feel more expensivebecause upscale homes don’t blast
full brightness like an interrogation room at all times.
Why it works
Dimmers let you tune your lighting: bright for cleaning, soft for movie night, somewhere in-between for “I’m hosting and pretending I’m calm.”
Just make sure your bulbs are dimmable and compatible with the dimmer type.
Tools & materials
- Screwdriver
- Voltage tester
- Wire connectors
- Dimmer switch rated for your load (LED vs incandescent matters)
How to do it
- Turn off the breaker and confirm power is off.
- Remove the switch plate and pull the switch out.
- Take a photo of wire positions.
- Disconnect the old switch and connect the dimmer per instructions.
- Install, restore power, test, and adjust dimmer settings if it flickers.
Pro tips
- LED flicker is usually a compatibility issuemany dimmers have an adjustment dial or require LED-rated models.
- Want the easiest version? Use a plug-in dimmer for lamps. Same mood, zero wiring.
DIY level: Moderate • Time: 30–60 minutes • Impact: High
4) Upgrade a Bathroom Faucet (Small Fixture, Big “New Bathroom” Energy)
Builder-grade faucets tend to be shiny, generic, and about as memorable as a hotel pen.
Swapping one faucet can modernize a vanity instantlyand it’s a classic DIY bathroom upgrade.
Why it works
The faucet is at eye level, used daily, and connected to everything that reads “clean” and “new.”
Pick a finish that coordinates with your mirror frame, lights, and hardware for a cohesive look.
Tools & materials
- Adjustable wrench or basin wrench
- Bucket + towel (because water is a prankster)
- Plumber’s putty or silicone (depending on faucet instructions)
- New faucet + supply lines (often worth replacing while you’re there)
How to do it
- Turn off hot and cold shutoff valves under the sink.
- Disconnect supply lines and remove mounting nuts.
- Lift out old faucet, clean the surface thoroughly.
- Install new faucet per instructions, tighten mounting nuts.
- Reconnect lines, turn water back on, and check for leaks.
Pro tips
- Take a photo under the sink before starting. It helps when you’re upside down later questioning your life choices.
- If your shutoff valves don’t fully stop water, you may need to shut off the main supply.
DIY level: Moderate • Time: 1–2 hours • Impact: High
5) Swap the Showerhead for a Better Shower (and Lower Water Use)
This is the rare upgrade that improves your life every single day. Builder-grade showerheads often feel… fine.
But “fine” is not the goal when you’re trying to feel like a functional adult with standards.
Why it works
A modern showerhead can improve spray coverage, offer multiple settings, and use less water.
WaterSense-labeled showerheads are designed to use no more than 2.0 gallons per minute, compared to the standard 2.5 gpm.[1]
Tools & materials
- Adjustable wrench or pliers
- Soft cloth (to protect finishes)
- PTFE plumber’s tape
How to do it
- Unscrew the old showerhead (hand-tight first; use a wrench with a cloth if needed).
- Clean threads on the shower arm.
- Wrap threads with plumber’s tape (usually 2–3 wraps).
- Screw on the new showerhead and tighten gently.
- Turn on the water and check for leaks.
Pro tips
- If it leaks at the connection, add another wrap of tape and retighten.
- Consider handheld models for easy cleaning and pet-washing (yes, your dog will judge your plumbing skills).
DIY level: Easy • Time: 15–30 minutes • Impact: Daily happiness
6) Add a Peel-and-Stick Backsplash (Fast Style, Minimal Commitment)
If your kitchen feels builder-grade, the backsplash is usually part of the problem: either it’s missing entirely or it’s a tiny strip of tile doing the bare minimum.
Peel-and-stick backsplash is a budget-friendly upgrade that can look surprisingly legitif you prep correctly.
Why it works
It adds texture, pattern, and contrastthree things builder-grade spaces often lack.
The secret is clean, smooth walls and careful alignment. Also: patience. Always patience.
Tools & materials
- Level + measuring tape
- Degreaser/cleaner and microfiber cloth
- Utility knife + straightedge
- Peel-and-stick tiles/panels
How to do it
- Clean the wall thoroughly; remove grease and dust.
- Let materials acclimate in the room before installing.[2]
- Dry-fit your layout and mark a level guideline.
- Peel a small section of backing, place carefully, then smooth outward as you go.
- Trim edges neatly with a sharp blade for a clean finish.
Pro tips
- Avoid areas with high heat or constant steam unless the product specifically says it’s rated for that location.
- Start in the most visible spot so any cut pieces land in less-noticed corners.
- Use a small roller or smoothing tool to reduce bubbles.
DIY level: Easy–Moderate • Time: 2–4 hours • Impact: “Did you remodel?” comments
7) Paint the Front Door for Instant Curb Appeal
If you only do one exterior upgrade, make it this one. A fresh front door color can make your entire home look more polished
like it has a skincare routine and drinks enough water.
Why it works
Your front door is a focal point. Builder-grade doors often come in bland colors with basic hardware.
Paint is relatively inexpensive, dramatically visible, and (best of all) doesn’t require you to demolish anything.
Tools & materials
- Cleaner/degreaser + rag
- Sandpaper (light sanding is usually enough)
- Painter’s tape + drop cloth
- Exterior-rated primer (if needed) and exterior door paint
- Brush + foam roller (for a smoother finish)
How to do it
- Clean the door. Dirt and oils ruin adhesion.
- Remove or tape hardware and protect surrounding trim.
- Lightly sand glossy surfaces; wipe clean.
- Prime if required (especially for big color changes).
- Paint with a brush for detail areas and a roller for flats for a smooth finish.
- Let it cure properly before rehanging hardware and closing it tightly.[3]
Pro tips
- Pick a color that complements your exterior tones, not fights them.
- If you can, paint on a mild, dry day. Extreme heat or humidity can mess with drying.
- Want extra credit? Add modern house numbers and a new welcome light fixture.
DIY level: Easy • Time: Half-day plus dry time • Impact: Very high
8) Add Under-Cabinet Lighting (Your Kitchen’s Glow-Up)
Under-cabinet lighting is one of those upgrades that makes your home feel thoughtfully designed.
It’s practical (hello, cutting board visibility) and it creates a warm, high-end glow at night.
Why it works
Builder-grade kitchens often rely on one overhead light source, which casts shadows everywhere you actually work.
Under-cabinet lights add task lighting and instant mood.
Two DIY-friendly options
- Plug-in light bars/strips: Easiest, renter-friendly, great results.
- Battery lights: Zero wiring, best for pantries or low-use areas.
How to do it (plug-in version)
- Choose light placement: front edge of cabinets reduces countertop shadows.
- Test the layout with painter’s tape before mounting.
- Mount lights using clips or adhesive (per product instructions).
- Route cords neatly with cable covers for a built-in look.
- Add a smart plug or dimmer-compatible model for extra convenience.
Pro tips
- If you go hardwired, follow a reputable guide and local codesor hire a pro for the wiring portion.
- Match color temperature across the kitchen so it doesn’t look like three different suns moved in.
DIY level: Easy (plug-in) • Time: 1–2 hours • Impact: “Luxury kitchen” vibes
Conclusion: Your Home, But Make It Personal
The best builder-grade home upgrades aren’t the ones that cost the mostthey’re the ones that fix what feels generic.
Swap the “standard” finishes you touch every day (hardware, faucets, lighting), add a little personality (backsplash, door color),
and improve function (dimmers, under-cabinet lighting). Do a few of these and your home stops feeling like “the model” and starts feeling like yours.
DIY Upgrade Experience Notes (The Stuff You Learn the Hard Way)
Let’s talk about the part of DIY that never makes the glossy “after” photos: the five minutes where you’re holding a screw,
looking at the instructions, and thinking, “This project is either going to be a triumph or a story I tell at parties.”
If you’re upgrading builder-grade finishes, you’re in excellent companybecause most homeowners start with the same realization:
the house works, but it doesn’t spark joy. And the fastest way to change that is by upgrading the things your hands and eyes interact with daily.
Here’s the biggest lesson: tiny upgrades compound. When you swap cabinet hardware, suddenly your cabinets look sharper.
Then the faucet looks a little lonely being the last shiny “default” item, so you replace it.
Next thing you know, you’re adding under-cabinet lighting and wondering why you didn’t do it two years ago.
It’s not that you became a different personit’s that your home started giving back a little more every time you used it.
The second lesson is that prep work is the real boss of DIY. Peel-and-stick backsplash? The difference between “wow” and “why is it bubbling”
is cleaning the wall like you mean it, letting things dry, and taking five extra minutes to draw level guidelines.
Painting a front door? The paint color isn’t the hard partcleaning, sanding, and taping are. But that’s also the secret sauce:
builder-grade homes often feel builder-grade because the finishes are basic and the details are rushed. Your DIY upgrades work because you’re doing the opposite:
slowing down for the details.
Another very real experience: you will buy the wrong thing at least once. A pull that’s slightly too long. A faucet with supply lines that don’t match.
A light fixture that looked “perfect” online but arrives and feels like it belongs in a spaceship. This is normal.
The cure is simple: keep packaging until you’re sure, take photos of measurements before shopping, and remember that returns are part of the processnot a personal failure.
(Also: don’t throw away the tiny bag of screws. Those screws are the main characters.)
If you’re nervous about electrical work, start with the easiest wins: switch plates, plug-in under-cabinet lights, hardware swaps, and painting.
Confidence in DIY doesn’t appear all at once; it shows up after you complete a small project and realize you didn’t break the house.
Then you do another. And another. Eventually, “builder-grade” becomes “customized,” not because you renovated everything,
but because you made a series of smart, manageable choices.
Last experience-based tip: take one “before” photo per project even if you think it’s unnecessary. DIY amnesia is real.
Two weeks after you upgrade a fixture, you’ll forget how bad it was. The before photo is proof that your effort matteredand it’s great motivation for the next upgrade.
Plus, it’s deeply satisfying to swipe between before and after like you’re hosting your own home makeover show, except the host is you,
in sweatpants, holding a screwdriver like it’s a microphone.