Table of Contents >> Show >> Hide
- Why a Cast Iron Bathtub Makes a Surprisingly Great Outdoor Sofa
- Before You Start: Reality Checks (and Safety Stuff You Shouldn’t Skip)
- Materials and Tools Checklist
- Step-by-Step: Turning a Cast Iron Bathtub Into an Outdoor Sofa
- Step 1: Choose the right tub (and inspect it like you’re buying a used car)
- Step 2: Deep clean it (because patio furniture shouldn’t smell like 1923)
- Step 3: Decide if you’re cutting it or keeping it whole
- Step 4 (Optional): Cut the tub safely
- Step 5: Finish the cut edge so nobody gets “patio-furniture injured”
- Step 6: Deal with rust the right way (don’t paint over your problems)
- Step 7: Prime and paint for outdoor life
- Step 8: Build a seat platform (and plan for drainage)
- Step 9: Choose cushions that won’t turn into a science experiment
- Design Ideas That Look Intentional (Not Accidental)
- Maintenance: How to Keep Your Bathtub Sofa from Looking Sad
- Common Mistakes (and How to Avoid Them)
- Is It Worth It? A Quick Cost-and-Effort Analysis
- Real-World Experiences: What It’s Like Living With a Cast Iron Bathtub Outdoor Sofa (About )
- Conclusion
- SEO Tags
If you’ve ever looked at an old cast iron bathtub and thought, “This would make a great patio sofa,” congratulations:
you’re either a design genius… or you’ve spent too long in the salvage yard sun. Either way, you’re in the right place.
A clawfoot tub couch (yes, that’s a thing) is one of those upcycling projects that feels wildly impractical until you sit
down on it with an iced drink and realize you’ve basically built a throne.
[1]
This guide walks you through turning a cast iron bathtub into an outdoor sofa that can handle weather, guests, and the
inevitable neighbor who asks, “So… does it still drain?” We’ll cover planning, safety, tools, rust and paint, cushions,
and real-world lessons so your “bathtub sofa” looks intentionalnot like a plumbing emergency.
Why a Cast Iron Bathtub Makes a Surprisingly Great Outdoor Sofa
It’s heavy in the best way
Cast iron clawfoot tubs are famously heavyoften hundreds of pounds even when empty. That’s annoying on moving day,
but amazing once it becomes furniture: it won’t scoot across your patio when someone flops down dramatically (as all
good guests do). Some sources cite typical empty weights in the ~300–600 lb range, with specific models around the
mid-300s. [1]
It’s already shaped like a lounge
The interior curve and high sides are basically a built-in backrest and armrests. With the right cushions, it becomes a
cozy, “sink-in” outdoor sofawithout the wobble you get from lightweight patio furniture.
It’s an instant conversation piece
Outdoor furniture usually falls into two categories: “fine” and “plastic.” A vintage tub sofa is neither. It’s the kind of
DIY that makes people pull out their phonespartly for photos, partly to text someone: “You will NOT believe what
I’m sitting on.”
Before You Start: Reality Checks (and Safety Stuff You Shouldn’t Skip)
1) Moving the tub is the first boss battle
Don’t try to “just muscle it.” Use a dolly, moving straps, furniture sliders, and extra hands. Workplace guidance often
references NIOSH lifting principles (including a 51 lb “load constant” under ideal conditions) and emphasizes that real-world
lifts get riskier fast with awkward shapes, twisting, distance from the body, and poor handholds. Translation: get help.
[2]
2) Old finishes can create nasty dust
If you’re sanding, grinding, or cutting anything coated, assume the dust is “not a snack” and control it accordingly.
EPA guidance for DIY lead-safe renovations emphasizes dust control (like misting, using plastic sheeting, and HEPA cleanup),
because dust can be generated when older coatings are disturbed. [3]
Also worth knowing: there’s published research discussing bathtubs as a possible source of lead exposure in children.
You’re not making a bathtub for bathing herebut it’s still smart to avoid creating dust, especially around kids and pets.
[4]
3) Cutting cast iron is serious tool time
Cast iron is strong but brittle, and cutting/grinding throws sparks, grit, and potentially sharp fragments. Industry safety
guidance commonly recommends eye protection (often safety glasses plus a face shield), gloves, and appropriate guards on
cutting/grinding tools. [5]
Materials and Tools Checklist
- Cast iron bathtub (clawfoot or freestanding is easiest for “sofa vibes”)
- Moving gear: dolly, straps, furniture sliders, gloves
- Cleaning: degreaser, scrub pads, vinegar or mild acidic cleaner for mineral buildup (test first)
- Rust prep: wire brush, sandpaper, rust converter/reformer (optional), metal primer
- Paint: exterior-grade enamel or metal paint suited for outdoor exposure
- Cutting tools (optional): angle grinder w/ cut-off wheel or diamond wheel, or hire a metal shop
- Edge finishing: grinding flap disc, metal file, edging trim or custom wood cap
- Seat platform: pressure-treated lumber, cedar, or composite + exterior screws
- Cushions: outdoor foam (quick-dry/reticulated is ideal), outdoor fabric, zippers or Velcro
- Weather protection: patio cover, furniture cover, or a storage plan
- PPE: eye + face protection, hearing protection, gloves, respirator (especially when grinding)
Step-by-Step: Turning a Cast Iron Bathtub Into an Outdoor Sofa
Step 1: Choose the right tub (and inspect it like you’re buying a used car)
Look for structural integrity: no major cracks, no severely crumbling iron, and feet (if clawfoot) that are stable. Surface
ugliness is finerust, stains, and chipped paint are fixable. Big cracks in the iron are not.
Salvage yards, architectural salvage shops, and marketplace listings are common sources. If you’re paying more than you’d
spend on a decent outdoor loveseat, you’re allowed to pause and ask yourself if you’re upcycling or adopting.
Step 2: Deep clean it (because patio furniture shouldn’t smell like 1923)
Start with a degreaser and a hard scrub. If the tub has mineral scale, a vinegar-based approach is commonly used by DIYers
(test a small area first, and avoid harsh methods if the interior is already refinished). [6]
Rinse thoroughly and let it dry completely. Moisture trapped under primer/paint is basically a “welcome” sign for rust.
Step 3: Decide if you’re cutting it or keeping it whole
You have two main design routes:
- No-cut sofa (easier): Keep the tub intact, build a raised seat platform inside, and use back/seat cushions.
The “sofa” effect comes from cushion shape and placement. - Cut-open sofa (more dramatic): Remove a section of the tub wall so you can sit like a normal couch. This is
the classic “bathtub couch” lookbut it’s the most tool-intensive and safety-heavy step.
If you want the cut-open style but don’t want to spend your weekend making sparks, consider taking the tub to a metal shop
for cutting. It’s often cheaper than replacing a ruined grinder wheel (or your confidence).
Step 4 (Optional): Cut the tub safely
Mark your cut line with painter’s tape and a marker. Many DIY builds cut a long side out to create a wide opening while
leaving enough rim for strength and a “finished” silhouette. Popular tutorials often show cutting with an angle grinder or
other metal-cutting tools, followed by smoothing the edge. [7]
Safety basics:
- Use tool guards, eye protection (glasses + face shield), gloves, and hearing protection. [5]
- Work outdoors or in a very well-ventilated area; control dust and debris.
- Go slow and let the tool do the workforcing cuts increases kickback and wheel stress.
- Keep bystanders far away. Sparks are tiny chaos meteors.
Step 5: Finish the cut edge so nobody gets “patio-furniture injured”
After cutting, grind the edge smooth with a flap disc and finish with a metal file. You want “smooth enough to run your hand
along” smooth.
Then choose an edge treatment:
- Automotive door-edge trim (quick, neat, and surprisingly durable)
- Wood cap (a cedar or composite cap can look high-end and feel comfortable on arms)
- Rounded filler + paint (works if you’re meticulous and seal well)
Step 6: Deal with rust the right way (don’t paint over your problems)
Remove loose rust with a wire brush or abrasive pad. For stubborn areas, rust converter/reformer products can chemically
stabilize remaining rust and create a paintable surface, but they still require proper prep and dry times. [8]
Even if you use a rust reformer, follow the product’s recoat windows. For example, some technical data sheets list recoat
guidance such as hours for certain paints and longer waits (days) for aerosol/lacquer-type topcoats. [9]
Step 7: Prime and paint for outdoor life
Outdoors is harsh: UV, rain, temperature swings, and bird-related incidents you didn’t schedule. Use a primer suited for metal
(and for rusty areas, if applicable), then finish with an exterior-grade enamel or metal paint.
If you’re refinishing the tub for a like-new look, know that professional bathtub refinishing is often described as a
cost-effective alternative to replacement, with guides citing typical professional ranges and noting that new cast-iron tub
replacement can be much higher. For a sofa, you don’t need bathroom-perfect gloss, but the prep principles (cleaning, sanding,
and using appropriate coatings) still matter. [10]
Step 8: Build a seat platform (and plan for drainage)
Here’s the big difference between “cute idea” and “actually comfortable sofa”: a platform inside the tub.
A simple approach:
- Build a slatted frame from cedar or pressure-treated lumber that sits inside the tub.
- Leave gaps between slats so water can drain and air can circulate.
- Keep the drain open (remove the stopper) so rainwater has an exit path.
- Optionally add rubber feet under the platform so cushions sit above any puddles.
If your tub sits directly on grass or soil, consider patio stones or pavers under the feet so it stays level and doesn’t sink.
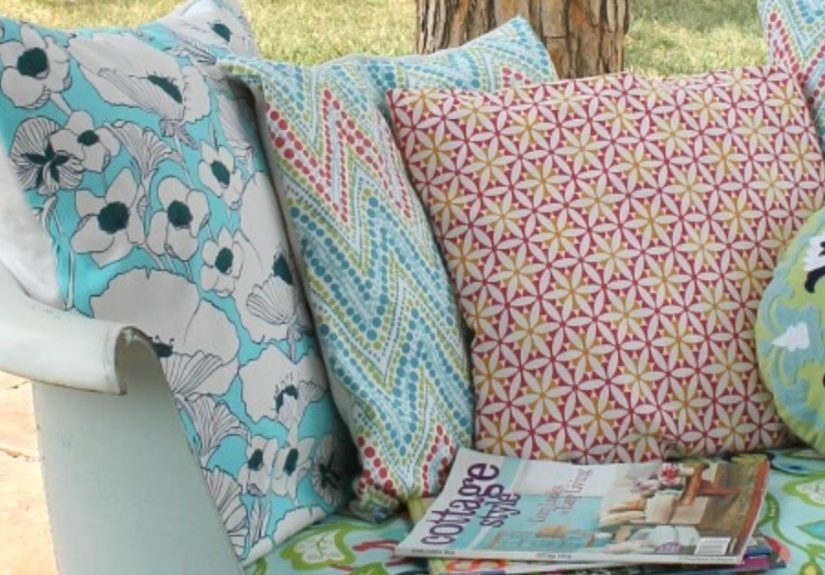
Step 9: Choose cushions that won’t turn into a science experiment
For outdoor cushions, material matters as much as color. “Quick-dry” cushion builds often use reticulated foam (designed with an
open structure so water drains and air moves through), paired with outdoor fabric and breathable construction. [11]
Cushion tips that work in real life:
- Use outdoor-rated fabric and add zippers so covers can be washed.
- Consider a slightly firmer seat foam so you don’t sink to “tub bottom.”
- Make a separate back cushion that can be stored during storms.
- Don’t block drainage: avoid a single cushion that seals the entire base like a bathtub lid.
Design Ideas That Look Intentional (Not Accidental)
Modern farmhouse
Paint the exterior matte black or soft white, add a warm wood cap on the cut rim, and use striped cushions. Bonus points for
a little side table made from reclaimed lumber so it looks like a “set,” not a solo oddity.
Coastal chill
Think pale blue or sea-glass green outside, sand-colored cushions, and an outdoor throw that says “I read novels,” even if you
mostly read menu QR codes.
Garden gothic
Keep the tub dark, use deep green or burgundy cushions, and surround it with potted ferns. It’s moody. It’s dramatic. It’s a
bathtub that finally found its calling.
Maintenance: How to Keep Your Bathtub Sofa from Looking Sad
- Cover it when you’re not using it, especially in rainy seasons.
- Ventilate after storms: flip cushions, open the drain, and let airflow do its job.
- Touch up chips promptly: bare iron + moisture = rust RSVP.
- Clean cushions as recommended by the fabric maker (some outdoor fabric brands provide specific cleaning guidance). [12]
Common Mistakes (and How to Avoid Them)
- Skipping prep: Paint hates grease, dust, and loose rust. Clean and prep like it mattersbecause it does.
- Blocking drainage: A sealed seat cushion over a closed drain traps water. Plan an exit route for rain.
- Underestimating weight: Plan your move and placement before you bring the tub home. [1]
- Ignoring dust control: If you grind/sand, control dust and clean up with safe practices. [3]
- Making it uncomfortable: A bathtub sofa should feel like furniture, not like you’re waiting for a plumber.
Is It Worth It? A Quick Cost-and-Effort Analysis
This project is usually worth it if you want a true statement piece and you enjoy hands-on DIY. The tub itself can be inexpensive
(or even free), but materials add up: primer/paint, cutting wheels, lumber for the platform, outdoor foam, and fabric.
The hidden “cost” is effortespecially if you cut the tub. Cutting and finishing can be the difference between a weekend project
and a multi-weekend saga. If you keep the tub intact and focus on the platform + cushions, it’s far more approachable.
From a sustainability angle, reuse and salvage keeps bulky materials out of disposal streams. EPA materials-management guidance
encourages practices like salvaging and reusing existing materials as part of reducing construction and demolition waste.
[13]
Real-World Experiences: What It’s Like Living With a Cast Iron Bathtub Outdoor Sofa (About )
The first thing you notice after you build a bathtub sofa is that people treat it like a landmark. Friends arrive and make a
beeline for it. Neighbors slow-walk past your yard like they’re casually sightseeing. And at least one person will ask,
completely sincerely, if you’re worried someone might try to bathe in it. (Answer: only if they bring their own bubble bath and
sign a waiver.)
Comfort-wise, the magic is in the platform and the cushions. The first version many DIYers try is “throw cushions directly in
the tub.” It looks cute for exactly five minutesuntil the cushion slides into the drain slope and you end up sitting like a
folded lawn chair. The upgrade is a simple slatted base that levels the seat and lets water drain. Once the seat is flat, the
tub shape becomes an advantage: the sides support your elbows, the back cushion stays tucked, and it feels surprisingly cozy.
Weather is the other big learning curve. If your climate is dry, you’ll feel unstoppable. If it rains, you’ll quickly discover
that a bathtub is excellent at holding waterbecause that was literally its original job. The best practical fix is to keep the
drain open, avoid “one-piece” cushions that seal the bottom, and use quick-dry foam for anything that stays outside. Even then,
after a heavy storm, it helps to flip the cushions and let the interior air out. A breathable furniture cover is a game-changer,
but you still want occasional airflow so moisture doesn’t linger.
Maintenance is mostly small, regular stuff. Painted surfaces will get the occasional chipespecially along edges where shoes
scuff when someone climbs in and out. Touch-up paint prevents a tiny chip from becoming a rust patch that spreads like gossip.
In autumn, leaves will collect in the tub (because of course they will), so a quick sweep-out becomes part of the routine.
On the bright side, cast iron is incredibly stable: no wobble, no flimsy joints, no “why is this armrest suddenly loose?”
surprises.
The social value is real. A bathtub sofa turns an ordinary patio into a place people remember. It’s a natural photo spot, a
party perch, and a conversation starter that makes even a simple backyard hang feel a little more special. If you’re the type of
person who enjoys projects that are functional and delightfully weird, it’s one of those builds that keeps paying you
backevery time someone sits down and says, “Okay… I hate that I love this.”
Conclusion
A cast iron bathtub turned outdoor sofa is peak upcycling: part furniture, part sculpture, part “how did you even think of that?”
With smart prep, safe cutting (or a no-cut approach), rust control, and cushions designed for weather, you can create a durable
patio sofa that’s equal parts comfortable and unforgettable. Keep drainage and maintenance in mind, and your tub couch won’t just
look coolit’ll actually earn its spot outside.