Table of Contents >> Show >> Hide
- Why This DIY Project Works So Well
- What You Will Need
- Plan the Shape Before You Start Cutting
- How to Make a DIY Deer Head From Chicken Wire
- Design Ideas for Styling Your Chicken Wire Deer Head
- Common Mistakes to Avoid
- Is a Chicken Wire Deer Head a Good Project for Beginners?
- A Realistic DIY Experience: What Making One Actually Feels Like
- Final Thoughts
If you have ever looked at a blank wall and thought, “You know what this room needs? A majestic woodland creature made out of metal netting,” congratulations: you are exactly the kind of wonderfully unhinged creative soul this project was made for. A DIY deer head made from chicken wire is one part sculpture, one part conversation starter, and one part proof that craft stores are basically adult playgrounds.
This project hits a sweet spot for DIY lovers because it feels artsy without demanding a fine arts degree, and it looks high-end without requiring a second mortgage. It also gives you that rustic-meets-modern, cabin-meets-gallery, “Yes, I made that, please admire it from this angle” kind of energy. Whether you want farmhouse charm, faux taxidermy flair, or just a bold handmade wall piece, a chicken wire deer head can absolutely deliver.
Best of all, this version is animal-friendly, highly customizable, and surprisingly forgiving. Chicken wire is flexible enough to shape by hand, strong enough to hold a sculptural form, and open enough to let the finished piece feel airy instead of bulky. In other words, it is perfect for creating a deer head wall decor project that looks impressive without turning your craft corner into a medieval blacksmith shop.
Why This DIY Project Works So Well
A chicken wire deer head works because it combines structure and illusion. You are not trying to carve every eyelash or reproduce a museum-quality anatomical study. You are building a recognizable silhouette: the tapered face, alert ears, long neck, and antlers that instantly say “deer” even when the form is simplified. That is what makes the project so beginner-friendly. The eye fills in the details for you.
It also fits into a lot of decorating styles. In a rustic room, it feels right at home above a mantel or sideboard. In a modern space, the open wire design gives it a sculptural, almost gallery-like feel. In a playful eclectic room, it can become a statement piece painted white, black, gold, or even wrapped in fairy lights for the holidays. A handmade faux taxidermy deer head is one of those rare projects that can look cozy, edgy, whimsical, or sophisticated depending on how you finish it.
What You Will Need
Basic Materials
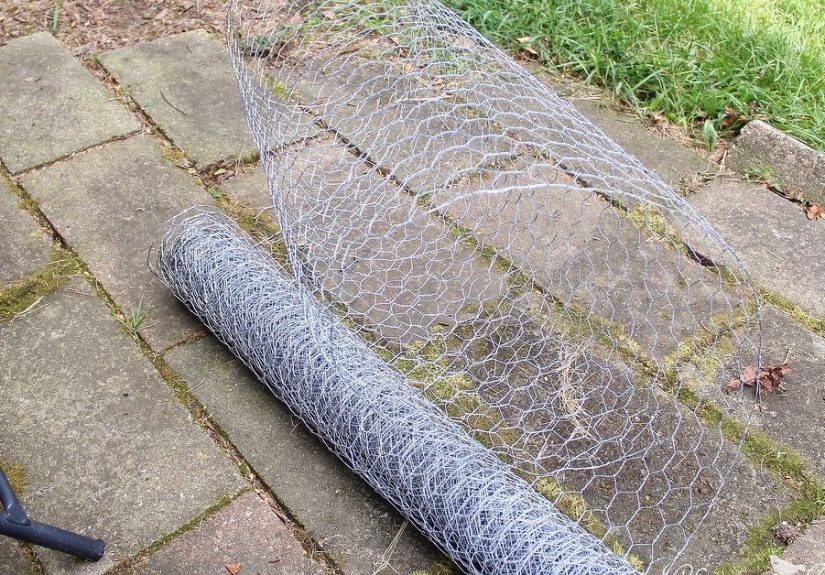
- Chicken wire or poultry netting
- Wire cutters or aviation snips
- Needle-nose pliers
- Work gloves
- Safety glasses
- Long sleeves
- Craft wire, floral wire, or zip ties for fastening sections together
- Cardboard or kraft paper for a simple template
- A wooden plaque or mounting board if you want a classic wall-mounted look
- Optional paint, stain, ribbon, faux greenery, or LED lights for styling
Before you begin, take the safety part seriously. Chicken wire has a real talent for acting innocent while secretly trying to scratch, snag, and poke everything in sight. Wear gloves, protect your eyes, and keep your work area clear. Sharp ends are part of the process, but they do not have to become part of your skin care routine.
Plan the Shape Before You Start Cutting
The biggest difference between a deer head that looks intentional and one that looks like a haunted laundry basket is planning. Start by deciding how large you want the finished piece to be. Small wall accents can be around 18 to 24 inches tall, while statement pieces often go much bigger. Sketch a side profile of the deer head first. Focus on the proportions: a narrow snout, wider cheek area, upright ears, a slightly elongated neck, and antlers that match the overall scale.
It helps to think of the form in sections rather than as one giant sculpture. Break it into five parts: snout, head, ears, neck, and antlers. Once you do that, the project becomes much less intimidating. You are no longer making “a whole deer head.” You are just making a cone, a rounded mask, two ears, a neck tube, and some branch-like antlers. Suddenly this looks a lot more doable.
How to Make a DIY Deer Head From Chicken Wire
1. Build the Snout
Start with the snout because it establishes the whole direction of the sculpture. Cut a rectangular piece of chicken wire and roll it into a tapered tube, narrower at one end and slightly wider at the back. Secure it with floral wire or by twisting the cut ends together carefully with pliers. This becomes the muzzle area.
Do not worry if it looks a little rough at first. Chicken wire always begins its life looking like an argument. The shape improves as you keep adjusting it. Gently squeeze, widen, or flatten sections until you get a more natural profile.
2. Form the Face and Head
Next, create a wider oval or rounded form for the main head. Attach the back of the snout to this larger section, overlapping the wire edges so the two pieces connect securely. From the side, the deer’s face should taper forward; from the front, it should feel slightly narrow but still balanced.
This is where the sculpture starts becoming recognizable. Pinch in areas that feel too puffy. Widen the cheek area slightly. Flatten the forehead just a touch. The trick is not perfection. The trick is editing. Keep removing visual bulk until the silhouette looks elegant.
3. Add Depth to the Neck
The neck gives the piece presence. Cut another large section of wire and shape it into a cylinder or elongated cone. Attach it underneath the head, angling it slightly backward so the finished deer head feels like it is mounted naturally rather than jutting straight out like a battering ram.
If you plan to mount the sculpture on a plaque, leave the back side of the neck somewhat flatter. That makes it easier to secure later. If you want a freestanding art piece instead, you can keep the neck more rounded and sculptural.
4. Shape the Ears
Ears make a huge difference. Cut two smaller pieces of chicken wire and fold each into a leaf-like shape. Pinch one end to create the base, then curve the rest into a gentle cup. Deer ears should look alert but not cartoonish. Attach them to the top sides of the head, checking the angle from the front and side before fastening them completely.
If the ears are too flat, the deer looks sleepy. If they are too big, it starts drifting into satellite dish territory. Aim for elegant and slightly upright.
5. Create the Antlers
Antlers are where you can go realistic, stylized, or dramatic. For a simple version, twist strips of chicken wire into long branch-like forms and secure them tightly. For a sturdier version, make a thin internal core from heavier craft wire first, then wrap chicken wire around it. Build one main stem per antler and add smaller offshoots.
Keep the antlers proportional to the head. Oversized antlers can look amazing in a statement piece, but they need balance. Too tiny, and the sculpture loses its deer-like identity. Too large, and it begins to look like your wall decor is preparing for battle.
6. Refine the Shape
Once all the sections are attached, step back and look at the piece from several angles. This is the secret stage that separates a rushed craft from a polished DIY project. Trim stray wires. Tuck sharp ends inward. Pinch and pull the contours until the head looks more sculpted and less accidental.
If you want a cleaner silhouette, you can double-layer some areas or add extra small patches of wire to fill hollow spots. The nose bridge, cheekbones, and base of the antlers often benefit from a little extra shaping.
7. Mount It
For a classic faux taxidermy look, attach the back of the neck to a stained wooden plaque. You can use strong wire, staples suited for the backing material, or a combination of screws and hidden fasteners depending on your construction style. Make sure the finished piece is stable before hanging.
If you are keeping the wire exposed, the light passing through the mesh becomes part of the appeal. If you want a softer or more finished appearance, you can spray-paint the deer head matte black, bright white, bronze, or gold. White gives it a crisp modern look. Black feels dramatic. Metallic finishes turn it into instant wall art with major attitude.
Design Ideas for Styling Your Chicken Wire Deer Head
One of the best things about this DIY deer head is how easy it is to personalize. You can leave it raw and industrial, or you can dress it up depending on the season and your home style.
Easy Styling Options
- Rustic farmhouse: Mount it on reclaimed wood and hang it above a mantel.
- Modern minimal: Paint it matte white or black and keep the rest of the wall simple.
- Holiday decor: Weave in greenery, mini ornaments, or warm string lights.
- Boho eclectic: Add ribbon, dried flowers, or hanging beads around the antlers.
- Cabin-inspired: Pair it with plaid, natural wood, and vintage-style sconces.
This piece also works beautifully in entryways, living rooms, home offices, creative studios, and even covered porches if protected from the elements. It has enough personality to stand alone, but it also looks great as part of a gallery wall.
Common Mistakes to Avoid
Most DIY problems with chicken wire deer head projects come down to three things: bad proportions, weak connections, and impatience. The head needs a clear silhouette. The joints need to be secure. And the maker needs to accept that shaping wire is a process of adjusting, not a one-and-done miracle.
Avoid making the neck too short. Skip flimsy antlers that droop dramatically after hanging. Do not leave sharp wire ends exposed where someone can brush against them. And do not rush the refinement stage. Ten extra minutes of trimming and reshaping can make the whole piece look twice as expensive.
If you do get scratched, stop and clean the area right away. Small wounds are easy to ignore when you are in “creative genius mode,” but basic first aid matters. DIY glory is wonderful. DIY infection is not.
Is a Chicken Wire Deer Head a Good Project for Beginners?
Yes, with one condition: beginners should treat it like sculpture, not perfectionism. You do not need to make an exact replica of a woodland animal. You just need to build a convincing artistic form. That mindset changes everything. Instead of panicking over tiny details, you focus on shape, balance, and style.
This project is ideal for people who enjoy home decor crafts, wall art, rustic decorating, and upcycled-looking design. It is also a smart choice if you want a statement piece that looks custom. Store-bought faux taxidermy can be expensive, and a handmade version has far more character. A slightly imperfect handmade deer head often looks better anyway because it feels original, not mass-produced.
A Realistic DIY Experience: What Making One Actually Feels Like
If you are wondering what the experience of making a chicken wire deer head is really like, here is the honest version: it starts with confidence, moves quickly into confusion, takes a detour through mild chaos, and ends in a deeply satisfying “Wait… I actually love this” moment.
At the beginning, most DIYers assume the project will be simple. You cut some wire, twist some sections together, and suddenly you are an avant-garde woodland sculptor. Then the chicken wire has other ideas. It bends in the wrong direction. It snags your sleeve. It flops where you wanted structure and stands up where you wanted a clean line. For about fifteen minutes, it feels less like crafting and more like negotiating with a shiny, stubborn porcupine.
Then something shifts. You stop trying to force the wire into perfection and start working with it. You pinch the snout a little narrower. You widen the cheeks. You tilt the ears and suddenly the piece looks less like “abstract farm geometry” and more like an actual deer. That is the turning point, and it is weirdly exciting. The sculpture begins to reveal itself one adjustment at a time.
The antlers are usually the biggest emotional roller coaster. They can make you feel brilliant for five minutes and betrayed the next. One side looks elegant, the other side looks like a tree branch after a thunderstorm. Most people end up reshaping them several times, and honestly, that is normal. The best antlers usually come from editing, not from getting it right on the first try.
There is also a fun surprise built into this project: it tends to look better the farther back you stand. Up close, you see every twist and every imperfection. From a few feet away, though, the whole thing reads as art. The open mesh catches light, the silhouette sharpens, and the deer head suddenly has presence. That is when many makers realize they do not need to hide the handmade quality. The little quirks are what give it charm.
Another common experience is the urge to customize once the structure is done. The moment the deer head finally holds its shape, ideas start multiplying. Maybe it needs a dark matte finish. Maybe it needs a reclaimed wood plaque. Maybe it needs eucalyptus for the holidays, ribbon in the spring, or tiny fairy lights because apparently now you are styling wildlife-inspired sculpture like it is attending a garden party.
And the final satisfaction is real. Hanging a finished DIY deer head on the wall feels more rewarding than buying one ever could. Guests notice it. They ask where you got it. You get to say, casually but with enormous inner pride, “I made it.” That sentence alone is worth a few pokes from the chicken wire and one dramatic moment where you briefly considered throwing the whole thing into the garage.
So yes, the experience can be messy. It can be fiddly. It can test your patience. But it is also creative, memorable, and genuinely fun. By the end, you do not just have a piece of wall decor. You have a story, a handmade sculpture, and proof that with a roll of chicken wire and a little persistence, you can make something striking out of a material most people associate with gardens and chicken coops.
Final Thoughts
A DIY deer head made from chicken wire is the kind of project that feels both crafty and artistic. It is affordable, customizable, and dramatic in the best possible way. It gives you the charm of faux taxidermy without anything stuffy or overly traditional, and it lets you turn a humble roll of wire into sculptural decor that looks surprisingly elevated.
If you approach it with patience, pay attention to the silhouette, and take the time to refine the details, you can create a wall piece that looks intentional, stylish, and completely your own. Whether your home leans farmhouse, cabin, modern rustic, or delightfully eclectic, this project has room to fit right in.
And honestly, there is something magical about making decor that feels a little unexpected. Plenty of people can buy a framed print. Not everyone can point to the wall and say, “That deer head? I built it out of chicken wire.”