Table of Contents >> Show >> Hide
- Why Fabric Wallpaper Is a Smart Cheat Code
- Best Uses for DIY Fabric Wallpaper
- What You’ll Need
- Choosing the Right Fabric (So Your Wall Doesn’t Turn Into a Wrinkle Festival)
- Prep the Wall (Yes, It Matters)
- How to Measure Fabric for Wallpaper Panels
- Step-by-Step: The Liquid Starch Fabric Wallpaper Method
- 1) Mix your starch (if you’re diluting)
- 2) Create a straight starting line
- 3) Cut and label panels
- 4) Hang the first panel dry (temporarily)
- 5) Apply starch to the wall in small sections
- 6) Smooth from center outward
- 7) Roll starch over the fabric to fully saturate
- 8) Match the next panel
- 9) Let it dry completely
- 10) Trim the edges for a crisp finish
- Handling Corners, Outlets, Windows, and Other Wall Surprises
- Troubleshooting: Fixes for the Most Common Issues
- How to Remove Fabric Wallpaper (Without Rage Scraping)
- Cost and Time: What to Expect
- Extra: of Real-World “Experience” Notes (What People Learn the Hard Way)
- Conclusion
Want the drama of wallpaper without the commitment, the mess, or the “I guess I live like this forever now” panic? Enter DIY fabric wallpaper: a renter-friendly (and commitment-phobe-friendly) way to dress up a wall using fabric and a simple, washable adhesive approach. You get big pattern energy, cozy texture, and a surprisingly polished look with a removal process that’s closer to “spa day for your wall” than “renovation rage.”
In this guide, you’ll learn how to choose the right fabric, prep your walls, apply fabric like wallpaper (without paste trauma), handle corners and outlets like a pro, and remove it cleanly when you’re ready for a new vibe.
Why Fabric Wallpaper Is a Smart Cheat Code
Traditional wallpaper can be gorgeous, but it’s also famously fussy. Fabric wallpaper gives you a similar “designer wall” effect with more flexibility and often less costespecially if you shop smart (hello, sheets and thrift finds).
- Renter-friendly: Designed to come down without turning your drywall into confetti.
- Budget-flexible: Use yardage, curtains, tablecloths, or sheet sets depending on your taste and wallet.
- Massive design options: Fabric prints can be bolder, softer, or more textured than many wallpapers.
- Low-commitment: Swap out seasonally, for nurseries, or when you’re simply tired of looking at the same wall.
Best Uses for DIY Fabric Wallpaper
Fabric wallpaper shines in spaces where you want a big impact without long-term permanence:
- Accent walls in bedrooms, offices, and dining rooms
- Nurseries and kids’ rooms (where style changes faster than shoe sizes)
- Behind open shelving or inside bookcase backs
- Stair risers (small surface, huge wow)
- Rental apartments where painting is a no-go
One caution: steamy bathrooms, super-humid climates, or walls that regularly get blasted by heat can make this approach less stable. Moisture is the sworn enemy of anything “starch-adjacent.” (Your shower is basically a humidity factory.)
What You’ll Need
The list is refreshingly short for something that can look like a high-end makeover.
Materials
- Fabric: Enough to cover your wall(s), plus extra for pattern matching and trimming.
- Liquid starch: The MVP (look in the laundry aisle).
- Painters tape or push pins: For temporarily holding panels while you align and smooth.
- Drop cloth or old sheets: Protect floors from enthusiastic rolling.
Tools
- Measuring tape
- Level (or laser level if you’re feeling fancy)
- Scissors (fabric shears are best)
- Paint tray or bucket
- Paint roller (clean!) and/or a wide brush
- Smoothing tool (plastic smoother, wallpaper brush, or even a clean plastic squeegee)
- Utility knife + extra sharp blades
- Step stool or ladder
- Sponge + warm water for removal
- Screwdriver (for outlet covers)
Choosing the Right Fabric (So Your Wall Doesn’t Turn Into a Wrinkle Festival)
Fabric choice is the difference between “custom wall treatment” and “I taped a blanket to my house.” Here’s how to pick wisely.
Go for stable fibers
Lightweight-to-medium cotton is a popular choice because it’s easier to smooth and less likely to fight you. Very stretchy knits can shift while you’re applying them, making pattern alignment… emotionally challenging.
Mind the thickness
Super thick upholstery fabric can be harder to saturate and smooth. Very thin fabric can show what’s underneath. The sweet spot is “substantial enough to look clean” but “not so heavy it wants to become a falling tapestry.”
Consider pattern scale and repeat
Large prints look amazing but require extra yardage for matching repeats across panels. If you’re a first-timer, a more forgiving pattern (small repeat, abstract, textured solid) is easier to align.
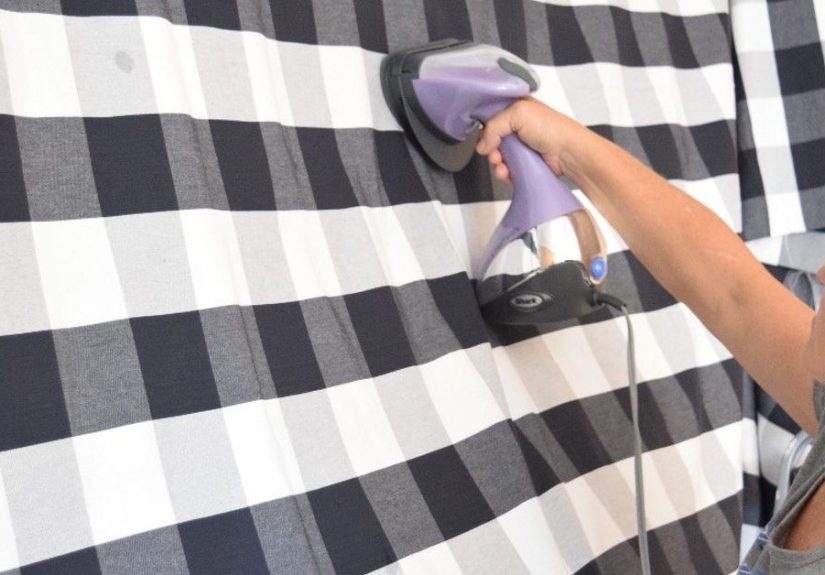
Pre-wash (usually) and iron
Many fabrics shrink. If you’re using washable cotton, pre-wash and dry it before installation so it doesn’t shrink later. Then iron it like you’re preparing it for a job interviewwrinkles translate loudly on walls.
Prep the Wall (Yes, It Matters)
Great results come from boring prep. Think of this as skincare for your walls: cleanse, smooth, and only then go glam.
- Clean the surface: Remove dust and grease. A damp cloth and mild soap work for many walls. Let it dry fully.
- Fix flakes and bumps: If paint is peeling or the surface is crumbly, address that first. Fabric wallpaper can tug at weak paint during removal.
- Patch holes and sand: Fill nail holes, sand smooth, wipe away dust.
- Check texture: Smooth walls are easiest. Heavy texture can show through and may reduce adhesion. If you’re unsure, test a small panel first.
- Prime if needed: A properly prepped surface can make application easier and removal cleanerespecially if the wall has stains, patchwork, or uneven porosity.
How to Measure Fabric for Wallpaper Panels
Here’s the simple approach:
- Wall height: Measure floor to ceiling (or to the top trim line you want).
- Add extra: Add 2–4 inches for trimming at top and bottom.
- Panel width: Choose a manageable width (often 18–36 inches). Wider panels mean fewer seams, but they’re harder to handle solo.
- Pattern matching: If the print repeats, buy extra yardage to align it across panels.
Pro tip: If you’re doing one accent wall, buy a little more fabric than your math says. Walls are rarely perfectly square, and pattern repeats love to eat “exact measurements” for breakfast.
Step-by-Step: The Liquid Starch Fabric Wallpaper Method
This is the classic fabric as wallpaper approach: apply starch to the wall (and/or over the fabric), smooth, saturate, let dry, then trim crisp edges.
1) Mix your starch (if you’re diluting)
Some methods use liquid starch straight; others dilute with water. A common beginner-friendly starting point is a roughly equal mix of liquid starch and water. The goal is easy rolling and good saturation without turning your floor into a skating rink.
2) Create a straight starting line
Use a level to mark a plumb vertical guideline near the center or one edge of the wall. This is your “truth line.” Walls lie. Levels do not.
3) Cut and label panels
Cut your fabric into panels with extra length for trimming. If there’s a repeating pattern, label each panel in order (Panel 1, Panel 2…) so you don’t accidentally create a “mystery seam” mid-wall.
4) Hang the first panel dry (temporarily)
Align the first panel with your guideline. Use painters tape or push pins along the top to hold it in place. Smooth it lightly just to position it.
5) Apply starch to the wall in small sections
Liquid starch dries fairly quickly, so work in sections you can cover right away. Roll starch onto the wall behind the fabric area you’re about to adhere.
6) Smooth from center outward
Press the fabric into the starched area, smoothing from the center outward to push air toward the edges. This is the same logic as applying a screen protectorslow, steady, and less dramatic than rushing.
7) Roll starch over the fabric to fully saturate
Once it’s positioned, roll starch over the front of the fabric until it’s thoroughly saturated and adhering well. You’re not misting a houseplant herethis needs to soak through so the fabric bonds evenly.
8) Match the next panel
Align the second panel to match the pattern. You can butt seams together carefully. If your fabric frays easily, consider folding under the raw edge for a cleaner seam (or use iron-on hem tape for a sharp finish).
9) Let it dry completely
Dry time varies by humidity and how much starch you used. Don’t trim immediately if the fabric is still damp; you’ll get wavy cuts and regret.
10) Trim the edges for a crisp finish
Once dry, use a straightedge and a fresh utility blade to trim along baseboards, ceiling lines, or trim edges. Replace blades oftendull blades snag fabric and create jagged cuts.
Handling Corners, Outlets, Windows, and Other Wall Surprises
Inside corners
Don’t assume your corner is square. Many aren’t. Wrap the fabric slightly into the corner, smooth it firmly, then start the next panel with a slight overlap or a tight butt seam depending on your pattern and fabric thickness.
Outside corners
Outside corners take a beating from daily life (bags, shoulders, furniture). Consider wrapping fabric around the corner a bit more for durability, then secure with extra smoothing and starch.
Outlets and switches
- Turn off power at the breaker for safety.
- Remove the cover plate.
- Apply the fabric over the area and smooth.
- Make a small X-cut in the fabric where the opening is, then trim carefully.
- Reattach the cover plate once fully dry.
Windows and trim
Leave slight overhang around trim, then trim cleanly once dry. For best results, cut slowly with a sharp blade and use a straightedge where possible.
Troubleshooting: Fixes for the Most Common Issues
Bubbles or ripples
- While wet: Smooth from center outward with even pressure.
- After drying: Some ripples relax on their own. For stubborn bubbles, you can prick a tiny pinhole and smooth the air out gently.
Edges lifting
Add a bit more starch under the edge with a brush, press, and smooth. If your room runs hot or humid, edges are the first to complain.
Fabric won’t stick well
Common culprits: dusty walls, overly textured paint, or not enough saturation. Clean, test, and don’t be shy with starch just don’t flood the wall.
Pattern drifting
Drift happens gradually. Step back every panel or two and check alignment. Busy patterns hide seams better; strict geometrics demand more precision (and more patience snacks).
How to Remove Fabric Wallpaper (Without Rage Scraping)
Removal is one of the big selling points. In most cases:
- Start at a corner and gently peel the fabric downward.
- If it resists, sponge warm water onto the fabric to rehydrate the starch.
- Wipe the wall with warm water and mild soap to remove residue.
- Wash and save the fabric if it’s still in good shape.
Go slowly and gently, especially if the underlying paint is old, flat/matte, or already peeling. The wall’s condition matters just as much as your technique.
Cost and Time: What to Expect
DIY fabric wallpaper can be a weekend projectoften faster for a single accent wall.
- Time: A few hours for one wall (plus dry time). More if you’re pattern matching or working solo.
- Cost: Depends on fabric choice. Starch is typically inexpensive, and the rest is basic tools.
- Value: High impact per dollar, especially compared to premium peel-and-stick wallpaper.
Extra: of Real-World “Experience” Notes (What People Learn the Hard Way)
The internet makes DIY fabric wallpaper look like a magical two-minute transformation. In real rooms with real corners (and real gravity), there are a few predictable “character-building moments.” Here are the most common experiences DIYers reportand the lessons hiding inside them.
First: everyone underestimates prep. People often start with the fun partholding up fabric and imagining their “after” photothen wonder why the top edge won’t behave. The usual culprit isn’t the starch. It’s the wall: dust, tiny grease spots, or a paint surface that’s chalky or uneven. Once someone wipes the wall down properly and sands a few rough patches, the same fabric suddenly starts acting like it signed a lease.
Second: wrinkles don’t “disappear later” unless you ironed the fabric first. Many DIYers learn this the moment the starch dries and locks in every fold like a permanent memory. The fix is annoyingly simple: take it down, iron it, and reapply. It’s not difficult, but it does add a chapter to your weekend. The upside: after one iron-and-rehang, people usually stop rushing and start getting cleaner seams.
Third: pattern matching is where confidence goes to get humbled. Large-scale prints look incredible, but they demand extra yardage and careful alignment. A common “aha” moment is realizing that if Panel 1 starts a tiny bit crooked, Panel 4 will be doing interpretive dance. The experience-based hack is to create a plumb guideline and actually use it, even if the wall seems straight. Also: stepping back every panel to check alignment saves you from redoing the entire wall at the end.
Fourth: working solo is possible, but it’s like wrapping a gift with one hand while the other hand texts your friend. DIYers often end up using more tape or pins than expected just to hold the fabric in place while they roll starch. Some people switch to narrower panels when working alone because wide panels are harder to manage without creating a diagonal tug that shifts the pattern. If you can recruit a helper, do it. If you can’t, narrower panels and extra temporary hold points are your best friends.
Fifth: humidity is real. People who try this in bathrooms or near steamy showers often report corners lifting like little fabric tongues. That doesn’t mean the project failed; it means the environment is doing what environments do. The experienced approach is either avoiding those areas or treating them as “small-surface experiments” (like shelf backs or tiny nooks) rather than full-room commitments.
The big takeaway from all these shared experiences: DIY fabric wallpaper isn’t hardit’s just honest. If you respect prep, work in manageable sections, and keep a sharp blade handy, the results can look shockingly professional. And if it isn’t perfect up close? Congratulations. You made something by hand. Welcome to the club.
Conclusion
DIY fabric wallpaper is one of the best “big impact, low commitment” upgrades you can doespecially if you’re renting, decorating on a budget, or simply allergic to wallpaper paste. Choose a stable fabric, prep your wall like you mean it, apply starch in small sections, smooth from the center outward, and trim only when fully dry. You’ll end up with a wall that looks customwithout signing up for a lifetime relationship with floral vines.