Table of Contents >> Show >> Hide
- Why a Farmhouse Island Works So Well
- Plan First: Size, Clearance, and “Will the Dishwasher Open?”
- Choose Your Build Style
- Materials That Nail the Farmhouse Look (Without Being Fussy)
- Tools and Hardware Checklist
- Step-by-Step Build: A Practical Farmhouse Island Plan
- Step 1: Finalize layout (storage-first vs seating-first)
- Step 2: Build the base (two solid approaches)
- Step 3: Add storage (shelves, drawers, doors)
- Step 4: Prep the countertop and plan the overhang
- Step 5: Secure the top correctly (so it can move with seasons)
- Step 6: Sand, prime, paint (or stain), and protect
- Step 7: Add farmhouse finishing touches
- Safety, Code, and “Please Don’t Wing the Electrical”
- Budget Reality Check (and Where to Spend the Money)
- Style It Like a Farmhouse (Without Turning It Into a Prop)
- FAQ: Quick Answers Before You Start Cutting Wood
- Experience Notes: Real-World Lessons From DIY Farmhouse Kitchen Islands (Extra Detail)
- 1) Floors are rarely levelplan for shims and forgiveness
- 2) “Just add seating” is never just anything
- 3) Drawer alignment is a slow dancego one millimeter at a time
- 4) The countertop finish you pick will affect your daily mood
- 5) Paint takes longer than you thinkand curing time matters
- 6) The best farmhouse detail is the one that makes your kitchen easier
A farmhouse kitchen island is basically the kitchen’s social director: it hosts pancake flips, homework meltdowns, and that one friend who always “just needs to charge their phone” (for three hours). The best part? You don’t have to buy a pricey showroom island to get the look. With a solid plan, a level, and a healthy respect for measuring twice, you can build a DIY farmhouse kitchen island that looks custom, works hard, and fits your space.
This guide walks you through smart sizing, materials that make sense, and a build approach that can go simple (stock cabinets + trim) or fully from-scratch (lumber + face frame + shelves). You’ll also get real-world tips on overhang support, storage layout, and finishing choices so your island doesn’t just look charmingit survives daily life.
Why a Farmhouse Island Works So Well
Farmhouse style is popular for a reason: it’s warm, forgiving, and practical. An island in this style usually features a thick wood top (hello, butcher block), chunky legs, simple paneling (beadboard/shiplap vibes), and storage that’s meant to be usednot admired from afar.
What you gain by building it yourself
- Perfect fit: You build to your kitchen’s clearances, not the internet’s “standard” kitchen.
- Better storage: Drawers where you need them, shelves where you’ll actually use them.
- Stronger bones: You can overbuild (in a good way) so it feels rock-solid.
- Budget control: Splurge on the top, save on the baseyour call.
Plan First: Size, Clearance, and “Will the Dishwasher Open?”
The most common DIY island regret isn’t the paint colorit’s building an island that’s just a little too big, turning your kitchen into a side-shuffle obstacle course. Before you buy anything, tape the island footprint on the floor (painter’s tape works great). Then open every door and appliance like you’re reenacting a kitchen ballet.
Clearance rules that actually feel good
- Absolute minimum clearance: 36 inches around the island (works in a pinch).
- Comfortable working clearance: 42–48 inches in main work aisles (especially with more than one cook).
- Behind seating: If people need to walk behind stools, plan more space so knees and traffic don’t fight.
Common island dimensions (use as a starting point)
- Height: 36 inches for standard counter height (matches most base cabinets).
- Depth: 24–30 inches is common for a storage-first island.
- Length: 48–72 inches often works well if your kitchen has the room.
Pro tip: If your floor isn’t perfectly level (spoiler: it probably isn’t), design a toe-kick or base that lets you shim and adjust. A level island in an unlevel kitchen is a small miracle you can create with planning.
Choose Your Build Style
There are two popular ways to DIY a farmhouse kitchen island. Neither is “better”they’re just different levels of effort, tools, and bragging rights.
Option A: Stock cabinets + trim (fast, beginner-friendly)
You build the island base using one or more off-the-shelf base cabinets (often placed back-to-back), then “farmhouse it up” with end panels, a toe-kick, and decorative trim. It’s efficient, sturdy, and offers great storage.
Option B: Build from scratch (more woodworking, more customization)
You build a leg-and-rail base, add shelves or a cabinet box, then finish with face frames, drawers, doors, and panels. This is ideal if you want open shelving, chunky legs, a furniture look, or very specific dimensions.
Materials That Nail the Farmhouse Look (Without Being Fussy)
Base wood
- Pine or poplar: Easy to work, budget-friendly, paints well.
- Maple or oak: Harder, heavier, and great for stain-grade projects.
- Plywood (cabinet-grade): Stable for panels and boxes; less warping than cheap boards.
Countertop choices
- Butcher block: Classic farmhouse, warm, DIY-friendly.
- Laminate: Affordable and durable (less “farmhouse,” more practical).
- Stone/quartz: Gorgeous, heavy, and usually needs professional handling.
Farmhouse details that make it look custom
- Chunky legs (4×4 posts or built-up legs)
- Beadboard or shiplap-style end panels
- Open shelf with baskets
- Black or oil-rubbed bronze hardware
- A slightly contrasting paint color (soft white base + warm wood top is a classic)
Tools and Hardware Checklist
You don’t need a full pro shop, but you do need safe basics. If you’re a teen DIYer: use proper eye/ear protection, and have an adult help with power tools and heavy lifting.
Common tools
- Tape measure, pencil, square, level
- Drill/driver, bits, countersink
- Circular saw (or miter saw/table saw if available)
- Clamps (more than you think you need)
- Sander + sandpaper (80/120/180/220 grits)
Hardware
- Wood screws (construction + cabinet screws)
- Wood glue
- Drawer slides (if adding drawers)
- Door hinges (if adding doors)
- Brackets/corbels (if countertop overhang needs support)
- Optional: locking casters (if building a mobile island)
Step-by-Step Build: A Practical Farmhouse Island Plan
Below is a flexible build approach that works for either cabinet-based or from-scratch construction. The example target size: 60 inches long × 30 inches deep × 36 inches high, with a butcher block top and an open shelf. Adjust to fit your taped-out footprint.
Step 1: Finalize layout (storage-first vs seating-first)
Decide what the island must do daily. A seating-first island needs knee space and overhang planning. A storage-first island can be deeper with more cabinets. If you’re unsure, choose storage-firststools can always be added later, but you can’t add inches of clearance after the fact.
Step 2: Build the base (two solid approaches)
Base approach A: Stock cabinet method
- Position cabinets (often back-to-back) and shim them level.
- Screw cabinets together through face frames or side panels (use proper cabinet screws).
- Add a platform/toe-kick underneath if needed for height and leveling.
- Wrap with panels (cabinet-grade plywood or beadboard) to create a furniture look.
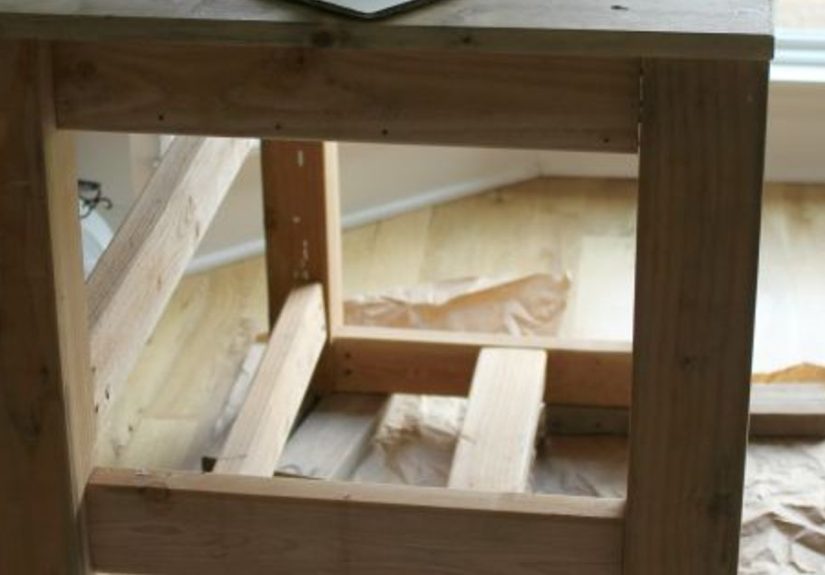
Base approach B: From-scratch leg-and-rail frame
- Cut four legs (4×4 posts or built-up legs) to account for final height minus countertop thickness.
- Build rails (2×4 or 1×4 material) to connect legs on all sidesfront/back and ends.
- Square the frame using diagonals (equal diagonals = square).
- Add a lower shelf frame and install shelf panels (plywood works well).
Farmhouse magic trick: Add a simple face frame and trim to the base. Even basic plywood starts looking “custom furniture” once it has clean edges and intentional detail.
Step 3: Add storage (shelves, drawers, doors)
- Open shelf: Great for baskets, cookbooks, mixing bowls, or the air fryer you swear is “temporary.”
- Deep drawers: Best for pots, pans, and stacks of containers (the ones that never match).
- Cabinet doors: Hide visual clutter and create a cleaner farmhouse look.
If you add drawers, take your time aligning slides. Drawer slides are like eyeliner: a tiny mistake is suddenly all you can see.
Step 4: Prep the countertop and plan the overhang
Standard countertops often overhang cabinet faces by about an inch or so. Seating overhang is differentmost stools need more knee room. A common range for comfortable seating overhang is about 12–15 inches for counter-height seating, and more for bar-height. The bigger the overhang, the more you must plan for support.
Do you need brackets or corbels?
Many wood tops can handle small overhangs, but longer spans can crack, sag, or warp over time. A safe approach is:
- Use support brackets/corbels when the overhang is substantial or will be leaned on daily.
- Space supports evenly and keep them near the ends for stability.
- Follow your bracket manufacturer’s instructions (they’re the ones guaranteeing the hardware, after all).
Step 5: Secure the top correctly (so it can move with seasons)
Wood expands and contracts with humidity. If you screw a solid wood top down too rigidly, it can split. Consider using countertop fasteners, figure-eight fasteners, or slotted holes that allow a little movement.
Step 6: Sand, prime, paint (or stain), and protect
For a farmhouse look, a painted base + stained wood top is a classic combo. The “secret” to a finish that looks professional is boring but true: prep work.
- Sand in stages (rough to smooth) and remove dust between grits.
- Prime the base if painting, especially with pine or plywood edges.
- Use durable paint (cabinet-rated enamel or a tough trim paint).
- Seal the top with a food-safe finish if you’ll prep food directly on it.
Step 7: Add farmhouse finishing touches
- Towel bar on the end panel
- Hooks for utensils or mugs
- Decorative X-bracing on one side
- Woven baskets on the lower shelf
- Vintage-style label pulls (optional, but fun)
Safety, Code, and “Please Don’t Wing the Electrical”
If your island includes electrical outlets, lighting, or appliances, follow local building codes and consider hiring a licensed electrician. Electrical requirements for island receptacles have changed in recent code cycles, and what’s required depends on which code version your area has adopted. When in doubt, ask your local building departmentfuture you will be grateful.
Also consider stability: a fixed island should be anchored properly, and a mobile island should use locking casters so it doesn’t roll away mid-chop like it’s trying to escape the salad.
Budget Reality Check (and Where to Spend the Money)
A DIY farmhouse kitchen island can be surprisingly affordable, especially if you use stock cabinets or repurpose materials. Your biggest cost swings usually come from the countertop and hardware.
Typical cost drivers
- Top: Butcher block and stone can raise costs quickly, but also elevate the look instantly.
- Drawers: Quality slides and drawer boxes add up, but they’re worth it for everyday use.
- Trim/panels: Adds the custom look without a massive spend.
If you’re choosing one place to “splurge,” choose the countertop. You touch it every day, and it’s the first thing people notice.
Style It Like a Farmhouse (Without Turning It Into a Prop)
The goal is “welcoming and functional,” not “nobody is allowed to make toast.” Try these practical styling ideas:
- Keep the top mostly clearuse one tray to corral daily items.
- Add one warm texture: a wood cutting board, a crock of utensils, or a small plant.
- Use baskets below for repeat-use items (snacks, linens, small appliances).
- Match hardware finishes to your faucet or lighting for a cohesive look.
FAQ: Quick Answers Before You Start Cutting Wood
How tall should a farmhouse kitchen island be?
Most are 36 inches tall for counter height. If you want bar-height seating, that’s typically taller, but it changes the feel and comfortespecially for prep work.
Can I build one without advanced tools?
Yesespecially with the stock cabinet method. A drill/driver, saw, level, and clamps can get you very far.
Is a rolling island a good idea?
It can be, if your kitchen needs flexibility. Use heavy-duty locking casters and build the base sturdy so it doesn’t wobble. If you want seating, fixed islands usually feel more stable.
Experience Notes: Real-World Lessons From DIY Farmhouse Kitchen Islands (Extra Detail)
DIY islands look simple on screen: a quick montage, a dramatic “after,” and someone magically holding a latte in a spotless kitchen. Real life is more like: “Why is the floor sloped?” and “How did I get paint there?” Here are experience-based lessons that come up again and again from people who’ve actually built and lived with a farmhouse kitchen island.
1) Floors are rarely levelplan for shims and forgiveness
Many builders discover the hard way that an island can be perfectly square and still rock like a tiny wooden boat. The fix isn’t panic; it’s planning. A toe-kick base or adjustable feet give you room to correct for dips. Even with stock cabinets, taking time to shim and level before fastening everything together makes doors line up better, drawers glide smoother, and countertops sit flat.
2) “Just add seating” is never just anything
Seating changes everything: overhang depth, bracket support, andmost importantlyclearance behind stools. A common experience is building a gorgeous overhang, then realizing that the dishwasher door and a seated person’s knees cannot peacefully coexist. The best workaround is mocking it up early: use a chair, open the appliance doors, and pretend you’re walking through with a laundry basket. If it feels tight in pretend-mode, it will feel tighter in real life.
3) Drawer alignment is a slow dancego one millimeter at a time
A farmhouse island often looks “simple,” which means every gap and reveal is obvious. Builders frequently say drawer slides are where patience is earned. The trick is to measure carefully, use spacers, and test-fit repeatedly. When drawers are square and smooth, the island instantly feels high-end. When they’re off, you’ll notice every single time you reach for a spoon.
4) The countertop finish you pick will affect your daily mood
A beautiful wood top is farmhouse gold, but the finish determines how it lives. Many DIYers start with a soft oil finish because it’s easy, then realize they need more protection from spills. Others choose a tougher sealed finish and love the durability, but miss the easy spot-repair of oil. The lesson: match the finish to your household. If you have kids, roommates, or a tendency to set down a sweating iced coffee and walk away, durability matters.
5) Paint takes longer than you thinkand curing time matters
A common experience is finishing the island, loving the color, and then scuffing it immediately because the paint wasn’t fully cured. “Dry” and “cured” aren’t the same. If you want a finish that survives belt buckles, chair bumps, and vacuum attacks, choose a durable cabinet/trim paint, let it dry properly between coats, and give it time before heavy use. The payoff is a base that stays crisp instead of looking “distressed” by accident.
6) The best farmhouse detail is the one that makes your kitchen easier
People often add a towel bar and wonder why they didn’t do it sooner. Hooks on the end panel can be life-changing for aprons, oven mitts, or a hand towel. Open shelves work best when they’re sized for what you ownmixing bowls, baskets, and small appliancesnot what looked cute online. The island that feels custom isn’t the one with the most decoration; it’s the one where everything has a logical home.
The overall takeaway from real builds is simple: the island becomes the most-used spot in the kitchen fast. That means build it sturdy, keep the layout practical, and don’t rush the finishing steps. A farmhouse island should feel like it’s always been thereworking hard, looking good, and quietly making your kitchen life easier.