Table of Contents >> Show >> Hide
- Step 0: Decide If You Need a Full Refinish (Or Just a Glow-Up)
- Know Your Teak: Solid vs. Veneer (This Matters a Lot)
- Tools & Materials (Choose Your Adventure)
- Safety First (Because Teak Dust Isn’t a Fun Snack)
- Step 1: Clean Like You Mean It (Most “Refinishing Problems” Start With Grime)
- Step 2: Remove the Old Finish (Two Main Paths)
- Step 3: Sanding Teak Without Regret
- Step 4: Fix Common Teak Problems (Stains, Rings, Scratches)
- Step 5: Choose the Best Finish for Household Teak
- Step 6: Apply the Finish (Thin Wins)
- Step 7: Cure, Reassemble, and Treat It Like a Finish (Because It Is)
- Troubleshooting (Because DIY Is Basically “Learning in Public”)
- Real-World DIY Experiences (An Extra 500-ish Words of Teak Truth)
Teak is basically the “low-maintenance friend” of the wood world: it’s naturally oily, famously durable, and somehow still manages to look classy even after
a decade of life’s greatest hits (spilled coffee, hot mugs, mystery scratches, and that one time someone used your sideboard as a standing desk).
The downside? Teak’s oilsand the finishes people put on teakcan make refinishing feel like you’re negotiating with a very attractive, very stubborn celebrity.
The good news: you can absolutely refinish household teak at home with normal tools, a little patience, and the willingness to clean more dust than you thought
existed on planet Earth. This guide walks you through a smart, safe, “do it once and be proud” processwhether you’re reviving a mid-century teak table,
a bathroom teak stool, or a tired cabinet that’s lost its glow.
Step 0: Decide If You Need a Full Refinish (Or Just a Glow-Up)
Not every teak piece needs the full “strip to bare wood and start over” treatment. Teak often rewards a lighter touch. Here’s the quick decision test:
Go for a quick refresh if…
- The surface looks dry or dull but isn’t peeling.
- Scratches are light and you can’t feel them deeply with a fingernail.
- The finish is thin and even (typical of many teak pieces) and you mainly want the color back.
Go for a full refinish if…
- The finish is flaking, cloudy, sticky, or has “alligator” cracks.
- Water rings and stains are widespread (or dark and deep).
- Someone previously “oiled” it repeatedly without wiping off the excess (hello, gummy grime magnet).
- You want a tougher, more protective finish for heavy daily use (like a dining table).
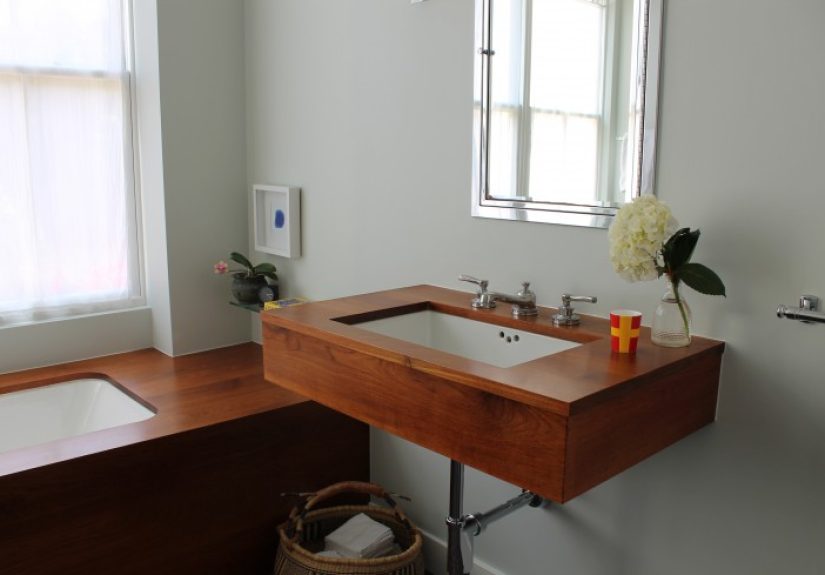
Know Your Teak: Solid vs. Veneer (This Matters a Lot)
Household teak furnitureespecially mid-century modern piecesoften uses teak veneer over a core wood. Veneer can look amazing, but it’s thin. Sand too
aggressively and you can burn through to the substrate faster than you can say “Why is this stripe suddenly… not teak?”
Quick veneer clues
- Edges: If the edge grain looks “different” than the top, or you see a seam line, it may be veneer.
- Underside: Look underneath tops and shelves; veneer patterns and seams can show there.
- Consistency: Perfectly uniform grain across a huge surface can indicate veneer.
If you suspect veneer, plan on gentler sanding (hand sanding and higher grits), and let cleaning/stripping do more of the work.
Tools & Materials (Choose Your Adventure)
Must-haves
- Microfiber cloths, soft rags (lint-free is best)
- Mild dish soap + warm water
- Painter’s tape and drop cloth
- Sanding sponge or sanding block
- Sandpaper: 120, 150, 180, 220 (and optionally 320 for between coats)
- Vacuum (with brush attachment if possible)
Nice-to-haves
- Random orbit sander (for large flat surfaces)
- Tack cloth (oil-free) or a slightly dampened cloth for dust pickup
- Wood filler (color-matched) for chipsnot for “I sanded through veneer” emergencies
- 0000 steel wool (for certain refresh methodsuse carefully and keep away from open-grain dust piles)
Finish options (pick one)
- Penetrating oil / oil-varnish blend (“teak oil,” Danish oil): easy, satin look, needs periodic maintenance
- Wipe-on polyurethane / wiping varnish: more durable, still DIY-friendly, great for tables
- Water-based polyurethane: clearer, less ambering, good if you want a lighter, modern look
- Hardwax oil: matte/natural look, easy spot repair, often pricier
Safety First (Because Teak Dust Isn’t a Fun Snack)
Work in a well-ventilated area. Wear eye protection and a good dust mask (or respirator if you’re using solvents/strippers). Teak dust can irritate some
people, and many finishing products produce strong fumes.
Big safety note about oily rags: Rags wet with oil finishes can heat up and potentially ignite as they dry. After use, lay rags flat to dry
outdoors on a nonflammable surface, or store them in a sealed metal container per local guidance. Don’t ball them up in a trash can unless you enjoy
stress-testing your smoke detector.
Step 1: Clean Like You Mean It (Most “Refinishing Problems” Start With Grime)
Teak’s natural oils are part of its charmbut household oils (hands, cooking residue, furniture polish, wax) can block new finish from bonding evenly.
So before sanding, strip, or finishing, get the surface truly clean.
Cleaning routine
- Dry dust first: Vacuum or wipe down to remove loose dust and grit.
- Wash: Use warm water + a few drops of dish soap. Wipe with a damp (not dripping) cloth.
- Rinse wipe: Wipe again with clean water to remove soap residue.
- Dry: Let it dry fullyespecially around joints and edges.
If the piece has heavy wax/polish buildup, follow the soap wash with a careful wipe using a suitable cleaner for removing oily residue (follow the product’s
label and safety instructions). Always test in an inconspicuous spot first.
Step 2: Remove the Old Finish (Two Main Paths)
Path A: Light scuff + refresh (best for intact finishes)
If the finish is mostly intact, you can often revive teak by lightly scuff-sanding and applying a compatible refresh coat.
This is ideal for pieces that look dry but aren’t failing.
- Lightly sand with 220–320 grit following the grain.
- Remove dust thoroughly (vacuum + microfiber wipe).
- Apply your chosen finish (oil blend, hardwax oil, or a wipe-on topcoat) in thin coats.
Path B: Full refinish (best for peeling, sticky, or blotchy surfaces)
For a full refinish, you’ll remove the old finish and bring the surface back to a clean, uniform base.
You can do this by careful sanding, stripping, or a combination.
Teak tip: Many vintage teak pieces were finished with very durable, thin film finishes that can look like oil.
If your “teak oil” keeps sitting on top and getting tacky, you may be dealing with a film finishnot bare wood.
Step 3: Sanding Teak Without Regret
Sanding is where your piece goes from “sad and questionable” to “wow, did you buy this new?” The key is gradual progress.
Start too coarse and you’ll chase deep scratches forever. Start too fine and you’ll be there until next Tuesday.
Recommended sanding sequence (most household pieces)
- Start at 150 or 180 grit (use 120 only if the surface is really rough or finish remnants won’t budge)
- Move to 220 grit for final smoothing
- Optional: 320 grit for an extra-smooth feel before certain finishes
How to sand (the “don’t ruin edges” method)
- Sand with the grain, especially on visible surfaces.
- Use a sanding block or sponge for even pressure.
- Go easy on edges and cornersthese sand through fastest.
- Stop periodically and vacuum dust so you can actually see what you’re doing.
Step 4: Fix Common Teak Problems (Stains, Rings, Scratches)
White water rings (in the finish)
White rings are often moisture trapped in the finish, not a deep stain in the wood. If you’re doing a quick refresh, you may be able to reduce them with
gentle methods (like a mild polish approach). If you’re doing a full refinish, stripping/sanding usually eliminates them.
Dark stains (in the wood)
Dark stainsespecially near metal contact pointscan sink into the wood. A common restoration approach is using a wood-safe bleaching method designed for
stain removal (often used by furniture restorers). Follow product directions closely, test first, and allow the wood to dry fully before sanding lightly again.
Dents and dings
Small dents in solid teak can sometimes be raised by placing a damp cloth over the dent and applying brief heat (like a clothes iron) to create steam. Don’t
lingertoo much heat can damage veneer or loosen glue. For chipped corners, a color-matched filler can help, but keep expectations realistic: filler is a
cosmetic patch, not time travel.
Step 5: Choose the Best Finish for Household Teak
Your finish choice should match how the piece lives. A teak coffee table that holds magazines needs different protection than a teak dining table that hosts
spaghetti night and homework marathons.
Option 1: Penetrating oil / “teak oil” look (easy, natural, lower protection)
Great for: cabinets, shelves, decorative pieces, low-wear surfaces, mid-century vibes.
Not ideal for: heavy-use dining tables unless you’re okay with more maintenance.
Important: “Teak oil” products vary widely. Many are blends (oil + varnish + dryers). You’re not squeezing oil out of a teak tree like it’s an olive.
That’s why reading the label mattersespecially if the piece will touch food.
Option 2: Wipe-on polyurethane / wiping varnish (durable, still DIY-friendly)
Great for: dining tables, desks, side tables, anything that sees water cups and daily use.
Why it’s popular: thin coats, fewer brush marks, and a tougher protective film.
Option 3: Water-based polyurethane (clearer, modern look)
Great for: keeping teak from darkening too much, or if you prefer a less-amber finish.
Note: water-based finishes can raise grain; a light sanding after the first coat usually fixes it.
Option 4: Hardwax oil (matte, repairable, designer vibe)
Great for: people who want a natural look and easy spot repairs. Follow the manufacturer’s instructions carefullyapplication style varies by product.
Step 6: Apply the Finish (Thin Wins)
If you’re using an oil / oil-varnish blend
- Apply generously with a lint-free cloth or brush, following the grain.
- Let it soak briefly (per product directionsoften around 10–15 minutes).
- Wipe off all excess until the surface feels dry to the touch, not slick.
- Let dry fully, then repeat 1–2 more times as needed for even sheen.
If you’re using wipe-on polyurethane
- Wipe on a thin, even coat with a clean cloth (go with the grain).
- Let it dry according to the label (often a few hours).
- Lightly sand with a fine grit (typically 220–320) to knock down dust nibs.
- Remove dust completely, then apply the next coat.
- Build 3–6 thin coats depending on the level of protection you want.
Pro tip: Dust control is half the finish. Vacuum, wipe, and keep pets out of the workspace unless you want a “limited edition” fur-inlaid
topcoat.
Step 7: Cure, Reassemble, and Treat It Like a Finish (Because It Is)
Dry to the touch isn’t the same as fully cured. Give your refinished teak time before heavy use. Avoid setting heavy objects, rubber mats, or hot mugs on the
surface too soonfresh finishes can imprint.
Maintenance for refinished teak
- Use coasters and trivets (your future self will send a thank-you note).
- Clean with a damp cloth; avoid harsh cleaners.
- If you chose an oil finish, refresh lightly when the surface looks drydon’t “panic oil” it every weekend.
- For film finishes, a gentle clean and occasional polish is usually enough.
Troubleshooting (Because DIY Is Basically “Learning in Public”)
Problem: Sticky or gummy surface
Usually caused by leaving excess oil on the surface. The fix is often removing the tacky buildup (per product guidance), letting it dry, then applying much
thinner coats and wiping thoroughly.
Problem: Blotchy sheen
Often from uneven sanding, leftover residue, or uneven absorption. Re-sand lightly and clean dust thoroughly, then recoat evenly.
Problem: Dust nibs
Normal! Lightly sand between coats and keep your workspace as clean as possible.
Real-World DIY Experiences (An Extra 500-ish Words of Teak Truth)
My first teak refinishing lesson was delivered by a coffee table that looked innocentuntil I cleaned it and discovered three different “finishes” living on
the same surface. The top was cloudy like someone had stored a snowstorm under the varnish. The edges were shiny. The middle felt slightly tacky, like it had
been “oiled” with something that may or may not have once been a salad dressing. In other words: it was perfect.
I did what many brave DIYers do: I started sanding immediately, because sanding feels productive. Ten minutes later I learned the eternal truth:
if you don’t clean first, you’re just sanding old furniture polish into modern art. The paper gummed up fast, and the dust clumped like
it was trying to form a union. After a deep clean and a second attempt, the sanding suddenly felt… normal. Boring, even. That’s how you know you’re doing it right.
Next came the “Is this veneer?” moment. I stared at the edges like a detective in a crime drama. The grain didn’t wrap the way I expected, and I realized I
was one overconfident pass away from turning a teak surface into a surprise patch of not-teak. So I switched to hand sanding on edges and corners, and I started
thinking of sandpaper like seasoning: you can always add more, but you can’t un-salt the soup.
Then there was the finish decision. I love the warm, low-sheen look of an oil finish on teakvery “mid-century catalog,” very “I definitely own at least one
turtleneck.” But the piece was going to live in a high-traffic zone where people set mugs down like they’re playing a speedrun. So I chose a wipe-on finish
for durability. And honestly? Wipe-on products are the cheat code of neat-looking DIY finishing: thin coats, fewer drips, less drama.
My biggest mistake (and most common beginner move) was trying to make one coat do the work of three. Thick coats feel efficient. Thick coats are also how you
get streaks, tackiness, and the urge to question all your life choices. Once I started applying thinner coats and “walking away” instead of fussing, everything
improved. The finish leveled out better, the surface felt smoother, and I stopped hovering over it like a helicopter parent at a school play.
Final real-life tip: dust control is not optional, it’s the entire game. Vacuum between sanding steps, wipe down like you’re trying to impress a very judgmental
museum curator, and keep airflow steady. The difference between “nice” and “wow” is often just fewer dust nibs. And yes, you will still find one tiny hair in
the final coat somewhere. Congratulations: you have made a handmade object. It’s authentic now.