Table of Contents >> Show >> Hide
- Before You Dig: Plan Like a Pro (So You Don’t Re-Dig Like a Rookie)
- Tools and Supplies Checklist
- Step-by-Step: Build the Base That Keeps Your Patio From Wiggling
- Lay the Stone Field and Add the Brick Border
- Lock It In: Joint Sand, Compaction, and Cleanup
- Material Estimating: A Simple Example
- Design Ideas That Make It Look “Custom” (Without Custom Prices)
- Common Mistakes (And How to Avoid Them)
- Maintenance: Keep It Looking Good Without Babysitting It
- Real-Life Lessons From Building Stone and Brick Patios (Experience-Based Notes, ~)
- Conclusion
If your backyard has been giving “sad patchy lawn” energy, a stone-and-brick patio is the glow-up it deserves. Done right, a patio feels permanent (like a tiny outdoor room) but stays forgivingbecause you can fix a wonky stone later without jackhammering your whole life.
This guide walks you through a classic build: a stable gravel base, a smooth bedding layer, a field of stone (pavers or flagstone), and a brick border that makes the whole thing look intentionallike you meant to do it all along.
Before You Dig: Plan Like a Pro (So You Don’t Re-Dig Like a Rookie)
Pick the patio style: “dry-laid” vs. “mortar-set”
- Dry-laid (recommended for most DIYers): Stone/pavers sit on compacted base + sand. Flexible, drain-friendly, repairable.
- Mortar-set: Stone is bonded to a concrete slab or mortar bed. Very solid, but less forgiving and more complex. If the ground moves, mortar can crack.
Choose your materials
- Field (main surface): concrete pavers, natural stone pavers, or flagstone.
- Border: clay brick or concrete “border pavers.” A soldier course (bricks standing tall) or a running border both look sharp.
- Joint fill: polymeric sand (common for pavers/brick) or regular joint sand; for wider natural-stone joints, use stone dust/decomposed granite or a product rated for wider joints.
Call 811 and check rules
Before you excavate, call 811 (in the U.S.) to have underground utilities marked. Also check local setback or drainage rules if you’re close to property lines or foundations.
Decide your finished height and drainage slope
Your patio should slope away from the house so water doesn’t collect near the foundation. A common target is 1/8 to 1/4 inch per foot. Example: over 12 feet, that’s about 1.5 to 3 inches of total drop.
Tools and Supplies Checklist
Tools
- Shovel, rake, wheelbarrow
- Measuring tape, stakes, mason’s string, line level
- Long straight board (2×4) for screeding
- Hand tamper or rented plate compactor (highly recommended)
- Rubber mallet
- 4-foot level (and/or a straightedge + level)
- Angle grinder with diamond blade or a wet saw for cuts
- Broom and leaf blower (helpful for polymeric sand)
- Safety gear: gloves, eye/ear protection, dust mask/respirator
Supplies
- Geotextile fabric (optional but helpful in clay or soft soils)
- Crushed stone base (often “paver base” or “road base”)
- Bedding sand (often concrete sand; follow local recommendations)
- Edge restraint (plastic/metal edging + spikes) or a concrete edge
- Stone/pavers + brick for border
- Jointing sand or polymeric sand (rated for your joint width)
Step-by-Step: Build the Base That Keeps Your Patio From Wiggling
1) Lay out the patio and square it up
Mark the shape with stakes and string. If your design is rectangular, use the 3-4-5 method to square corners (or measure diagonalsthey should match). For curves, use a garden hose or marking paint to sketch the line.
2) Calculate excavation depth (the “dig once, cry never” moment)
Typical dry-laid patio layers:
- Base: 4–6 inches compacted (often more in wet/clay soils or freeze-thaw regions)
- Bedding sand: about 1 inch screeded
- Pavers/brick/stone thickness: varies (often 2–3+ inches)
So if your pavers are 2.5 inches thick and you’re using a 5-inch base + 1-inch sand, you’ll excavate roughly 8.5 inches, plus a little extra to fine-tune grade and slope. Always plan to excavate a bit beyond the patio edge so you have room for edge restraint and working space.
3) Excavate and shape the subgrade
Remove sod and soil to your calculated depth. The bottom doesn’t need to be prettyit needs to be consistent. Shape the subgrade to your slope (away from structures). Compact the soil with a plate compactor or tamper. Soft spots? Dig them out and replace with compacted base material.
4) Add geotextile fabric (optional, but often worth it)
If you have clay soil, poor drainage, or you’re building on disturbed ground, fabric helps keep your base from mixing into the soil. Overlap seams and extend it slightly up the sides of the excavation.
5) Install the crushed stone base in lifts (layers)
Don’t dump 6 inches at once and hope for the best. Spread the base in 2–3 inch lifts, compact each lift thoroughly, and re-check slope as you go. The goal is a firm, even base that won’t settle after the first rainstorm.
Pro tip: If you discover low areas after compaction, fix them with base material, not bedding sand. Sand is for smoothingnot for filling structural dips.
6) Set up screed guides and add bedding sand
Place two parallel pipes or rails (often 1-inch diameter) on the compacted base. Pour bedding sand between them and pull a straight 2×4 across the rails to create a smooth, even layerusually about 1 inch thick. Remove the rails and carefully fill the voids.
Important: Once sand is screeded, avoid walking all over it like you’re testing a mattress at the store. Work from one side, placing pavers as you go.
Lay the Stone Field and Add the Brick Border
7) Dry-fit your pattern before committing
Lay a few rows to confirm spacing, pattern, and how your stone meets your brick border. If you’re mixing materials (stone field + brick border), make sure heights match. If they don’t, adjust at the basedon’t try to “cheat” with extra sand under one piece.
8) Start laying from a straight edge
Start at the house, a straight edge, or a hard border. Place pavers/stone down verticallydon’t slide them across the sand or you’ll create ridges and dips. Tap gently with a rubber mallet to seat them.
9) Build the brick border (two common approaches)
Option A: Soldier course border
Bricks stand “upright” around the perimeter, creating a crisp frame. It looks formal and also functions as a sturdy visual edge.
Option B: Flat border in a running bond
Bricks lie flat like pavers, usually one or two bricks wide. This is easier to keep flush with the field and often requires fewer cuts.
Whichever you choose, keep lines tight and consistent. The border is what people notice firstlike a haircut. A good haircut can save a questionable outfit.
10) Cut pieces cleanly (and safely)
Expect cutting along edges, curves, and around posts. Use a wet saw or angle grinder with a diamond blade. Wear eye protection and control dust (a mask or respirator helps a lot). Try to keep cut edges toward the outer edge or under furniture where possible.
11) Install edge restraint (don’t skip this)
Edge restraint prevents the patio from slowly “spreading” over time. Install plastic/metal edging tight against the perimeter and spike it into the base (spacing varies by product, but “about every foot” is a common rule of thumb). If you’re doing a brick border, edge restraint can go outside the brick, or you can use a concrete curb edge for a more permanent lock.
Lock It In: Joint Sand, Compaction, and Cleanup
12) Compact the surface (for pavers/brick patios)
For many paver patios, you compact after laying the field to help “seat” units into the bedding layer. Use a plate compactor with a protective pad (especially on textured or finished pavers). If you’re working with fragile or irregular flagstone, follow guidance for that materialsome installations avoid plate compactors on certain stones.
13) Sweep in jointing material
Sweep joint sand or polymeric sand into the joints until they’re full. If using polymeric sand, the surface must be dry and very clean before activationleftover dust can harden into a haze. Read the bag instructions carefully (joint width limits and watering method matter).
14) Activate polymeric sand carefully
Light misting in multiple passes usually works better than blasting with a jet stream. You want to activate the binders without washing the sand out of the joints. After activation, keep foot traffic off for the recommended cure time.
15) Final backfill and finishing touches
Backfill soil along the outside edge restraint, compact lightly, and re-grade nearby soil so water flows away from the patio. Add mulch, gravel, or groundcover to make the patio look integratednot like it landed there from space.
Material Estimating: A Simple Example
Let’s say your patio is 12 ft x 12 ft (144 sq ft):
- Base (5 inches): 144 sq ft x (5/12 ft) = 60 cu ft ≈ 2.2 cu yd (add extra for compaction and waste)
- Bedding sand (1 inch): 144 sq ft x (1/12 ft) = 12 cu ft ≈ 0.45 cu yd
- Pavers/stone: add 5–10% for cuts and pattern waste (more for herringbone or curves)
If your patio includes a brick border, calculate the border area separately (perimeter length x border width) and add extra for cuts at corners and curves.
Design Ideas That Make It Look “Custom” (Without Custom Prices)
- Stone field + brick frame: timeless, works with most home styles.
- Herringbone brick inset: put a small brick “rug” in the center and surround it with larger stone.
- Mixed-size paver pattern: hides minor alignment issues better than large-format grid layouts.
- Border contrast: dark border + light field (or vice versa) makes the patio look deliberate and upscale.
Common Mistakes (And How to Avoid Them)
Skipping compaction
If the base isn’t compacted well, your patio will settle unevenly. Compact the subgrade and each base lift. Your future self will send you a thank-you card.
Wrong slope or no slope
Water must go somewhere that’s not “into your house.” Set the slope early and re-check it often.
Using bedding sand to fix low spots
Bedding sand should be consistent thickness. Fix dips in the base with base material, compact it, then re-screed.
Messy polymeric sand application
Polymeric sand is greatuntil it’s activated on the surface and leaves haze. Keep pavers dry, sweep and blow off excess, and follow the watering steps.
Maintenance: Keep It Looking Good Without Babysitting It
- Annual check: top off joint sand where needed.
- Weeds: most weeds start from windblown seeds; keep joints filled and remove early.
- Cleaning: mild detergent + brush works for most grime; avoid harsh acids on certain stone types.
- Sealing (optional): can enhance color and reduce staining, but follow manufacturer timing and compatibility notes.
Real-Life Lessons From Building Stone and Brick Patios (Experience-Based Notes, ~)
The first stone patio I ever helped build taught me a life lesson: gravity always collects its bill. We were so proud of our crisp layout lines that we rushed the base workbecause, honestly, the base is boring. It’s just gravel. It doesn’t “spark joy.” Until the first heavy rain showed up, and suddenly our “level” patio became a gentle interpretive dance of tiny puddles. Not catastrophic, but annoying enough that every chair leg found a new personality.
Here’s what I’ve learned since: your patio is basically a fancy sandwich, and the base is the bread. If the bread is squishy, nobody cares how good the filling is. When you compact the base in thin lifts, it feels slow, but it’s the fastest way to avoid rework. The plate compactor is loud and slightly terrifying the first time you use itlike you’re walking a machine that wants to escapebut it makes the whole project feel “real.” If you can only upgrade one part of your DIY plan, rent the compactor.
Cutting is another reality check. In your head, you’ll cut five pieces and be done. In real life, you’ll cut five pieces, decide the border would look better shifted by half an inch, and then cut five more. Plan for extra material and extra time, especially if you’re mixing stone and brick. Brick borders are wonderful because they hide small layout sins, but they also highlight sloppy cuts. A simple trick: keep your “best cuts” in the most visible spots and hide the weird ones under a grill, planter, or outdoor rug. That’s not cheating; that’s staging.
Joint filling is where patience wins. Polymeric sand can make a patio look finished and reduce washout, but it is not forgiving of “good enough” cleanup. I’ve watched someone water too aggressively and create little rivers that carried sand right out of the joints. I’ve also seen polymeric haze bake onto pavers like a stubborn frosting. The fix is simple but unglamorous: sweep more than you think you need to, blow off dust, and mist gently in passes. If the weather is humid and dew is a thing where you live, start after things are truly dry and don’t push into evening moisture.
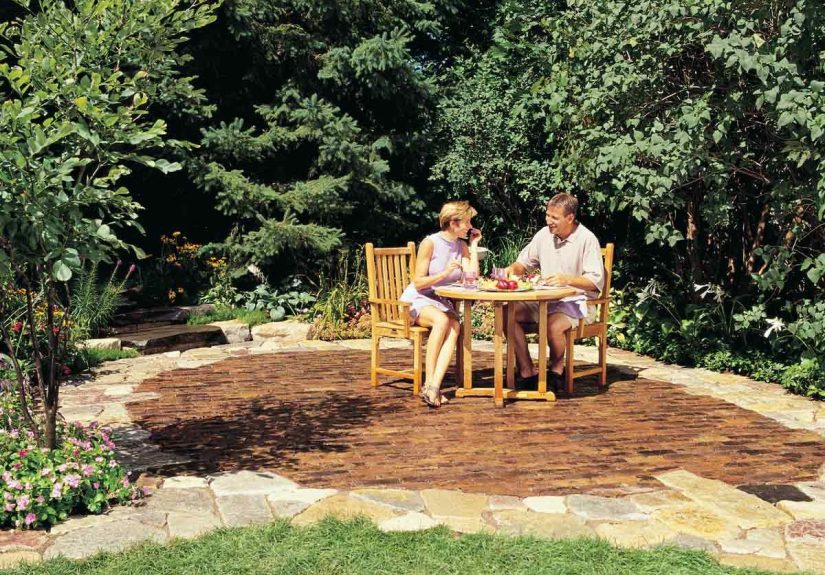
The best moment, though, is the end: when you place the last brick, step back, and realize the yard suddenly has a destination. Your brain stops thinking “backyard” and starts thinking “outdoor coffee spot,” “friend hang,” or “quiet place to scroll on your phone pretending you’re not scrolling.” And if one paver settles a little months later? That’s the beauty of dry-laid work. You can lift it, fix it, and carry onno jackhammer therapy required.
Conclusion
A DIY stone-and-brick patio is equal parts planning, base work, and detail finishing. The winning formula is simple: solid excavation, properly compacted base, consistent bedding sand, clean layout lines, and a border/edge restraint that keeps everything locked in. Take your time on the layers you won’t see, and your patio will reward you with years of low-maintenance outdoor livingplus a perfectly reasonable excuse to buy nicer patio chairs.