Table of Contents >> Show >> Hide
- Why Lighting Is the Ultimate Low-Drama Home Upgrade
- Start Here: Swap to Better LED Bulbs (The 5-Minute Win)
- Add a Dimmer (Because One Brightness Level Is a Crime)
- Smart Lighting: The “Wow” Factor Without Rewiring
- Under-Cabinet Lighting: The Kitchen Upgrade That Feels Expensive
- Recessed Lighting Retrofits: Modernize Without Cutting Holes
- Outdoor Lighting: Safer, Prettier, and Less “Trip Hazard Chic”
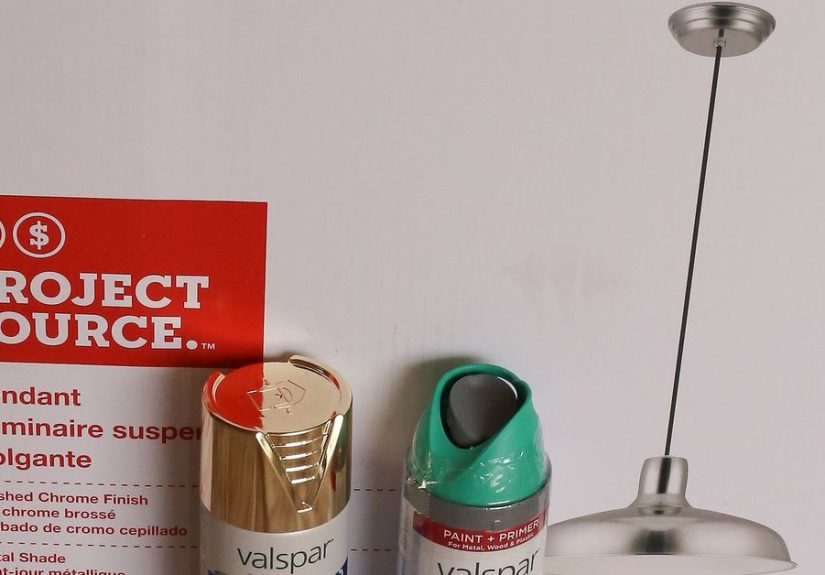
- The Shopping Checklist: What to Look For on the Box
- Common Mistakes (So You Don’t Repeat Internet History)
- Room-by-Room Easy Lighting Upgrade Plan
- Conclusion: Small Changes, Big Glow-Up
- Experiences: What “Easy” Looks Like in Real Homes (About )
- Research Notes
Want your home to feel newer, warmer, and slightly more “I have my life together” without renovating your entire existence?
An easy lighting upgrade is the closest thing to a cheat code in home improvement. With a few smart swapsthink
better bulbs, smoother dimming, and targeted task lightingyou can make a room look cleaner, cozier, and more expensive…
even if the only expensive thing you bought was guacamole.
This guide breaks down the simplest, most impactful lighting upgrades you can do fast (often in under an hour), with clear examples,
room-by-room recommendations, and a couple of “learn-from-my-mistakes” momentsso your next lightbulb run doesn’t become a weekend saga.
Why Lighting Is the Ultimate Low-Drama Home Upgrade
Paint gets all the glory, but lighting is the real mood manager. The right light can make a small space feel open, make skin tones look
less “hospital chic,” and help you actually see what you’re chopping in the kitchen. Better still, modern LEDs can cut energy use and last
years longer than old-school bulbs, so you’re not constantly performing the “which drawer has the spare bulbs?” scavenger hunt.
The Three Goals of a Great Lighting Plan
- Ambient light: the general “room is usable” glow (ceiling fixtures, recessed lights).
- Task light: focused light where you work (under-cabinet lighting, desk lamps, vanity lights).
- Accent light: the “look at my taste” layer (picture lights, wall sconces, LED strips behind a TV).
Start Here: Swap to Better LED Bulbs (The 5-Minute Win)
If you do nothing else, replace your most-used bulbs with quality LEDs. The trick is not buying “the brightest thing on the shelf”
and accidentally turning your living room into an interrogation room. Instead, shop by lumens (brightness),
not watts (energy use).
How to Pick the Right Brightness Without Guessing
A quick rule of thumb for everyday rooms:
- Bedrooms & living rooms: moderate brightness with warm light for comfort.
- Kitchens & bathrooms: brighter, cleaner light for detail.
- Home office: bright enough to stay alert, not so harsh you feel judged by your own paperwork.
Use the package “Lighting Facts” label to compare brightness (lumens), estimated yearly cost, light appearance (Kelvin), and life.
It’s basically the nutrition label for your lightbulbexcept it won’t shame you for eating chips at 10 p.m.
Color Temperature: The Secret Sauce of “Cozy” vs “Clinical”
Color temperature is measured in Kelvin (K):
- 2700K–3000K: warm white (cozy, inviting, classic “home” feel).
- 3500K–4000K: neutral to cool white (crisper, great for kitchens and baths).
- 5000K+: daylight (very bright, better for garages, workshops, task-heavy areas).
Pro tip: if you want your home to feel cohesive, keep color temperature consistent within an open floor plan.
Mixing warm and cool bulbs in the same sightline can feel “off,” like wearing a tuxedo jacket with gym shorts.
Add a Dimmer (Because One Brightness Level Is a Crime)
Dimmers are a top-tier easy lighting upgrade because they instantly give you “scenes” without buying anything fancy.
Full brightness for cleaning, mid-level for hanging out, low glow for movies, and “barely on” for midnight snack missions.
LED + Dimmer Compatibility: Avoid Flicker, Buzz, and Regret
Not every LED bulb dims nicely on every dimmer. That’s not you failing at adulthood; it’s just electronics.
Use manufacturer compatibility tools (for example, from major dimmer brands) and choose bulbs labeled dimmable.
If you’re upgrading a dimmer, look for models specifically designed for LEDs. These are built to handle the lower watt loads and
reduce flicker, shimmer, and that weird buzzing sound that makes you suspect your wall is haunted.
DIY Safety Snapshot
- Turn off power at the breakernot just the wall switch.
- Confirm wires are dead with a non-contact voltage tester before touching anything.
- If the wiring is confusing or damaged, call an electrician. Pride is not a safety strategy.
Smart Lighting: The “Wow” Factor Without Rewiring
Smart bulbs and smart switches let you control lighting from an app, voice assistant, or schedules. The practical benefit isn’t just
party tricksit’s convenience and consistency. Lights can turn on automatically at sunset, dim at bedtime, and make it look like
someone’s home when you’re out.
Smart Bulb or Smart Switch?
- Choose smart bulbs when you want color control, simple setup, or you’re renting and don’t want to swap switches.
- Choose a smart switch/dimmer when you want the wall control to stay intuitive for everyone (guests, kids, your future self).
A common “oops” moment: installing smart bulbs, then turning them off with the wall switch like normal bulbs.
That cuts powerand your “smart” bulb becomes a regular bulb with a degree in disappointment.
If you go smart-bulb-first, train the household: leave the switch on, use app/voice/buttons.
Under-Cabinet Lighting: The Kitchen Upgrade That Feels Expensive
Under-cabinet LED lighting is one of the highest impact upgrades for kitchens. It improves task visibility, reduces shadows on counters,
and makes the whole room feel more layered and “designed.” It’s also one of the most satisfying before-and-after moments you can create
without a contractor showing up and eating all your good snacks.
Choosing the Right Under-Cabinet Setup
- LED strips/tape lights: flexible, modern, great for even illumination.
- LED bars/pucks: easy to aim, great for targeted pools of light.
- Plug-in vs hardwired: plug-in is simplest; hardwired is cleaner-looking if you’re comfortable with electrical work.
For best results, aim for continuous, diffused light (not a row of spotlight dots unless you’re specifically going for “runway vibes” while slicing onions).
Use a diffuser channel if your strip is visible from normal viewing angles.
Recessed Lighting Retrofits: Modernize Without Cutting Holes
If you already have recessed “can” lights, retrofit LED trims can give you a clean, modern look and better light distributionoften with
selectable color temperature (so you can choose warm, neutral, or daylight before you commit).
When Canless Recessed LEDs Make Sense
If you’re remodeling or adding new recessed lights where no cans exist, ultra-thin “canless” LEDs are popular because they fit into tight ceiling spaces.
Just make sure you understand your ceiling conditions, follow installation instructions, and don’t ignore electrical safety basics.
Outdoor Lighting: Safer, Prettier, and Less “Trip Hazard Chic”
Outdoor lighting upgrades improve curb appeal and safety. The easiest wins:
- LED porch/garage bulbs for brighter entry lighting.
- Dusk-to-dawn bulbs or fixtures for convenience.
- Motion sensor lights for side yards and back entrances.
- Path lights to guide guests and save ankles.
For outdoor color temperature, many homeowners prefer a warmer look for comfort and curb appeal, while cooler light can feel brighter and more “security-forward.”
The “best” choice depends on your home style, neighborhood lighting, and whether you want your landscaping to look romantic or tactical.
The Shopping Checklist: What to Look For on the Box
- Lumens: brightness (higher = brighter).
- Kelvin (K): color temperature (warm to cool).
- CRI: color rendering (higher = colors look more natural).
- Dimmable: only if you plan to dim.
- Base and shape: match your fixture (A19, BR30, E12 candelabra, etc.).
- Estimated yearly cost and life: compare long-term value.
Common Mistakes (So You Don’t Repeat Internet History)
1) Mixing Color Temperatures in the Same Room
One lamp at 2700K and another at 5000K can make a space feel visually “split.” Pick a target Kelvin range per room and stick to it.
2) Buying “Super Bright” for Every Fixture
Brightness should match the job. Use higher lumens for task zones and balanced ambient light elsewhere. Your living room does not need to be visible from space.
3) Ignoring Dimmer Compatibility
Flicker and buzzing aren’t personality traits of your house. They’re often compatibility issuessolve them with a modern LED-rated dimmer and compatible bulbs.
4) Skipping Safety Steps
Turning off the breaker and testing for power takes minutes and prevents serious hazards. Electricity doesn’t care if you “watched a tutorial.”
Room-by-Room Easy Lighting Upgrade Plan
Living Room
- Warm LEDs (2700K–3000K) for comfort.
- Add a dimmer to the main overhead light.
- Layer with a floor lamp and a table lamp to reduce harsh ceiling glare.
Kitchen
- Neutral-to-cool LEDs (3000K–4000K) for clarity.
- Install under-cabinet lighting for task work.
- Consider brighter bulbs over counters and sink zones.
Bathroom
- Bright, flattering vanity lighting (often 3000K–4000K depending on preference).
- Use multiple light sources to reduce shadows on faces.
- Choose bulbs with strong color rendering so makeup and shaving don’t become surprise events later.
Bedroom
- Warm LEDs and dimmers for relaxing wind-down lighting.
- Smart bulbs can automate bedtime and wake-up routines.
- Use bedside lamps to avoid relying on the “big light.”
Home Office
- Brighter, cleaner light to support focus (often 3500K–5000K depending on sensitivity).
- Add a task lamp that aims light onto your work surface.
- Reduce screen glare by positioning light sources off-axis from monitors.
Conclusion: Small Changes, Big Glow-Up
A true easy lighting upgrade isn’t about buying the fanciest fixtures. It’s about choosing the right brightness,
the right color temperature, and the right controlthen layering light so your home looks intentional instead of accidental.
Start with LED bulbs, add dimmers where you want flexibility, and level up with under-cabinet lighting or smart controls when you’re ready.
Your future self will thank youprobably while enjoying a perfectly lit midnight snack.
Experiences: What “Easy” Looks Like in Real Homes (About )
Here’s what tends to happen when people try an “easy lighting upgrade” for the first time: they start with one bulb, then suddenly they’re
standing in a cart aisle debating Kelvin temperatures like it’s a wine tasting. “Ah yes, a bold 3000K with notes of ‘my kitchen finally looks clean.’”
The good news is that lighting upgrades are forgivingif you plan just a little.
One of the most common “experience lessons” is discovering that the same bulb can look different in different rooms.
A warm 2700K bulb that feels cozy in a bedroom might read slightly yellow in a bathroom with bright tile and mirrors. Meanwhile, a crisp 4000K bulb
that makes a kitchen feel fresh can make a living room feel like a waiting area at a very punctual dentist. The fix is simple: choose the mood per room,
then keep that temperature consistent within the space.
Another classic moment: the dimmer upgrade that was supposed to be “quick.” You swap the switch, turn the power back on, and… the lights flicker like
they’re sending Morse code. That’s usually not a haunted house; it’s a mismatch between the dimmer and the LED load. People who have the smoothest results
typically do one extra step: they pick a dimmer made for LEDs and check compatibility guidance before buying. Once it’s right, though, the payoff is immediate:
the same room becomes a bright workspace in the morning and a relaxing lounge at nightwithout touching a lamp.
Under-cabinet lighting has its own “wow” story arc. At first, it feels like an optional extrauntil the first time you chop vegetables without your own head
casting a shadow on the cutting board. Then it becomes non-negotiable. The most satisfying installs usually focus on even, diffused light
across the whole counter. People who skip diffusers sometimes end up with bright dots reflecting on glossy countertops, which can feel visually busy.
A simple channel or diffused strip can turn “I installed lights” into “I upgraded my kitchen.”
Smart lighting experiences are split into two camps: “Why didn’t I do this sooner?” and “Why is the living room purple?” The happiest smart-light homes keep
it practical: schedules for porch lights, a warm evening scene indoors, and maybe a fun color scene for holidays. They also choose a control method everyone can use:
either smart switches (so the wall behaves normally) or smart buttons/voice/app routines that don’t rely on remembering which switch must stay on forever.
The biggest real-world win is confidence. After the first successful bulb swap and one simple upgradelike a dimmer or under-cabinet strippeople realize lighting
isn’t mysterious. It’s measurable (lumens), adjustable (dimming), and customizable (Kelvin and placement). And once you see how much better a room feels with the
right light, you start noticing opportunities everywhere. That’s how “one new bulb” turns into “my whole house looks better,” one easy step at a time.
Research Notes
This article was informed by consumer and safety guidance from major U.S. organizations, retailers, and lighting manufacturers, including:
- ENERGY STAR (LED bulb performance and savings guidance)
- U.S. Department of Energy (lumens, labels, and efficient lighting education)
- Federal Trade Commission (Lighting Facts label details)
- Consumer Reports (bulb buying guidance and color temperature basics)
- Lutron (LED dimmer selection and compatibility tools)
- Leviton (LED/dimmer compatibility guidance)
- This Old House (under-cabinet LED lighting installation overview)
- The Home Depot (dimmer installation overview)
- Lowe’s (LED bulb shopping factors and packaging label explanation)
- Family Handyman (fixture replacement safety steps)
- NFPA (home electrical safety guidance)
- GE Lighting (smart bulb features and scheduling concepts)