Table of Contents >> Show >> Hide
- What “Elegant Vintage” Really Means (So It Doesn’t Turn Into “Theme Park”)
- Start With the Layout: Vintage Style Needs Good Flow
- The Vintage Material Playbook: Tile, Paneling, and Surfaces That Age Well
- Fixtures That Nail the Look: Tub, Vanity, Sink, and Metals
- Lighting: The Fastest Way to Make Vintage Feel Expensive
- Color and Pattern: Vintage Without the Visual Hangover
- Modern Upgrades That Don’t Ruin the Vintage Mood
- A Step-by-Step Plan for an Elegant Vintage Master Bathroom Remodel
- Specific Makeover Examples (Steal These Ideas)
- Common Mistakes (So Your Bathroom Doesn’t Become a Cautionary Tale)
- Real-World Experiences and Lessons From an Elegant Vintage Master Bath Makeover (Extra)
- Conclusion
There are two kinds of bathrooms in this world: the ones that get the job done, and the ones that make you feel like you
should be wearing a monogrammed robe and calling everything “darling.” An elegant vintage master bathroom makeover
is firmly in the second categoryyet it can still be practical enough for real life (yes, even the 7:12 a.m. hair-wars).
The magic is in the mix: vintage details that look collected over time, paired with modern performance so you’re not
constantly negotiating with a leaky faucet like it’s a tiny, shiny hostage situation. This guide walks you through how to
plan, design, and execute a timeless vintage master bathroom remodel with smart choices, specific examples,
and a few gentle warnings from the Land of Regrets (population: “I chose white grout”).
What “Elegant Vintage” Really Means (So It Doesn’t Turn Into “Theme Park”)
“Vintage” doesn’t mean every surface has to look like it survived a cross-country move in 1927. In a master bath, the goal
is refined nostalgia: classic shapes, period-friendly materials, and thoughtful symmetrywithout going full “saloon
doors on the toilet room.”
Pick a Vintage Lane (Then Borrow Tastefully)
- Victorian/Edwardian: clawfoot tub, high-contrast tile, ornate mirrors, unlacquered brass or polished nickel.
- 1920s–1930s: white subway tile, hex or penny tile floors, pedestal sinks, crisp black accents.
- 1940s–1960s: colored tile, softer pastels, playful geometry, warm metals and globe lighting.
You can blend eras, but keep one “lead actor.” If the star is a clawfoot tub, let supporting characters be classic tile,
vintage-inspired lighting, and a vanity that looks like furniturenot a chaotic costume party of “old-timey.”
Start With the Layout: Vintage Style Needs Good Flow
Before you fall in love with a mirror that weighs as much as a small car, look at the bones. A master bathroom makeover
becomes elegant faster when it’s comfortable and logical.
Three Layout Upgrades That Feel Luxurious (Without Being Fussy)
- Give the vanity breathing room: adequate clear floor space and door swings prevent the “shuffle-and-bonk” morning routine.
- Separate wet and dry zones: even a subtle division (half wall, glass panel, or tiled wet room area) improves daily use.
- Make the tub a focal point: if you’re using a freestanding or clawfoot tub, place it where it reads as intentionaloften centered or aligned with a window/sightline.
The Vintage Material Playbook: Tile, Paneling, and Surfaces That Age Well
Classic Wall Tile: Subway, But Make It Personal
Subway tile is popular because it’s dependable, historically rooted, and flexible. The difference between “classic” and
“contractor white box” is in the details:
- Layout: traditional running bond, vertical stack for a fresher take, or herringbone for subtle drama.
- Edge details: a pencil trim, bullnose, or darker border can lean more authentic to early-20th-century styles.
- Grout strategy: match grout for softness; contrast grout for definition (but know contrast shows more maintenance).
Floors That Whisper “1920s Spa” (Not “Slip ‘n Slide”)
For a vintage master bathroom, hex tile and penny tile are the classics. They also offer
good traction thanks to more grout lineshelpful in a room where water is, frankly, always plotting.
- Small hex mosaics: a true vintage staple and works in large and small baths.
- Penny rounds: playful and period-friendlyuse sparingly if you don’t love “lots of dots.”
- Marble mosaics: gorgeous, but plan for sealing and gentle cleaning habits.
Beadboard and Wainscoting: Instant Character (And Forgiveness)
Painted beadboard or wainscoting adds architectural charm and makes a space feel finished.
It also visually balances tileso you don’t end up with a bathroom that looks like it’s wearing a full-body ceramic suit.
Pro tip: use moisture-rated materials and paint, and keep paneling away from direct shower spray unless it’s specifically
designed for wet zones. Done right, it reads historic and cozyespecially paired with a vintage-style sconce and a warm
paint color above.
Fixtures That Nail the Look: Tub, Vanity, Sink, and Metals
Clawfoot vs. Freestanding: The Romance and the Reality
A clawfoot tub is the iconic centerpiece for an elegant vintage bathroom makeover. It’s also a commitment: you’ll want
thoughtful plumbing placement, a good bath mat strategy, and the emotional readiness to clean around feet (the tub’s feet,
not yoursalthough both deserve support).
If you want the silhouette without the “open underside,” a traditional freestanding slipper tub can give vintage vibes with
easier cleaning.
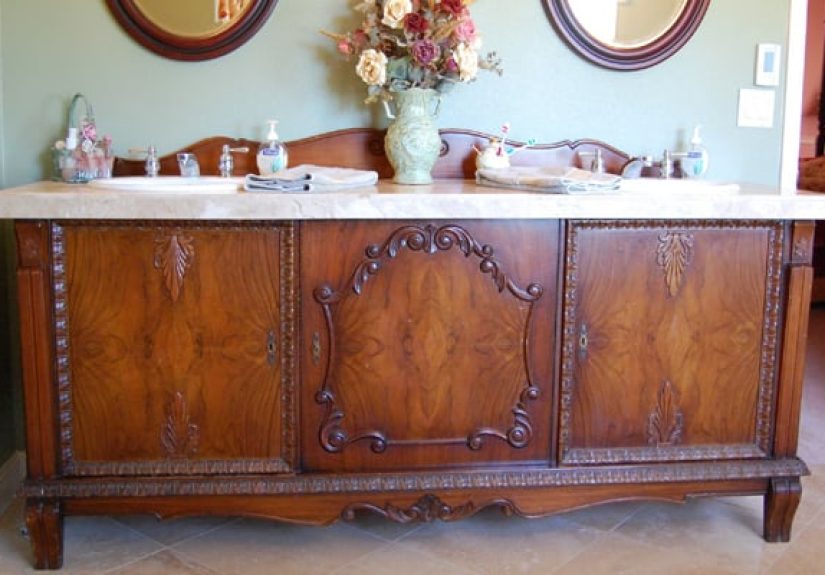
Vanity Options: Furniture Style Without the Furniture Problems
Vintage bathrooms love a vanity that looks like it belonged to someone who writes letters with fountain pens. You have three
main paths:
- Furniture-style vanity: feels collected; add modern storage inside for real-life functionality.
- Console sink: airy and classic; pair with a recessed medicine cabinet for storage.
- Pedestal sink: pure vintage charmbut you’ll need storage elsewhere unless you enjoy living like a minimalist monk.
Metal Finishes: Brass, Polished Nickel, and “Don’t Mix by Accident”
Warm metals (like brass) read instantly vintage and elevated. Polished nickel and chrome can be equally classic, especially
in 1920s-inspired bathrooms. If you mix metals, do it deliberately: choose a “dominant” finish (about 70%) and a “supporting”
finish (about 30%). This keeps the room from feeling like a sample board exploded.
Lighting: The Fastest Way to Make Vintage Feel Expensive
Lighting is where elegant vintage bathrooms either glow like a boutique hotelor look like a basement utility sink with big
dreams. Aim for layers:
- Ambient: a semi-flush mount, petite chandelier, or vintage-inspired ceiling fixture.
- Task: sconces at the mirror (often the most flattering and functional option).
- Accent: a dimmer, picture light, or subtle under-vanity glow to soften nighttime trips.
If you’re doing makeup or shaving daily, place task lights thoughtfully so they reduce harsh shadows. The goal is “I look
awake,” not “I can see my soul leaving my body in 4K.”
Color and Pattern: Vintage Without the Visual Hangover
Elegant vintage master bathrooms tend to succeed with a restrained palette plus one memorable moment:
- Classic neutrals: warm whites, cream, soft gray, and putty tones pair beautifully with brass and marble.
- Moody heritage colors: deep navy, forest green, oxblood, or smoky tealespecially above wainscoting.
- Pattern “pop”: a floral wallpaper, a border tile, or a patterned floorjust don’t do all three at full volume.
Want a vintage nod without repainting your life? Add pattern through a washable rug, café curtains, or wallpaper in a powder
room–friendly zone (away from direct steam).
Modern Upgrades That Don’t Ruin the Vintage Mood
Ventilation: The Quiet Hero of a Beautiful Bathroom
Vintage style is charming. Mold is not. Good ventilation helps protect paint, grout, wallpaper, and wood details. Choose an
exhaust fan sized for the room and vented to the exterior, then consider a timer or humidity sensor so it keeps working
after the shower ends (when moisture is still doing its little villain monologue).
Water Efficiency: Old-School Look, New-School Performance
You can keep the vintage aesthetic and still choose efficient fixtures. Look for high-efficiency toilets and water-saving
faucets/showerheads that maintain good pressure. It’s the kind of upgrade you won’t “see,” but your utility bill will send a
thank-you note.
A Step-by-Step Plan for an Elegant Vintage Master Bathroom Remodel
Step 1: Build a “Non-Negotiables” List
- One hero piece (clawfoot tub, antique mirror, or statement vanity)
- One classic surface (subway tile or marble-look porcelain)
- One warmth element (brass, wood, or textured paneling)
- One storage solution that isn’t “three baskets and a prayer”
Step 2: Choose Materials Like You’ll Live With Them (Because You Will)
Marble is gorgeous, but it can etch. Unsealed grout can stain. Matte black can show mineral spots. None of these are deal
breakersbut you should choose with eyes wide open and cleaning habits moderately realistic.
Step 3: Spend Where It Shows
- Worth it: lighting, faucets, mirror, tile details, hardware (these create the “wow”).
- Save smart: large-field wall tile, standard white toilet, simple paint colors, stock cabinetry upgraded with custom pulls.
Step 4: Add Vintage Detail in the “Trim and Tailoring”
The final layer is what separates “nice remodel” from “elegant vintage master bathroom makeover”:
- Framed mirrors or medicine cabinets with classic profiles
- Picture-frame molding or beadboard with a crisp top rail
- Bridge faucets, cross handles, or lever handles that echo the era
- Soft textiles: waffle towels, café curtains, and a washable runner
Specific Makeover Examples (Steal These Ideas)
Example 1: The 1920s-Inspired Bright Classic
- White subway tile to about shoulder height with a slim dark border
- Black-and-white hex tile floor
- Pedestal sink + recessed medicine cabinet for storage
- Polished nickel faucet set + globe sconces
- Paint color: warm white or pale greige above the tile line
Example 2: The Moody Vintage Boutique-Hotel
- Wainscoting in a deep navy or smoky green
- Marble-look porcelain floor tile (low maintenance, high impact)
- Furniture-style vanity with a stone countertop
- Brass fixtures + a petite chandelier
- Pattern: a vintage botanical wallpaper in a dry zone
Example 3: The Soft Glam “Old Meets New”
- Clawfoot tub as the centerpiece
- Warm white wall tile + gentle blush or cream paint above
- Brass hardware, plus a vintage-style arched mirror
- Textiles: patterned rug and linen café curtain
- Storage: slim tower cabinet that looks like built-in millwork
Common Mistakes (So Your Bathroom Doesn’t Become a Cautionary Tale)
- Over-trending the “vintage”: too many ornate details can feel costume-y fast.
- Ignoring storage: the prettiest pedestal sink won’t hold your electric toothbrush army.
- Skimping on ventilation: moisture damage is expensive and rude.
- Choosing “hard mode” finishes everywhere: pick one high-maintenance star, not a whole cast.
Real-World Experiences and Lessons From an Elegant Vintage Master Bath Makeover (Extra)
Here’s the part most design photos don’t show: the lived experience. Not the glamorous “champagne flute by the tub” moment
(although you can absolutely have that), but the actual day-to-day of remodeling and then using a vintage-inspired master
bathroom like a real human being who sometimes drops mascara wands.
First, homeowners often underestimate how much the order of decisions matters. The tile choice feels like the
big dramatic decision (and it is), but the layout and plumbing placements quietly control everything. People commonly share
that once the shower valve and drain locations were set, they realized their “dream vanity” wouldn’t fit without turning the
door into a battering ram. The lesson: confirm clearances early, then shop fixtures with a tape measure in hand. If you
feel silly measuring a mirror in your hallway, congratulationsyou’re doing it right.
Next: the emotional roller coaster of “vintage details.” A classic hex tile floor looks timeless, but the installation can
be finicky because small tiles amplify tiny mistakes. Many remodelers report that the floor was the moment they learned
patience, humility, and at least three new synonyms for “oops.” The fix is simple: hire an installer who’s done mosaics,
approve a small mockup if possible, and don’t rush the grout color decision. Grout is not backgroundit’s basically the
tile’s eyeliner.
Then there’s the great brass debate. Warm brass fixtures look elegant and vintage, but people are often
surprised by how different finishes read in different lighting. Under cool bulbs, brass can look harsher; under warm bulbs,
it looks expensive and cozy. A common “aha” moment is swapping to warm, flattering light and suddenly loving the same faucet
they were side-eyeing for weeks. Moral: plan lighting early, and put it on a dimmer. Your bathroom should be able to do both
“bright morning reality” and “soft evening spa delusion.”
Storage is another frequent real-life plot twist. Vintage-inspired bathrooms lean airypedestal sinks, console vanities, open
legsbeautiful, but not naturally generous with drawers. Homeowners often end up adding a recessed medicine cabinet, a tall
linen cabinet, or a furniture-style vanity with hidden modern organizers. The happiest outcomes usually come from deciding
what needs to live in the bathroom (daily skincare, hair tools, towels) and designing storage around that list instead of
hoping the aesthetic will magically swallow clutter.
And finally: maintenance. People who adore the look of marble sometimes learn about etching the first time a bottle of
something “brightening” sits too long. Others discover that pure-white grout in a high-traffic primary bath is basically a
part-time job. The best experience-based advice is to pick one “delicate luxury” (maybe the stone countertop or a handmade
tile) and keep everything else easy: durable porcelain for the big surfaces, washable textiles, and ventilation strong enough
to keep steam from redecorating your ceiling.
The good news? Once it’s done, an elegant vintage master bathroom makeover tends to feel less like a trend and more like a
personal upgrade to daily life. It’s the difference between “a room where you brush your teeth” and “a room that makes you
stand up straighter while brushing your teeth.” Which, honestly, is the kind of character development we all deserve.
Conclusion
An elegant vintage master bathroom makeover is a balancing actclassic materials and shapes, modern comfort,
and just enough personality to feel collected rather than copied. If you focus on a solid layout, timeless surfaces, great
lighting, and smart upgrades like ventilation and efficient fixtures, you’ll end up with a bathroom that feels like it has a
story… without forcing you to live like it’s 1923.