Table of Contents >> Show >> Hide
- What Are Embroidered Face Photos?
- Why Embroidered Face Photos Are So Popular
- How to Make Embroidered Face Photos
- Best Stitches for Embroidered Face Photos
- Common Mistakes to Avoid
- Creative Ways to Use Embroidered Face Photos
- Are Embroidered Face Photos Beginner-Friendly?
- The Real Experience of Making Embroidered Face Photos
- Final Thoughts
Some crafts are cute. Some are clever. And some quietly sneak up on you and become the thing everyone in the room suddenly wants to talk about. Embroidered face photos belong in that last category. They combine photography, textile art, memory-keeping, and just enough patience to make you feel like a genius when the final piece comes together. One minute you are staring at a plain portrait, and the next minute you are adding thread to a cheekbone, a curl, or a smile line until the whole image starts to feel alive in a completely different way.
At its core, this style is exactly what it sounds like: taking a face photo and transforming it with embroidery. Sometimes the stitches are worked directly over a printed or transferred image. Sometimes the photo is simplified into a line drawing and stitched onto fabric. Sometimes the finished piece looks more like thread painting than traditional embroidery. Whatever route you choose, the result is personal, tactile, and far more charming than yet another photo trapped in a phone gallery between a grocery list screenshot and a blurry latte.
If you are curious about embroidered face photos, this guide breaks down what they are, why they have become so appealing, how to make them, which materials work best, and how to avoid the classic mistakes that can turn “sentimental keepsake” into “why does Aunt Linda have three eyebrows?”
What Are Embroidered Face Photos?
Embroidered face photos are portraits created by combining a photograph with hand embroidery or machine embroidery techniques. In some projects, the photo is used only as a reference. In others, the image is transferred onto fabric so the stitcher can work directly over the outlines and shadows. The final effect can range from minimal and modern to highly realistic and painterly.
This is why the category is so fascinating. It is not limited to one look. You can create:
- Minimal line portraits with a few stitched facial features
- Colorful thread-painted faces with layered shading
- Mixed-media portraits that combine printed photos and stitched accents
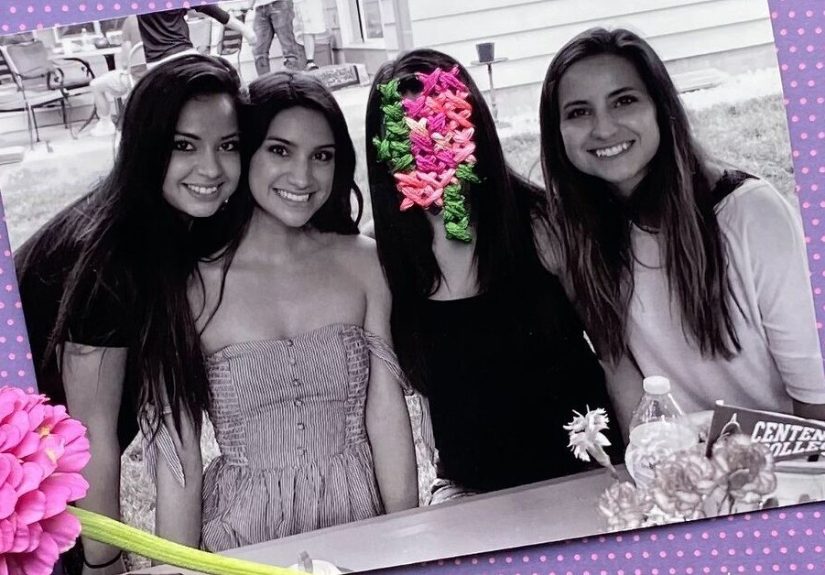
- Decorative portraits with embroidered flowers, text, or symbolic details around the face
- Heirloom-style keepsakes based on wedding, baby, graduation, or family photos
Because the medium is flexible, embroidered face photos appeal to beginners who want a meaningful first project and advanced stitchers who enjoy subtle shading, dimension, and detail. It is art, memory, and a tiny bit of thread-fueled stubbornness all rolled into one.
Why Embroidered Face Photos Are So Popular
The popularity of embroidered portraits is not hard to explain. People want personalized decor and gifts, but they also want handmade work to feel emotional rather than mass-produced. A stitched face photo feels intimate. It slows a digital image down and turns it into something tactile. That shift matters.
There is also a visual reason. Embroidery softens a portrait. Thread introduces texture, shadow, and movement in a way ink cannot. Hair becomes more expressive. Clothing folds gain life. Even a simple outline around a jaw or nose can make a photo feel more artistic and less static.
Another reason is accessibility. Modern stitchers have more tools than ever for transferring designs, choosing color families, learning shading techniques, and stabilizing fabric. Woven cotton, linen, and evenweave fabrics are friendly for hand embroidery, while water-soluble stabilizers make it much easier to transfer detailed patterns or work on darker fabrics. In other words, the barrier to entry is lower than it used to be, which is good news for anyone holding a needle and thinking, “I have no idea what I am doing, but I am emotionally invested already.”
How to Make Embroidered Face Photos
1. Choose the Right Photo
Start with a clear, well-lit photo. High-contrast images usually work best because embroidery relies on visible shape, value, and structure. A face turned slightly to the side often gives you stronger shadows and more definition than a perfectly flat front-facing snapshot. If you are a beginner, choose a photo with simple lighting and a clean background.
It also helps to think like a designer, not just a photographer. You do not need every eyelash, pore, and flyaway hair. What you need is a recognizable silhouette, clear facial landmarks, and a balanced composition. The best embroidered portraits are edited interpretations, not stitched photocopies of every microscopic detail.
2. Simplify the Image Before You Stitch
One of the smartest things you can do is simplify the photo into major shapes. Focus on the outline of the head, hair mass, nose bridge, lips, eyes, neck, and key shadow areas. Many successful embroidered faces rely on fewer tones than you might expect. Even a small face can read clearly from a distance when its main values are handled well.
This is where restraint becomes your best friend. In face embroidery, less is often more. Too many stitched lines can make the portrait look stiff or overworked. If you simplify the image first, you give the embroidery room to breathe.
3. Pick Materials That Support the Portrait
For hand embroidery, a stable woven fabric is usually the easiest starting point. Linen, cotton percale, muslin, or evenweave fabrics are good choices because they hold stitches well and are less likely to distort. Stretchy fabrics can work, but they usually need stabilizer unless puckering is part of your artistic plan, which it almost never is.
Useful materials often include:
- Embroidery hoop or frame
- Woven fabric such as cotton or linen
- Embroidery floss in coordinated skin, hair, and clothing shades
- Embroidery needles with a long eye
- Sharp embroidery scissors
- Tracing paper, transfer paper, or a light source for pattern transfer
- Water-soluble stabilizer for detailed or dark-fabric work
Keep the fabric taut in the hoop. A properly tightened hoop helps you make cleaner stitches and reduces puckering. If the fabric is loose and saggy, your portrait may end up looking like it survived a tiny emotional crisis.
4. Transfer the Design Carefully
There are several reliable ways to transfer a face photo or simplified outline onto fabric. For light fabrics, a light box or even a bright window can work beautifully. For dark fabrics or highly detailed portraits, printable or water-soluble stabilizer is often the easiest option because you can stitch through it and then dissolve it away after finishing.
If you are working from a digital image, you can also edit the photo first by increasing contrast or turning it into a simplified line drawing. That step can save a lot of confusion later. The goal is not to prove you can trace freehand under stressful conditions; the goal is to make a great portrait.
5. Start With Structure, Not Tiny Details
Begin with the major lines and anchor points: face outline, hairline, eyes, nose, mouth, neck, and shoulders. Use a stitch such as backstitch, split stitch, or stem stitch for line work. This gives you a strong framework before you move into shading.
Once the structure is in place, decide whether the portrait will stay line-based or move into filled areas. Minimal portraits can stop after the outline stage and still look elegant. More realistic work will continue into layered shading.
6. Build Shadows and Highlights With Thread
For realistic embroidered face photos, long-and-short stitch is one of the most useful techniques. It works well for filling larger areas and creating smooth transitions between colors. This is the stitch that helps cheeks look rounded instead of flat and helps a forehead look softly lit instead of aggressively surprised.
Choose thread colors in families rather than jumping randomly from light to dark. A portrait usually looks smoother when highlights, midtones, and shadows come from related shades. That is especially true for skin. Human skin is rarely just “beige.” It contains pink, peach, brown, gold, olive, and cool shadow tones depending on the lighting and the subject. If you approach skin like one flat color, the result can feel dull. If you build it in related tones, the portrait gains depth.
Best Stitches for Embroidered Face Photos
You do not need fifty fancy stitches to make a strong portrait. In fact, a smaller stitch vocabulary often produces a more polished result. The most useful stitches include:
- Backstitch: great for outlines, facial contours, and simple line portraits
- Split stitch: excellent for soft lines and detailed face areas
- Stem stitch: useful for curves, contours, and expressive outlines
- Satin stitch: good for smaller filled areas with a smooth finish
- Long-and-short stitch: the star player for shading and realistic thread painting
- French knots: handy for textured accents, background elements, or playful detail
If you are new to portrait embroidery, start with line work and add only a few shaded sections. Hair, collars, and clothing folds are often easier places to practice before you commit to shading cheeks, lips, or eyelids.
Common Mistakes to Avoid
Using a Photo With Too Much Detail
A busy background, dramatic shadows across the whole face, or a tiny cropped image can make stitching harder than necessary. Choose a photo that gives you clear information.
Skipping Stabilizer on Difficult Fabrics
If your fabric stretches, shifts, or puckers, stabilizer is not optional. It is the hero working backstage while the thread gets all the applause.
Overworking the Face
Faces become recognizable through proportion, shape, and value. You do not need to stitch every line you see in the photo. Overstitching can make features look harsh or crowded.
Ignoring Stitch Direction
Thread direction matters. Hair should flow like hair. Shadows on cheeks should follow facial form. Random stitch direction can flatten the portrait or make it look visually noisy.
Choosing Colors Without a Plan
Random thread choices lead to muddy shading. Work in color families and think in layers of light, medium, and dark. Your thread palette should act like a team, not like strangers forced to sit together at a wedding.
Creative Ways to Use Embroidered Face Photos
Once you finish a portrait, you have plenty of options beyond hanging it on a wall. Embroidered face photos can become:
- Wedding and anniversary gifts
- Baby portraits and family keepsakes
- Memorial art pieces
- Holiday ornaments
- Decorative hoop art
- Framed textile art on stretched canvas
- Album covers, fabric books, or stitched story panels
If the piece is intended for display, make sure you plan enough extra fabric around the portrait for finishing. Some artists love displaying embroidery in the hoop, while others stretch it over canvas for a more polished wall-art look. Both options work; it just depends on whether you want “cozy handmade charm” or “yes, this absolutely belongs in a gallery corner of my living room.”
Are Embroidered Face Photos Beginner-Friendly?
Yes, but with an asterisk shaped like a tiny embroidery needle. The easiest beginner version is a simplified portrait with line stitching and selective details. Think outline of the face, a few stitched facial features, and maybe embroidered flowers, text, or a colored background. That approach teaches design transfer, hoop tension, thread control, and line quality without immediately throwing you into advanced skin shading.
If you want realism, start with a small section rather than a full masterpiece. Practice one eye, a curl of hair, or a jawline shadow first. Portrait embroidery rewards observation, patience, and editing more than speed. It is less about racing to the finish and more about slowly convincing thread to behave like light.
The Real Experience of Making Embroidered Face Photos
What is it actually like to make one of these portraits? In a word: memorable. Embroidered face photos tend to create a very specific kind of crafting experience, because the project is technical and emotional at the same time. You are not just stitching a flower or a geometric pattern. You are stitching someone’s expression, someone’s posture, someone’s presence. That changes the energy of the project right away.
For many people, the first experience is a mix of excitement and panic. The excitement comes from choosing a meaningful image: a grandparent’s smile, a child’s school portrait, a wedding photo, or a candid shot that feels impossible to replace. The panic arrives about ten minutes later, when the stitcher realizes that a human face is a little less forgiving than a leaf. A leaf can be “stylized.” A face can accidentally become your cousin, a Victorian ghost, or a very confused potato. That learning curve is real.
But that is also what makes the process rewarding. As makers spend more time with the photo, they begin to notice details they might have ignored before: the direction of a strand of hair, the curve of a lower lip, the shadow under the chin, or the way one eyebrow lifts slightly higher than the other. Portrait stitching trains the eye. It turns casual looking into active observation. People often come away from the process saying they felt more connected to the image by the end of the project than they did at the beginning.
Another common experience is surprise at how calming the work becomes once the difficult setup is done. Choosing the photo, simplifying the design, and transferring the image can feel intimidating. But after that, the rhythm of stitching often takes over. Thread selection, repeated shading, and small adjustments become absorbing in the best way. Many stitchers describe portrait embroidery as both emotionally grounding and mentally engaging. It demands focus, but it also creates a quiet kind of momentum. One stitch leads to another, and before you know it, two hours have disappeared and you are somehow deeply invested in whether a cheek needs one more row of pale peach floss.
Gift-giving is another huge part of the experience. People who receive embroidered face photos usually understand immediately that this is not a quick craft-store project dashed off in one evening. A stitched portrait signals time, care, and attention. It feels personal because it is personal. That makes these pieces especially powerful for anniversaries, memorials, birthdays, and family milestones. Even when the embroidery is simple, the fact that it was made by hand gives it emotional weight.
There is also the experience of imperfection, which deserves an honest mention. Portrait embroidery teaches humility fast. Sometimes a nose looks right only after three attempts. Sometimes a mouth goes from “gentle smile” to “mild disapproval” and needs to be redone. Sometimes removing stitches is part of the art. In fact, one of the most useful emotional lessons in this craft is learning that unpicking thread is not failure. It is editing. It is part of getting the portrait closer to the feeling you want.
Over time, the experience tends to change. Beginners often focus on getting a likeness. More experienced stitchers start thinking about mood, texture, symbolism, and composition. They experiment with leaving parts of the image unstitched, using bold thread colors instead of realistic ones, or combining fabric printing with selective embroidery. At that point, embroidered face photos stop being just a craft technique and start becoming a true artistic language. And honestly, that is when things get really fun.
Final Thoughts
Embroidered face photos sit at a sweet spot between art and memory. They are visually striking, deeply personal, and flexible enough to suit minimalist makers and detail-loving thread painters alike. Whether you stitch a simple line portrait or a fully shaded face with carefully blended tones, the magic comes from translation: turning a flat image into something textured, handmade, and lasting.
If you want a creative project with emotional value, this is a beautiful place to start. Choose a strong photo, simplify the design, use stable materials, and let the stitches do what they do best: add warmth, character, and just enough handmade soul to make the portrait feel unforgettable.