Table of Contents >> Show >> Hide
- What #septfabflippincontest Usually Celebrates
- Before You Touch Paint: Pick the Right Geometric Concept
- Tools and Materials Checklist
- Safety Note: Older Paint Can Mean Lead Dust
- Step-by-Step: How to Build a Geometric Dresser That Looks “Factory-Made”
- 1) Disassemble like a responsible adult
- 2) Clean like you mean it
- 3) Repair and level the surface
- 4) Prime for adhesion and peace of mind
- 5) Paint the base color (your “canvas”)
- 6) Map the geometry (measure twice, tape once)
- 7) Tape the pattern for crisp lines
- 8) Paint the geometric shapes in layers
- 9) Remove tape carefully for sharp edges
- 10) Add optional upgrades that scream “designer flip”
- 11) Seal for durability (because drawers get abused)
- Three Real-World Geometric Dresser Examples (That Don’t Require a Design Degree)
- Common Mistakes (So You Can Avoid Posting a Cry-for-Help Reel)
- How to Photograph Your Geometric Dresser for a Contest Entry
- Conclusion: Make the Angles Work for You
- Extra: of Real-World “Geometric Dresser” Experience (What Makers Commonly Learn the Hard Way)
Some dressers are born to blend inquiet little beige rectangles that hold socks and secrets. And then there’s the dresser that wakes up one day and chooses angles. If you’re entering #septfabflippincontest (or just treating your furniture like it finally got a personality), a geometric design is the fastest way to make an ordinary thrift-store find look like it belongs in a boutique showroom.
Geometry works because it’s visual order with just enough rebellion. Crisp lines signal “modern,” repeating shapes signal “intentional,” and bold contrast signals “I absolutely meant to do that.” (Even if your first tape line looked like a seismograph reading.) This guide walks you through planning, prepping, painting, and protecting a geometric dresserplus how to make it photograph-ready for a contest entry.
What #septfabflippincontest Usually Celebrates
Furniture flip contests thrive on a simple formula: a theme, a deadline, and a whole lot of makers who suddenly decide they can do “just one more coat” at midnight. The September “Fab Flippin’” community has historically leaned into a Geometric Design thememeaning your piece should feature a bold, intentional geometric element: painted shapes, panel overlays, veneer patterns, trim grids, or even geometric fabric accents inside drawers.
Translation: a plain coat of paint is cute, but it won’t stop the scroll. A geometric dresser, on the other hand, practically begs for a before-and-after swipe.
Before You Touch Paint: Pick the Right Geometric Concept
Start with the dresser’s “architecture”
A dresser already has geometry: drawer fronts, borders, hardware spacing, and legs. Your job is to decide whether your pattern echoes that geometry (clean and cohesive) or interrupts it (edgy and artsy). Here are three contest-friendly directions:
- Color-blocked drawers: each drawer is a field for triangles, diagonals, or asymmetrical blocks. Great for dressers with flat fronts.
- One hero panel: keep most of the dresser simple, then place a bold geometric feature on the top drawers or center section. This is the “statement necklace” approachless work, more drama.
- Texture geometry: add thin wood strips, screen molding, or veneer in geometric layouts, then paint or stain. This reads high-end because the pattern is physical, not just visual.
Choose a pattern you can execute cleanly
A geometric design should look deliberate. That doesn’t mean it must be complicated. In fact, the most “designer” flips often use simple shapes repeated well. Try one of these:
- Triangles + diagonals: modern, energetic, forgiving if you keep angles consistent.
- Mondrian-style blocks: rectangles with a few bold accent areasgreat if you want balance without perfect symmetry.
- Chevron: classic, high-impact, and surprisingly easy with tape and patience.
- Grid + metallic accents: subtle sophisticationespecially with brass pulls.
- Two-tone “sheen-on-sheen”: same color, different finish (flat vs satin) for a quiet pattern that shows up in light.
Pick a palette that photographs well
Contest entries live and die by photos. Colors that read beautifully in real life can turn into “mystery gray” on camera. Use high-contrast or clearly differentiated tones:
- Classic modern: black + warm white + brass
- Color-forward: emerald + white + natural wood
- Soft contemporary: sage + cream + matte black hardware
- Desert modern: terracotta + blush + sand + walnut accents
- Moody designer: navy + camel + gold
Tools and Materials Checklist
Your supplies depend on whether you’re painting only or adding texture, but most geometric dressers use the same core toolkit:
Prep
- Screwdriver (hardware removal)
- Cleaner/degreaser and rags
- Sandpaper (120/150 for repairs, 220 for smoothing) or sanding sponge
- Wood filler + putty knife
- Vacuum/tack cloth
Paint + pattern
- Bonding primer (especially for laminate, glossy finishes, or stain-blocking needs)
- Furniture paint or durable trim enamel
- Quality angled brush + small foam rollers
- Painter’s tape (low-tack for delicate surfaces; premium tape for crisp lines)
- Measuring tape, ruler, level, and a pencil
Protection + finishing touches
- Topcoat (water-based poly for durability, or a manufacturer-recommended sealer for your paint system)
- New pulls/knobs (optional but impactful)
- Felt pads for drawers/feet
- Legs or risers (optional “modernizer” upgrade)
Safety Note: Older Paint Can Mean Lead Dust
If your dresser is old (or you don’t know its history), treat sanding and scraping seriously. Old coatingsespecially those associated with pre-1978 environmentscan create hazardous lead dust when disturbed. Use lead-safe practices, contain dust, wear proper protection, and keep kids/pregnant people away from the work area. When in doubt, consider testing or professional guidance before heavy sanding.
Step-by-Step: How to Build a Geometric Dresser That Looks “Factory-Made”
1) Disassemble like a responsible adult
Remove all drawers, pulls, and rails you can safely take off. Put hardware in a labeled bag. Take one minute to photograph the “before,” even if it’s ugly. Especially if it’s ugly. The internet loves a glow-up.
2) Clean like you mean it
Furniture collects wax, oils, polish, and the invisible fingerprints of everyone who ever ate pizza while opening a drawer. Degrease thoroughly and let it dry. Paint does not bond to “mystery residue,” no matter how confident you feel.
3) Repair and level the surface
Fill dents, chips, and old hardware holes with wood filler. Once dry, sand smooth. For glossy finishes or laminate, scuff-sand enough to remove shine and help primer grip. Vacuum dust, then wipe again.
4) Prime for adhesion and peace of mind
Priming is the unglamorous hero of a contest-worthy finish. Use a bonding/stain-blocking primer when needed: laminate, glossy factory finishes, knotty wood, or pieces that smell like someone stored onions inside for three years. Apply a thin, even coat and let it dry fully. Lightly sand with fine grit if the surface feels rough.
5) Paint the base color (your “canvas”)
Apply your base coat in thin layers. A foam roller helps on flat surfaces; a brush is for edges and details. Let it dry between coats. Rushing here is how you earn “texture,” and not the good kind.
6) Map the geometry (measure twice, tape once)
Decide where the pattern lives: all drawers, just top drawers, or a center focal panel. Use a ruler and pencil to mark key points. If your design includes diagonals, measure from the same reference edges each time. Consistency beats complexity every day of the weekand twice on contest submission day.
7) Tape the pattern for crisp lines
Apply painter’s tape along your pencil lines. Press the edges down firmly with a putty knife or an old gift card. For the cleanest result, “seal” the tape edge before your contrast color: either brush a light coat of the base color along the tape edge or use a tape system designed to reduce bleed. Then paint your accent color with minimal brush overload near tape edges.
8) Paint the geometric shapes in layers
Geometric designs often look best when built in stages:
- Paint the lightest accent color first (it’s easier to cover with darker shades).
- Let it dry.
- Re-tape for the next shape/color section.
- Repeat until the pattern is complete.
If you’re using multiple bold colors, balance is everything. A simple guideline: one dominant base + one main accent + one small “pop” color. Anything beyond that can drift into “kindergarten mural,” unless you’re intentionally going for that (no judgment).
9) Remove tape carefully for sharp edges
Pull tape slowly at a 45-degree angle. If you feel resistance or see paint lifting, score lightly along the tape edge with a sharp blade and continue. The goal is “crisp line,” not “peeling sunburn.”
10) Add optional upgrades that scream “designer flip”
- New hardware: Oversized pulls can modernize a dresser instantly. Match the finish (brass, matte black, chrome) to your vibe.
- Legs: Adding legs makes a dresser feel lighter and more contemporary. Even short legs can change the whole silhouette.
- Drawer interior surprise: Paint inside edges, add geometric paper, or line drawers with a subtle pattern. It’s the flip equivalent of a fun sock: not required, but delightful.
- Veneer triangles or trim grids: If you want next-level texture, cut veneer or thin trim into repeating shapes, adhere carefully, then paint or stain. Texture makes your geometry look expensive.
11) Seal for durability (because drawers get abused)
A geometric dresser is art, yesbut it’s also a storage workhorse. Use a durable topcoat appropriate for your paint system, especially on drawer fronts and the top surface. Apply thin coats, avoid overworking, and allow curing time before heavy use.
Three Real-World Geometric Dresser Examples (That Don’t Require a Design Degree)
Example 1: “Two-Tone Minimalist”
Paint the dresser a soft white. Tape a repeating triangle pattern across just the top two drawers using the same white in satin finish over a matte base. The pattern appears when light hits itsubtle, modern, and shockingly classy.
Example 2: “Bold Drawer Gradient”
Choose a deep base color (navy or forest green). On each drawer, create a diagonal split with tape. Paint the lower half a lighter shade of the same family and add brass pulls. The result feels cohesive, not chaotic, and it photographs like a magazine spread.
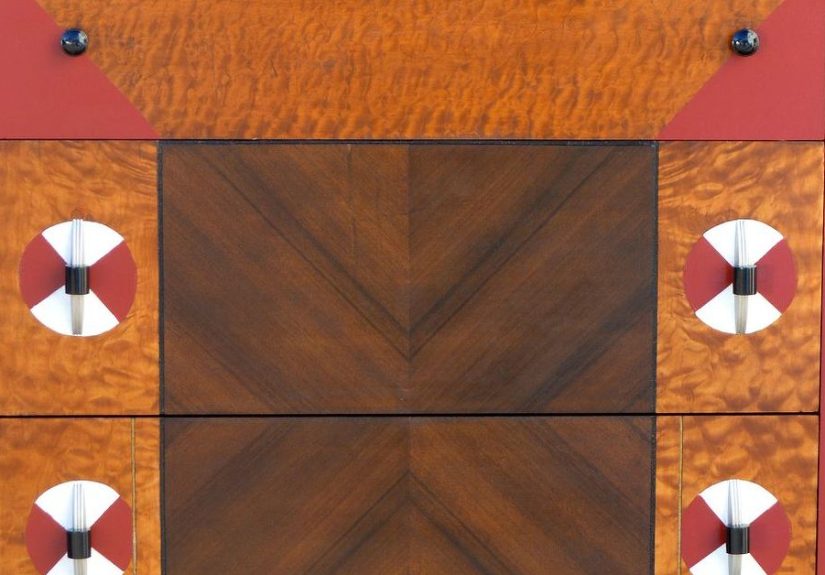
Example 3: “Wood + Paint Geometry”
Keep the dresser body painted (warm white or greige), then apply wood veneer triangles to the drawer fronts in a repeating pattern. Finish the veneer with a clear coat while keeping the body painted. This mixed-material look is a proven “wow factor” move for contest entries because it reads custom and high-end.
Common Mistakes (So You Can Avoid Posting a Cry-for-Help Reel)
- Skipping cleaning: paint hates waxy residue more than cats hate closed doors.
- Not using primer on slick surfaces: adhesion issues show up later as chips, and nobody wants that plot twist.
- Overloading paint near tape edges: heavy paint loves to seep. Keep coats thin.
- Removing tape too aggressively: slow and steady wins the crisp-line race.
- Too many colors with no hierarchy: limit the palette so the geometry feels intentional.
How to Photograph Your Geometric Dresser for a Contest Entry
Your work deserves better than a dim garage photo next to a lawn mower. Use these quick staging rules:
- Natural light: place the dresser near a bright window or shoot outdoors in open shade.
- Straight lines: keep the camera level so your geometric pattern doesn’t look like it’s sliding off the dresser.
- Simple styling: one plant, a book stack, maybe a small lampdon’t cover the pattern.
- Before/after: include both. People love proof of transformation.
- Detail shots: close-ups of crisp lines, hardware, and topcoat sheen help judges and viewers appreciate craftsmanship.
Conclusion: Make the Angles Work for You
A geometric dresser flip isn’t just “painting shapes.” It’s design strategy: using structure, contrast, repetition, and clean execution to turn a basic dresser into a statement piece. Whether you’re entering #septfabflippincontest or just want your bedroom storage to look like it has a Pinterest board, geometry is your friendsharp, stylish, and never afraid of a little drama.
Extra: of Real-World “Geometric Dresser” Experience (What Makers Commonly Learn the Hard Way)
If you hang around furniture flippers long enough, you’ll notice a pattern (pun fully intended): almost everyone starts their first geometric dresser thinking, “This will be quick.” And then they meet tape math. The lived reality of geometric design is that the pattern itself is rarely the hard part. The hard part is everything that happens between the shapes: drying time, alignment, and resisting the urge to “just touch up” an edge that was perfectly fine until you stared at it for ten minutes.
One of the most repeated lessons is that good geometry begins before paint. Makers often report that the first hourcleaning, sanding, priming, and smoothingdecides whether the final pattern looks crisp or looks like it survived a minor earthquake. The most contest-ready finishes tend to come from thin coats, fully dried layers, and a willingness to lightly sand when the surface starts feeling like an orange peel impersonation.
Another common experience: people underestimate how much color choice affects perceived precision. High-contrast palettes (think black and white) are stunningbut they also spotlight every tiny wobble. Softer transitions (sage + cream, navy + camel) can feel more forgiving while still looking designer. That doesn’t mean you should avoid bold color. It just means if you go bold, you’ll want to go slow and keep tape lines clean.
Then there’s the “tape truth”: flippers often discover that crisp lines come less from the tape brand and more from the processpressing edges firmly, sealing tape lines, and painting light coats rather than flooding the edge. Many makers also learn to treat tape like a temporary roommate: it’s helpful, but the longer it stays, the more likely it is to cause drama. Removing it carefullyat an angle, with patienceoften makes the difference between “professional” and “why is my paint coming with it?”
Geometric flips also teach a sneaky design principle: rest space matters. When every drawer front is packed with pattern, the eye has nowhere to land. The most striking dressers frequently use a calm base (solid color) plus a targeted geometric momenttop drawers, outer drawers, or a center band. Makers describe this as the “hero area” approach: it looks more intentional, takes less time, and photographs better because the pattern reads clearly from a distance.
Finally, experienced entrants often say the secret sauce is the finishing stage: hardware, topcoat, and cure time. Great pulls can make a simple design look custom. A durable protective finish makes the piece feel “real” (not delicate). And letting paint cure before reassembling drawers prevents the heartbreak of fresh paint sticking, scuffing, or imprinting. The end result? A dresser that doesn’t just look geometricit looks designed, like it always deserved those angles.