Table of Contents >> Show >> Hide
- What Makes an Anthropologie-Style Trinket Dish Look So… Anthropologie?
- Before You Start: The Three Rules of a Trinket-Dish Hack
- Hack #1: Air-Dry Clay + Napkin Decoupage + Gold Edge (The “This Looks Expensive” Classic)
- Hack #2: Polymer Clay Dish (A.K.A. “I Want Crisp Edges and Real Durability”)
- Hack #3: The Thrifted Saucer Glow-Up (Fast, Cheap, Shockingly Chic)
- Hack #4: Decoupage on Ceramic or Glass (For Instant “Gift Shop” Prints)
- Hack #5: The “Brass + Marble” Moment (Luxury Look Without Luxury Money)
- Common Mistakes (So You Don’t Have to Learn the Hard Way)
- Styling Your Trinket Dish Like You Bought It on Purpose
- Mini Cost Breakdown (Because We Love a Budget Plot Twist)
- Real-World “Experiences” From the Trinket-Dish Life (Add-On Section)
- Final Thoughts
Confession: there are two kinds of people in this worldthose who have a “junk drawer,” and those who have a curated trinket dish moment. If you’ve ever scrolled past a dreamy Anthropologie-style trinket dish and thought, “I need that for my rings / keys / tiny regrets,” welcome. This is your guide to hacking an Anthropologie-inspired trinket dishaka getting the look, the charm, and the “where did you buy that?” energywithout spending the same amount you’d spend on brunch for two.
By “hack,” I mean DIY upgrades, dupes, and glow-ups: thrift-store saucers turned boutique-cute, air-dry clay dishes with gold edges, and clever finishes that read “handmade artisan” (not “middle-school art fair,” unless that’s your aestheticno judgment).
What Makes an Anthropologie-Style Trinket Dish Look So… Anthropologie?
Even when the shapes and themes vary, a lot of Anthropologie-style trinket dishes share a few telltale design traits:
- Handmade vibes: slightly imperfect edges, visible brush strokes, “this was made by a person with taste” texture.
- Whimsical details: quippy phrases, tiny illustrations, playful motifs (florals, eyes, moons, hands, fruit, shells).
- Material heft: lots of stoneware/ceramic and occasional “fancy hardware” energy like brass + marble accents.
- Shiny little surprises: metallic rims, gold leaf touches, pearly topcoats, or glossy sealers that make it feel giftable.
That’s good news, because most of those vibes are totally hackable with basic craft supplies and one important skill: being willing to let things dry.
Before You Start: The Three Rules of a Trinket-Dish Hack
1) “Inspired by” is cool. Counterfeit is not.
Make something that fits your décor and feels “Anthropologie-inspired,” but don’t label it as the brand or resell it as the real thing. Your craft karma will thank you.
2) Decide if your dish is decorative or functional.
Most DIY finishes are best for decorative use (rings, coins, keys, hair clips) rather than food. Some paints and sealers specifically warn against food-contact surfaces. If you want something food-safe, you’ll need materials that are explicitly rated for that useand you’ll still want to follow curing instructions like your dish’s life depends on it. For most people: keep it decorative and sleep peacefully.
3) Prep is not optional (unless you love peeling paint).
Whether you’re painting, decoupaging, or adding metallic finishes, the secret sauce is boring but mighty: cleaning, lightly sanding/scuffing when appropriate, and thin layers. Your future self will high-five you.
Hack #1: Air-Dry Clay + Napkin Decoupage + Gold Edge (The “This Looks Expensive” Classic)
This is the viral-style trinket dish hack for a reason: it’s forgiving, customizable, and it screams “boutique gift shop” in the best way.
What you’ll need
- Air-dry clay
- Rolling pin (or a smooth bottle)
- A bowl to use as a mold (inverted)
- Pretty paper napkins (the fancy kind you “save” and never use)
- Decoupage glue/sealant (or Mod Podge-style product)
- Soft brush
- Metallic wax (or gold leaf, if you’re feeling brave)
- Optional: clear acrylic sealer spray for extra protection
Step-by-step
- Roll your clay to an even thickness (think: sturdy cookie). Too thin = fragile. Too thick = chunky coasters.
- Cut a shape (circle, scallop, blob-with-confidence). A slightly organic shape looks more “artisan” and less “math homework.”
- Form the dish over an inverted bowl. Smooth edges with a damp fingertip.
- Let it dry fully. Air-dry clay is not a microwave dinner. Give it time, flip it partway through drying to prevent warping.
- Decoupage the design: separate the printed napkin layer, brush a thin coat of decoupage medium onto the dish, lay the napkin gently, and smooth carefully (soft brush, light touch).
- Seal it: add 2–3 thin top coats, letting each coat dry before the next.
- Add the “Anthro edge”: rub a tiny bit of metallic wax along the rim (gloved finger or cotton swab), then buff gently for shine.
Pro tips that make it look store-bought
- Use thin layers of decoupage medium to avoid cloudy streaks.
- Embrace tiny wrinkles in napkinsmicro texture reads handmade and charming, not messy.
- Buff the metallic wax after it sets a bit. The shine is where the “ooh” lives.
Hack #2: Polymer Clay Dish (A.K.A. “I Want Crisp Edges and Real Durability”)
If you want a dish that feels sturdier than air-dry clay and gives you cleaner lines, polymer clay is the move. It bakes in a home oven (follow the brand instructions), and it’s great for sculpting tiny details: ridges, stamped words, or a little crescent moon that makes your nightstand feel like it reads poetry.
What you’ll need
- Polymer clay
- Oven-safe bowl or curved form
- Parchment paper or foil
- Acrylic paint (optional)
- Clear sealer (optional)
Step-by-step
- Condition the clay (knead it until it’s pliable). Yes, it’s like bread dough, but you can’t eat it. Probably.
- Roll and cut your shape. Use a template if you want symmetry, or freestyle if you want that “gallery shop” feel.
- Form over a bowl and smooth edges.
- Bake per package directions (temperature and timing matter). Let it cool completely before handling.
- Decorate: paint motifs, add a metallic rim, or embed texture (stamps, lace impressions).
Design ideas that read “Anthropologie-inspired”
- Minimal line art (eyes, hands, moons)
- Botanical stamps with a glossy topcoat
- Color-blocked edges with a metallic accent
- Personalized letters (but make them artsy, not “team jersey”)
Hack #3: The Thrifted Saucer Glow-Up (Fast, Cheap, Shockingly Chic)
This is for the people who love a good thrift store stroll and the thrill of turning a $1.99 saucer into a “designer catch-all.” The key is surface prep and thin coats. Glazed ceramics are slippery little liarsthey look paint-ready, but they’re not.
What you’ll need
- A small saucer, ramekin plate, or random dish with good bones
- Fine-grit sandpaper (or a sanding block)
- Cleaner/degreaser (dish soap works; rubbing alcohol is even better)
- Spray primer (optional, but helpful)
- Spray paint (matte, satin, or glossy)
- Clear protective coat
- Painters tape (if you’re doing patterns)
Step-by-step
- Scuff sand lightly to reduce shine and help adhesion. You’re not carving a canoejust roughing it up.
- Clean thoroughly and let it dry. Any grease = heartbreak.
- Prime (optional) if the surface is very glossy or if you want max durability.
- Spray in thin coats, keeping the can moving. Several light coats beat one thick coat every day of the week.
- Let it dry and cure according to the product label. “Dry to touch” is not “ready for keys and coins.”
- Seal it with a clear coat if you want extra protection, especially for metallic finishes.
Pattern ideas
- Half-dipped paint (classic, modern, easy)
- Thin stripe + gold rim (looks boutique)
- Speckle effect (use a stiff brush to flick paint lightly)
- Stencil motifs (tiny moons, florals, abstract shapes)
Hack #4: Decoupage on Ceramic or Glass (For Instant “Gift Shop” Prints)
If you want that illustrated, patterned look without being a professional painter, decoupage is your best friend. Paper napkins, scrapbook paper, wrapping paperif it’s pretty and thin enough, it can become your trinket dish “print.”
Quick method
- Clean the surface well (rubbing alcohol helps remove oils).
- Apply a thin coat of decoupage medium.
- Lay your paper gently and smooth from the center outward.
- Top coat 2–3 times, letting coats dry in between.
Reality check: even products marketed as “dishwasher safe” vary by surface, curing time, and how gently you treat the item. For a trinket dish that holds jewelry, you’ll get plenty of durability without pushing it into heavy-duty kitchen life.
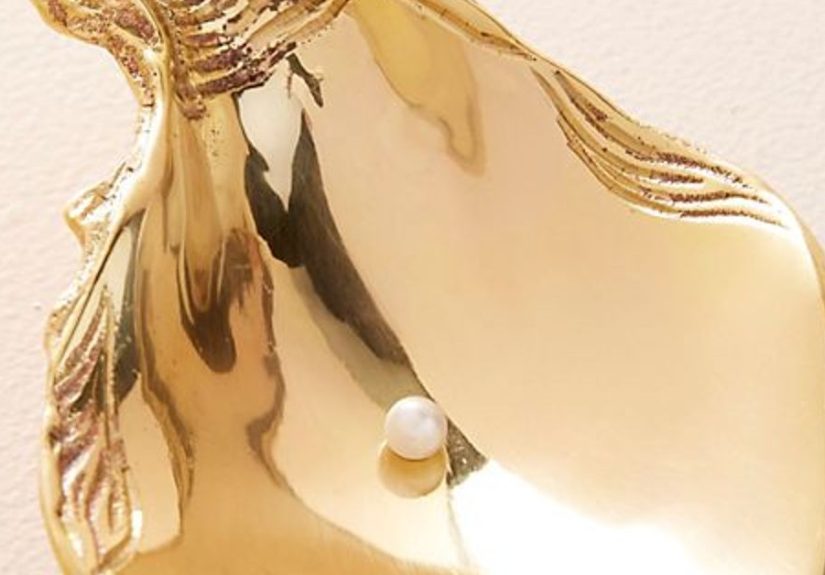
Hack #5: The “Brass + Marble” Moment (Luxury Look Without Luxury Money)
Some of the fanciest trinket dishes pair stone-like surfaces with metallic accents. You can mimic this look in a few ways:
- Metallic rim + faux marble center: paint a base coat, add subtle gray veining with a thin brush, then seal and rim with metallic wax.
- Marble contact paper insert: line the inside of a dish, then seal edges carefully and add a gold rim.
- Two-part look: glue a small “marble-look” tile or coaster onto a painted base (use strong adhesive and follow ventilation guidance).
This hack is especially good when you want something that looks like it belongs on a vanity next to perfume, not next to yesterday’s receipts.
Common Mistakes (So You Don’t Have to Learn the Hard Way)
“Why is my paper wrinkling?”
Too much glue at once. Use thin coats, and don’t over-brush once the napkin is down. Napkins are basically emotional support tissue: they’re delicate and will fall apart if you look at them too aggressively.
“Why is my paint scratching off?”
Glossy surfaces need scuffing and cleaning. Also: curing time matters. If you start using the dish too soon, it can feel dry but still be soft underneath.
“Why does my clear coat look cloudy?”
Humidity can do that, and so can heavy coats. Use light, even sprays and let each coat flash off before adding another.
“My gold edge looks messy.”
Less product, more buffing. Metallic wax looks best when it’s applied sparingly and polished. Think “subtle jewelry,” not “pirate treasure explosion.”
Styling Your Trinket Dish Like You Bought It on Purpose
- Entryway: keys + earbuds + one dramatic coin you found in the couch.
- Nightstand: rings, watch, lip balm, and that hair tie you swear you didn’t sleep in.
- Bathroom: bobby pins, tiny skincare tools, cotton rounds (if it’s big enough).
- Desk: paper clips, USB drive, “important” sticky notes you will ignore.
Gift idea: pair your dish with a mini candle, a cute keychain, or a handwritten note. Suddenly it’s not “a dish,” it’s “a thoughtful set.”
Mini Cost Breakdown (Because We Love a Budget Plot Twist)
- Air-dry clay dish: low cost, high charm, best for decorative use.
- Polymer clay dish: still affordable, more durable, crisp details.
- Thrifted saucer glow-up: cheapest base, fastest transformation, great for sets.
- Decoupage print look: best “boutique pattern” payoff with minimal painting skill.
The biggest expense is usually the extras (metallic wax, sealers, cute brushes). The good news: once you own them, you’ll suddenly “need” to upgrade everything that sits still long enough.
Real-World “Experiences” From the Trinket-Dish Life (Add-On Section)
If you’re extending this project into a true hobby (or you’re about to make five dishes because you accidentally entered your Craft Era), here are some real-world experiences you’re likely to run intothe good, the chaotic, and the “why is this sticky?” moments.
The first dish is always a pilot episode. You’ll do everything “right,” and then your napkin will wrinkle in one corner like it’s trying to communicate in Morse code. You’ll stare at it. You’ll consider starting over. Then you’ll seal it, step back, and realize it looks… charming. That’s the funny part about Anthropologie-inspired style: a little imperfection reads intentional, like “handmade European market find,” not “oops.”
Dry time becomes your personality. You’ll start saying sentences like, “I can’t go out tonight, my top coat needs another hour,” which is honestly a strong boundary and I respect it. Air-dry clay teaches patience the way houseplants doslowly, and with mild emotional consequences if you rush it. The dish might curl a little if one side dries faster, so you’ll learn to flip it and let air circulate. By dish number two, you’ll be casually rotating clay like a pro baker turning a cake.
You’ll discover your finish preference fast. Some people love matte, pottery-like softness. Others want glossy, candy-coated shine. The fun twist is that your taste can change depending on where the dish lives. A glossy finish looks amazing on a vanity beside perfume bottles, while a soft satin or matte finish can feel more modern on a desk. You might even make “siblings”: same pattern, different finisheslike a mini design collection you didn’t know you were launching.
Metallic edges will humble you once. The first time you apply a gold rim, you may go too heavy. The edge will look thick, or you’ll leave fingerprints, or you’ll realize metallic wax is basically glitter’s sophisticated cousin: it gets everywhere, quietly. Then you’ll learn the trickuse a tiny amount, apply in short sections, and buff gently. Once you nail it, you’ll want to gold-rim everything you own, including objects that have no business being gilded (remote controls, water bottles, your emotional support mug).
People will ask where you bought it, and you’ll feel powerful. This is the hidden benefit of a good hack. A trinket dish is small enough to be non-intimidating, but stylish enough to signal “I have my life together,” even if the dish is literally holding three mismatched earrings and a spare key you can’t remember. When someone compliments it, you get to say, “Oh, I made it,” and casually glow for the rest of the day.
Eventually you’ll start making them for memories. A napkin from a birthday party. A pattern that matches a friend’s wedding colors. A tiny stamped word (“breathe,” “keys,” “nope”). That’s when it stops being just a décor project and starts feeling like a small, meaningful ritualturning everyday clutter into something a little prettier and a lot more personal.
Final Thoughts
Hacking an Anthropologie-style trinket dish is one of those rare DIY wins where effort-to-impact is wildly in your favor. You’re turning small, everyday chaos into something charmingand honestly, that might be the most adult thing any of us can do.
Pick one method, keep your layers thin, let things cure properly, and don’t be afraid of a little handmade quirk. That’s not a flaw. That’s the vibe.