Table of Contents >> Show >> Hide
- What Is a Halloween Miniature Garden (and Why Is It So Addictive)?
- Planning Your Mini Scene: Pick a Theme That Makes You Smile
- Choosing the Right Container: The Stage Matters
- Plants That Work Beautifully in a Halloween Miniature Garden
- Materials Checklist: What You Need (and What You Can Totally Improvise)
- How to Make a Halloween Miniature Garden: Step-by-Step
- Step 1: Sketch a Quick Layout (30 Seconds, Not a Masterpiece)
- Step 2: Prep the Container for Healthy Roots
- Step 3: Add Soil and Create Tiny “Terrain”
- Step 4: Plant First, Decorate Second
- Step 5: Build the Hardscape (Paths, Patios, and Tiny Drama)
- Step 6: Add Halloween Décor Like You’re Directing a Movie
- Step 7: Light It Up (Safely)
- Design Tricks That Make It Look Pro (Even If You Built It in Pajamas)
- Care & Maintenance: Keeping Your Tiny Haunted World Alive
- Common Mistakes (and How to Avoid Them)
- Specific Example Builds You Can Copy
- Safety & Practical Notes (Because Spooky Shouldn’t Be Stressful)
- Experience Notes: Real-World Lessons From Making Halloween Miniature Gardens (Extra Long, Extra Honest)
- Conclusion: Your Tiny Haunted World Awaits
If you’ve ever looked at a regular-sized pumpkin and thought, “Cool, but what if it had a tiny front porch and a questionable mortgage rate?”welcome.
A Halloween miniature garden is the perfect mashup of container gardening, craft-night chaos, and spooky-season joy.
It’s part plant project, part tabletop set design, and part “why do I suddenly own nine miniature tombstones?”
The best part: you don’t need a big yard, a greenhouse, or a coven membership.
You can build a bewitching little scene on a porch, windowsill, desk, or coffee tableanywhere that could use a tiny haunted vibe and a lot more whimsy.
What Is a Halloween Miniature Garden (and Why Is It So Addictive)?
A Halloween miniature garden is a small, contained landscapeusually in a pot, tray, bowl, basket, birdbath, or terrariumdecorated with
miniature props and plants to tell a spooky (or silly) seasonal story.
Think “fairy garden,” but with a haunted twist: tiny pumpkins, little lanterns, itty-bitty fences, and a skeleton who looks like he’s had a long week.
It’s addictive because it hits three buttons at once:
- Creative storytelling: You’re building a scene, not just planting a pot.
- Low-commitment gardening: Small scale means fewer plants to water (and fewer regrets).
- Instant seasonal décor: It looks finished the moment the last mini pumpkin lands.
Bonus: it’s easy to refresh for the next holiday. Swap bats for turkeys, then turkeys for tiny snowmen, and you’ve got a year-round miniature universe.
Planning Your Mini Scene: Pick a Theme That Makes You Smile
Your theme is the “plot” of your garden. If you skip it, you’ll end up with a random assortment of spooky stuff that looks like a Halloween store exploded in a planter.
(No judgmentsome of us call that “maximalism.”)
Easy Halloween Miniature Garden Theme Ideas
- Haunted Pumpkin Patch: Mini pumpkins, vines, hay-like moss, a tiny wheelbarrow.
- Witch’s Cottage: A small house (or pumpkin house), mini broom, potion bottles (beads work!), and “spellbook” stones.
- Spooky Graveyard (Cute Edition): Little tombstones, black pebbles as “soil,” and a polite ghost.
- Trick-or-Treat Street: A path, a couple of houses, candy bucket accents, and tiny costumed figures.
- Monster Botanical Lab: Unusual plants (think spiky succulents), glass jars, and faux “specimen” labels.
Pro tip: choose one main character (witch, skeleton, ghost, black cat) and let everything else support the story.
Your garden should feel like a scenenot a crowd.
Choosing the Right Container: The Stage Matters
Your container is the set. The same props can look cozy in a shallow tray or dramatically haunted in a deep cauldron-style pot.
Best Container Options
- Shallow trays or dish gardens: Great for pathways, fences, and “town” layouts.
- Terracotta pots or bowls: Classic, breathable, and easy to drill if needed.
- Wood boxes or crates: Rustic “pumpkin patch” vibes (line with plastic if needed).
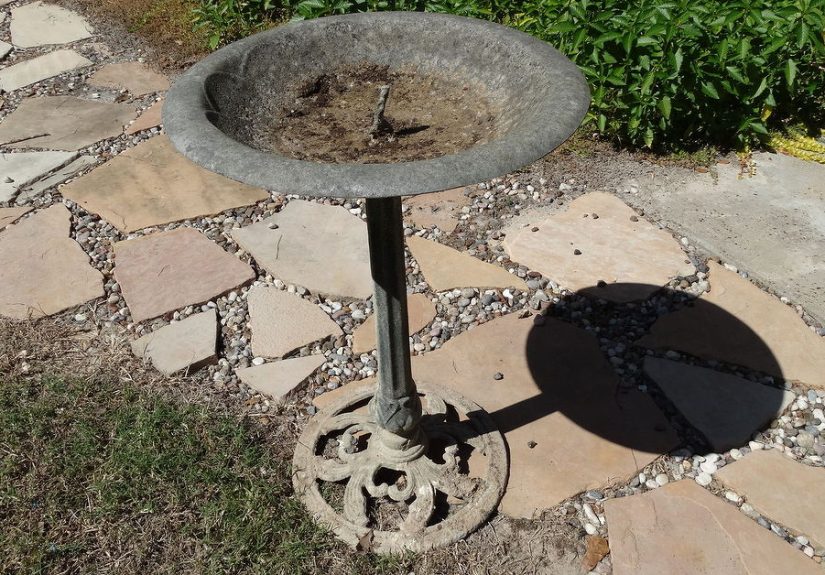
- Birdbath or wide planter: Perfect for porch displays and big, layered scenes.
- Glass terrarium or cloche: Best for indoor displaychoose plants that match the humidity level.
Drainage: The Not-Scary-But-Important Part
If your container has a drainage hole, use it. Your plants want waterjust not as a permanent roommate.
If you’re using glass (no drainage), you’ll need to water very lightly and build thoughtfully (more on that below).
Plants That Work Beautifully in a Halloween Miniature Garden
The best miniature garden plants have small leaves, compact growth, or a naturally “gnarly” texture that fits spooky season.
Choose plants based on light (indoors vs outdoors) and watering style (dry vs moist).
Great “Spooky-Cute” Plant Choices
- Succulents (bright light): Echeveria rosettes look like alien flowers; haworthia and aloe bring spiky drama.
- Moss (shade/indirect light): Perfect “forest floor” groundcover for haunted scenes.
- Mini ivy or creeping plants (outdoors/bright shade): Creates vines, paths, and overgrown graveyard energy.
- Small herbs (outdoors/sun): Thyme can be a tiny “lawn,” and it smells amazing.
- Color pops: Small coleus or polka-dot plant can add Halloween-friendly contrast (indoors with bright light).
Quick Plant Pairing Guide
- Sunny porch: Succulents + gravel + mini pumpkins + LED lights.
- Shady stoop: Moss + small-leaf groundcovers + twig “trees” + tombstones.
- Indoor desk: A dish garden with compact houseplants + dry-friendly décor + very controlled watering.
Keep plant height proportional to your figurines. If your skeleton is 2 inches tall and your plant is 14 inches tall, your “miniature garden” becomes a “lost tourist in a jungle” scene.
Materials Checklist: What You Need (and What You Can Totally Improvise)
Core Supplies
- Container (with drainage if possible)
- Potting mix (or cactus/succulent mix for dry-loving plants)
- Mini plants (2–6 depending on container size)
- Hardscape materials: small stones, gravel, sand, bark, twigs
- Mini décor: tiny pumpkins, fences, figures, signs
- Optional: LED tea lights or micro string lights (battery-powered)
Household “Freebie” Props That Look Shockingly Good
- Twigs: instant “dead trees.” Nature really understood the assignment.
- Wine cork slices: mini stepping stones or stump stools.
- Egg carton pieces: paint them graymini rock formations.
- Broken terracotta shards: terraces, retaining walls, and “ruins.”
- Beads + toothpicks: tiny signposts and lantern stakes.
How to Make a Halloween Miniature Garden: Step-by-Step
Here’s a reliable process that works whether you’re building a simple pumpkin patch or a full haunted village with zoning laws.
Step 1: Sketch a Quick Layout (30 Seconds, Not a Masterpiece)
Decide where your focal point goes first: a pumpkin house, a witch figure, a graveyard gate, or a big cluster of mini pumpkins.
Then plan a path or open space around it so the scene can “breathe.”
Step 2: Prep the Container for Healthy Roots
If your container has drainage: add potting mix right in. Skip the old “rocks at the bottom” mythgood drainage comes from a hole + the right soil texture, not a secret gravel basement.
If your container has no drainage (glass/terrarium): use a thin layer of pebbles at the bottom to create a place for extra water to collect, then add a small amount of horticultural charcoal (often recommended for odor control in closed setups).
Keep watering extremely lightthis is where people accidentally create a swamp monster origin story.
Step 3: Add Soil and Create Tiny “Terrain”
Add soil and shape it into gentle hills and dips. A little topography makes the scene look realistic and helps you place items at different heightsinstantly more “mini world,” less “stuff on dirt.”
Step 4: Plant First, Decorate Second
Place your plants while you can still move soil around easily. Keep taller plants toward the back and low growers in front.
If you’re using succulents, use a gritty mix so roots dry out faster.
Step 5: Build the Hardscape (Paths, Patios, and Tiny Drama)
- Paths: small gravel, flat pebbles, cork slices, or sand lines.
- Borders: twigs, mini fences, or small stones.
- “Mulch” texture: fine bark, dried moss, or leaf bits.
Step 6: Add Halloween Décor Like You’re Directing a Movie
Start with the big pieces (house, gate, main figure), then add supporting props (pumpkins, signs, broom).
Finish with tiny details: a mini candy bucket, a “keep out” sign, or a pebble “cauldron circle.”
Step 7: Light It Up (Safely)
Use battery LED tea lights or micro string lightsespecially indoors.
They give that haunted glow without the very un-fun side quest of “why is my miniature garden on fire?”
Design Tricks That Make It Look Pro (Even If You Built It in Pajamas)
Use the “Thriller, Filler, Spiller” IdeaBut Make It Spooky
- Thriller: one standout element (pumpkin house, witch, big lantern).
- Filler: medium plants and décor clusters (mini pumpkins, shrubs, stones).
- Spiller: trailing plant or a winding path that leads your eye through the scene.
Stick to a Tight Color Palette
Halloween doesn’t have to mean “every color known to mankind plus glitter.”
Try: black + orange + natural greens, or moody neutrals (gray stone + dark foliage) with one orange accent.
Scale Is Everything
Keep props in the same size “world.” If one chair is fairy-sized and the next is dollhouse-sized,
your miniature residents will need to file a complaint with the Department of Confusing Furniture.
Care & Maintenance: Keeping Your Tiny Haunted World Alive
Watering Rules (So You Don’t Summon Mold)
- Succulents: water deeply, then let soil dry well before watering again.
- Moss/woodland plants: keep lightly moist, not soggy; misting can help indoors.
- Terrariums: less water than you think; if it fogs up constantly, ventilate.
Light
- Bright window or sunny porch: succulents thrive.
- Indirect light or shade: moss and shade-tolerant mini plants do better.
Season Longevity Tips
Real mini pumpkins and gourds look amazing, but they don’t last foreverespecially in warm indoor air.
If you want your display to survive beyond Halloween night, mix in faux minis or swap real ones out as they age.
Common Mistakes (and How to Avoid Them)
- Overwatering: the #1 cause of miniature garden heartbreak. Start light; you can always add more.
- Too many props: leave negative space so the scene reads clearly. Your garden is not obligated to host every tiny object you own.
- Mismatched plants: don’t pair a drought-loving succulent with a moisture-loving fern unless you enjoy constant negotiation.
- No focal point: choose one star of the show so your eye knows where to land.
Specific Example Builds You Can Copy
Example 1: The “Haunted Pumpkin House” Porch Pot
Use a medium pot with drainage. Plant 2–3 succulents (rosette + spiky + trailing), top with gravel,
and place a carved faux pumpkin “house” in the center. Add a mini fence crescent around it and line a pebble path to a tiny “door.”
Finish with an LED tea light tucked behind the pumpkin for glow.
Example 2: The “Cute Graveyard” Shallow Tray
In a shallow tray, mound soil higher in the back. Plant moss or low groundcover, then set mini tombstones at angles (older graveyard = more character).
Add a twig “dead tree,” black pebbles as a path, and one tiny ghost near the gate like it’s waiting for friends to arrive.
Example 3: The “Witch’s Potion Garden” Indoor Bowl
Choose compact houseplants that tolerate indoor light (and a bowl with hidden drainage if possible).
Add tiny bottles (beads), a “potion label” sign, and a mini cauldron made from a small black cap.
Keep décor away from wet soil so labels don’t peel and turn into “mystery potion, probably fine.”
Safety & Practical Notes (Because Spooky Shouldn’t Be Stressful)
- Skip real flames indoors: use LEDs instead of candles.
- If kids/pets are around: avoid tiny pieces that could be swallowed and research plant toxicity before choosing varieties.
- Outdoor displays: secure lightweight props (wind is an unpaid special-effects intern).
- Weather: if freezing temps hit, move tender plants inside or treat the garden as a temporary décor piece.
Experience Notes: Real-World Lessons From Making Halloween Miniature Gardens (Extra Long, Extra Honest)
People who fall into the Halloween miniature garden hobby tend to share a few universal experienceslike discovering you can’t “just buy one tiny accessory,”
or learning that miniature pumpkins have a shorter lifespan than your Halloween candy.
If you’re building your first spooky mini scene, these practical lessons can save you time, money, and a surprising amount of emotional energy.
First, the layout always looks bigger in your head. You picture a charming haunted village with a path, a graveyard, a witch’s cottage,
and a pumpkin patch the size of a parking lot. Then you look at your 10-inch bowl and realize you’ve planned a metropolitan area for ants.
The fix is simple: pick one main scene (like a pumpkin house) and let the rest be supporting details.
A single mini fence and a handful of tiny pumpkins can suggest “pumpkin patch” without you needing to create an entire agricultural economy.
Second, scale consistency is the secret sauce. A lot of first-time mini gardeners buy pieces from different places and end up with
a chair that fits a Barbie, a tombstone for a LEGO person, and a witch who appears to be eight feet tall in this universe.
The easiest way to avoid this is to choose your “standard” early:
decide whether your figurines are about 2 inches tall, then buy accessories that match that approximate world.
When everything is scaled similarly, the garden instantly looks more believableeven if your story is “a ghost runs a bookstore.”
Third, watering is always the plot twist. Mini gardens feel like décor, so it’s easy to forget they’re living (or at least partly living).
The most common experience people report is going from “I’ll just mist it a little” to “why does my haunted forest smell like a swamp?”
If you’re using succulents, the biggest win is letting the soil dry properly.
If you’re using moss, the biggest win is keeping it lightly moist without saturating the whole container.
Many makers find it helps to water with a squeeze bottle or small spout so the water goes to the plant rootsnot onto your cardboard tombstones.
Fourth, real pumpkins are dramatic divas (and we love them anyway). They look incredible, they photograph beautifully,
and they make your miniature garden scream “Halloween!”but they also age faster indoors, especially near heat vents.
A common approach is a hybrid strategy: use one real mini pumpkin as the “hero” for a week or two, and mix in faux minis that can stay all season.
Then, if the real pumpkin starts looking tired, you swap it out like a celebrity changing outfits.
Nobody needs to know. Your garden remains glamorous.
Fifth, the details are where the joy lives. The most satisfying part of a Halloween miniature garden usually isn’t the big centerpieceit’s the tiny story beat:
a pebble “candy trail,” a mini sign that says “BOO,” a little black cat hiding behind a lantern, or a skeleton posed like it’s politely waiting for coffee.
People often discover that two or three small “character moments” make the scene feel alive.
It becomes less of a decoration and more of a tiny world you can keep noticing, even days after you built it.
Finally, most miniature gardeners learn that reusability is the real win. After Halloween, you can remove the spooky props,
keep the plants, and refresh the scene for fall or winter. Many people store décor in labeled bags:
“Halloween fences,” “tiny lanterns,” “mini pumpkins,” and (inevitably) “random tiny stuff I couldn’t categorize.”
Next year, setup is faster, cheaper, and even more funbecause you’re not starting from scratch, you’re building a tradition.
If your first Halloween miniature garden isn’t perfect, congratulationsyou’ve officially made it authentic.
Miniature gardens are meant to evolve. The plants grow, the props shift, and your story changes.
And honestly? A slightly messy haunted garden feels more realistic anyway. Even tiny witches have clutter.