Table of Contents >> Show >> Hide
- What Are Herringbone Highlights, Exactly?
- Why Herringbone Highlights Work So Well on Gray Hair
- Herringbone vs. Balayage vs. Babylights: What’s the Difference?
- Who Should Try Herringbone Highlights?
- What to Ask Your Colorist (So You Actually Get the Look)
- What the Appointment Usually Looks Like
- Maintenance: Keep the Blend Looking Fresh (Without Living at the Salon)
- Common Mistakes to Avoid (A.K.A. How Not to Turn Genius Into Chaos)
- Quick FAQ
- The Bottom Line
- of Experience: What Living With Herringbone Highlights Feels Like
- SEO Tags
Gray hair has officially entered its “main character” era. And no, you don’t need to fight it with a root touch-up every other Tuesday like it’s a recurring subscription you forgot to cancel.
If you want your grays to look intentional (not accidental), modern colorists have a smarter option: herringbone highlights.
This technique doesn’t try to erase silver strands. Instead, it designs around themblending cool and warm tones through strategic foil placement so your gray reads as part of the palette.
The result is dimensional, polished, and way more low-maintenance than traditional “cover it up” dye jobs.
What Are Herringbone Highlights, Exactly?
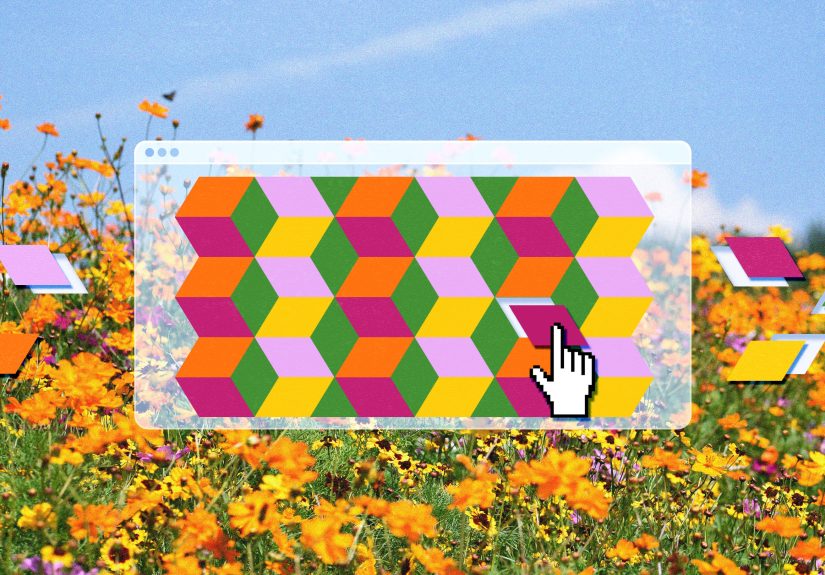
Herringbone highlights are a foil-based highlighting method where color is placed in a subtle, angled, interwoven patternkind of like the flooring style that looks expensive even when you’re wearing sweatpants.
Instead of uniform stripes, the highlights and lowlights are placed so they “cross-talk” visually, creating a blended, multi-tonal finish.
The magic is that the pattern can be customized to work with the way your gray naturally appearsscattered, streaky, concentrated at the hairline, or clustered around the part.
Your gray becomes a built-in highlight shade, not a problem to patch over.
Why Herringbone Highlights Work So Well on Gray Hair
1) They turn gray into a feature, not a flaw
Traditional gray coverage often relies on one base shade at the root. That can create a harsh line as new growth comes inlike a demarcation line your hair draws to announce,
“Hello, I have appointments and opinions.”
Herringbone highlights avoid that by using multiple tones that weave around your natural grays so the grow-out looks softer and more “lived-in.”
2) The multi-tonal effect creates an optical blend
Gray hair can contrast strongly against darker bases, especially in early stages when you’re at 10–30% gray.
Herringbone placement mixes brighter ribbons with deeper lowlights, so the eye reads the overall color as a cohesive blend.
Translation: the gray doesn’t “pop” as starkly because it’s part of a bigger, dimensional picture.
3) Foils give precisionespecially near the roots
Gray typically shows first at the temples, hairline, and part. A foil-based technique allows more control near these areas than many freehand methods.
That precision helps your colorist place brightness exactly where it will blur gray most effectivelywithout accidentally turning your whole head into a highlighter pen.
4) Regrowth is more forgiving, so you can stretch appointments
Because the result isn’t a single flat shade, regrowth blends more naturally. Many people find they can go longer between salon visits compared to all-over permanent color.
If your goal is lower upkeep (and fewer emergency “can you squeeze me in?” texts), this technique is a strong contender.
5) It works across hair colorsand across stages of going gray
Herringbone highlights can be adapted for blondes, brunettes, and redheads. It also scales well whether you’re just starting to gray or you’re well into a silver transition.
The key is choosing tones that match your base and your gray’s temperature (cool, neutral, or warm).
Herringbone vs. Balayage vs. Babylights: What’s the Difference?
These techniques can all look natural, but they’re not interchangeableespecially when gray blending is the goal.
- Herringbone highlights: Foil-based, angled/interwoven placement, intentionally multi-tonal, designed to incorporate natural gray into the final look.
- Balayage: Freehand painting for a sun-kissed gradient, often lighter mid-lengths and ends; can be gorgeous, but may need extra planning if your gray is concentrated at the roots.
- Babylights / mini-lights: Very fine highlights that mimic natural brightness; excellent for subtle gray blending, especially at early gray stages.
- Single-process coverage: One shade applied all over (or at the root); best for full coverage, but often the highest upkeep with the most obvious grow-out line.
If your #1 priority is making gray look intentional at the root, herringbone-style foil placement shines.
If your gray is mostly mid-length or you want a softer “vacation hair” effect, balayage may still workbut it’s a different strategy.
Who Should Try Herringbone Highlights?
This technique is especially smart if you relate to any of the following:
- You’re seeing gray at the hairline/part and want it softened, not erased.
- You want to transition to gray gradually without an awkward grow-out phase.
- You’re tired of frequent root touch-ups and want a lower-maintenance plan.
- You like dimensionyour hair looks better with contrast than with a single flat color.
- You want “expensive-looking hair” without the “expensive-looking upkeep.”
One note: if you’re aiming for full, uniform coverage (no visible gray), herringbone highlights may not be your endgame.
But if you want your gray blended beautifullythis is exactly the point.
What to Ask Your Colorist (So You Actually Get the Look)
A good request is clear, specific, and tells your colorist what you want your gray to do: blend.
Here’s a helpful script you can steal:
“I want to incorporate my natural grays into my highlights rather than fully covering them.
I’m looking for a multi-tonal blend with soft regrowthsomething like a herringbone foil pattern with a mix of warm and cool tones.”
Bring these details to your consultation
- Your gray percentage: Rough estimate (10%, 30%, 50%+) helps plan placement.
- Your natural base level: Dark brown, medium blonde, etc.this affects lift and toning.
- Your tone preference: Cool/ashy, neutral, or warm/honey.
- Your maintenance tolerance: “Every 6 weeks” vs. “See you seasonally.” Be honest.
- Your hair history: Prior color, box dye, keratin treatments, bleachthis matters for results.
Pro tip: if you’ve been doing all-over permanent color, ask about a softer root-blending step (often called a root smudge/root melt)
so the transition from root to highlights looks seamless.
What the Appointment Usually Looks Like
Every salon and head of hair is different, but herringbone highlights often include:
- Consultation: Your gray pattern, your base, and your tone goals get mapped out.
- Sectioning + foil placement: The angled, interwoven pattern is created with fine sections for dimension.
- Lift (if needed): Lightener may be used strategically, depending on how much contrast is required.
- Toning: Crucial for gray blendingtone controls warmth, brass, and the “silver vs. yellow” vibe.
- Gloss (optional but beloved): Adds shine and refines tone for a “glassier” finish.
Expect this to take time. Gray blending is detail workmore like tailoring than painting a wall.
But the payoff is that the grow-out tends to look better for longer.
Maintenance: Keep the Blend Looking Fresh (Without Living at the Salon)
Use toning products intelligently
Gray and lightened hair can pick up yellowing from sun exposure, heat styling, hard water, and product buildup.
A purple (or violet-toning) shampoo can help neutralize brassinessbut more isn’t always better.
Overuse can make hair look dull or slightly lavender, which is cute if you’re aiming for “mystical witch,” less cute if you’re aiming for “polished professional.”
Moisture is non-negotiable
Gray hair can feel drier and more wiry than pigmented strands. Add lightening to the mix and hydration becomes your best friend.
Rotate in a deep conditioner or mask, and consider a leave-in conditioner if your ends feel rough.
Protect from heat and UV
Heat can roughen the cuticle and contribute to dullness. UV can shift tone warmer.
If you use hot tools, keep temperatures reasonable and use a protectant. If you spend time outdoors, consider hair products that support color longevity.
Plan “maintenance moments” instead of constant touch-ups
Instead of chasing roots, many people maintain herringbone highlights with occasional toning/glossing appointments and (if needed) a root-blending refresh.
This keeps the overall look intentional without restarting the whole process every few weeks.
Common Mistakes to Avoid (A.K.A. How Not to Turn Genius Into Chaos)
Mistake: Going too high-contrast too fast
If you’re a brunette with scattered gray, jumping straight to super bright highlights can create a stripey look.
Better: build dimension gradually with a mix of tones, then adjust brightness over time.
Mistake: Ignoring undertone
Gray hair often reads cool, but your base might be warm, or your skin might glow with golden tones.
A balanced mix of warm and cool shades often looks most naturalthis is where herringbone placement excels.
Mistake: DIY bleaching around grays
Lightening hair at home can lead to uneven lift, hot roots, and breakageespecially when gray and previously colored hair are involved.
If you want a blended, expensive-looking finish, professional placement is the shortcut (yes, the irony is noted).
Mistake: Over-toning
Too much toning pigment can flatten dimension. The goal is clarity and polish, not “one-note gray.”
Use toning products as a tune-up, not a lifestyle.
Quick FAQ
Do herringbone highlights cover gray hair?
They don’t aim to fully cover gray like permanent root color does. They blend gray into an overall highlight design so it looks intentional and softer.
Are they low maintenance?
Compared to frequent root touch-ups, yesbecause regrowth is less harsh. You’ll still want good at-home care and occasional toning or glossing.
Will this work if I’m mostly gray?
It can, but the strategy may shift. When hair is predominantly gray or white, some people add lowlights or reverse highlights for dimension instead of focusing on lift.
A colorist can tailor the plan based on your hair’s porosity and your end goal (silver-forward vs. blended).
The Bottom Line
Herringbone highlights are genius because they solve the real gray-hair dilemma: not “How do I hide it?” but “How do I make it look great?”
By weaving complementary tones through a smart foil pattern, this method blends grays into a dimensional look with softer grow-out and less upkeep.
It’s not about pretending you don’t have grayit’s about styling it like you meant to.
of Experience: What Living With Herringbone Highlights Feels Like
Here’s the part most people don’t hear until they’re already in the salon chair: the best “gray-blending” color isn’t just about how it looks on day oneit’s about how it behaves on day forty-one,
when you’re squinting in the mirror like, “Wait… is that new growth or just excellent lighting?”
Week 1: You notice the dimension immediately. Gray strands around the hairline stop screaming for attention and start acting like they belong in the blend.
The overall effect often feels brighter, but not “bleached.” More like your natural color got a promotion.
People may comment that your hair looks “healthy” or “expensive”which is flattering, because you did not buy it a tiny handbag.
Week 2–3: This is the sweet spot where your color starts looking even more natural. The initial “freshly done” contrast softens a little,
and the interwoven tones settle into that effortless look people try to fake with filters.
If you use toning products, you’ll start learning your personal threshold: too little and things warm up; too much and you risk looking muted.
Many people land on a once-a-week toning routine, adjusting based on season, water quality, and how often they heat style.
Week 4–6: This is where herringbone really earns its reputation. Instead of a blunt root line, you get a gradual shiftmore like a soft shadow than a harsh border.
Grays can continue to come in (because they will, and they do not care about your calendar), but they don’t disrupt the look as dramatically as they would with a single-process root color.
If you’re a brunette with 20–40% gray, this is often when you realize the blend makes the gray look less “patchy” and more like it’s part of a deliberate, dimensional design.
Real-world scenario #1: Someone with medium brown hair and grays concentrated at the temples gets herringbone highlights with subtle brightness around the face and soft lowlights through the mid-lengths.
The result: the hairline grays don’t stand alone; they merge into the highlight pattern. Maintenance becomes about tone and shine, not frantic root coverage.
Real-world scenario #2: Someone with naturally dark hair and a strong salt-and-pepper pattern chooses a more muted blendless lift, more strategic lowlights and a root-blurring step.
Their grays look intentional, their base stays rich, and the grow-out looks calm instead of chaotic.
The most satisfying part? You stop thinking of gray as an emergency. You start treating it like a design elementbecause, with the right placement, it is.