Table of Contents >> Show >> Hide
- What “Adding an RSS Feed” to Blogger Usually Means
- Why an RSS Feed Still Matters
- Before You Start: Know the Main Feed Types
- How to Add an RSS Feed to a Blogger Blog: 12 Steps
- Step 1: Sign In to Blogger and Choose the Correct Blog
- Step 2: Open the Settings Panel
- Step 3: Turn On “Allow Blog Feed”
- Step 4: Choose the Best Feed Format Strategy
- Step 5: Save Your Feed Settings
- Step 6: Copy Your Main RSS Feed URL
- Step 7: Test the Feed Before You Display It
- Step 8: Add a Visible Subscribe Link to Your Blog
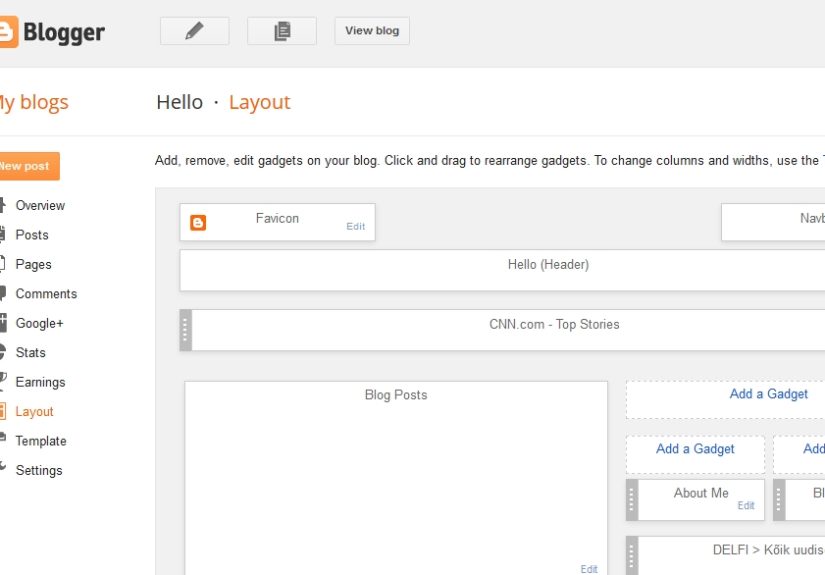
- Step 9: Add a Feed Gadget if You Want Feed Content Displayed
- Step 10: Customize the Gadget Title and Placement
- Step 11: Use a Feed Redirect If You Need a Third-Party Service
- Step 12: Validate, Troubleshoot, and Clean Up
- Common Mistakes to Avoid
- Best Practices for a Blogger RSS Feed
- Final Thoughts
- Experience and Practical Lessons From Doing This in Real Life
If you run a Blogger blog, adding an RSS feed is one of those small jobs that quietly does a lot of heavy lifting. It helps readers subscribe, lets apps and email tools pull in new posts, and makes your content easier to distribute without forcing visitors to refresh your homepage like it’s 2009. The funny part? Blogger already does a lot of the hard work for you. The trick is knowing where the feed lives, how to enable the right settings, and how to place it on your blog so humans can actually find it.
That’s where this guide comes in. Below, you’ll learn exactly how to add an RSS feed to a Blogger blog in 12 practical steps, along with common mistakes, feed URL examples, and real-world tips that save time. We’ll keep the tech jargon on a short leash and focus on what actually works.
What “Adding an RSS Feed” to Blogger Usually Means
When people say they want to add an RSS feed to Blogger, they usually mean one of three things:
- Enable Blogger’s built-in blog feed so other tools and readers can access it.
- Add a visible subscribe option on the blog so readers can follow updates.
- Display a feed in the sidebar or layout using a gadget.
In other words, this job is part settings, part visibility, and part cleanup. Blogger already supports feeds, but a feed nobody can find is like baking a pie and hiding it in the attic. Technically impressive. Strategically questionable.
Why an RSS Feed Still Matters
RSS may not be flashy, but it is still useful. It gives your Blogger blog a clean stream of updates that can be read by feed readers, pulled into automation tools, or used in email workflows. It also helps people follow your posts without depending on social media algorithms, which are about as predictable as a cat on espresso.
For bloggers, an RSS feed can support content syndication, subscriber growth, and distribution workflows. It is also handy if you want to create a label-specific feed for a niche topic, share comments, or connect your blog to another platform that watches feeds for new content.
Before You Start: Know the Main Feed Types
Blogger can support more than one kind of feed. Knowing which one you need keeps you from pasting the wrong URL into a widget and then blaming your laptop.
- Main blog RSS feed: Best for sharing all posts from the blog.
- Label feed: Best for showing posts from one category or topic.
- Comments feed: Useful if you want a comments subscription or moderation workflow.
- Redirected feed: Used when you want Blogger to point to a third-party feed service.
The most common Blogger RSS feed format is:
https://yourblog.blogspot.com/feeds/posts/default?alt=rss
If you use a custom domain, the same structure usually applies:
https://www.yourdomain.com/feeds/posts/default?alt=rss
How to Add an RSS Feed to a Blogger Blog: 12 Steps
Step 1: Sign In to Blogger and Choose the Correct Blog
Log in to your Blogger dashboard and select the blog you want to update. This sounds obvious, but if you manage more than one blog, it is surprisingly easy to edit the wrong one and then wonder why your recipe blog suddenly has tech widgets on it.
Take a second to confirm the blog title and URL before changing anything.
Step 2: Open the Settings Panel
In the left-hand menu, click Settings. Scroll until you reach the Site feed area. This is where Blogger handles feed visibility and feed redirection.
This section is the control room for your feed setup. If your blog feed is turned off here, the rest of the process becomes a dramatic performance with no actual result.
Step 3: Turn On “Allow Blog Feed”
Under Allow blog feed, choose the level of content you want to share. Your usual options include:
- Full – shows the full post content in the feed.
- Until Jump Break – shows only the content before the jump break.
- Short – shows a brief excerpt.
- Custom – gives more advanced control.
- None – disables the feed.
If your goal is maximum convenience for readers and tools, Full is the simplest choice. If your goal is to drive clicks back to the site, Until Jump Break or Short can make more sense.
Step 4: Choose the Best Feed Format Strategy
Blogger publishes both Atom and RSS-style feed URLs, but many users specifically want RSS because third-party tools often ask for it by name. In Blogger, the most practical RSS version is the feed URL with ?alt=rss at the end.
That means the safe, official-looking URL to remember is:
https://yourblog.blogspot.com/feeds/posts/default?alt=rss
This is the version you’ll most likely paste into readers, widgets, automation tools, or email platforms.
Step 5: Save Your Feed Settings
After choosing your feed visibility, click Save. Do not skip this. Blogger is friendly, but it is not psychic.
At this point, your blog feed should be available as long as the blog is public and the URL is correct.
Step 6: Copy Your Main RSS Feed URL
Now build or copy your feed URL. Replace the sample domain with your actual blog address.
https://yourblog.blogspot.com/feeds/posts/default?alt=rss
If you use labels and want a category-specific feed, the structure looks like this:
https://yourblog.blogspot.com/feeds/posts/default/-/Travel?alt=rss
Replace Travel with the exact label you want to use. This is especially helpful if your blog covers multiple topics and you want readers to subscribe only to a specific niche.
Step 7: Test the Feed Before You Display It
Paste the RSS URL into your browser. If it loads structured feed content or XML-style output, that’s a good sign. You can also test it in a feed validator or an RSS reader to confirm the feed works properly.
Why bother? Because one typo in the URL can turn your carefully planned feed launch into a blank page and a long afternoon. Testing now is much cheaper than troubleshooting later.
Step 8: Add a Visible Subscribe Link to Your Blog
A working RSS feed is great, but readers need a way to find it. One easy option is to add a visible text link in your sidebar, header, or footer.
Go to Layout, click Add a Gadget, and choose a simple gadget such as HTML/JavaScript or a text-friendly widget area. Then add a short call to action, such as:
- Subscribe via RSS
- Follow New Posts
- Get Blog Updates
Link that text to your RSS feed URL. Keep the wording plain. Nobody wakes up thinking, “I hope I find a wildly cryptic syndication portal today.”
Step 9: Add a Feed Gadget if You Want Feed Content Displayed
If you want your blog to display feed items in the layout, not just link to them, go to Layout, click Add a Gadget, and select the Feed gadget.
Then paste in the feed URL. You can use:
- Your own RSS feed, to highlight recent posts in a different area.
- A label-specific feed, to show one topic stream.
- An external RSS feed, if you are curating updates from another source.
This is useful if you want a compact “Latest Posts” area without editing theme code by hand.
Step 10: Customize the Gadget Title and Placement
Once the feed gadget is added, edit the title so it fits your brand. “Latest Posts” is clean. “Freshly Baked Blog Goodness” is charming, assuming your audience appreciates baked metaphors.
Place the gadget somewhere readers will actually notice it. Sidebars, upper footer areas, and homepage sections usually work well. If the feed widget is buried under twenty badges, three counters, and a motivational quote from 2014, it won’t do much.
Step 11: Use a Feed Redirect If You Need a Third-Party Service
If you use another feed service, you can redirect Blogger’s feed under Post feed redirect URL in the Site feed settings. This is helpful when an external service is handling analytics, distribution, or a customized feed experience.
Just paste the feed service’s URL into the redirect field and save. This tells Blogger to point feed requests to that destination instead of serving only the default path.
Only do this if you have a clear reason. If you just want a normal Blogger RSS feed, the built-in URL is usually enough.
Step 12: Validate, Troubleshoot, and Clean Up
Now do one final pass:
- Make sure the blog is public, not private.
- Confirm Allow blog feed is not set to None.
- Use the correct RSS URL ending in
?alt=rss. - Check that your gadget or link points to the exact feed you tested.
- Validate the feed if a tool says the XML looks strange.
- Make sure your blog and feed are loading over HTTPS consistently.
If everything checks out, congratulations. Your Blogger RSS feed is no longer hiding in the shadows like a secret menu item.
Common Mistakes to Avoid
Using the Wrong Feed URL
The biggest mistake is grabbing a random feed path from an old tutorial. Blogger’s standard RSS path is the safe choice. Stick with /feeds/posts/default?alt=rss unless you have a specific reason to use another format.
Forgetting Feed Visibility Settings
If your feed is disabled in settings, no amount of gadget rearranging will save you. Always check Allow blog feed first.
Confusing RSS with Email Subscription
RSS is a feed format, not an inbox service by itself. It can power email tools, but it does not automatically send newsletters unless another platform is connected.
Making the Feed Hard to Find
You may technically have a feed, but if the subscribe link is tucked behind vague wording or hidden at the bottom of the page, fewer readers will use it. Make it visible and obvious.
Best Practices for a Blogger RSS Feed
- Use descriptive calls to action such as “Subscribe via RSS.”
- Pick the right feed length for your business goal: full content or teaser.
- Create label-specific feeds for focused topic streams.
- Test feeds after major theme or domain changes.
- Keep sidebar feed widgets tidy and easy to scan.
- Validate the feed if a service refuses to accept it.
If your blog supports a broader content strategy, RSS can also feed automation tools, content curation systems, and email campaigns. That makes it more than a tiny orange icon from internet history. It becomes a practical distribution channel.
Final Thoughts
Adding an RSS feed to a Blogger blog is easier than it sounds once you know where Blogger keeps the controls. In most cases, you are not building a feed from scratch. You are enabling it, choosing how much content it shares, copying the correct RSS URL, and making it visible with a gadget or subscribe link.
The smartest approach is simple: turn on the feed, test the official RSS path, add a clear subscribe option, and validate it if needed. That gives your blog a cleaner publishing workflow and makes it easier for readers and tools to keep up with your content.
And honestly, that’s a pretty good return for one small settings panel and a few clicks.
Experience and Practical Lessons From Doing This in Real Life
Here’s the part most quick tutorials skip: adding an RSS feed to Blogger is usually easy, but getting it to work well takes a little practical thinking. In real-world use, the most common problem is not technical failure. It is mismatch. Bloggers often want one thing, set up another, and only notice later when readers or tools behave differently than expected.
For example, many people say they want to “add RSS” when what they actually want is a visible subscribe button. Others want their latest posts displayed in the sidebar, which means a feed gadget. Some want to connect Blogger to an email platform or automation tool, which means the feed URL matters more than the widget. That is why the first win is simply identifying the real goal before touching the settings.
Another common experience is choosing the wrong feed length. Full feeds feel generous and reader-friendly, especially for loyal followers who use feed readers. But excerpt feeds can make more sense if your strategy depends on visitors clicking through to your site for the full article, ads, or internal links. There is no universal answer. The best choice depends on whether you care more about convenience, traffic, or distribution.
Theme layout is another sneaky issue. A feed can be perfectly active and still perform badly because the subscribe option is hidden in a neglected sidebar zone. I’ve seen blogs with beautiful content and a working RSS setup that practically whispers, “Please don’t notice me.” If you want subscribers, the invitation has to be obvious. A simple “Subscribe via RSS” link in the upper sidebar often works better than something clever but confusing.
Testing also saves a lot of frustration. When a feed is copied into a browser, validator, or RSS reader before it is added to a widget, mistakes become obvious fast. Maybe the label name is slightly wrong. Maybe the blog is private. Maybe the feed redirect points to an outdated service. These are tiny issues, but they can waste a shocking amount of time if you skip the test step and assume everything is fine.
One more practical lesson: keep your expectations realistic. RSS is powerful, but it is quiet technology. It will not magically grow traffic by itself. What it does do is make your Blogger content easier to distribute, easier to subscribe to, and easier to connect with other platforms. That matters more than it gets credit for.
So if you add an RSS feed to Blogger and nothing feels dramatically different right away, that is normal. Behind the scenes, though, you have made your blog more accessible, more flexible, and more future-friendly. For a tool that has been around forever, RSS still knows how to do its job without demanding applause.