Table of Contents >> Show >> Hide
- What Makes a Great Display Shelf (Spoiler: Not Just “Wood on a Wall”)
- Measurements That Actually Work in Real Homes
- Materials and Tools
- Step-by-Step: Build a Picture Ledge Display Shelf
- Mount It Like You Mean It: Installing the Shelf Securely
- Upgrade Options: Make It More “You”
- Styling a Display Shelf So It Looks Intentional
- Troubleshooting: Common Shelf Problems (and Fixes)
- Real-World Experience: What You Learn After Building a Few Shelves (500+ Words)
- Conclusion
A home display shelf is basically a stage for the things you love: framed photos, little plants, travel souvenirs,
and that weird ceramic object your friend swore was “very modern.” The goal is simple: make your stuff look
intentional (instead of like it’s waiting for a yard sale).
In this guide, you’ll build a sturdy, good-looking DIY home display shelf that works in living rooms,
bedrooms, kitchens, bathrooms, or hallways. It’s beginner-friendly, doesn’t require fancy joinery, and offers a clean
“gallery ledge” look that keeps frames from sliding off the moment someone breathes near them.
Safety note: If you’re using power tools, wear eye protection, take your time, and follow the tool’s
instructions. If you’re under 18, build with a supervising adultbecause shelves are fun, and emergency rooms are not.
What Makes a Great Display Shelf (Spoiler: Not Just “Wood on a Wall”)
Start with the shelf’s job
Before you cut anything, decide what the shelf is supposed to hold. A display shelf for lightweight frames and small
decor can be slimmer and sleeker than a shelf meant for a row of heavy art books. This matters because the load
determines the mounting style (studs vs. anchors), shelf thickness, and whether you’ll need brackets.
- Light display: photos, small plants, candles, tiny sculptures
- Medium display: a few books, larger frames, small speakers
- Heavy display: lots of books, big ceramics, anything you’d describe as “solid”
Pick a style that matches your walls and your patience
Display shelves usually fall into a few categories:
- Picture ledge (gallery shelf): shallow with a front lip. Great for frames and easy rearranging.
- Bracketed shelf: visible brackets support the weight. Easiest for heavy loads and imperfect walls.
- Floating shelf: hidden hardware for a “magic shelf” look. Clean, modern… and less forgiving if your wall is wonky.
- French cleat shelf system: super strong and modular. Excellent if you like swapping things around.
This tutorial focuses on a picture ledge display shelf because it’s practical, stylish, and forgiving.
You’ll also get options to “level up” to floating or bracketed variations.
Measurements That Actually Work in Real Homes
A display shelf should feel proportional to the wall and the items you’ll show off. Here are sizes that tend to work well
for most rooms (and most decor collections):
- Length: 24–60 inches (48 inches is a sweet spot for most walls)
- Depth: 3–6 inches for picture ledges (enough for frames without eating the room)
- Back height: 2.5–4 inches (helps keep frames stable)
- Front lip height: 1–2 inches (keeps frames from slipping)
Example build in this guide: 48 inches long, about 4 inches deep, with a 1.5-inch front lip.
It’s roomy enough for layered frames and small objects, but still sleek.
Materials and Tools
Materials
- Wood: 1×4 for the back, 1×3 for the base, 1×2 for the front lip (select pine is budget-friendly; poplar paints nicely)
- Wood glue
- Finish nails (or trim screws if you prefer)
- Sandpaper (120 and 220 grit)
- Paint + primer or stain + clear coat
- Wall screws (length depends on your shelf and wall; aim for stud attachment whenever possible)
- Optional: wood filler, edge banding (if using plywood), caulk (for a built-in look)
Tools
- Measuring tape, pencil, and a level
- Stud finder (highly recommended)
- Miter saw or circular saw (a store can often cut lumber for you)
- Drill/driver and drill bits
- Clamps (helpful, not mandatory)
- Brad nailer (optional, but makes life easier)
No stud finder? You can still locate studs using common clues like outlet placement and fastener lines, but a stud finder
is quicker and tends to create fewer “mystery holes” in your drywall.
Step-by-Step: Build a Picture Ledge Display Shelf
Step 1: Plan your cut list
Decide your shelf length. In our example, we’re building a 48-inch shelf.
Cut these pieces to the same length:
- Back board: 1×4 (48″)
- Base: 1×3 (48″)
- Front lip: 1×2 (48″)
Want a more “finished furniture” look? Add a thin top trim (like a 1×2 or lattice strip) along the back board.
It’s purely optional, but it can make the shelf look custom.
Step 2: Dry fit before glue (future-you will be grateful)
Lay your pieces on a flat surface to confirm how they’ll assemble:
the base sits perpendicular to the back board, forming an L-shape, and the front lip sits on the outer edge of the base.
This creates a shallow tray that supports frames.
Step 3: Assemble the L-shape (back + base)
- Apply a thin, even bead of wood glue along the long edge of the base board.
- Press it against the back board at a 90-degree angle (use a carpenter’s square if you have one).
- Clamp if possible. Then fasten with finish nails or trim screws spaced evenly along the length.
- Wipe off glue squeeze-out with a damp rag before it dries into a permanent “oops.”
Step 4: Add the front lip
- Apply wood glue to the bottom edge of the front lip.
- Set it on the front edge of the base so it stands upright.
- Clamp and fasten with nails/screws. Keep the top edge straightyour frames will thank you.
Tip: If you plan to display larger frames, a slightly taller lip (closer to 2 inches) can prevent tipping.
If you want a minimalist look, keep it closer to 1 inch.
Step 5: Fill, sand, and make it feel “store-bought”
Fill nail holes with wood filler. Once dry, sand all surfaces smooth:
start with 120 grit to knock down roughness, then finish with 220 grit for a paint-ready (or stain-ready) surface.
Lightly soften sharp edges so the shelf looks refined and doesn’t snag sleeves.
Step 6: Finish it (paint, stain, or clear coat)
Choose your vibe:
- Paint: prime first for a smoother, more durable finish. A satin or semi-gloss is easy to wipe clean.
- Stain: pre-condition softwoods (like pine) if you want more even color, then seal with a clear topcoat.
- Clear coat only: great if you used a pretty hardwood or high-quality poplar and want a natural look.
For a shelf that’ll be touched a lot (hallway shelves get bumped, it’s their job), a protective topcoat helps. Water-based
clear coats stay more color-neutral, while oil-based options can add warmth and tend to be tougherbut take longer to dry
and can amber over time.
Mount It Like You Mean It: Installing the Shelf Securely
Step 1: Choose height and spacing
If you’re hanging one shelf, chest height often looks balanced. For multiple shelves, plan consistent spacing so your wall
looks curated, not chaotic. Use painter’s tape to mark a “visual outline” on the wall before drilling anything.
Step 2: Find studs (best practice for strong shelves)
Stud attachment is the gold standard for wall shelves. Use a stud finder and mark stud centers. Many homes have studs
spaced about 16 inches apart (sometimes 24), but don’t guessverify. Walls love surprises.
Step 3: Pre-drill and level
- Hold the shelf against the wall at your desired height.
- Use a level on the shelf base (or along the top edge) and adjust until perfectly level.
- Mark screw locations through the back board where you’ll hit studs.
- Remove the shelf and pre-drill pilot holes in the shelf back board.
Step 4: Screw it into studs
Put the shelf back on the wall, align it with your marks, and drive screws through the back board into studs.
Use at least two screws into studs for a longer shelf when possible.
What if you can’t hit studs?
For very light decor, heavy-duty wall anchors can workbut this is where people get overly confident, then hear a crash at
2:00 a.m. If you must use anchors, choose ones rated for your wall type and load, spread the load with multiple fasteners,
and keep the shelf’s contents lightweight. When in doubt, use brackets or a backer board secured to studs.
Pro move: If your studs don’t line up with your ideal shelf location, mount a painted backer board to studs first,
then attach the shelf to the backer. It’s a clean workaround that boosts strength.
Upgrade Options: Make It More “You”
Option A: Make it look floating (without the floating shelf drama)
You can hide fasteners by countersinking screws, filling holes, and painting. From a few feet away, it reads as “floating”
without requiring specialized hardware.
Option B: Go full floating shelf with hidden supports
If you want a true floating look, use a concealed bracket system designed for floating shelves. These typically mount into
studs and slide into drilled holes in the shelf. The result is sleek, modern, and very satisfyingif your measuring is precise.
Option C: Add decorative brackets for heavier loads
For books or heavier decor, brackets are your friend. They’re easier to install level, they handle imperfect walls better,
and they can become a design feature (modern metal, carved wood corbels, minimalist trianglesyou get the idea).
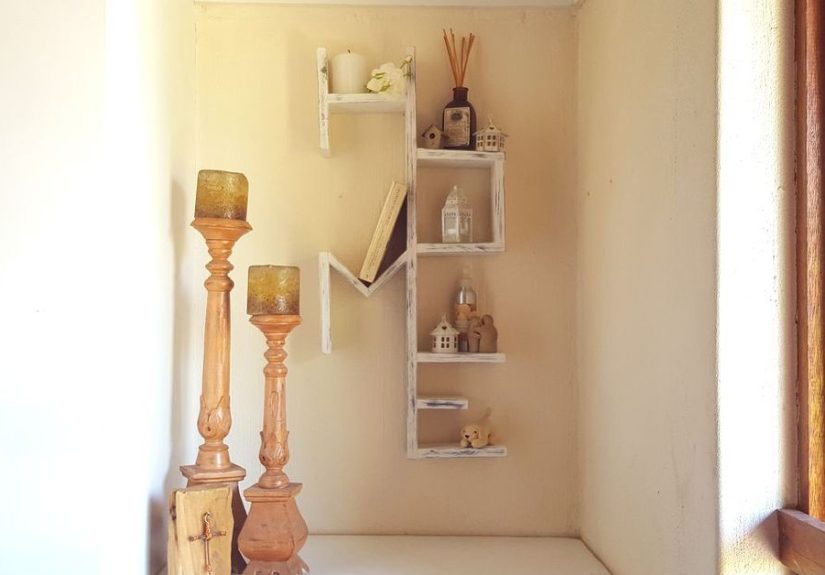
Styling a Display Shelf So It Looks Intentional
A display shelf is only half carpentry. The other half is “how do I make this look good without buying 17 matching vases?”
Try these practical styling moves:
- Layer frames: place larger frames in back, smaller in front.
- Use odd numbers: groups of 3 often look more natural than pairs.
- Mix heights: combine tall (vase), medium (frame), and small (object) so the lineup isn’t flat.
- Leave breathing room: empty space is not a failure; it’s design.
- Add one living thing: even a small plant makes the shelf feel less “museum of random objects.”
If you’re in a high-traffic spot, consider using non-damaging stability solutions for lightweight items (like grippy shelf liner),
and keep fragile pieces away from edges where elbows roam free.
Troubleshooting: Common Shelf Problems (and Fixes)
“My shelf isn’t level, but my level says it is.”
Some walls aren’t perfectly flat. If your shelf looks off, trust your eyes and double-check measurement points. A tiny shim
behind the shelf back can correct minor wall irregularities.
“It wobbles when I touch it.”
This usually means the shelf isn’t fastened securely into studs, the fasteners aren’t snug, or your anchors aren’t appropriate
for the load. Tighten fasteners, add additional screws, or switch to a stronger mounting strategy (like a backer board or brackets).
“The wood looks blotchy after staining.”
Softwoods can absorb stain unevenly. Sand consistently, remove dust thoroughly, and consider a wood conditioner before staining.
Testing on an offcut first saves heartbreak.
“My frames keep sliding.”
Increase the lip height slightly, add a thin strip of shelf liner, or reduce the shelf’s tilt by verifying the base is level.
Small adjustments make a big difference.
Real-World Experience: What You Learn After Building a Few Shelves (500+ Words)
If you’ve never built a shelf before, here’s the honest truth: the woodworking part is usually easier than the wall part.
Cutting and assembling a picture ledge is straightforwardmeasure, cut, glue, fasten, sand, finish. Then you walk over to the
wall with your confidence and your level… and the wall quietly reminds you it has its own personality.
One of the most common “first shelf surprises” is that studs are rarely exactly where you want them. You’ll pick the
perfect visual spotcentered between two windows, aligned with a light switch, directly over a console tablethen your stud finder
will beep somewhere that feels deeply unhelpful. This is why experienced DIYers plan shelf length with stud spacing in mind, or they
use a backer board solution. It’s not cheating; it’s adapting. Homes are not ruled notebooks.
Another lesson: walls aren’t always straight. You can build a shelf that’s perfectly square on your work surface and still
see tiny gaps when it hits the wall. Drywall can bow. Corners can be slightly out of true. Paint can build up in ridges. So when your
shelf meets the wall and there’s a hairline gap, don’t panic and assume you’ve failed woodworking forever. This is where small shims,
caulk (for painted shelves), or simply repositioning fasteners can create a crisp finished look.
Then there’s the “level” situation. You will eventually meet a wall where something level looks slightly off because the ceiling line,
floor line, or nearby trim is not perfectly level. This is the moment you discover the ancient DIY principle: make it look level.
In most display situations, your eye is the final judge. If the shelf looks correct relative to the space, you’ve won.
On the build side, people often underestimate how much difference sanding makes. A shelf can be structurally solid and still look a
little “garage project” if the edges are sharp, the filler isn’t smooth, or the finish highlights rough grain. The fix is rarely complicated:
sand a bit more, wipe dust thoroughly, and do a calm second coat. That’s where the “custom” look appears.
You’ll also learn that display shelves encourage clutter the way cookies encourage “just one more.” At first, you’ll style it
with restraint: two frames, a candle, a tiny plant. A week later, the shelf has evolved into a miniature museum of: keys, unopened mail,
three coins from 2017, a charger that belongs to nothing, and a souvenir that’s “temporary” but has lived there for months. The best cure is
building with intention: keep the shelf narrow enough to discourage piles, and style it with a few anchor pieces that make it obvious when
clutter is creeping in.
Finally, the most practical experience-based tip: build for how you actually live. If your home is busykids, pets, roommates,
clumsy adults carrying laundry baskets like they’re doing an obstacle courseuse stronger mounting choices and keep fragile items away from
edges. A display shelf should make your room feel better, not create a daily game of “Will that vase survive today?”
When you build your own shelf, you don’t just get storageyou get control. You pick the size, the finish, the placement, the style. And every
time someone says, “Where did you get that shelf?” you get to casually respond, “Oh, I made it,” which is one of the most satisfying sentences
in the DIY language.
Conclusion
Building a DIY home display shelf is one of those projects that delivers fast wins: it’s practical, it upgrades your space,
and it gives your favorite items a proper home. With a simple picture ledge design, careful measuring, and solid mounting (preferably into studs),
you’ll end up with a shelf that looks polished and stays put. Finish it to match your room, style it with intention, and enjoy having a space that
makes everyday life look a little more “designed.”