Table of Contents >> Show >> Hide
- Why Build a Trellis (Besides Looking Like a Garden Wizard)?
- Plan First: Match the Trellis to the Plant and the Place
- Pick Your Trellis Style
- Materials and Tools
- Build a Simple Freestanding Wood Panel Trellis (Step-by-Step)
- Build an A-Frame Trellis (Cattle Panel or Welded Wire)
- Build a Wall-Mounted Wire Trellis (Modern and Minimal)
- Train Plants Like a Pro (Without Overthinking It)
- Common Mistakes (And How to Avoid a Mid-Season Trellis Collapse)
- Maintenance and Longevity Tips
- Conclusion: Build Once, Grow Up (Literally)
- Extra: Real-World Trellis Experiences and Lessons (500-ish Words of “What People Actually Learn”)
A trellis is basically a climbing plant’s best friend: part ladder, part personal trainer, part “please don’t sprawl across my entire garden” negotiator. Whether you’re growing cucumbers, pole beans, sweet peas, clematis, or a grapevine that’s convinced it’s auditioning for an action movie, the right trellis makes plants healthier, harvesting easier, and your yard look like you have your life together (even if you ate cereal for dinner).
This guide walks you through planning, choosing materials, and building three practical trellis styles: a classic freestanding wood panel, a super-sturdy A-frame for vegetables, and a clean wall-mounted wire trellis for vines. You’ll also get installation tips, common mistakes to avoid, and a longer “lessons learned” section at the endbecause real gardens don’t read the instructions.
Why Build a Trellis (Besides Looking Like a Garden Wizard)?
A good trellis does more than hold plants up. It improves airflow so leaves dry faster after rain or watering, which can reduce disease pressure. It also keeps fruit off the soil (fewer blemishes and pests), makes harvesting faster (no treasure hunt under a jungle), and helps you use space efficiently, especially in raised beds or small yards.
The not-so-secret bonus: vertical growth is easier on your back. Instead of crawling around like you dropped a contact lens in a zucchini patch, you can stand, clip, twist, and harvest at eye levellike a civilized human.
Plan First: Match the Trellis to the Plant and the Place
Step 1: Know what you’re supporting
Not all climbers behave the same. Some are light and twine gently (sweet peas, morning glories). Others are enthusiastic gymnasts with heavy produce (cucumbers, pole beans, squash, melons, grapes). The heavier the crop, the stronger the trellis and anchors need to be.
Step 2: Choose a sensible height and access
For many vining vegetables, a trellis around 5–6 feet tall is a sweet spot: tall enough to encourage upward growth, short enough to harvest without needing a step ladder and a motivational speech. If you’re building for grapes or a permanent ornamental vine, go sturdier and plan for years of growth.
Also consider access. If your trellis uses mesh that’s too tight, you’ll struggle to reach through for harvest. A more open grid (often around a few inches per opening) generally makes picking easier and reduces the “I can see the cucumber but I can’t reach the cucumber” tragedy.
Step 3: Put it in the right spot
Place tall trellised crops where they won’t shade shorter plants all day. In many gardens, that means positioning trellises on the north side of beds (or at least where the shadow falls away from sun-loving neighbors). If you’re mounting a trellis to a wall or fence, pick a spot that gets the light your plant needsand make sure the structure won’t trap moisture against siding.
Pick Your Trellis Style
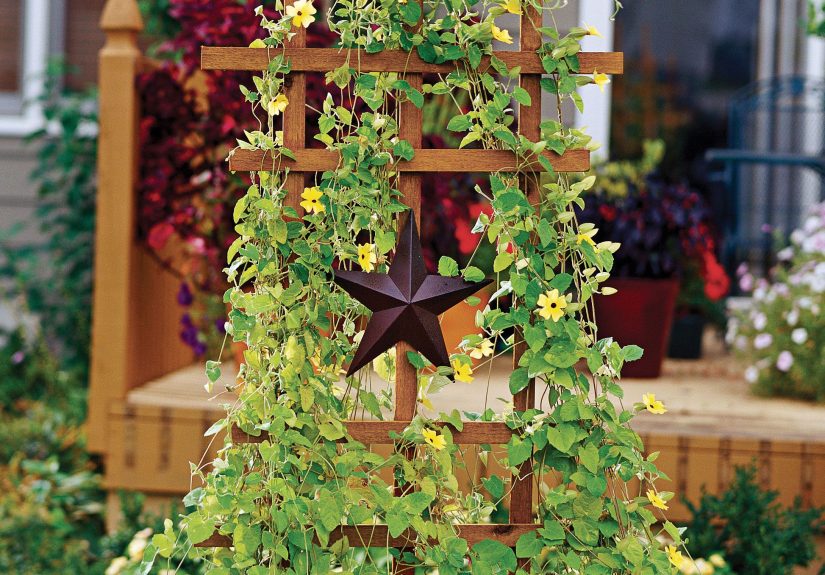
1) Freestanding wood panel trellis (classic and versatile)
Best for: peas, beans, cucumbers, flowering vines, and “I want it to look nice” situations. This is the go-to DIY garden trellis because it’s simple to build, easy to customize, and can be installed in-ground or behind a raised bed.
2) A-frame cattle panel or welded-wire trellis (the heavy lifter)
Best for: cucumbers, squash, climbing melons (with support slings), and anyone who wants a trellis that laughs at wind. The A-frame shape is naturally stable, and the metal grid is strong and harvest-friendly.
3) Wall-mounted wire trellis (clean, modern, great for vines)
Best for: clematis, jasmine, climbing roses (trained carefully), and decorative vines along fences or walls. This style uses tensioned wire anchored with eye bolts and turnbuckles, creating a tidy pattern that plants can climb without bulky lattice.
Materials and Tools
Materials (choose based on style)
- Wood: cedar or redwood for natural rot resistance, or pressure-treated lumber for ground contact (use appropriate fasteners).
- Grid material: exterior lattice, welded wire panel, cattle panel, or trellis netting rated for outdoor use.
- Fasteners: exterior-grade screws (coated or stainless), galvanized staples or fencing staples (for wire), washers as needed.
- Anchors: stakes, post bases, or concrete (optional) depending on soil and wind.
- For wire trellis: stainless/galvanized wire rope, eye bolts, wall anchors, turnbuckles, and cable clamps/sleeves.
Tools
- Measuring tape, pencil, square
- Saw (miter saw, circular saw, or handsaw)
- Drill/driver and bits
- Level
- Staple gun or fencing staple hammer (for wire)
- Post hole digger or digging bar (for in-ground posts)
- Wire cutters and gloves (for cattle panel/welded wire)
- Safety glasses (your eyeballs will thank you)
Build a Simple Freestanding Wood Panel Trellis (Step-by-Step)
This is a sturdy “panel” style trellis: a rectangular wooden frame with either lattice or wire attached inside. You can size it for a raised bed, a row, or a decorative spot in the yard.
Recommended dimensions (easy, practical)
- Height: 5–6 feet above soil (add extra length if you’re burying legs or setting posts).
- Width: 3–4 feet for a single panel, or longer if you’re building multiple panels in a row.
- Grid openings: open enough to reach through for harvest, especially for vegetables.
Step 1: Cut your frame pieces
For a simple 6-foot-tall by 3-foot-wide panel, you’ll typically cut two verticals and two horizontals. Use thicker stock if you’re supporting heavier crops. If you’re using lattice, plan for a small overlap inside the frame.
Step 2: Assemble the rectangular frame
Lay pieces flat on a level surface. Check for square (measure corner-to-corner diagonals; matching diagonals means square). Pre-drill to prevent splitting, then drive exterior screws. For extra strength, add wood glue at joints (optional but helpful for longevity).
Step 3: Add a brace (the “don’t wobble” upgrade)
If your trellis will face wind or carry heavy vines, add a diagonal brace across the back of the frame or use corner brackets. This reduces racking (side-to-side sway), which is the silent enemy of DIY projects.
Step 4: Attach the climbing surface
Choose lattice for a polished look or welded wire for maximum strength. Center it inside the frame, then fasten:
- Lattice: screw it to the frame with exterior screws and washers (washers help prevent cracking).
- Wire panel: staple it with galvanized fencing staples or screw it down with fender washers.
- Netting: staple or tie it securely, but use netting mainly for lighter crops.
Step 5: Seal or finish (optional, but smart)
Cedar can be left unfinished, but it will weather to a silvery gray. If you prefer a consistent look or want longer life, use an exterior stain/sealant. Avoid coatings that aren’t rated for outdoor exposure.
Step 6: Install it securely
For a lightweight decorative vine, you may stake the panel with metal stakes or short posts. For vegetable production (where vines get heavy fast), set sturdy supports. A common approach is to attach the panel to posts driven about 2 feet into the ground. If your soil is sandy, your wind is strong, or your plants are ambitious, go deeper or add concrete for stability.
Build an A-Frame Trellis (Cattle Panel or Welded Wire)
If you want strength without complicated carpentry, the A-frame trellis is your best “weekend warrior” build. The basic idea: create a tent shape over a bed or row, then let plants climb both sides.
Option A: Folded welded wire (fastest build)
- Measure your bed: cut a piece of stiff welded wire long enough to fold into an A-frame and still stand tall.
- Wear gloves: wire edges can be sharp and have zero respect for your fingers.
- Fold lengthwise: bend the panel into a tent shape. Use body weight, a board, or clamps to help crease it.
- Anchor it: stake both sides into the ground or attach to wood rails so it doesn’t shift.
- Plant at the base: place seedlings at the bottom edge and train upward as vines grow.
Option B: Cattle panel A-frame (maximum strength)
Cattle panels are beefy (pun intended). Use two panels hinged at the top, or one panel arched and supported by posts. Secure the structure with zip ties, wire, or bolts at the top seam, and stake the bottom edges. This setup is especially great for cucumbersfruit hangs down, harvest is easy, and you’ll feel like you hacked gardening.
Pro tip: Support heavy fruit
If you’re growing melons or squash vertically, use slings (old T-shirts, mesh produce bags, soft cloth) to cradle fruit so the vine isn’t carrying the full load. Think of it as a tiny hammock for your cantaloupe.
Build a Wall-Mounted Wire Trellis (Modern and Minimal)
Wire trellises look clean, cost less than large wood structures, and work beautifully for flowering vines. The key is tension: you’re building a strong “web” that plants can grab while staying slightly off the wall for airflow.
Step 1: Map your pattern
Use painter’s tape to sketch a grid or diamond pattern on the wall. Keep wires several inches away from delicate siding or use spacers so vines don’t trap moisture against the surface.
Step 2: Install anchors and eye bolts
Find studs if possible. If not, use heavy-duty wall anchors rated for exterior use. Install eye bolts where wires will start/turn/finish. Use washers if needed to keep hardware stable.
Step 3: Run wire and add turnbuckles
Thread wire rope through eye bolts, crimp or clamp ends securely, then tighten with turnbuckles. You want it tautnot “guitar string tight,” but firm enough that it won’t sag when vines grow.
Step 4: Plant and train
Plant climbers a short distance from the wall so roots have room, then gently guide new growth to the wires. Use soft ties (garden tape, jute, fabric strips) to avoid damaging stems.
Train Plants Like a Pro (Without Overthinking It)
Most vines want to climb; your job is mostly directing traffic. Check plants every few days and gently weave tips through openings or tie them loosely. Avoid tight knotsstems thicken quickly.
- Weave, don’t wrestle: guide growth early; it’s easier than fixing a vine that chose chaos.
- Harvest access matters: if fruit forms behind tight mesh, you’ll regret it later.
- Mind the wind: in exposed areas, add extra ties so vines don’t whip around and snap.
Common Mistakes (And How to Avoid a Mid-Season Trellis Collapse)
Mistake 1: Building for “today” instead of “August”
A cucumber plant in June weighs almost nothing. A cucumber plant in Augustafter rain, full of fruit, and determined to conquer the neighborhoodcan put serious stress on your structure. Build sturdier than you think you need.
Mistake 2: Skipping real anchors
Stakes pushed a few inches into loose soil are basically decorative suggestions. If you want a reliable trellis, drive posts deep, brace corners, or use strong attachment points. Stability is everything.
Mistake 3: Using indoor hardware outdoors
Regular screws and cheap hardware rust fast outside, especially in humid climates. Use exterior-rated fasteners (coated, galvanized, or stainless) so your trellis doesn’t become a crunchy orange mess.
Mistake 4: Forgetting harvest and pruning space
Your trellis should make gardening easier, not turn it into an escape room. Leave access paths, keep openings reachable, and consider where you’ll stand when harvesting.
Maintenance and Longevity Tips
- Check fasteners annually: tighten loose screws, replace rusted hardware, and re-staple wire where needed.
- Protect wood: reapply stain/sealant as recommended for your climate and product.
- Winter care: in harsh winters, remove netting and store it; brush soil off wood legs to reduce rot.
- Rotate stress points: if you use removable panels, rotate them so the same joints aren’t always bearing the heaviest vines.
Conclusion: Build Once, Grow Up (Literally)
Building a trellis is one of the highest-return DIY garden projects you can tackle: the materials are straightforward, the designs are forgiving, and the payoff lasts all season. Start by matching the trellis to your plant’s weight and climbing style, then choose a build that fits your spacewood panel for versatility, A-frame for strength, or wire for a clean wall look.
And remember: the goal isn’t perfection. The goal is a structure that stays upright, keeps vines off the ground, and makes harvesting feel less like a scavenger hunt and more like the satisfying “look what I grew” moment it should be.
Extra: Real-World Trellis Experiences and Lessons (500-ish Words of “What People Actually Learn”)
Here’s the part no cut list can teach you: a trellis is less like furniture and more like a relationship. It looks simple at first, then it reveals feelingsusually during a storm, or the exact week your cucumbers decide to produce 47 pounds of fruit overnight.
One of the most common “aha” moments is realizing that vines gain weight fast, and not just from fruit. After a good rain, leaves hold water, stems swell, and everything becomes heavier and more wind-resistant at the same time. That’s why a trellis that seemed rock-solid in May can start shimmying in July. The fix is almost always the same: deeper anchors, better bracing, and fewer “it’ll probably be fine” assumptions.
Another lesson: mesh size matters more than people expect. Tight netting can seem like a great ideauntil you try to reach through to harvest a cucumber that grew behind the grid like it’s hiding from its responsibilities. A more open wire panel is often easier for hands, pruners, and sanity. When in doubt, think like Future You, holding a basket and trying to pick quickly.
Gardeners also discover that training vines early is the difference between “neatly climbing” and “I woke up and it colonized the tomatoes.” A quick weave-through every few days is easier than yanking and untangling later. It’s the same logic as brushing your teeth: a little routine prevents a lot of drama. Soft ties help, especially in windy sites, but most vines do well if you guide them while they’re still flexible.
For heavy fruit, the sling trick feels goofy until it saves the day. Hanging melons and squash can snap stems under their own weight, particularly late in the season. The first time someone cradles a cantaloupe in an old T-shirt tied to a panel, they usually laughthen they usually do it again next year because it works. The sling also prevents ripe fruit from dropping and bruising on the way down, which is nature’s version of “you snooze, you lose.”
On the decorative side, wall-mounted wire trellises teach a different set of lessons. Tension is everything. Too loose and wires sag; too tight and you can stress anchors or damage siding. The sweet spot is “firm enough to guide growth” with room for seasonal changes. People also learn to keep a little separation from the wall, because vines pressed flat against a surface can trap moisture and invite problems.
Finally, almost everyone learns that a trellis is never “done.” It’s adjusted. Maybe you add a brace after the first windy day. Maybe you upgrade to stainless fasteners after your screws start rusting like they’re auditioning for a pirate movie. Maybe you move the whole thing two feet next season because you didn’t account for shade. That’s normal. Trellises evolve, and so does your garden. The win is building something sturdy enough to adaptso your plants can climb, your harvest can be easy, and you can spend more time enjoying the garden than rescuing it.