Table of Contents >> Show >> Hide
- Before You Build: A Quick (Important) Reality Check
- Design Goal: “Hutch + Run” Beats “Box”
- Tools and Materials
- How to Build an Outdoor Rabbit Cage: 10 Steps
- Step 1: Decide the Right Size (Bigger Than You Think)
- Step 2: Pick a Safe Location (Shade, Drainage, Calm)
- Step 3: Choose a Predator-Proof Layout (Layered Security)
- Step 4: Build the Frame Like a Small Deck (Square, Level, Braced)
- Step 5: Create a Dig-Proof Floor Plan (Comfort + Security)
- Step 6: Install Wire Panels (Use the Right Mesh, Attach It Like You Mean It)
- Step 7: Build the Weatherproof Hutch Compartment (Dry, Draft-Protected, Ventilated)
- Step 8: Add a Roof That Actually Works (Overhang + Drainage)
- Step 9: Install Doors and Locks (Because Raccoons Exist)
- Step 10: Set Up the Inside for Comfort, Enrichment, and Cleaning
- Maintenance Checklist (Non-Negotiable Stuff)
- Wrap-Up + Real-World Lessons (The 500-Word “Wish I Knew” Section)
Building an outdoor rabbit cage (a.k.a. an outdoor rabbit hutch + run combo) sounds like a wholesome weekend DIY project.
And it can beif you build it like you’re housing a tiny, fluffy celebrity who has both paparazzi and predators trying
to get in. Because outdoors is where weather, parasites, neighborhood dogs, raccoons with suspiciously nimble hands, and
heat waves all hang out… together… like a terrible sitcom.
This guide walks you through a practical, humane build that prioritizes airflow, shade, sanitation, and predator-proofing.
It’s written for pet rabbits, not commercial productionand it assumes you want something sturdy, cleanable, and sized for real
rabbit behavior (hopping, stretching, digging, and flopping dramatically as if life is simply too much).
Before You Build: A Quick (Important) Reality Check
Many rabbit welfare organizations discourage full-time outdoor housing because rabbits are vulnerable to predators,
extreme temperatures, and diseases carried by insects and wildlife. If you’re building an outdoor setup, the safest use is
often as a daytime exercise run with supervision, plus bringing your rabbit indoors (especially at night,
during storms, or during temperature extremes).
That said, if you’re committed to an outdoor enclosure, your job is to reduce risk as much as possible:
predator resistance, shade, ventilation without drafts, dry bedding,
and easy daily checks. This article is built around those priorities.
Design Goal: “Hutch + Run” Beats “Box”
The best outdoor setup usually has two connected zones:
- A weatherproof hutch (the secure sleeping/shelter area)
- An attached run (space for exercise, exploring, and general bunny mischief)
This combo gives rabbits choice: hide when they’re nervous, stretch out when they’re confident, and move between the two.
It also lets you build security in layersbecause “one latch” is never enough when raccoons live nearby and treat puzzles as a lifestyle.
Tools and Materials
Tools
- Measuring tape, carpenter’s square, pencil
- Circular saw or miter saw (or a handsaw if you’re feeling historically accurate)
- Drill/driver with bits
- Staple gun (heavy-duty) and/or fencing staples
- Tin snips (for cutting wire mesh)
- Wire cutters, pliers
- Level
- Safety gear: gloves, eye protection, dust mask
Materials (recommended)
- Lumber: 2x4s (frame), 1x2s (trim), exterior-grade plywood (for hutch walls)
- Wire: welded wire mesh / hardware cloth (avoid chicken wire for predator protection)
- Fasteners: exterior screws, washers, heavy-duty staples
- Roofing: corrugated metal or polycarbonate panel + roofing screws
- Hardware: heavy hinges, two-step latches, carabiners or padlocks
- Weatherproofing: exterior sealant/paint for outside surfaces, flashing tape for roof edges
- Flooring options: pavers, removable tray, or dig-proof apron (hardware cloth skirt)
Rabbit-safety note: Rabbits chew. Assume they will taste-test anything reachable. Avoid letting rabbits chew
pressure-treated lumber, adhesives, foam insulation, or peeling paint. If you use treated wood for exterior structural strength,
keep it fully out of reach (or sealed and shielded behind chew-proof trim).
How to Build an Outdoor Rabbit Cage: 10 Steps
Step 1: Decide the Right Size (Bigger Than You Think)
Size is welfare. A rabbit that can’t take a few consecutive hops is basically living in a storage bin with opinions.
As a baseline, plan for:
- Hutch (shelter zone): big enough to stretch out fully, turn around, and sit upright comfortably.
- Run (exercise zone): long enough for at least 3–4 hops in a straight line.
A practical DIY target for 1–2 medium rabbits is often something like a 4 ft x 2 ft sheltered hutch attached to a
6–8 ft long run (or larger). If you have large breeds, go biggerand consider a walk-in run so cleaning and health checks
are actually realistic (because you will not enjoy crawling on your knees with a scoop while your rabbit judges you).
Step 2: Pick a Safe Location (Shade, Drainage, Calm)
Put the enclosure where it stays dry, shaded, and well-ventilated. Avoid spots that:
flood, bake in full sun, or sit in constant wind tunnels. Ideal placement is:
- Morning sun, afternoon shade (or consistent shade)
- Good drainage (slight slope is helpful)
- Near your house for easy monitoring
- Protected from sprinklers and roof runoff
In hot weather, shade is not optional. Rabbits can overheat quickly, so plan for shade and airflow from the start.
Step 3: Choose a Predator-Proof Layout (Layered Security)
Your design should assume predators will:
pull, push, chew, dig, and figure out basic latches.
A robust layout includes:
- Raised hutch (reduces dampness, improves airflow, helps deter some pests)
- Enclosed “hide” compartment inside the hutch (a dark, secure resting area)
- Run fully enclosed on sides and top (hawks and climbing predators exist)
- Dig-proof barrier around or under the run perimeter
If you’re thinking “My yard is fenced, so it’s fine,” that’s adorable. Predators climb fences.
And some can open latches.
Step 4: Build the Frame Like a Small Deck (Square, Level, Braced)
Build a rectangular base frame from 2x4s. Make sure it’s square (measure diagonalsif they match, you’re golden).
Add cross-bracing so the enclosure doesn’t rack (twist) over time.
If you’re raising the hutch section, add sturdy legs and braces. For windy areas, consider anchoring the structure to
ground stakes or a patio pad.
Step 5: Create a Dig-Proof Floor Plan (Comfort + Security)
You have three common approaches, and each has tradeoffs:
- Option A: Solid floor (easy to predator-proof)
Use plywood + a removable tray or washable liner in the hutch. For the run, you can use pavers or a framed base with
a removable floor. Downside: less natural digging/foraging unless you add a dig box. - Option B: Natural ground in the run (best enrichment)
Great for grazing and diggingif you install a dig barrier: bury hardware cloth or build an outward “apron/skirt”
around the perimeter so rabbits (and predators) can’t tunnel under. - Option C: Wire floor (common, but needs foot support)
Wire floors can be sanitary, but they can contribute to sore feet in some rabbits. If you use wire, provide a solid
resting platform (wooden board or mat) so rabbits can get off the wire.
For most pet owners, the sweet spot is often: solid, dry hutch floor + natural-ground run with a
properly installed hardware cloth apron.
Step 6: Install Wire Panels (Use the Right Mesh, Attach It Like You Mean It)
For outdoor rabbit cage walls and run panels, use welded wire mesh / hardware cloth, not lightweight chicken wire.
Chicken wire can keep rabbits in, but it’s not reliable as predator armor.
Attachment matters as much as the wire:
- Use screws with washers (or fencing staples) at frequent intervals
- Sandwich wire edges between wood strips (“trim clamping”) for extra strength
- Make sure no sharp cut ends are accessible inside
Also: fully cover the top of the run. A “roofless run” is basically a takeout box for hawks.
Step 7: Build the Weatherproof Hutch Compartment (Dry, Draft-Protected, Ventilated)
The hutch is your rabbit’s shelter zone. Build it like a tiny shed:
- Walls: exterior-grade plywood (sealed on the outside), or solid boards
- Ventilation: high vents under the roofline (covered with mesh) so air flows without creating a ground-level draft
- Access: a big door for cleaning and quick health checks
- Interior: a hide box or partitioned “quiet” section for security
Keep it dry. Damp bedding is a fast track to odors, flies, and unhappy rabbits.
Step 8: Add a Roof That Actually Works (Overhang + Drainage)
Install a sloped roof with a decent overhang to keep rain from blowing in. Corrugated metal or polycarbonate roofing is popular because
it sheds water well. Add drip edges if possible, and seal roof screw holes.
In hot climates, consider a double-roof effect:
a reflective top panel with a small air gap beneath can reduce heat buildup. At minimum, ensure the enclosure has shade during peak sun.
Step 9: Install Doors and Locks (Because Raccoons Exist)
Your doors should be:
strong, square, and easy to open with one hand (because the other hand will be holding hay, a bowl,
or a rabbit that has decided your sleeve is a hammock).
Locking best practices:
- Use a two-step latch (latch + carabiner or latch + padlock)
- Avoid simple hook-and-eye closures for outdoor enclosures
- Make sure doors can’t be pried open from the edge
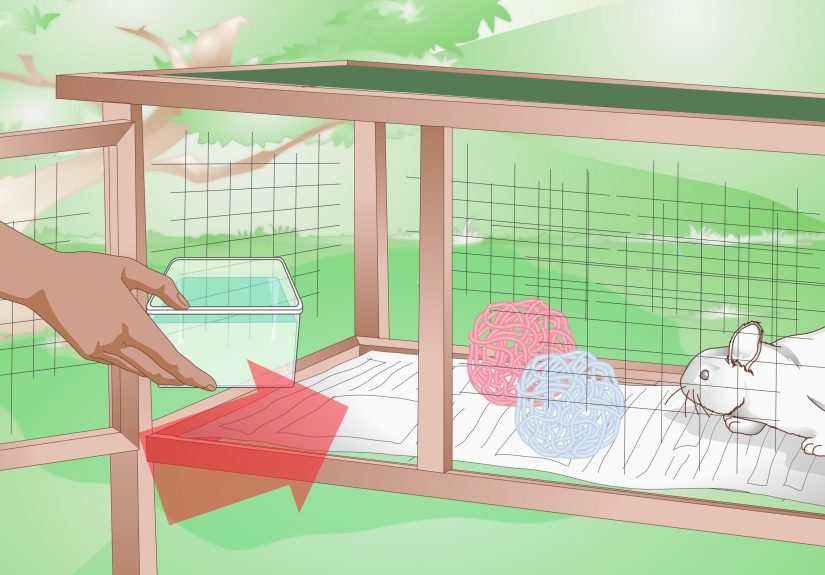
Step 10: Set Up the Inside for Comfort, Enrichment, and Cleaning
A safe cage isn’t just a fortressit’s a livable space. Add:
- Bedding: clean, dry bedding in the hutch (avoid dusty materials)
- Hay station: hay rack or bin (hay is diet + entertainment)
- Water: heavy ceramic bowl is often easier to keep clean than bottles outdoors
- Hideouts: a wooden hide house or tunnel (chew-safe)
- Platforms: solid resting surface, especially if any wire flooring is used
- Chew items: untreated wood blocks, safe branches, cardboard
Finally, make cleaning easy for Future You. If the hutch is miserable to clean, it will get cleaned less. And then the smell will
start negotiating with your neighbors.
Maintenance Checklist (Non-Negotiable Stuff)
- Daily: water refresh, quick droppings cleanup, check appetite and behavior
- Weekly: full bedding change, scrub bowls, check for rusted wire or loose staples
- Monthly: deep clean, inspect roof seals, check latches, look for chewing damage
- Seasonally: adjust shade/windbreaks, review heat/cold plan, tighten hardware
If your rabbit is outdoors, add extra vigilance for insects, temperature spikes, and stress. If your rabbit ever seems lethargic,
stops eating, or is breathing heavily, treat it as urgent and contact a veterinarian promptly.
Wrap-Up + Real-World Lessons (The 500-Word “Wish I Knew” Section)
If there’s one theme that pops up again and again in real-world outdoor rabbit cage builds, it’s this:
the first version is rarely the final version. Not because you did it “wrong,” but because rabbits and weather are both
surprisingly honest critics. They will immediately reveal what works and what doesn’toften at 2:00 a.m., during a rainstorm,
when you discover that “water-resistant” is not the same as “waterproof.”
Common experiences DIY builders reportand how to get ahead of them
1) Underestimating the chewing. Your rabbit will test corners, door frames, and any exposed plywood edge like a tiny beaver
doing quality assurance. Builders often end up adding metal corner guards or “chew strips” after the fact. Plan for it early:
cover exposed edges, keep toxic finishes out of reach, and assume anything reachable will be nibbled.
2) Learning that airflow is a whole personality. The first warm week of the year can turn a cute wooden hutch into a
solar oven if ventilation and shade aren’t dialed in. People often add shade cloth, reposition the hutch, or create a second “roof”
layer after experiencing how quickly heat builds up. A good rule: if you feel hot standing next to it, your rabbit is hotter inside it.
Add shade, keep airflow moving above the enclosure, and provide cooling options (like frozen water bottles wrapped in cloth so your
rabbit can lean against them without getting soaked).
3) Discovering that cleaning access is everything. Many first-time builds look amazinguntil you try to scrub the back corner.
Then suddenly a “cute little door” becomes the enemy. Builders frequently retrofit larger doors, removable trays, or hinged roof panels.
The best design is the one you’ll actually maintain, because clean housing isn’t just aestheticsit’s fly control, odor control, and health.
4) Predator-proofing turns into a mindset. Even if nothing ever attacks the enclosure, rabbits can become stressed by the
presence of predators nearby. Builders often upgrade from simple latches to two-step locks, add stronger wire, or reinforce corners
after hearing nighttime disturbances or spotting paw prints. The lesson: build security in layers, and don’t rely on “probably fine.”
Outdoors is not a place for “probably.”
5) Weather teaches you where your weak points are. Wind-driven rain finds gaps you didn’t know existed. Sunlight warps cheap panels.
Ground moisture creeps in if your base sits too low. That’s why experienced DIYers swear by roof overhangs, raised floors, and sealing exterior
surfaces. They also keep a simple seasonal kit: extra tarps (for emergencies), spare latches, a small roll of hardware cloth, and a handful of screws.
6) Rabbits have preferences. Some rabbits love a ramp. Some refuse ramps like they’re an insult. Some only drink from bowls, some from
bottles. Many builders end up tweaking interior layoutsadding a second hide, moving the hay station, or creating a dedicated “flop platform.”
The best outdoor rabbit cage isn’t just built once; it’s adjusted as you learn your rabbit’s habits.
Bottom line: a great outdoor rabbit enclosure is secure, shaded, dry, easy to clean, and sized for movement. Build it like you’re
protecting a small, delicate athlete who also happens to be made of anxiety and fur. And whenever you can, choose supervision and indoor timebecause
the safest rabbit is the one you can actually see, check, and enjoy.