Table of Contents >> Show >> Hide
- Step 1: Decide What Kind of Pantry Shelving You’re Building
- Step 2: Plan Your Pantry Shelf Depth and Spacing (So You Don’t Build Regrets)
- Step 3: Measure Your Space the Right Way (Walls Love to Lie)
- Step 4: Find Studs and Make a Plan for Support
- Materials and Tools Checklist
- How to Build Pantry Shelves with Cleats (Fixed Shelves)
- How to Build Adjustable Pantry Shelves (Track + Standards System)
- Prevent Sagging: Build Pantry Shelves That Stay Straight
- Finishing: Paint, Stain, and Make It Look Like You Meant To Do This
- Troubleshooting: Common Pantry Shelf Problems (and Fixes)
- Quick Example Layouts You Can Copy
- Real-World Pantry Shelf Lessons (Extra 500+ Words of Experience-Based Tips)
- Conclusion: Build Pantry Shelves Once, Enjoy Them Every Day
A pantry is basically your kitchen’s backstage: nobody’s supposed to see the chaos, but the show still has to run on time.
If your “shelf system” is currently a wobbly stack of cereal boxes and good intentions, it’s time to build pantry shelves
that are sturdy, practical, and sized for the stuff you actually store (not the stuff you pretend you store, like quinoa).
This guide walks you through planning, measuring, choosing the right shelf style, and building pantry shelving that won’t sag,
wobble, or mysteriously tilt like it’s trying to escape. You’ll get step-by-step instructions for two popular approaches:
fixed cleat shelves (simple, strong, budget-friendly) and adjustable track shelves
(flexible, tidy, and easy to reconfigure).
Step 1: Decide What Kind of Pantry Shelving You’re Building
Before you buy lumber or fall in love with a Pinterest photo, pick a shelf system that fits your space and your patience level.
Here are the most common pantry shelf types:
Option A: Fixed Cleat Shelves (DIY Classic)
You install wood “cleats” (support strips) on the wall, then drop shelves on top. These are strong, forgiving, and perfect for
closet-to-pantry conversions. If you can use a level and a drill, you can build these.
Option B: Adjustable Track Shelves (The “Future-Proof” Choice)
You mount a horizontal hang track and vertical standards, then move brackets up or down whenever your pantry needs change.
This is great if you rotate between “snack era,” “bulk Costco era,” and “why do we own three crockpots” era.
Option C: Bracket-and-Board Shelves (Fast, Visible Hardware)
Basic wall brackets plus boards. Easy to install, but the brackets are visible and you’ll want to be careful about load limits.
This can be great for open pantry shelves where you don’t mind a utilitarian look.
Option D: Wire Shelving (Lightweight & Airy)
Wire pantry shelving improves airflow and visibility, but smaller items can tip and it’s not everyone’s favorite for aesthetics.
It shines in tight spaces, rentals, or as a quick upgrade.
Step 2: Plan Your Pantry Shelf Depth and Spacing (So You Don’t Build Regrets)
The biggest pantry-shelf mistake is making shelves too deep. Deep shelves turn into “food archaeology”: you’ll discover ancient
crackers behind the pasta you forgot you owned. Aim for a depth that keeps everything visible and reachable.
Practical shelf depth guidelines
- 10–12 inches: Great for canned goods, jars, spices in bins, and everyday pantry items.
- 14–16 inches: Better for small appliances, larger containers, paper goods, or bulk items.
- Top shelves: Consider slightly shallower shelves up high for easier reach and visibility.
Smart shelf spacing guidelines
Shelf height spacing depends on what you store. The goal is to avoid wasted vertical space while still fitting taller items.
A flexible plan looks like this:
- 6–8 inches: Cans, jars, small bottles (especially if you use bins to keep rows tidy).
- 10–12 inches: Snacks, pasta boxes, most pantry staples, medium containers.
- 12–16 inches: Cereal boxes, tall storage canisters, stand mixers, small appliances.
- Bottom zone: Leave room for bulk items (bags, beverage cases, big bins) and easier cleaning.
Pro tip: Do a “grocery rehearsal.” Stack the tallest items you regularly store (cereal, paper towels, blender,
dog food binwhatever your household worships). Measure those stacks, then plan shelf spacing around real life.
Step 3: Measure Your Space the Right Way (Walls Love to Lie)
Pantries and closets are rarely perfectly square. Measure each shelf location independently instead of assuming one measurement
fits the whole wall.
- Measure width at the front and back where the shelf will sit.
- Measure depth on both side walls (yes, bothone side is often slightly different).
- Subtract a tiny bit (about 1/8 inch) from width/depth so shelves slide in without wedging.
- Mark shelf heights on all walls using a level (a laser level makes this ridiculously easier).
Step 4: Find Studs and Make a Plan for Support
Pantry shelves get heavy fast. Cans, jars, and appliances add up, so your shelves should be anchored to studs whenever possible.
If your layout forces you between studs, use the correct wall anchors for your wall type and loadbut treat studs as the main event.
Quick stud-finding methods
- Use a stud finder (fastest, least drama).
- Measure from a known stud location (studs are commonly spaced at regular intervals).
- Check near outlets/switches and confirm carefully.
- Use a magnet to locate fasteners in drywall (then verify).
Safety note: Be cautious drilling near outlets, switches, and plumbing walls. If you’re unsure,
drill small pilot holes to confirm stud position before driving larger screws.
Materials and Tools Checklist
Common materials (choose based on your shelf style)
- Shelf boards: 3/4-inch plywood (paint-grade or hardwood plywood), or solid wood boards.
- Cleats: 1×2 or 1×3 lumber (straight pieces matter more than fancy wood species).
- Optional stiffener: 1×2 front edge strip (reduces sag and hides plywood edges).
- Fasteners: Wood screws sized to reach studs; anchors for non-stud locations as needed.
- Finish supplies: Sandpaper, primer/paint (or stain + clear coat), caulk for gaps if painting.
Tools
- Tape measure, pencil, level (or laser level)
- Stud finder (helpful), drill/driver, drill bits
- Circular saw or miter saw (or have shelves cut at the store)
- Clamps (nice to have), sanding block or sander
- Safety glasses and hearing protection
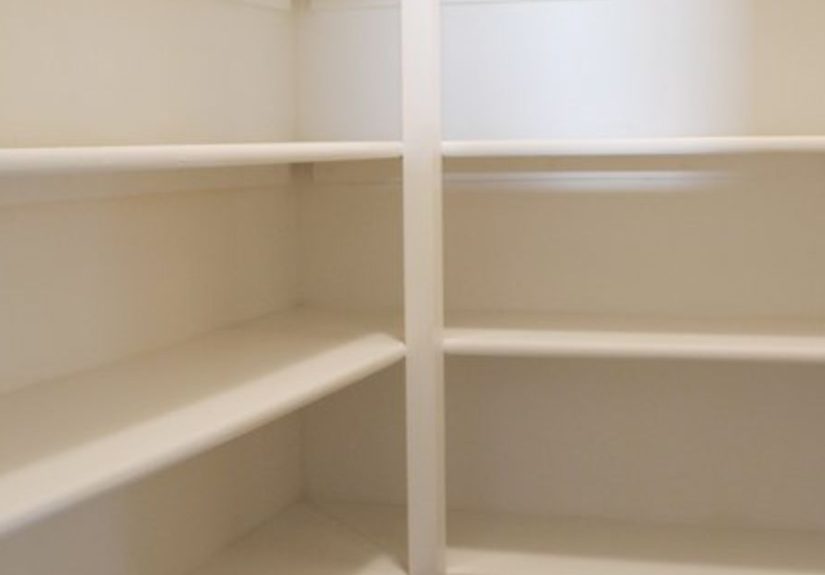
How to Build Pantry Shelves with Cleats (Fixed Shelves)
Fixed cleat shelves are a sweet spot: strong, clean-looking, and beginner-friendly. You’ll install cleats on the side and back walls,
then set the shelves on top. For longer spans, add a front edge stiffener or a center bracket to prevent sag.
1) Mark your shelf layout
- Pick shelf heights based on your pantry plan.
- Use a level to draw a straight line on the back wall at each shelf height.
- Extend those lines onto both side walls.
2) Cut the cleats
You’ll typically use three cleats per shelf: one on the back wall and one on each side wall.
Cut them to match the measured shelf depth and shelf width plan.
3) Install cleats (level + studs = happiness)
- Hold the back cleat on your level line and pre-drill holes.
- Drive screws into studs for strong support.
- Repeat for side cleats, keeping everything level and aligned.
Small detail that matters: If your walls are a little wavy (they are), keep the shelf level
rather than trying to “follow the wall.” Your eyes forgive a wall gap; they don’t forgive a shelf that looks tipsy.
4) Cut and test-fit the shelves
- Cut your shelf boards to size based on your measurements (remember the small clearance gap).
- Dry fit each shelf before finishing. Trim as needed.
- Label shelves by position if your pantry is slightly out of square (which it probably is).
5) Add a front edge (recommended for strength and looks)
A 1×2 strip on the front edge does two jobs: it makes plywood shelves look finished and helps reduce sag.
Glue and brad-nail it in place (or screw from underneath if you prefer). Sand flush after it dries.
6) Install shelves and secure them
- Set each shelf onto the cleats.
- Drive a few screws down into the cleats (or up from underneath) to keep shelves from shifting.
- If you have a long span, add a center support bracket or a vertical divider panel for extra rigidity.
How to Build Adjustable Pantry Shelves (Track + Standards System)
If you like flexibility, adjustable pantry shelving is hard to beat. The basic idea: mount a hang track, attach vertical standards,
and place brackets wherever you want shelves.
1) Install the hang track
- Mount the hang track level near the top of the pantry (many systems recommend high placement for strength and adjustability).
- Anchor into studs whenever possible.
2) Attach vertical standards
- Hang standards from the track.
- Plumb them (perfectly vertical) and fasten them to the wall using the recommended hardware.
- Space standards so shelf loads are supported evenly (especially for heavy pantry zones).
3) Add brackets and shelves
- Insert brackets at your desired heights.
- Cut shelves to size (wood shelves, melamine, or ventilated shelving depending on your system).
- Set shelves on brackets and secure if the system calls for it.
Bracket sizing tip: Many shelf systems match bracket depth to shelf depth, with specific exceptions depending on shelf-and-rod setups.
Always follow the manufacturer’s guidance for your exact components.
Prevent Sagging: Build Pantry Shelves That Stay Straight
Shelf sag is slow-motion heartbreak. It starts as “barely noticeable” and ends as “why is the pasta sliding forward?”
The good news: you can design around it.
Use these sag-fighting strategies
- Use 3/4-inch material for most pantry shelves, especially if spans are long.
- Keep spans reasonable or add supports (center brackets or vertical dividers).
- Add a front stiffener (a 1×2 edge strip works wonders).
- Distribute weight (heavy items low; lighter items up high).
- Consider a shelf sag calculator if you’re building unusually long shelves or storing very heavy items.
Finishing: Paint, Stain, and Make It Look Like You Meant To Do This
Finishing isn’t just for looksit helps shelves wipe clean and resist scuffs. The best finish depends on your pantry’s vibe:
crisp and bright, or warm and wood-toned.
Paint finish (most popular for pantries)
- Sand splinters and sharp edges.
- Prime first (especially on raw plywood edges).
- Paint with a durable interior enamel or cabinet-grade paint.
- Caulk small gaps between cleats/shelves and wall for a built-in look.
Stain + clear coat (for wood grain lovers)
- Use hardwood plywood or solid wood for a better stain result.
- Condition wood if needed to avoid blotchiness.
- Seal with a wipeable clear coat so spills don’t become permanent residents.
Troubleshooting: Common Pantry Shelf Problems (and Fixes)
“My shelf doesn’t fit even though I measured!”
Welcome to the club. Walls can bow, corners can be off, and drywall can do its own thing.
Trim a small amount and test-fit again. For tricky corners, cardboard templates help.
“My shelf rocks like a tiny seesaw.”
Check cleats for level and flatness. A slightly twisted cleat or a drywall bump can cause rocking.
Sand high spots or shim low areas behind cleats.
“I’m worried about drilling into something I shouldn’t.”
Smart fear. Avoid aggressive drilling near outlets/switches and on plumbing-heavy walls.
Use pilot holes to confirm stud locations and stop if you hit unexpected resistance.
Quick Example Layouts You Can Copy
Small closet pantry (common conversion)
- Depth: 10–12 inches on side walls
- Spacing: 6–8 inches for cans/jars; 12 inches for boxes; one tall zone for appliances
- Add bins and labels so everything stays visible
Walk-in pantry wall (single wall of shelves)
- Lower shelves: deeper and taller for bulk items
- Mid shelves: your everyday staples zone
- Upper shelves: lighter items, backstock, less-used appliances
Real-World Pantry Shelf Lessons (Extra 500+ Words of Experience-Based Tips)
If you’ve never built pantry shelves before, here’s what DIYers commonly discover once the drill dust settlesaka the “experience”
part nobody tells you until you’re holding a shelf that’s 1/4 inch too wide.
Lesson #1: The pantry looks bigger when it’s empty.
The moment you load shelves with cans, bins, and snack boxes, you realize space is a psychological illusion.
That’s why shelf spacing matters so much. People often build shelves evenly spaced because it looks tidy, then regret it when
one shelf can’t fit cereal boxes and another shelf wastes five inches of air above soup cans. The fix is simple:
design shelves in “zones.” A can zone. A snack zone. A tall-appliance zone. Even if you don’t label them, your pantry will behave better.
Lesson #2: Deep shelves are where good intentions go to hide.
A lot of homeowners build shelves that are 16–20 inches deep because they think “more depth = more storage.”
In practice, deep pantry shelves can turn into a two-row system: things you use and things you forget behind them.
People who love deep shelves usually pair them with pull-out bins, risers, or turntablesanything that prevents the back row
from becoming a time capsule. If you want simple shelves without extra organizers, slightly shallower shelves feel more “usable,”
even if the math says you lost a few square inches.
Lesson #3: Studs rarely show up exactly where you want them.
The plan in your head is always: “I’ll put supports exactly here.” The wall’s plan is: “I put the studs somewhere else.”
DIYers often end up adjusting cleat screw locations, adding more fasteners, or choosing an adjustable track system because it
offers more anchor points. A common best practice is to anchor the main supports into studs, then use appropriate anchors only
where necessaryespecially for lighter shelf loads.
Lesson #4: Shelf sag is preventable, but only if you respect physics.
Many first-time builders use plywood, set it on cleats, and assume “wood is strong.”
It isuntil you span too far and load it with canned tomatoes and a blender.
The experienced move is adding a front edge strip (a simple 1×2) or building in a center support for longer shelves.
People are often shocked how much stiffer a shelf feels after a front stiffener is attached.
The other experience-based trick: store heavy items low. Your shelves will last longer, and your toes will thank you.
Lesson #5: Painting shelves before installation saves frustration later.
It’s tempting to install first and paint later. Then you meet the corner where a brush doesn’t fit and rollers can’t reach.
DIYers who’ve done this once usually switch to “paint first, install second.” You can still touch up after, but you won’t be
doing yoga poses in a pantry trying to cut in a clean line behind a cleat.
Lesson #6: The best pantry shelves aren’t just shelvesthey’re a system.
After the shelves go up, most people add one or two “system upgrades” that make everything smoother:
labeled bins, a basket for snacks, a dedicated backstock row, or a small step stool stored nearby.
The pantry doesn’t have to look like a showroom, but it should make daily life easier. When your shelves are sized well and
your storage has a plan, you waste less food, you find ingredients faster, and you stop buying your third jar of paprika
because you couldn’t see the two jars you already owned.
Conclusion: Build Pantry Shelves Once, Enjoy Them Every Day
Building pantry shelves is one of those rare DIY projects that pays you back constantly: fewer messes, less wasted space,
and way less time spent searching for that one ingredient you know you bought.
Plan around what you store, anchor supports securely, keep shelf depth practical, and add anti-sag features if spans are long.
Do it right, and your pantry becomes the calm, organized side character your kitchen deserves.