Table of Contents >> Show >> Hide
- Why Cleaning a Betta Bowl Matters (More Than You Think)
- Before You Start: The Fish-Safe Rules
- Supplies You’ll Want (No Fancy Gear Required)
- How Often Should You Clean a Betta Fish Bowl?
- The Best Way to Clean a Betta Bowl (Routine Weekly Cleaning)
- How to Do a Deep Clean (Monthly or As Needed)
- Common Mistakes (That Make Cleaning Harder Than It Needs to Be)
- Troubleshooting: If Your Bowl Still Looks (or Smells) Bad
- A Simple Cleaning Schedule You Can Actually Stick To
- Should You Upgrade From a Bowl?
- Real-World Experiences From Betta Keepers (What Usually Works)
- Conclusion
Betta fish have an unfair reputation for being “puddle pets” who can thrive in a tiny bowl with zero effort.
In reality, a bowl is more like living in a studio apartment with no trash pickup: things get funky fast.
The good news? Cleaning a betta fish bowl doesn’t have to be dramatic, messy, or a full-on fish eviction.
With the right routine, you’ll keep the water clear, the ammonia low, and your betta’s fins looking like
they’re headed to a red-carpet event.
This guide walks you through a fish-safe cleaning process (no soap, no panic, no “why is my fish giving me
that look?”), plus a realistic schedule based on bowl size and setup. We’ll also cover what to do if your bowl
is already cloudy, smelly, or growing algae like it’s auditioning for a nature documentary.
Why Cleaning a Betta Bowl Matters (More Than You Think)
A betta bowl is a small volume of water, which means waste builds up quickly. Uneaten food and poop break down
into ammonia, and ammonia can stress fish and damage gills. In a properly established setup, beneficial bacteria
convert ammonia into nitrite and then into nitrate (the nitrogen cycle). Your job during cleaning is to remove
the gunk without “resetting” the bowl’s biology every time you wipe the glass.
Bigger tanks are more stable and easier to maintain, but if you’re working with a bowl, the key is consistency:
small, regular water changes beat huge, random “nuke-and-restart” cleanings.
Before You Start: The Fish-Safe Rules
- Never use soap, detergents, or household cleaners on the bowl, gravel, or decor. Residue can harm fish.
- Always dechlorinate tap water before it goes into the bowl (chlorine/chloramine aren’t fish-friendly).
- Match temperature as closely as you can to avoid stressing your betta.
- Don’t overclean: you’re removing waste, not sterilizing a science lab.
- Feed less on cleaning day if your water is already strugglingless food in means less waste out.
Supplies You’ll Want (No Fancy Gear Required)
- Clean bucket or container used only for aquarium water
- Water conditioner/dechlorinator
- Small cup or measuring container (for scooping water)
- Soft algae sponge or clean microfiber cloth (aquarium-only)
- Turkey baster or small siphon/gravel vacuum (great for bowls)
- Thermometer (helpful, especially in cooler rooms)
- Optional: water test kit/strips for ammonia, nitrite, nitrate
- Optional: white vinegar (for hard-water stains on an empty bowl only)
How Often Should You Clean a Betta Fish Bowl?
The honest answer is: it depends on bowl size, whether you have a filter, live plants, and how much you feed.
Here are practical starting points:
If your bowl is unfiltered (most bowls)
- Under 1 gallon: frequent partial changes (often several times per week), plus quick debris removal as needed.
- 1–2 gallons: plan on multiple partial water changes weekly.
- 3 gallons: typically at least weekly partial changes, sometimes more depending on testing and clarity.
If your “bowl” is more like a small tank (filtered/heated)
- 3–5+ gallons with a filter: weekly partial changes are common, adjusted by water testing and stocking.
If you’re unsure, let the water tests be the referee. If ammonia or nitrite shows up above zero, it’s your cue
to change water sooner and review feeding.
The Best Way to Clean a Betta Bowl (Routine Weekly Cleaning)
This routine is designed to be low-stress for your fish and low-effort for you. It’s basically “clean the house
without setting it on fire.”
Step 1: Prep your new water
- In a clean container, prepare enough water for your change (usually 25–50% of the bowl).
Smaller bowls often benefit from smaller, more frequent changes rather than huge swaps. - Add dechlorinator according to the label directions. If your area uses chloramine, conditioner is essential
(letting water “sit out” won’t reliably fix chloramine). - Try to match temperature. If your betta is in warmed water, adding cold water is like
someone opening the shower curtain mid-rinse and blasting Arctic wind.
Step 2: Leave your betta in the bowl (most of the time)
For routine partial cleanings, you usually don’t need to net your betta out. Chasing a betta with a net is
stressful and can damage delicate fins. The exception is a deep clean where you must remove decor and scrub
heavilymore on that below.
Step 3: Remove debris first (the “gross but satisfying” part)
- Use a turkey baster or small siphon to suck up visible waste and uneaten food from the bottom.
Focus on corners where debris collects. - If you have gravel, lightly vacuum the surface. In a bowl, you don’t need to excavate like you’re hunting treasure
just lift the obvious stuff.
Step 4: Take out old water
Scoop or siphon out 25–50% of the bowl water into your bucket. If the bowl is tiny and unfiltered,
you may need a larger percentage more oftenbut try to avoid “100% changes” as your default routine because
it can swing parameters and stress the fish.
Step 5: Wipe the inside glass (no chemicals)
Use an aquarium-safe sponge or cloth to wipe algae film. If algae is stubborn, use gentle pressure and patience.
Think “polite persuasion,” not “power-washing a driveway.”
Step 6: Refill slowly with conditioned water
- Pour the prepared water in slowly to avoid stirring debris and startling your betta.
- Angle the pour against the side of the bowl or onto a clean dish/saucer in the bowl to diffuse the flow.
- Make sure the water level leaves appropriate air spacebettas are labyrinth fish and surface access matters.
Step 7: Quick check and tidy-up
- Is the water clear enough to see your betta’s “judging face”? Good.
- Is the bowl in a stable spot away from direct sun and drafts? Even better.
- If you have a thermometer, confirm you didn’t accidentally create “hot tub” or “ice bath” conditions.
How to Do a Deep Clean (Monthly or As Needed)
Deep cleans are for when algae has taken over, the bowl has mineral crust, or decor has turned into a slime museum.
You still want to be gentle with the biological balanceespecially if you have a filter or established media.
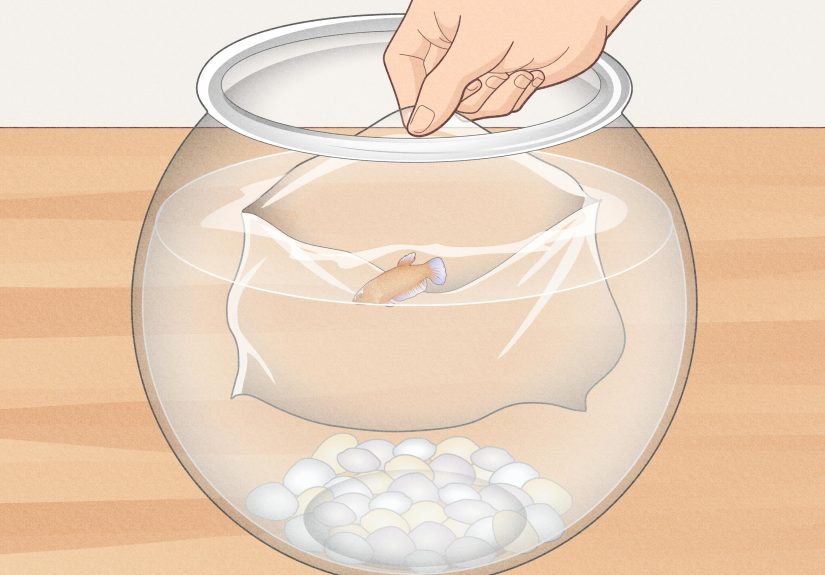
Step 1: Set up a temporary holding container
- Use a clean container with water from the bowl (not fresh tap water).
- Gently transfer your betta with a cup (often easier than a net for long-finned fish).
- Keep the holding time short and calm (dim lights help).
Step 2: Remove decor and rinse it the right way
- Rinse decor in removed bowl water or dechlorinated water.
- Scrub algae with a dedicated brush or spongeno soap.
- If decor is extremely grimy, a longer soak in dechlorinated water and elbow grease usually beats chemicals.
Step 3: Handle gravel carefully
If you have gravel, don’t rinse all of it under chlorinated tap water like you’re washing rice for dinner.
That can reduce beneficial bacteria and destabilize the system. Instead, rinse small portions in old bowl water
or vacuum more thoroughly during your water change.
Step 4: Hard-water stains and mineral buildup (vinegar option)
If your bowl has stubborn white mineral rings and the bowl is empty, you can wipe the glass with
white vinegar, then rinse extremely well until there’s no smell. Vinegar is commonly used to dissolve mineral
deposits, but it must be thoroughly rinsed before the bowl goes back into service.
Step 5: Reassemble and refill
- Add gravel and decor back.
- Refill with conditioned, temperature-matched water.
- Return your betta gently, ideally by floating the holding container briefly and mixing small amounts of bowl water if needed.
Common Mistakes (That Make Cleaning Harder Than It Needs to Be)
1) Overfeeding
Most “dirty bowl” problems start at the dinner table. Overfeeding creates more waste, more ammonia, and more algae fuel.
A betta doesn’t need a buffet that looks like a cereal spill.
2) Doing giant water changes too randomly
Huge, infrequent changes can swing temperature and chemistry. Smaller, scheduled partial changes are steadier
especially in small water volumes.
3) Scrubbing everything spotless every time
Your goal is healthy water quality, not sterile glass. Overcleaning can remove beneficial microorganisms and
destabilize the bowl’s balance.
4) Skipping conditioner
If your water contains chlorine or chloramine, your fish will feel it. Conditioner is not “extra”it’s the seatbelt.
Troubleshooting: If Your Bowl Still Looks (or Smells) Bad
Cloudy water
- Cause: bacterial bloom, overfeeding, stirred debris, or an unstable cycle.
- Fix: reduce feeding for a few days, do smaller water changes more frequently, and test for ammonia/nitrite.
Green water or fast algae growth
- Cause: too much light (especially direct sun) + nutrients from waste.
- Fix: move the bowl away from windows, shorten light hours, wipe algae during routine changes.
Bad odor
- Cause: decaying food, trapped waste in gravel, low maintenance frequency.
- Fix: vacuum debris more aggressively, increase water change frequency, review feeding amount.
Betta acting stressed after cleaning
- Cause: temperature swing, parameter swing, or too much disruption during cleaning.
- Fix: match temperature better, switch to smaller/more frequent changes, refill slowly, keep lights low after cleaning.
A Simple Cleaning Schedule You Can Actually Stick To
Here’s a realistic routine you can adjust based on bowl size and test results:
Quick daily/near-daily habit (1–2 minutes)
- Remove uneaten food (turkey baster is your best friend).
- Check water clarity and your betta’s behavior.
Routine cleaning (2–3 times per week for very small bowls; weekly for larger/filtered setups)
- Partial water change (often 25–50% depending on conditions).
- Light algae wipe if needed.
- Debris removal from the bottom.
Deep clean (monthly or when buildup is obvious)
- Remove and scrub decor (no soap).
- Address mineral ring buildup (vinegar on empty glass only, rinse thoroughly).
- More thorough gravel vacuuming.
Should You Upgrade From a Bowl?
If you can, yesyour future self will thank you. Many care guides recommend larger, heated, filtered setups
because they’re more stable and easier to maintain. A small filtered tank often needs less frantic cleaning
than a tiny bowl, because the water volume buffers waste and temperature swings.
But if a bowl is what you have right now, your betta can still do well when you clean consistently, feed carefully,
and use conditioned, temperature-matched water. “Small habitat” doesn’t have to mean “small effort.”
Real-World Experiences From Betta Keepers (What Usually Works)
If you talk to enough betta owners, you’ll notice a pattern: the people who say “my bowl is always nasty”
usually aren’t dealing with a mysterious curse. They’re dealing with math. Small water volume + food + time =
water quality problems. Once you accept that equation, cleaning becomes less stressful and more predictable.
One common experience is the overfeeding trap. New owners often want to “treat” their betta like
a tiny aquatic puppy. The fish begs, the owner caves, and suddenly the bowl has leftover pellets wedged under
a decorative bridge like crumbs in a couch. The fix is almost always boring but powerful: feed smaller portions,
watch what gets eaten, and remove leftovers quickly. People are often shocked at how much cleaner the bowl stays
when they feed a little less and clean a little smarter.
Another frequent story is the big-clean shock: someone does a full bowl drain, scrubs everything
until it sparkles, refills with fresh tap water, and wonders why their betta looks stressed afterward. That’s
because “sparkling clean” can come with sudden changes in temperature and chemistry. Many keepers report better
results when they switch to smaller, more frequent partial changesit’s less disruptive, and it
prevents the bowl from ever reaching “swamp level” in the first place.
Algae is another classic. Lots of owners say, “I clean the bowl, and two days later it’s green again!”
In many cases, the bowl is sitting near a sunny window or under a bright light for long hours. The experience
here is almost universal: once you move the bowl away from direct sun and reduce light time, algae stops acting
like it pays rent. Pair that with quick wipes during water changes, and you’ll usually see algae become a minor
annoyance instead of a full-time roommate.
Keepers also learn the value of a couple of humble tools: a turkey baster (for spot-cleaning waste)
and a dedicated bucket (so you’re not accidentally adding soap residue from a “regular” cleaning pail).
These aren’t glamorous upgrades, but they’re the kind that make maintenance feel easy instead of exhausting.
Finally, many people share the “upgrade revelation.” They start with a small bowl, fight constant water issues,
then move to a 5-gallon filtered, heated setup and realize: bigger can be simpler. The water stays stable longer,
the fish acts more relaxed, and cleaning becomes a weekly routine instead of a mini-emergency.
If you can’t upgrade yet, don’t worryyou can still borrow the mindset: keep changes gentle, keep them consistent,
and use observation (and testing when possible) to guide your schedule. Your betta doesn’t need perfection.
It needs steady, clean waterand a human who doesn’t panic-clean like they’re on a reality TV show.
Conclusion
Cleaning a betta fish bowl is really about keeping water quality stable in a small space. Focus on fish-safe basics:
no soap, conditioned water, temperature matching, and consistent partial water changes. Remove debris early, wipe algae
gently, and avoid “total reset” cleanings unless absolutely necessary. When you build a simple routine, your bowl stays
cleaner, your betta stays calmer, and you spend more time enjoying your fish instead of battling mystery sludge.