Table of Contents >> Show >> Hide
- What is the difference between mildew and mold?
- Before you start: safety first, superhero later
- Supplies that actually help
- How to clean mould and mildew step by step
- How to remove mold and mildew from common surfaces
- What cleaning products work best?
- What not to do
- How to prevent mold and mildew from coming back
- When to call a professional mold remediation service
- Final thoughts
- Experiences and practical lessons from real-life mold and mildew cleanup
Mold has a special talent for showing up where nobody invited it: shower grout, basement corners, window sills, laundry rooms, and that one mystery patch behind a dresser that suddenly makes you feel like your house is judging you. Mildew, its clingy cousin, often appears first as a flat gray or white film. Mold tends to go bolder, darker, fuzzier, and more dramatic. Neither one belongs in your home.
If you want to know how to clean mould and mildew the right way, here is the big truth up front: scrubbing the stain is only half the job. The real win comes from removing the moisture source that caused the problem in the first place. Otherwise, mold comes back like an annoying sequel nobody asked for.
This guide walks through how to remove mold and mildew safely, when to clean it yourself, when to call a pro, what products actually help, and how to stop the problem from returning. It is practical, realistic, and written for normal people with normal houses, not for people who casually own industrial dehumidifiers.
What is the difference between mildew and mold?
Mildew is usually the early-stage troublemaker. It often appears as a powdery or flat patch on damp surfaces like shower walls, window frames, or fabric. Mold is typically more established and can look black, green, brown, orange, or white depending on the surface and growth stage. It may appear fuzzy, slimy, or blotchy.
For day-to-day household cleaning, the exact species usually matters less than the situation itself. If you can see growth or smell that familiar musty odor, treat it as a moisture problem that needs cleanup and prevention. The goal is not to become a fungus detective. The goal is to get your space clean, dry, and healthy again.
Before you start: safety first, superhero later
Before attacking mold with maximum enthusiasm, slow down and prep the area. Good cleanup is less about rage-scrubbing and more about smart containment.
Wear the right protection
At a minimum, use gloves, eye protection, and a mask or respirator suited for dusty, moldy cleanup. If you are sensitive to fumes, have allergies, asthma, COPD, or a weakened immune system, be especially cautious. If the area is large or the smell is intense, that is a hint to step back and consider professional help.
Ventilate the room
Open windows if possible. Run an exhaust fan that vents outdoors. Good airflow helps reduce fumes from cleaners and speeds drying time. Mold loves stale, damp air, so fresh air is part of the cleanup strategy, not just a nice bonus.
Know when not to DIY
Do not handle it yourself if the mold covers a large area, keeps coming back, is caused by sewage or contaminated water, is inside walls or HVAC systems, or appears after major flooding. Also skip the DIY route if anyone in the home has significant breathing issues or serious mold sensitivity. Sometimes the best cleaning tool is a phone call to a qualified remediation professional.
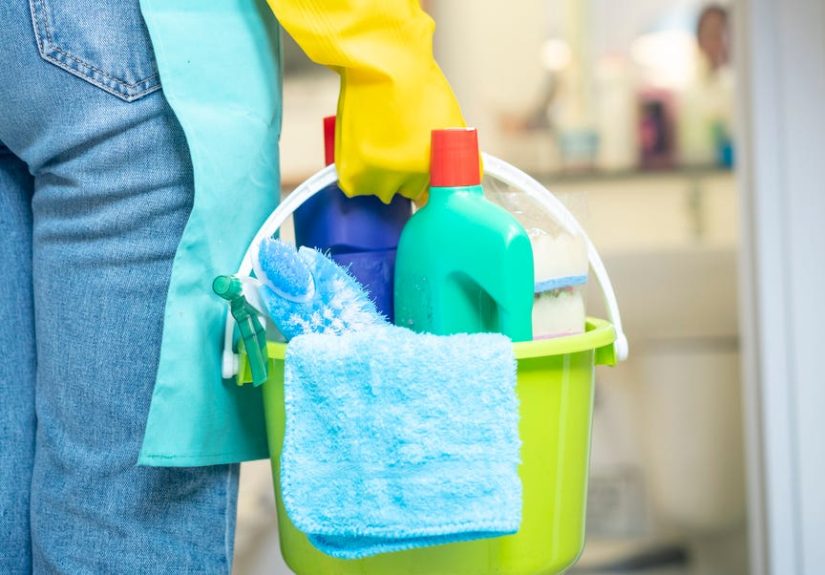
Supplies that actually help
You do not need a shopping cart full of miracle sprays with dramatic labels. For many household situations, simple supplies work well:
- Rubber or nitrile gloves
- Goggles
- N-95 or similar mask
- Bucket of warm water
- Mild detergent or dish soap
- Spray bottles
- Microfiber cloths or disposable rags
- Soft-bristle or medium-bristle scrub brush
- Baking soda for deodorizing and light scrubbing
- White vinegar for some household applications
- Bleach for limited, careful use on appropriate surfaces
- Trash bags for moldy debris
- Fans or a dehumidifier for drying
One important rule deserves its own spotlight: never mix bleach with ammonia or other cleaners. That is not “extra powerful.” That is “accidentally turn cleaning day into a very bad idea.”
How to clean mould and mildew step by step
Step 1: Find and fix the moisture source
If a pipe leaks, fix it. If your bathroom fan is decorative rather than functional, replace it. If condensation forms on windows every morning, improve ventilation and humidity control. If the basement smells like a wet sock convention, bring in a dehumidifier. Cleaning without solving the dampness issue is like shampooing your carpet while the roof is still leaking.
Step 2: Remove loose dirt and isolate the mess
Move nearby items out of the way. Bag obviously moldy trash right away. On hard surfaces, wipe away loose grime first so your cleaner can actually reach the growth instead of sliding over soap scum, dust, or whatever mystery paste had been living there.
Step 3: Scrub hard, nonporous surfaces
For tile, sealed stone, glass, metal, tubs, sinks, and many plastic surfaces, start with warm water and detergent. Apply, scrub, rinse, and dry thoroughly. This is often enough for mild to moderate mildew and surface mold.
If staining remains, use a product appropriate for the material. In bathrooms, a mildew remover, diluted vinegar solution for certain surfaces, or carefully used bleach solution may help with stubborn discoloration. Always check the label and test a hidden spot first.
Step 4: Dry the area completely
This step is where many people lose the battle. A surface that looks clean but stays damp is basically a polite invitation for mold to return. Use dry cloths, fans, open windows, and a dehumidifier if needed. The drier the area, the better the outcome.
Step 5: Dispose of what cannot be truly cleaned
Porous materials are the heartbreakers in mold cleanup. Drywall, insulation, carpet padding, ceiling tiles, paper products, untreated particleboard, and heavily affected fabrics may not be salvageable once mold gets deep into them. If the material stays stained, smells musty, or keeps regrowing spots, it may need to go.
How to remove mold and mildew from common surfaces
Bathroom tile and grout
This is the classic mildew habitat: warm, wet, steamy, and never fully dry. Spray the affected area with a bathroom-safe mold or mildew cleaner, or use soapy water first. Let the product sit according to directions, then scrub grout lines with a small brush. Rinse well and dry the space. Leave the shower curtain partly open after use, run the bathroom fan longer than you think you need to, and wipe wet surfaces down when possible.
Painted walls
If the growth is minor and clearly on the surface, gently clean with a mild detergent solution and a soft sponge. Do not saturate drywall. Too much water can make the problem worse. If the paint bubbles, the wall feels soft, or the stain bleeds through repeatedly, mold may be behind the surface. At that point, cleaning the front is like brushing your hair while ignoring the rainstorm.
Wood surfaces
Wood can be tricky because some finishes resist moisture while raw wood absorbs it. Start with a detergent solution and light scrubbing. For lingering staining, some homeowners use vinegar or a carefully diluted bleach solution, depending on the finish and manufacturer guidance. Sanding may remove staining on unfinished wood, but only after the area is dry and only with proper protection, since sanding can spread spores if done carelessly.
Fabric and upholstery
If the item is washable, launder it promptly and dry it completely. If it is an upholstered item with light mildew, spot-cleaning may help, but deeply moldy furniture is often difficult to restore. If the cushion smells musty after cleaning, the growth may still be inside the padding. That is usually your cue to stop being optimistic.
Carpet and rugs
Surface mildew on a small rug may sometimes be cleaned and dried outdoors in sunlight if the material can handle it. Wall-to-wall carpet and padding are a tougher story, especially after water intrusion. If the carpet stayed wet for too long or the backing and padding are affected, replacement is often the smarter move.
Window sills and frames
These spots collect condensation, dust, and neglect. Lucky for mold, that is basically a buffet. Clean with detergent and water, dry thoroughly, and reduce future condensation with better ventilation, weather sealing, and humidity control. Repeat cleaning is common here, but repeated prevention is what finally solves it.
What cleaning products work best?
There is no single product that wins every mold battle. The best choice depends on the material, the severity, and whether you are removing active growth, stains, or odors.
Detergent and water
This is the workhorse. For many hard surfaces, it is the first and best place to start. It physically removes mold from the surface and is simple, inexpensive, and less likely to damage materials.
Vinegar
White vinegar is a popular household option for some surfaces and light mold problems. It may help with odor and light staining. It is not ideal for every material, and it should never be treated as a magic wand. Still, many homeowners like it because it is easy to keep on hand and useful in damp areas such as bathrooms and laundry spaces.
Bleach
Bleach has a role, but a limited one. It may help disinfect and brighten certain hard, nonporous surfaces. It is not suitable for every material, and it is not a guaranteed answer for porous items where mold may be growing beneath the visible surface. Use it carefully, dilute it properly, ventilate well, and never mix it with other cleaning chemicals.
Commercial mold and mildew removers
These can be convenient for showers, grout, siding, or outdoor hard surfaces. Some are designed to cling to vertical areas, which is useful when gravity is being rude. Always follow the label, use the right protective gear, and make sure the surface can handle the product.
What not to do
- Do not paint over mold and call it fixed. That is decorating the problem, not solving it.
- Do not ignore repeated regrowth. Mold that keeps returning is telling you there is still moisture somewhere.
- Do not soak drywall, carpet, or wood during cleanup unless the method specifically calls for it.
- Do not use fans that blow contaminated air through the whole house without proper control.
- Do not mix bleach with ammonia or other cleaners.
- Do not assume every black spot is harmless mildew or that every dark spot is “toxic black mold.” Focus on safe cleanup and moisture control first.
How to prevent mold and mildew from coming back
Once you have removed mold, the next goal is to make your home less welcoming to it.
Keep humidity under control
Aim to keep indoor humidity below 50 percent. Bathrooms, basements, laundry rooms, and kitchens are the main trouble zones. Exhaust fans, dehumidifiers, and air conditioning can all help.
Dry wet areas fast
Wet towels, shower walls, leaked water under sinks, damp bath mats, and condensation around windows should not linger. Fast drying matters. Mold does not need a grand opening. It just needs enough moisture and time.
Improve airflow
Leave some space between furniture and exterior walls. Open closet doors occasionally. Use bathroom fans during showers and for a while afterward. Run the kitchen hood when cooking. Let air move.
Stay on top of maintenance
Check caulking, grout, roof leaks, plumbing connections, window seals, sump pumps, and gutters. Tiny water problems often create surprisingly large mold problems because they stay hidden long enough to get comfortable.
When to call a professional mold remediation service
You should strongly consider professional help if:
- The moldy area is large
- The growth is inside walls, ceilings, crawlspaces, or HVAC equipment
- The water source involved sewage or flood contamination
- You cleaned it once and it came back quickly
- The structure feels damaged, soft, or warped
- Someone in the home has asthma, COPD, severe allergies, or a weakened immune system
Professional remediation is not just about stronger chemicals. It is about proper containment, safe removal, drying, disposal, and identifying the hidden source that caused the problem in the first place.
Final thoughts
If you are wondering how to clean mould and mildew or how to remove mold and mildew for good, the answer is refreshingly simple, even if the work is not: clean the visible growth safely, dry the area completely, and eliminate the moisture source. That three-part formula solves more problems than any trendy cleaner ever will.
The best mold strategy is not dramatic. It is consistent. Wipe condensation. Fix leaks. Use ventilation. Run a dehumidifier when your home feels damp. Keep an eye on the usual suspects like bathrooms, basements, and laundry corners. Mold is persistent, but so is good maintenance. And unlike mold, good maintenance does not smell weird.
Experiences and practical lessons from real-life mold and mildew cleanup
One of the most common experiences people report with mold cleanup is that the first attempt often focuses too much on the stain and not enough on the cause. Someone notices a dark patch in the bathroom, sprays it with a strong cleaner, scrubs for ten minutes, and feels victorious. Then the patch returns two weeks later, smug as ever. Why? Because the bathroom fan was weak, the room stayed humid after every shower, and the grout never really dried. The lesson is memorable: if the room stays damp, the mold stays interested.
Basements create another classic scenario. A homeowner smells something musty, but there is no obvious giant mold colony waving from the corner. The smell turns out to come from cardboard boxes stored against a cool wall, plus a little condensation problem and not enough airflow. In these situations, the cleanup is often less about one heroic scrubbing session and more about changing the environment. People who solve basement mildew long term usually do the same few things: they remove clutter from exterior walls, use a dehumidifier, keep storage off the floor, and stop treating the basement like a cave where moisture gets to make all the decisions.
Window mildew is another everyday headache. It often shows up in bedrooms or living rooms where curtains stay closed, air circulation is poor, and morning condensation sits on the sill like it pays rent. People often clean the visible spots successfully, only to see them return in the next humid stretch. The successful fix usually involves better ventilation, wiping moisture from the window frame regularly, and occasionally moving furniture or fabric that blocks airflow. A surprising number of home problems improve once the air can actually move around like it was designed to.
Then there is the emotional side of mold cleanup, which nobody talks about enough. Mold makes a lot of people feel anxious, embarrassed, or overwhelmed. It can look dramatic even when the affected area is relatively small. It can also hide in ways that make homeowners feel like they are losing an argument with their own walls. The best practical experience here is this: break the job into parts. First, stop the water. Second, remove what cannot be saved. Third, clean what can be cleaned. Fourth, dry everything thoroughly. Fifth, monitor the area. Once people stop trying to solve everything at once, the job gets much less intimidating.
Many people also learn that “clean” and “dry” are not the same thing. A shower may sparkle and still be a mildew factory if the curtain stays bunched, the fan never runs long enough, and damp towels live in a heap on the floor. A room may smell fresher after scrubbing, yet still have moisture trapped in materials. The homes that stay mold-free are usually not cleaned with fancier products. They are simply managed with better drying habits.
The most useful real-world takeaway is probably the least glamorous one: consistency beats intensity. You do not need to wage war every weekend with industrial-strength chemicals. You need a few good routines that actually happen. Run the fan. Fix the leak. Dry the spill. Wash the bath mat. Check the corners. Empty the dehumidifier. Those small habits are what keep mildew from turning into a bigger mold problem. In real life, that is what works.