Table of Contents >> Show >> Hide
- Why Detangling Hurts (And How to Make It Stop)
- Quick Prep: What You Need Before You Start
- How to Detangle Hair Without Pain: 11 Steps
- Step 1: Decide if this is “tangled” or “matted.”
- Step 2: Pick the right time (aka: not when you’re rushing).
- Step 3: Add moisture firstdry detangling is the villain in many stories.
- Step 4: Saturate with conditioner or detanglerand let it sit.
- Step 5: Section your hair like you mean it.
- Step 6: Start with your fingers (yes, really).
- Step 7: Hold the hair above the knot to protect your scalp.
- Step 8: Use a wide-tooth comb (or detangling brush) from ends upward.
- Step 9: Use “micro-moves” on stubborn knots (don’t escalate to violence).
- Step 10: Rinse (or don’t), then add leave-in protection.
- Step 11: Dry gently and prevent tomorrow’s tangles tonight.
- Adjust the Routine by Hair Type
- Common Detangling Mistakes That Cause Pain (And Breakage)
- Conclusion: Smooth Hair, Calm Scalp, Zero Drama
- Real-World Detangling Experiences (The Stuff People Actually Learn)
Hair tangles have one job: to show up when you’re already late. They tighten up like tiny, stubborn shoelaces,
and suddenly your brush becomes a medieval torture device. The good news? Detangling doesn’t have to hurt, and it
definitely doesn’t have to end with a wad of hair in your hand and a dramatic monologue in the mirror.
This guide walks you through a gentle, foolproof routine for detangling hair without painwhether
your hair is straight, wavy, curly, coily, color-treated, or currently auditioning for the role of “bird’s nest.”
You’ll learn what causes knots, what tools actually help, and the exact steps to get smooth results with minimal
breakage and maximum dignity.
Why Detangling Hurts (And How to Make It Stop)
Tangles are basically friction + dryness + shed hairs throwing a party. When hair is dry or damaged, the outer
layer (the cuticle) doesn’t lie flat. That roughness makes strands catch on each other, especially at the ends.
Add split ends, product buildup, wind, collars, ponytails, and you’ve got knots that grip like they’re holding a
grudge.
Pain usually comes from two things: (1) pulling tangles tight against the scalp, and (2) forcing a tool through a
knot instead of loosening it first. The solution is simple (but not always easy): more slip, smaller sections,
and slower movement. Think “gentle persuasion,” not “lawnmower.”
Quick Prep: What You Need Before You Start
- Slip: conditioner, a detangling spray, or a leave-in conditioner
- Tool: wide-tooth comb and/or a detangling brush designed for your hair type
- Clips: to section hair (your future self will thank you)
- Optional helpers: hair oil (argan, coconut, jojoba), a spray bottle with water, microfiber towel or soft T-shirt
Pro tip: If you’re detangling a child’s hair, add one more itemdistraction. Cartoons count as a medical device in
this context.
How to Detangle Hair Without Pain: 11 Steps
Step 1: Decide if this is “tangled” or “matted.”
A few knots? Totally manageable at home. A dense mat that feels like felted fabric? Still possible, but it
requires patience and productlots of it. If the hair is severely matted, painfully tight at the scalp, or
you see redness/irritation, consider getting help from a professional stylist. No shame. Mats can be stubborn,
and scalps are not replaceable.Step 2: Pick the right time (aka: not when you’re rushing).
Detangling is like untangling headphones: doing it in a hurry makes it worse. Give yourself a calm 10–20 minutes
(longer for thick or curly hair). Good lighting helps you see what’s actually happening instead of guessing and
yanking.Step 3: Add moisture firstdry detangling is the villain in many stories.
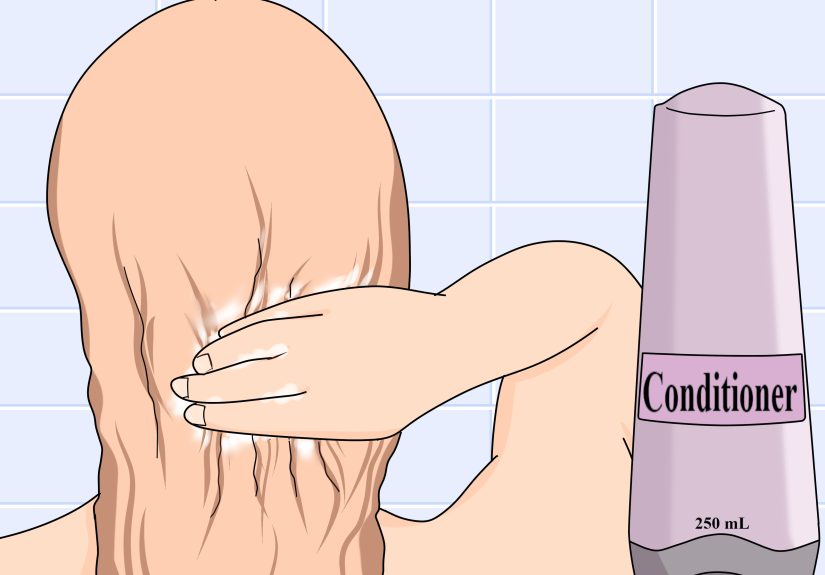
For most people, hair detangles best when it has some moisture and “slip.” Lightly mist with water or detangle
in the shower. If your hair is curly/coily, detangling with conditioner is often the least painful route because
it adds glide and reduces snagging. If your hair is straight and extremely fragile when wet, aim for damp hair
(not dripping) and be extra gentle with a wide-tooth comb.Step 4: Saturate with conditioner or detanglerand let it sit.
Don’t just “apply.” Saturate. Focus on mid-lengths and ends where tangles live. Let the product sit for
2–5 minutes so it can soften and lubricate the knot. This pause is not lazinessit’s strategy.If hair is very knotted, add a small amount of hair oil on top of conditioner for extra slip. The goal is for
strands to slide apart, not fight you.Step 5: Section your hair like you mean it.
Split hair into 4–8 sections (more sections for thick, long, curly, or coily hair). Clip each section up.
Working in sections prevents “re-tangling,” which is when you detangle one part and the rest of your hair forms
a new knot out of spite.Step 6: Start with your fingers (yes, really).
Finger-detangling is underrated. Use your fingertips to gently pull apart larger knots and locate where the
snag is. This reduces how much force you need with a tool. Think of it as loosening the jar lid before you
twistmuch less drama.Step 7: Hold the hair above the knot to protect your scalp.
Place one hand above the tangle (closer to the roots) to absorb tension. This simple move dramatically reduces
pain because the pulling force doesn’t travel straight to your scalp. It’s the hair version of bracing yourself
before you hit a pothole.Step 8: Use a wide-tooth comb (or detangling brush) from ends upward.
Start at the very ends and work upward in small increments. Don’t drag the comb from root to tip like you’re
mowing a lawn. Short, gentle strokes are faster in the long run because they prevent breakage and “knot
tightening.”Tool choice matters:
- Wide-tooth comb: great for minimizing snagging, especially on wet or conditioned hair.
- Detangling brush: helpful for many hair types, especially when designed for wet hair and used gently.
- Fine-tooth comb: save it for styling after detangling, not for knot removal.
Step 9: Use “micro-moves” on stubborn knots (don’t escalate to violence).
If you hit resistance, stop. Add more product. Then try:
- Pick-and-release: use the comb tip to gently tease apart the knot, a few hairs at a time.
- Side-to-side wiggle: tiny motions can loosen a knot without tightening it.
- Re-finger detangle: fingers can separate strands a tool can’t see.
If your hair is bleached, balayaged, or chemically processed, be extra patientthose strands often tangle more
because they’re more porous and prone to catching.Step 10: Rinse (or don’t), then add leave-in protection.
If you detangled in the shower with rinse-out conditioner, rinse gently and follow with a leave-in conditioner
or detangling spray. If you detangled outside the shower, apply a leave-in to keep hair slippery and protected.
Finish with a tiny amount of oil on the ends if they feel rough or dry.This is where you reduce future knots: hydration + lubrication now means fewer tangles later.
Step 11: Dry gently and prevent tomorrow’s tangles tonight.
Rubbing hair with a rough towel can create frizz, breakage, andsurprisemore tangles. Instead, blot with a
microfiber towel or soft T-shirt. If you blow-dry, use a heat protectant and avoid blasting soaking-wet hair
with high heat.Prevention checklist:
- Sleep on a silk/satin pillowcase or use a bonnet.
- Loosely braid long hair or use a gentle scrunchie “pineapple” for curls.
- Trim regularly to reduce split ends that snag and knot.
- Clean brushes and combsproduct buildup can increase friction.
Adjust the Routine by Hair Type
Curly and coily hair (2C–4C)
Curly hair tangles easily because the bends and coils encourage strands to wrap around each other. Detangle on wet
hair with conditioner or leave-in for maximum slip. Work in smaller sections. Finger-detangling first can save a lot
of breakage (and a lot of sighing).
Fine or thin hair
Fine hair can tangle quickly and break easily, so gentleness matters more than speed. Use a lightweight detangler,
start with fingers, and choose a wide-tooth comb. If your hair stretches a lot when wet, detangle when damp rather
than dripping.
Thick, long hair
Long hair collects tangles from clothes, seats, scarves, and basically existing in a world with wind. Sectioning is
non-negotiable. Consider detangling in the shower with conditioner, then adding a leave-in afterward to keep things
smooth.
Natural hair in protective styles, wigs, or extensions
Shed hair can get trapped and create knots over time. Take down styles gently, use plenty of slip, and detangle in
sections. Avoid aggressive brushing at the base where tension can stress the scalp.
Kids’ hair
The best trick is to reduce scalp tugging: hold hair above the knot, detangle from ends, and use lots of detangler.
If mornings are chaos, do a gentle detangle at night, braid loosely, and save everyone’s nervous systems.
Common Detangling Mistakes That Cause Pain (And Breakage)
- Starting at the roots: This pushes knots tighter and yanks on the scalp.
- Using the wrong tool: Fine-tooth combs and stiff brushes can snag and snap hair.
- Skipping slip: No conditioner or detangler = more friction = more ouch.
- Detangling one giant section: Big sections hide knots and encourage yanking.
- Brushing aggressively when hair is most fragile: If hair is wet or damaged, be extra gentle and use the right tool.
Conclusion: Smooth Hair, Calm Scalp, Zero Drama
The secret to detangling hair without pain isn’t superhuman strengthit’s strategy. Add moisture,
create slip, work in sections, start from the ends, and treat stubborn knots like a puzzle instead of a personal
insult. Once you build the habit, detangling becomes a quick routine instead of a daily battle scene.
And remember: your hair isn’t “being difficult.” It’s responding to friction, dryness, damage, and handling. Give
it the right conditions, and it’ll cooperatelike a cat that has decided you are worthy of affection (for now).
Real-World Detangling Experiences (The Stuff People Actually Learn)
Here’s what tends to happen in real life: people don’t detangle in perfect conditions with spa music playing and
unlimited time. They detangle in a rush, half-awake, with a phone balanced on a bottle of leave-in conditioner.
Over time, a few patterns show uplittle “aha” moments that make detangling easier forever.
1) The “shower tornado” lesson: A lot of people discover the hard way that flipping hair upside down
and scrubbing like they’re polishing a bowling ball can create knots that weren’t there five minutes ago. The fix
is boring but effective: cleanse the scalp with your fingertips, let suds run through lengths, and save rough
handling for your laundry. When you treat hair lengths gently, you’re not creating tangles and then blaming your
brush for them.
2) The beach day plot twist: Sun + wind + salt water turns hair into a knot factory. People who have
the easiest post-beach detangles usually do one small thing: they add slip early. A quick rinse, a coat of
conditioner, and gentle finger-detangling before the hair dries can prevent the “crispy tangle surprise” later.
Waiting until hair is fully dry and stiff often makes detangling feel like negotiating with a cactus.
3) The gym ponytail trap: High ponytails and tight elastics can tangle hair at the nape and around
the hair tieespecially if hair is long or textured. What helps? Switching to softer scrunchies, loosening tension,
and detangling the nape area first (it’s usually the worst). Also: a quick nightly detangle is less painful than a
weekend “major excavation.”
4) The curly-hair breakthrough: Many curlies report a turning point when they stop trying to detangle
dry curls like straight hair. Detangling with conditioner in sectionsoften in the showercan reduce snapping,
frizz, and scalp pain. Another common win is learning the difference between “tangles” and “curl clumps.” Not every
group of curls needs to be separated; sometimes, you’re accidentally dismantling your own hairstyle and calling it
detangling.
5) The color-treated reality check: After bleaching or heavy highlighting, hair can feel rougher and
snag more easily. People often notice that detangling becomes painless again when they (a) use richer conditioners,
(b) add a leave-in after every wash, and (c) handle hair more gently when damp. It’s not that your hair is doomed;
it’s that it’s thirstier and needs more slip to behave.
6) The “kids have ninja knots” truth: Parents and caregivers often find that the fastest detangling
session is the one that starts with prevention: detangle at night, braid loosely, and use a satin pillowcase or
bonnet when possible. In the morning, a detangling spray plus the “hold above the knot” trick can turn tears into
mild annoyancewhich is basically success. Also, many people learn to detangle while the child is occupied, because
a moving target makes knots worse.
7) The patience paradox: The weirdest experience-based lesson is this: going slower is often faster.
When people stop yanking and start using micro-moves (tiny strokes, pick-and-release, more product), they spend
less time fighting the same knot. The hair stays on the head, the scalp stays calm, and the whole process feels
way less like a battle with an inanimate object that’s winning.
If there’s one universal takeaway from real routines, it’s this: detangling is mostly prevention plus slip.
When hair is moisturized, handled gently, and protected at night, knots don’t get a chance to become monsters.
And when knots do show upas they always willyour approach determines whether it’s a quick fix or a full episode.