Table of Contents >> Show >> Hide
- What You Need Before You Start
- What Is Xcode (And Why Is Everyone Obsessed With It)?
- Part 1: How to Download Xcode on Mac (The Official, Easiest Way)
- Part 2: How to Download Xcode from Apple Developer (Betas or Older Versions)
- Install Xcode Command Line Tools (Optional but Commonly Needed)
- Part 3: Can You Download Xcode on a Windows PC?
- Part 4: The Best Legal Ways to Use Xcode From a PC
- Troubleshooting: Common Xcode Download and Install Problems
- Quick FAQ
- What It’s Like in Real Life: of “Been There” Wisdom
- Conclusion
If you’ve ever Googled “download Xcode on PC” and felt personally attacked by the internet’s smug “You need a Mac,”
you’re not alone. Xcode is Apple’s official development environment for building iPhone, iPad, Mac, Apple Watch,
and Apple Vision appsand Apple designed it to run on macOS only.
The good news: getting Xcode on a Mac is straightforward, and using Xcode from a Windows PC is totally possible
(legally) if you do it the right way. This guide walks you through both: a clean, step-by-step Xcode install on macOS,
and the best practical options for PC users who need Xcode access without turning their computer into a courtroom exhibit.
What You Need Before You Start
- A Mac (physical or cloud-hosted) running a compatible macOS version
- Apple Account (free) for the Mac App Store and Apple Developer downloads
- Plenty of storage (Xcode is famous for expanding like a suitcase you packed at 2 a.m.)
- Stable internet (because large downloads + spotty Wi-Fi = emotional damage)
What Is Xcode (And Why Is Everyone Obsessed With It)?
Xcode is Apple’s official toolset for building apps for Apple platforms. It includes the code editor, compiler tools,
Interface Builder (for UI design), simulators (so you can run iOS apps without owning every iPhone ever made),
debugging tools, performance profilers, and SDKs for Apple operating systems.
If you want to create iOS apps with Swift or Objective-C, run an iPhone Simulator, sign and archive an app for App Store
submission, or work deeply with SwiftUIXcode is the “official gate” you walk through.
Part 1: How to Download Xcode on Mac (The Official, Easiest Way)
The Mac App Store is the simplest and most “set it and forget it” option. It also makes updates easier.
Step 1: Check Your macOS Version
- Click the Apple menu (top-left).
- Select About This Mac.
- Confirm your macOS version is supported by the Xcode version you want.
Tip: If your Mac is running an older macOS, the App Store may only offer the newest Xcode that your system supports,
or it may block installation until you update macOS.
Step 2: Make Sure You Have Enough Storage
Xcode is a large download and can take up significantly more space after installation because it includes simulators,
device support files, caches, and developer tools. If you’re tight on storage, plan to free space before installing.
- Open System Settings → General → Storage.
- Aim for at least 30–50 GB free to avoid installation drama.
Step 3: Sign In to the Mac App Store
- Open the App Store app.
- Click your profile icon and sign in with your Apple Account.
Step 4: Download Xcode
- In the App Store search bar, type Xcode.
- Select Xcode by Apple.
- Click Get or Install.
- Wait for download and installation to finish (this may take a while).
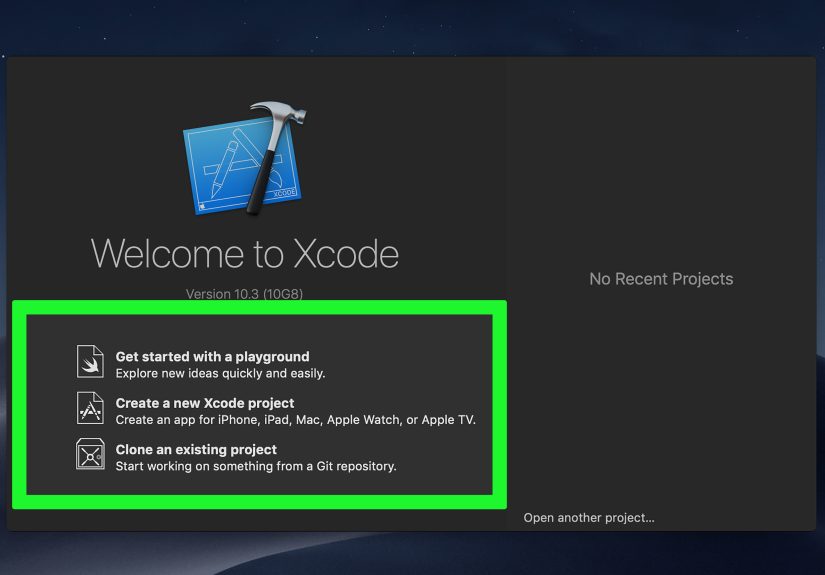
Step 5: Launch Xcode and Complete Setup
- Open Applications and launch Xcode.
- Accept the license agreement.
- If prompted, allow Xcode to install additional components (common on first launch).
Step 6: Confirm It Works
Open Xcode and create a quick test project:
- Choose Create a new Xcode project.
- Select iOS → App.
- Choose Swift and SwiftUI (a popular modern combo).
- Run the project with an iPhone Simulator to confirm everything is installed correctly.
Part 2: How to Download Xcode from Apple Developer (Betas or Older Versions)
Sometimes the App Store isn’t what you need. Maybe you’re testing a beta, working on a project that requires an older Xcode,
or you want a specific version for compatibility reasons.
Step 1: Go to Apple Developer Downloads
- Sign in with your Apple Account.
- Find Xcode downloads (including older versions and betas).
Important: A paid Apple Developer Program membership is not always required just to download Xcode resources,
but certain developer features (like publishing to the App Store) do require enrollment.
Step 2: Download the .xip File
Xcode from the developer portal often comes as a .xip archive. It’s like a zip file with extra Apple vibes.
Step 3: Install the Downloaded Xcode
- Double-click the .xip file to extract it (this can take time).
- You’ll get an Xcode.app.
- Drag Xcode.app into your Applications folder.
Step 4: If You Have Multiple Xcode Versions, Keep Them Organized
Developers often keep more than one Xcode installed (for example, stable + beta).
Rename them to avoid confusion:
Xcode.app(stable)Xcode-Beta.app(beta)Xcode-ProjectName.app(special compatibility version)
Install Xcode Command Line Tools (Optional but Commonly Needed)
Even if you don’t open Xcode every day, you’ll probably need its command line tools for things like Git, compiling dependencies,
or installing Homebrew packages.
Option A: Install via Terminal
- Open Terminal.
- Run:
xcode-select --install - Follow the on-screen prompts to install.
Option B: Point Tools to the Correct Xcode (If You Have Multiple)
If your system uses the wrong Xcode version, you can switch the active developer directory.
For example, if you want to use the stable app in Applications:
sudo xcode-select -s /Applications/Xcode.app
Part 3: Can You Download Xcode on a Windows PC?
The blunt truth: you can’t install Xcode natively on Windows. Xcode is a macOS application, and Apple
doesn’t provide a Windows version.
Also, running macOS in a virtual machine on non-Apple hardware may violate Apple’s licensing terms. In other words:
it’s not just “hard,” it can also be “not allowed,” depending on how you do it.
Part 4: The Best Legal Ways to Use Xcode From a PC
If you’re on Windows but need Xcode (for iOS builds, signing, testing, or submitting apps), here are realistic options that
developers actually use.
Option 1: Use a Physical Mac (Best Long-Term Value)
If you’re serious about iOS development, the simplest solution is owning a Mac. A Mac mini (even used) is often the
most budget-friendly way to get a reliable Xcode machine. You can still do most coding on your PC and use the Mac mainly
for builds, simulators, signing, and App Store tasks.
Option 2: Remote Into a Mac You Already Have
If you have access to a Mac at home, work, or school, you can remote into it from your Windows PC using remote desktop tools.
Then you install Xcode on that Mac exactly like the steps above.
Option 3: Rent a Cloud Mac (Fastest “No Hardware” Path)
Cloud Mac providers give you a real macOS environment running on genuine Apple hardware. You connect remotely, install Xcode,
and work as if it’s your own Macwithout physically owning it.
- Cloud Mac hosting (for a full desktop experience)
- Amazon EC2 Mac (powerful, flexible, commonly used by teams)
PC-to-Cloud-Mac Workflow (Step-by-Step)
- Create an account with a Mac cloud provider (choose based on budget and region).
- Provision a macOS machine (you’ll get an IP/connection method).
- Connect via a remote desktop client.
- On the remote Mac, open the Mac App Store and install Xcode (same Mac steps).
- Optionally, code on Windows using an editor like VS Code and connect to the Mac via SSH for a smoother workflow.
This setup is popular because you can write code on your Windows machine (fast keyboard, big monitor, your favorite setup),
while the Mac handles Xcode builds, simulators, and signing in the background.
Option 4: Use macOS Runners for CI (Good for Builds, Not Great for Clicking Around)
If you mainly need Xcode for building and signing apps (not for interactive simulator testing), CI services with macOS runners
can help. For example, you can run automated builds and tests on hosted macOS machines.
This is fantastic for teams and repeatable builds. It’s not a substitute for an interactive Mac desktop, but it can reduce how often
you personally need to open Xcode.
Troubleshooting: Common Xcode Download and Install Problems
Problem 1: “Not Enough Storage” (Even Though You Swear You Have Space)
Xcode often needs more free space than the download size suggests because it expands during installation and may pull extra components.
Fixes that usually work:
- Free up additional storage (delete large files, old iOS backups, unused apps).
- Restart your Mac (yes, really).
- Update macOS and try again.
- If you have external storage, consider moving large media libraries off the internal drive.
Problem 2: Xcode Download Is Stuck or Slow
- Pause and resume the download.
- Restart the App Store app.
- Sign out of the App Store and sign back in.
- Check your network (large downloads hate unstable Wi-Fi).
Problem 3: Xcode Opens, Then Immediately Crashes
- Make sure your macOS version is compatible with the installed Xcode version.
- Update macOS and try again.
- If you installed from a downloaded .xip, confirm the app is in the Applications folder.
Problem 4: Command Line Tools Not Found
If Terminal tools complain (for example, during Git operations), install Command Line Tools:
xcode-select --install
Problem 5: Simulator Takes Forever to Download or Uses Tons of Space
Simulators are optional downloads for different iOS versions and devices. Install only what you need at first. You can always
add more later. If storage is tight, remove older simulators you don’t use.
Quick FAQ
Is Xcode free?
YesXcode is free to download. You may need a paid Apple Developer Program membership for certain developer services like
App Store distribution, but Xcode itself is available without paying.
Do I need Xcode to build iOS apps?
If your goal is to run an iPhone simulator, archive and sign apps, and submit to the App Store, then yesXcode is the standard tool.
Some cross-platform toolchains exist, but iOS signing and final distribution almost always leads back to Xcode at some stage.
Can I develop iOS apps on Windows without ever touching a Mac?
Realistically, you’ll need macOS access at least for building/signing/testing in an Apple environment. The most practical “Windows-first”
setup is writing code on Windows and using a remote or cloud Mac for the Xcode-specific steps.
What It’s Like in Real Life: of “Been There” Wisdom
Here’s the part most “step-by-step guides” skip: the experience. Not the buttons you click, but how this actually feels once you’re doing it.
First, almost everyone underestimates the storage situation. Xcode looks like a normal app until you install it and discover it’s more like adopting
a large dog that comes with accessories, toys, a bed, and a sudden need for extra closet space. Developers commonly report that the download size is
only the beginningonce you add simulators, device support files, and caches, Xcode can balloon quickly. The practical lesson: don’t treat your disk
like it’s “fine.” Treat it like it’s hosting a party and you still need room to breathe.
The second “real-life” moment: your first launch can feel slow and dramatic. Xcode may install additional components, index your system, and quietly
prepare itself like a chef sharpening knives. This is normal. New users often assume something’s broken because the UI pauses or because the first build
takes longer than expected. But once indexing finishes, day-to-day work gets smoother. A simple habit helps: install Xcode, open it once, let it settle,
then restart your Mac before doing serious work. It’s the software equivalent of “let the pizza rest before slicing.”
If you’re using a PC with a remote Mac, the biggest quality-of-life factor is your workflow split. Most people land on one of two approaches:
(1) Do everything on the remote Mac desktop, or (2) write code locally on Windows and use the Mac mainly for Xcode builds, simulator runs, and signing.
The second approach is often faster and more comfortable because text editing over remote desktop can feel laggy, especially on weaker connections. That’s
why many developers pair a Windows editor (like VS Code) with remote access (SSH) to the Mac. Your Windows machine stays snappy, and the Mac handles the
Apple-only tasks without you fighting latency for every keystroke.
Another “wish someone told me” moment is version compatibility. Teams frequently pin Xcode versions because one update can change build settings, Swift
compiler behavior, or simulator quirks. It’s common to keep two Xcodes installed: a stable version for work and a beta for experimenting. If you do that,
naming your apps clearly (like Xcode-Beta) and setting the active developer directory intentionally saves a lot of confusion. Otherwise, you’ll eventually
encounter the classic problem: “Why is my build using the wrong toolchain?” (Answer: because your Mac is loyal to chaos.)
Finally, remember that Xcode is powerfulbut not emotionally gentle. It’s normal to hit odd errors that disappear after a clean build, a simulator reset,
or a restart. The most productive developers aren’t the ones who never see weirdness; they’re the ones who recognize it quickly and move on with a calm
checklist. Keep your system updated, keep storage healthy, and treat Xcode like a high-performance tool: incredible when maintained, grumpy when neglected.
Conclusion
If you’re on a Mac, downloading Xcode is as simple as installing it from the Mac App Store and letting it complete first-launch setup.
If you’re on a PC, the smart move is using a real Maceither one you own, one you can remote into, or a cloud Macso you can develop iOS apps without
stepping into licensing trouble. Either way, once Xcode is installed and your toolchain is stable, you’ll be able to build, test, and ship Apple-platform
apps with a setup that fits your budget and your sanity.