Table of Contents >> Show >> Hide
- What “ombré” means (and why it works)
- Start smart: choose fabric and dye that actually like each other
- Supplies checklist
- Prep work that makes your gradient look expensive
- The classic one-bath ombré method (time = gradient)
- Upgrade your fade: concentration layering (the “designer gradient” trick)
- How much water, salt, vinegar, and “helpers” do you need?
- Pro handling tricks for cleaner fades
- Rinse, wash, dry: how to lock in your work
- Troubleshooting: fix the usual ombré drama
- Project ideas that look high-effort (but aren’t)
- Safety and cleanup (because your future self deserves peace)
- FAQ
- Conclusion
- Real-World Ombre Dyeing Experiences & Lessons (The Stuff People Learn the Hard Way)
- SEO JSON
Ombré fabric dyeing is basically the art of making your textile look like it’s fading into a sunset, a fog bank,
or a moody indie album cover (in the best way). The good news: you don’t need a fashion degree, a laboratory,
or a mystical “dye whisperer” certification. You need a little planning, a steady hand, and the willingness to
accept that your kitchen might temporarily resemble a watercolor crime scene.
This guide walks you through dip dyeing an ombré gradient step-by-step, explains why your fade sometimes turns into
a hard “tide line,” and gives you options depending on what your fabric is made of. We’ll keep it practical, detailed,
and just funny enough to keep you from rage-rinsing a pillowcase at midnight.
What “ombré” means (and why it works)
Ombré is a gradual transition from light to dark (or one color to another). In dip dyeing, you create that transition
by controlling how long each section of fabric stays in dye and/or how concentrated
the dye is where that section sits. More time + more concentration typically equals deeper color. Add heat and agitation,
and dye molecules move fastermeaning stronger color, faster.
Start smart: choose fabric and dye that actually like each other
1) Fabric matters more than vibes
For the smoothest ombré, natural fibers are your best friends: cotton, linen, rayon, silk, and wool.
They absorb dye more willingly and evenly than many synthetics. Polyester can be dyed, but it usually requires higher heat
and specialized dyeso it’s doable, just not always “relaxing weekend craft” energy.
2) Pick the right dye type (quick cheat sheet)
-
All-purpose dye (common and beginner-friendly): works on many natural fibers and some nylon blends.
Great for casual projects and experimenting. -
Fiber reactive dye (often used for cotton/rayon/linen): bonds strongly with plant fibers and can give
bright, washfast colorexcellent for towels, tees, and anything you’ll launder often. - Acid dye (best for wool/silk/nylon): typically used with heat and an acidic helper (like vinegar/citric acid).
- Disperse dye / iDye Poly-type (for polyester): usually requires near-boiling heat and a dedicated pot.
If your project is 100% cotton (or cotton-heavy), you’ll usually get the most satisfying “designer fade”
with fiber reactive dye. If you want something simple and widely available, all-purpose dye can still look fantastic.
Supplies checklist
Gather everything first. Ombré is smoother when you’re not sprinting around holding dripping fabric like a soggy flag.
- Dye (appropriate for your fiber)
- Large container (plastic bin, bucket, sink, or stainless potbig enough for fabric to move)
- Very hot water (as needed by your dye type)
- Stir stick/spoon (not for food afterward if you’re using a dye-only setup)
- Gloves (your hands will otherwise become “Season 3: Blue Edition”)
- Drop cloth/plastic to protect surfaces
- Measuring cups/spoons
- Salt (often used to boost color on plant fibers with some dye systems)
- Vinegar (commonly used for nylon/silk/wool with certain dyes)
- Dish detergent (a small amount can help level dyeing in some methods)
- Binder clips + ruler/dowel (optional “hanger” to hold fabric evenly)
- Old towels/paper towels for inevitable splashes
Prep work that makes your gradient look expensive
Pre-wash like you mean it
Wash your fabric in warm water with detergent and skip fabric softener. Many new textiles have finishes
(sizing, stain resistance, softeners) that can block dye and cause blotches. If there are visible stains, treat them first
dye won’t magically “cover” a stain; it usually just turns the stain into a more colorful stain.
Pre-wet the fabric
Dip dyeing works more evenly when the fabric is wet before it hits the dye bath. Dry fabric can grab dye too quickly in
random places, creating speckles and streaks.
Set up your “dye zone”
Cover your workspace with plastic. Keep paper towels handy. And if you’re using powdered dye, work in a well-ventilated area
and avoid breathing dye dust. Your lungs are not a craft supply.
The classic one-bath ombré method (time = gradient)
This method creates a fade by controlling how long different sections of fabric stay submerged. The bottom stays in longest
(darkest), and you gradually lift the fabric out so the top gets less time (lighter).
Step-by-step
-
Make your dye bath.
Fill your container with enough hot water so fabric can move freely. Stir in dye until fully dissolved.
Add any recommended helpers (for example, some all-purpose methods use salt for cotton/rayon/linen and vinegar for nylon/silk/wool,
plus a small amount of dish detergent to promote level dyeing). -
Test the color.
Dip a paper towel or scrap fabric. Remember: wet dye looks darker than it may dry, and most fabric lightens a bit after rinsing.
Adjust dye strength nowfuture-you will be grateful. -
Choose your “fade zone.”
Decide where the darkest color ends. Mark it lightly with a safety pin or washable marker on the inside hem. -
Start fully submerged (briefly).
Hold the fabric from the top corners and dip the entire piece in for just a few seconds to “prime” it.
Then lift it back up to the point where you want the darkest area to be. -
Build the gradient with small lifts.
Keep the bottom portion in the dye. Every 30–90 seconds, lift the fabric 1–2 inches and gently swish.
Think “slow elevator,” not “ripcord.” Small moves make a smoother fade. -
Swish to avoid a hard line.
A harsh line often happens when the fabric sits still at one level. Gentle motion helps blur that line. -
Stop before it looks perfect.
Seriously. Wet dye is dramatic. It will often lighten after rinsing and drying. If you wait until it’s “exactly perfect”
while wet, it may dry darker than planned. -
Rinse strategically.
Rinse in cool water first (to remove excess dye) and gradually shift to warmer water until the water runs clearer.
Then wash with detergent and dry as appropriate for the fabric.
A simple timing guide (adjust to taste)
Timing varies by dye type, temperature, and fabric thickness, but this framework helps you plan:
| Section | Time in dye | Expected look |
|---|---|---|
| Bottom 10–20% | 8–20 minutes | Deepest shade |
| Middle zone | 3–10 minutes (with lifts) | Smooth gradient |
| Top zone | 0–2 minutes | Light tint (or near-white) |
Want a very subtle ombré? Shorten the total time and/or dilute the dye bath. Want bold drama? Increase concentration,
keep the bath hot (if your dye calls for heat), and extend the deepest section’s time.
Upgrade your fade: concentration layering (the “designer gradient” trick)
If you’ve ever tried ombré and gotten “pretty good, but not buttery-smooth,” this section is for you.
Instead of relying only on time, you also control dye strength.
Option A: Add dye gradually (one container)
- Start with a lighter dye bath (diluted).
- Dip and lift to create the first soft gradient.
- Add more dye to the bath (stir thoroughly).
- Repeat dipping and lifting, focusing on the lower portion to deepen the base.
This method works well when you want a fade from pale to saturated in the same color familylike blush to wine,
sky blue to navy, or sage to deep forest.
Option B: Two-bath ombré (color-to-color fade)
For a two-color ombré (say, teal fading into indigo), use two containers:
- Create Bath 1 (Color A) and Bath 2 (Color B) at similar temperature and volume.
- Dip the fabric in Bath 1 for the lighter/upper portion and create a soft gradient.
- Rinse lightly or squeeze out excess (depending on dye system), then dip the lower portion into Bath 2.
- Blend the transition zone by gently alternating dips at the boundary area.
Pro tip: choose colors that mix nicely. If your overlap zone mixes into “mystery brown,” it’s not the fabric’s fault.
It’s color theory’s little prank.
How much water, salt, vinegar, and “helpers” do you need?
The exact recipe depends on your dye brand and dye chemistry, but here are practical guidelines used in common
home dyeing instructions:
-
Water volume: A roomy bath helps evenness. A common guideline for immersion dyeing is roughly
several gallons per pound of dry fabric, enough that fabric can move freely. - Salt: Often used to boost color on plant fibers in many all-purpose/fiber-reactive immersion approaches.
- Vinegar: Commonly used when dyeing protein fibers or nylon with certain dyes.
- Soda ash (for fiber reactive dyes): Helps fiber reactive dyes bond strongly to cotton/rayon/linen, improving washfastness.
- Dish detergent (tiny amount): Sometimes used to promote level dyeing by helping wet out the fabric evenly.
If you’re new, the safest route is: follow your dye’s official instructions for fiber type, water temperature,
and additivesthen use the ombré dipping/lifting technique to create the gradient.
Pro handling tricks for cleaner fades
Use a simple “hanger” tool
Long fabric is awkward. An easy hack: clip the top edge with binder clips, tie string to the clips, and wrap the string
around a ruler or dowel so you can hold the fabric evenly and adjust height smoothly. It’s like giving your fabric a tiny elevator system.
Keep the tub walls clean
Dye on the sides of your container can leave surprise streaks when fabric brushes against it. Wipe the inside walls if you notice build-up.
Yes, it’s annoying. Yes, it helps.
Agitation is your secret weapon
Gentle stirring and swishing reduces splotches. Stillness creates lines. Ombré is basically the reward you get for not letting the fabric nap.
Rinse, wash, dry: how to lock in your work
Whatever dye you use, finishing well matters. A beautiful ombré that bleeds all over your next laundry load is not a flex.
- Rinse progressively: start cool, move warmer as water runs clearer.
- Wash with detergent: a regular wash helps remove loose dye.
- Dry fully: evaluate color only when dry; wet fabric lies (politely, but still).
Troubleshooting: fix the usual ombré drama
Problem: A harsh “tide line” instead of a fade
- Cause: Fabric sat still at one dye level.
- Fix: Swish more, lift in smaller increments, and spend extra time blending the transition zone.
- Save it: Re-dip just the boundary area and gently pulse up/down to blur the line.
Problem: Blotches or speckles
- Cause: Fabric wasn’t pre-wet, or dye wasn’t fully dissolved, or fabric had finishes/oils.
- Fix: Prewash, pre-wet, dissolve dye thoroughly, keep fabric moving.
Problem: The top is accidentally tinted when you wanted it white
- Cause: Wickingdye creeps upward through wet fabric.
- Fix: Keep the “white zone” higher and drier, and don’t let the fabric fold or touch dyed sections.
Problem: Color is too light after drying
- Fix: Re-dye. Increase concentration or time for the lower portion. Testing small swatches helps you dial in results.
Problem: Color keeps bleeding
- Cause: Excess dye not rinsed out, or incorrect fixative/temperature for the dye type.
- Fix: Rinse longer, wash again, and make sure the dye system matches the fiber and method.
Project ideas that look high-effort (but aren’t)
- Tea towels: Quick, forgiving, and photogenic.
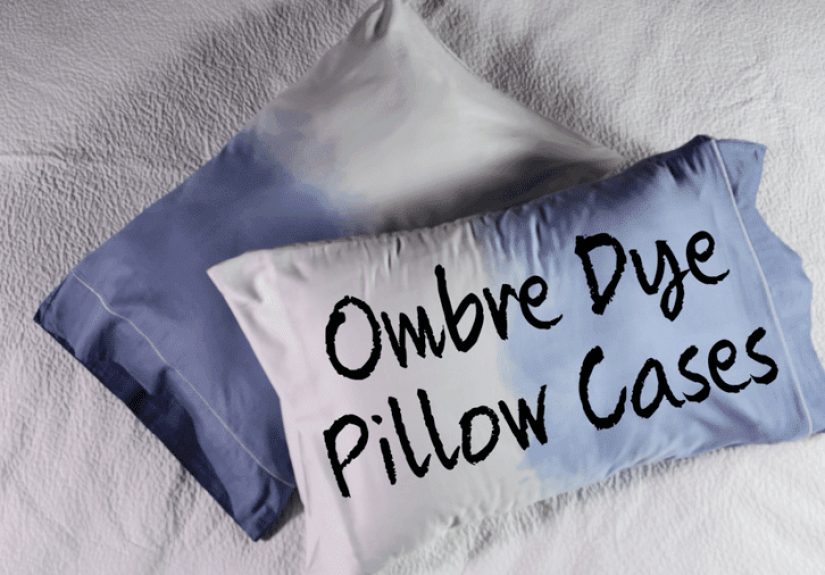
- Pillow covers: Make two matching fades, or flip one upside-down for a mirror effect.
- Ombre curtains: Big impact. Use a large bin and a hanger tool to keep the dip level steady.
- Canvas tote bag: Practical and funand if it’s not perfect, you can call it “art.”
- Dress or oversized tee: Dip the hem for a fashion-y gradient that hides “oops I spilled coffee” moments.
Safety and cleanup (because your future self deserves peace)
Wear gloves and protect your eyes if you’re handling powders or splashing is likely. Work in a ventilated area and avoid breathing dye dust.
Keep dye materials away from kids and pets. And if you use a pot for high-heat synthetic dyeing, make it a dedicated dye potno one wants “Soup à la Navy Blue.”
FAQ
Can I do ombré in a washing machine?
A washing machine is great for even, all-over colorbut ombré requires controlled placement. You can use the machine for a base shade,
then do a dip dye ombré in a tub afterward if you want a gradient.
Can I ombré dye polyester?
Yes, but it’s more advanced. Polyester typically needs high heat and a dye designed for synthetics. If you’re after an easy first win,
start with cotton or linen.
How do I keep the fade super smooth?
Use smaller lift increments, keep the fabric moving, keep the bath consistent (temperature + concentration), and blend the boundary area longer than you think you need.
Smooth ombré is basically patience in fabric form.
Conclusion
Ombré dip dyeing looks fancy because it’s all about subtle transitionsbut the technique is wonderfully learnable.
Prewash and pre-wet your fabric, pick a dye that matches your fiber, and build your fade with small, steady lifts and gentle motion.
If your first try isn’t runway-perfect, that’s normal: ombré is part science (time, temperature, concentration) and part art (your hand movements and eye).
The best part? You can almost always tweak it with a second dip to deepen or smooth the gradient. So grab a plain towel, a tote, or that “meh” pillow cover,
and give it a glow-up that screams “custom,” not “I panicked in aisle seven.”
Real-World Ombre Dyeing Experiences & Lessons (The Stuff People Learn the Hard Way)
If you ask a room full of DIYers about their first ombré project, you’ll hear the same storyline: confidence at the start,
mild panic at the midpoint, and triumph (or at least acceptance) by the rinse cycle. The most common “whoa” moment is realizing
how fast fabric can take dyeespecially when the bath is hot and the fabric is thin. Many people dip the bottom, blink,
and suddenly they’ve invented a brand-new color called “Oops, That’s Dark.” The fix is simple: start with a more diluted bath than you think you need,
and build intensity gradually. You can always go darker, but going lighter is basically a long, awkward relationship with color remover.
Another frequent lesson is that ombré is less about “one perfect dip” and more about micro-movements.
Beginners often hold the fabric at one height, waiting for magic to happen, and that’s how the infamous tide line is born.
People who get the smoothest fades tend to treat the fabric like it’s on a slow escalator: tiny lifts, gentle swishing,
and a little extra blending time in the transition zone. Even when you’re aiming for a crisp two-tone dip dye,
a few small pulses up and down will keep the line from looking accidental.
There’s also a hilarious-but-true discovery about “white space.” Many first-timers plan a bright white top that fades into color,
only to find the dye has crept upward like it’s trying to climb the corporate ladder. That’s wicking: wet fabric transports dye beyond
where you dipped it. People who eventually master the cleanest white tops usually do three things: (1) they keep the upper section higher and
drier, (2) they avoid folding the fabric so dyed sections don’t touch undyed areas, and (3) they stop dipping slightly lower than their final goal,
knowing the dye may travel a bit.
The rinse stage is where expectations get recalibrated. Wet fabric often looks darker and more intense, and many people assume they messed up.
Then it dries, lightens, and suddenly it looks “expensive.” The lesson: don’t judge your ombré while it’s dripping and dramatic.
Rinse thoroughly, wash once, and evaluate only when dry. If it’s lighter than you wanted, you can repeat the dip processthis time with more confidence
and a better sense of timing.
Finally, a practical experience tip: your setup matters as much as your dye. People who struggle with streaks often used a container that was too small,
so the fabric bunched up and dyed unevenly. Upgrading to a larger bin, clipping the top edge with binder clips, and using a ruler/dowel “hanger” to control
the lift turns the whole process from chaotic to smooth. Ombré rewards calm, controlled handlingso give yourself the space and tools to move slowly.
The result is the same fabric, but a totally different vibe: intentional, polished, and very “yes, I meant to do that.”