Table of Contents >> Show >> Hide
- What Makes Potstickers “Freeze Well” (A Tiny Bit of Science, But Fun)
- Before You Freeze: Set Yourself Up for Potsticker Success
- The Best Method: Flash-Freezing Raw Potstickers (So They Don’t Stick Together)
- Storage Options: Bags vs Containers (And the Best Way to Prevent Freezer Burn)
- How Long Can You Freeze Homemade Potstickers?
- Should You Freeze Potstickers Cooked or Uncooked?
- Do You Need to Thaw Frozen Potstickers Before Cooking?
- How to Cook Frozen Potstickers (3 Reliable Methods)
- Food Safety Notes (Especially for Meat Fillings)
- Troubleshooting: Common Freezer Problems (And How to Fix Them)
- A Simple Make-Ahead Workflow (For Normal Humans With Busy Weeks)
- FAQ: Freezing Homemade Potstickers
- Kitchen Experiences: What Usually Happens When You Start Freezing Homemade Potstickers (500+ Words)
- Conclusion
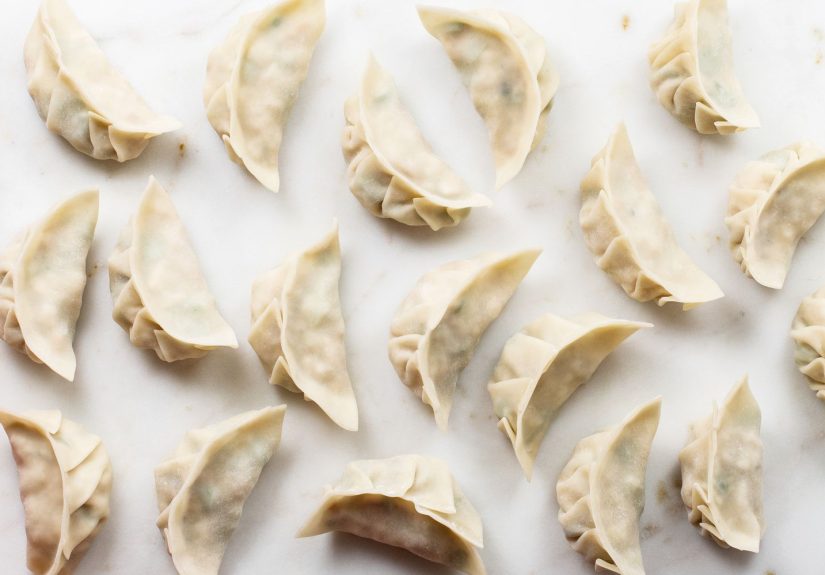
Homemade potstickers are one of life’s great little flexes. You wrap a bunch, you feel like a kitchen wizard, and then reality hits:
you made 60… because wrappers come in packs that do not respect math or personal limits.
Freezing is the answer. Done right, your future self gets a fast, impressive dinner that tastes like you worked way harder than you did
(and you did work hardfolding dumplings is basically origami you can eat).
This guide walks you through the best way to freeze homemade potstickers so they don’t stick together, crack, leak, or get freezer burn.
You’ll also learn how to cook them straight from frozenbecause thawing dumplings is where good intentions go to die.
What Makes Potstickers “Freeze Well” (A Tiny Bit of Science, But Fun)
Potstickers freeze best when you keep three things under control: moisture, air, and pressure.
Too much moisture can turn wrappers gummy or cause ice crystals. Too much air invites freezer burn. Too much pressure (aka stacking
soft dumplings in a bag like you’re packing socks) causes sticking, tearing, and filling leaks.
The solution is a simple two-stage process:
flash-freeze in a single layer, then store airtight.
Before You Freeze: Set Yourself Up for Potsticker Success
1) Keep the filling from becoming a watery drama
- Salt smart: Salt draws water out of cabbage and veggies. If your filling is heavy on vegetables, either squeeze out excess moisture or add salt right before wrapping.
- Use a “binder” if needed: A little egg, cornstarch, or minced mushroom can help hold moisture in the filling instead of leaking into the wrapper.
- Chill the filling: Cold filling is easier to wrap and less likely to sweat liquid while you’re working.
2) Don’t overstuff (your wrapper is not a suitcase)
Overfilling makes sealing harder and increases the odds of blowouts during freezing or cooking. Aim for a neat, compact moundenough to feel generous,
not enough to make the dumpling look like it’s holding its breath.
3) Seal like you mean it
Any gap becomes a leak point once steam pressure builds during cooking. Press out air pockets, pinch seams firmly, and keep a small dish of water nearby
to help the wrapper edges bond. If you’re using homemade wrappers, make sure the dough isn’t drying out while you workcover with a damp towel.
The Best Method: Flash-Freezing Raw Potstickers (So They Don’t Stick Together)
Step 1: Prep your tray
- Line a rimmed baking sheet (or any freezer-safe tray) with parchment paper.
- If your potstickers have a soft bottom, you can lightly dust the parchment with a bit of cornstarch or flour.
- Make sure the tray fits flat in your freezer. A tilted tray = sliding dumplings = modern art.
Step 2: Arrange potstickers with space
Place potstickers in a single layer with a little breathing room so they’re not touching. Touching turns into sticking. Sticking turns into
ripping. Ripping turns into “fine, I’ll just make noodles.”
Step 3: Freeze until solid
Freeze uncovered until potstickers are firm all the way through. In most home freezers, this takes about 1–2 hours for average-size potstickers.
Bigger dumplings can take longer.
Step 4: Pack for the long haul
Once solid, transfer potstickers into a freezer bag or airtight container.
Remove as much air as possible (press it out, use the straw trick, or vacuum-seal if you’re fancy).
Step 5: Label like a responsible adult
Add the date and a quick note: “Pork/Chive,” “Chicken/Cabbage,” “Mushroom/Tofu,” etc.
Future-you will be grateful. Or at least less confused.
Storage Options: Bags vs Containers (And the Best Way to Prevent Freezer Burn)
Freezer bags (best for space)
- Pros: Compact, easy to squeeze out air, stacks well.
- Cons: Dumplings can break if you crush the bag under something heavy.
- Pro move: Freeze the bag flat in a single layer first, then store upright like a “dumpling file folder.”
Airtight containers (best for fragile dumplings)
- Pros: More protection from crushing.
- Cons: Takes more freezer space and can trap extra air if not packed well.
- Pro move: Layer dumplings with parchment between layers so they don’t fuse together.
Vacuum sealing (best for long storage)
Vacuum sealing dramatically reduces air exposure (hello, fewer freezer-burn tragedies). Just make sure dumplings are fully frozen before sealing,
or the vacuum can squish them into weird shapes.
How Long Can You Freeze Homemade Potstickers?
Safety-wise, foods kept continuously frozen stay safe; quality is the bigger issue. For potstickers, the sweet spot is typically
2–3 months for best texture and flavor. After that, they may still be fine, but you’re more likely to notice dryness or freezer burn.
| Potsticker Type | Best Quality Window | Notes |
|---|---|---|
| Raw, homemade potstickers (most fillings) | 2–3 months | Best texture; wrapper stays springy and seals stay strong. |
| Cooked potstickers (leftovers) | 1–2 months | Safe longer, but wrappers can soften after reheating. |
| Delicate wrappers (very thin/homemade) | 1–2 months | More prone to cracking and freezer burn. |
Should You Freeze Potstickers Cooked or Uncooked?
Freeze uncooked (recommended)
Uncooked potstickers cook up closest to freshjuicy filling, tender wrapper, crisp bottom. This is the classic “flash-freeze, then cook from frozen” approach.
Freeze cooked (works, but with trade-offs)
Cooked potstickers can be frozen, especially if you’re saving leftovers. Cool completely first, freeze in a single layer, then pack airtight.
Expect a softer wrapper when reheated (you can re-crisp the bottoms in a skillet).
Do You Need to Thaw Frozen Potstickers Before Cooking?
In almost all cases: no. Cooking from frozen helps wrappers hold their shape and prevents them from turning sticky or gummy.
Thawing often creates condensation that makes dumplings stick together and tear.
The only time thawing makes sense is if you want to gently re-steam cooked leftovers, or if you’re trying to fix a batch that froze into a single mega-clump
(we’ll cover that in troubleshooting). Even then, thaw in the fridgenot on the counter.
How to Cook Frozen Potstickers (3 Reliable Methods)
Method 1: Classic Steam-Fry (The Real “Potsticker” Way)
- Heat a nonstick skillet over medium heat. Add 1–2 teaspoons neutral oil.
- Arrange frozen potstickers flat-side down (don’t crowd; cook in batches).
- Let them fry 1–3 minutes until the bottoms start to turn golden.
- Carefully add water (about 1/4 cup for a medium skilletenough to create steam, not a dumpling pool).
- Cover immediately. Steam 6–10 minutes (time depends on size and filling).
- Uncover and let remaining water evaporate. Continue cooking until bottoms re-crisp.
- Serve crisp-side up with dipping sauce (because you’re classy).
Method 2: Steaming (Gentle, Great for Thin Wrappers)
- Line a steamer basket with parchment (or lightly oil it) to prevent sticking.
- Bring water to a strong simmer.
- Steam frozen potstickers 8–12 minutes, depending on size and filling.
- Check one: the wrapper should look slightly translucent and the filling should be cooked through.
Method 3: Boiling (Fast, Foolproof, Less Crispy)
- Bring a pot of water to a gentle boil.
- Add frozen potstickers and stir carefully once so they don’t stick to the bottom.
- Cook until they float and the filling is cooked through (often 5–8 minutes, depending on size).
- Drain well. Optional: pan-fry 1–2 minutes after boiling for a quick crisp bottom.
Food Safety Notes (Especially for Meat Fillings)
- Keep things cold: Don’t leave raw filling or assembled potstickers out for long stretches. Work in batches and refrigerate what you’re not actively wrapping.
- Cook thoroughly: If your filling uses ground meat, aim for safe doneness (commonly 160°F for ground pork/beef and 165°F for poultry). When in doubt, cut one open and check that the center is no longer pink and juices run clear.
- Freeze promptly: The sooner you freeze after wrapping, the better the texture (and the safer the process).
Troubleshooting: Common Freezer Problems (And How to Fix Them)
Problem: Potstickers froze together in a big clump
This usually happens when they were bagged before fully frozen, or they touched on the tray.
Fix: Next time flash-freeze longer. For the current batch, separate what you can gently, then cook from frozen.
If they’re truly fused, steam them first to loosen, then separate carefully with chopsticks.
Problem: Wrappers cracked in the freezer
Thin wrappers plus freezer dehydration can cause cracking.
Fix: Store with less air (press out air or vacuum seal) and avoid leaving dumplings uncovered in the freezer longer than needed for flash-freezing.
Problem: Freezer burn (dry patches, weird flavor)
That’s air exposure. Fix: Upgrade packagingdouble-bag, use thicker freezer bags, or vacuum seal. Label and rotate stock so older batches get eaten first.
Problem: Potstickers stick to the tray
Parchment paper prevents most sticking. If you used a smooth plate or glass tray, sticking can be intense.
Fix: Always line with parchment, and if needed, lightly dust with starch.
Problem: Bottoms burn before the inside cooks
Your heat is too high or you didn’t add enough water for steaming.
Fix: Use medium heat, cover promptly after adding water, and let steam do the heavy lifting before crisping at the end.
A Simple Make-Ahead Workflow (For Normal Humans With Busy Weeks)
- Saturday: Mix filling, refrigerate (flavor improves as it chills).
- Sunday: Wrap potstickers while watching something comforting.
- Flash-freeze: Tray in freezer 1–2 hours until solid.
- Pack + label: Portion into bags (e.g., 12 per bag for quick dinners).
- Weeknight: Steam-fry from frozen and feel like a genius.
FAQ: Freezing Homemade Potstickers
Can I freeze potstickers on wax paper?
You can, but parchment tends to behave better in the freezer. Wax paper can stick or tear depending on moisture and freezer conditions.
Can I freeze potstickers with homemade wrappers?
Yesjust be extra careful about drying out. Homemade wrappers can be more delicate, so minimize air exposure and avoid leaving them uncovered longer than necessary.
What dipping sauce freezes well?
Most soy-vinegar sauces don’t need freezing (they live happily in the fridge). But chili oil, chili crisp, and concentrated ginger-scallion mixes can be portioned and frozen.
If you freeze sauces, use small containers or ice-cube trays so you can thaw only what you need.
Can I air-fry frozen potstickers?
You can, though the texture won’t be identical to steam-fried. Air frying can dry out wrappers if you go too hot too long. If you try it, lightly spray with oil and check early.
Kitchen Experiences: What Usually Happens When You Start Freezing Homemade Potstickers (500+ Words)
Most people don’t mess up dumplings because they lack skill. They mess up dumplings because they’re optimistic. The first time you make homemade potstickers,
you think, “I’ll just freeze the extras.” That sounds simpleright up until you discover that “extras” is a suspiciously large number and your freezer is
currently a museum of half-used frozen fruit, mystery bread, and one ice pack you’ve moved apartments with three times.
The most common first-timer experience goes like this: you finish wrapping, you’re proud, you toss them into a bag, and you freeze them. Next day, you reach in
for a quick dinner and pull out… a single dumpling boulder. It’s basically a potsticker asteroid. The good news is you didn’t ruin dinner forever.
The better news is you just learned why flash-freezing matters. That single layer on a tray is the difference between “grab a handful” and “chisel your meal.”
Another classic moment: you freeze them on a plate because it’s convenient, then they bond to it like they signed a lease. Some home cooks report that glass or
super-smooth plates create stubborn sticking, especially if there’s moisture on the wrapper surface. The fix is easy: parchment paper. And if you forget parchment,
a light dusting of starch can save you from having to pry dumplings off like you’re opening a paint can.
Then there’s the “my dumplings cracked” phase. This tends to show up after a few weeks, when a bag has been opened and closed multiple times, letting in little
bursts of humid air that re-freeze as ice crystals. The dumplings still cook, but the wrapper looks like it’s been through a stressful week (relatable).
The lesson: push out air, seal tight, and if you’re the type who snacks on “just three dumplings” repeatedly, consider portioning into smaller bags. That way
you’re not exposing the whole batch every time a craving hits.
Cooking from frozen is another “aha” moment. Many people assume thawing is kinder. With potstickers, it’s usually the opposite. When dumplings thaw, condensation
forms on the wrapper, which makes them sticky and fragile. You go to lift one, it tears, and suddenly your filling is freelancing in the pan. Cooking from frozen
keeps the wrapper firm while the steam does its job. It’s one of those rare kitchen rules that feels like a cheat code: you do less work and get better results.
Finally, there’s the joy phasethe one that makes you a potsticker person for life. You come home tired, you remember you have dumplings, and 12 minutes later
you’re eating something that tastes like a weekend project (because it was) but feels like a weeknight win. You start making “dumpling meals” out of thin air:
potstickers plus a cucumber salad, potstickers in broth with greens, potstickers next to a quick fried rice. You may even start offering dumplings to guests like
you’re running a tiny, delicious secret restaurant out of your kitchen.
The overall experience is this: freezing homemade potstickers isn’t hard, but the small details matter. Once you learn the tray-freeze-and-bag rhythm, it becomes
second naturelike meal prep, but way more fun and significantly more satisfying than portioning plain chicken and rice (no offense to chicken and rice).
Conclusion
Freezing homemade potstickers is all about protecting your hard work: flash-freeze them in a single layer, pack them airtight, label them, and cook straight
from frozen when you’re ready. You’ll get dumplings that keep their shape, don’t stick together, and still deliver that crisp-bottom, juicy-center magic that
makes potstickers worth the folding effort.