Table of Contents >> Show >> Hide
- Step 1: Pick Your Renaissance “Character” (and Stop Here for 60 Seconds)
- Step 2: Set Your Budget, Your Deadline, and Your “Heat Tolerance”
- Step 3: Choose Fabrics That Look Right (and Won’t Roast You)
- Step 4: Gather Tools and Notions (the Boring Stuff That Prevents Chaos)
- Step 5: Take Measurements and Choose Your Base Pattern Strategy
- Step 6: Sew the Base Layer (Chemise/Shift or Shirt)
- Step 7: Build the Structured Layer (Bodice/Corset or Doublet/Jerkin)
- Step 8: Add Bottoms (Skirt + Petticoat or Breeches + Hose)
- Step 9: Add Sleeves (Because Renaissance Fashion Loved Options)
- Step 10: Make an Outer Layer (Overskirt, Gown, Surcoat, or Cloak)
- Step 11: Choose Closures: Lacing, Hand-Sewn Eyelets, Buttons, and Hooks
- Step 12: Add Accessories That Sell the Look (Belt, Pouch, Hat, and Shoes)
- Step 13: Fit, Finish, and Faire-Proof Your Renaissance Costume
- Conclusion: Your Costume, Your Rules (But Make It Layered)
- of Hard-Won Renaissance Costume Wisdom (So You Don’t Learn the Fun Way)
Want a Renaissance costume that looks legit, feels comfortable, and doesn’t fall apart the moment you attempt a heroic turkey leg bite?
You’re in the right place. This guide walks you through a practical, historically inspired way to make a Renaissance costume
for a Renaissance fair, cosplay, or themed partywithout requiring a time machine or a royal tailor on payroll.
The secret is simple: layers, natural-looking fabrics, smart closures, and accessories that do the heavy lifting.
You’ll build from the skin outwardchemise or shirt, structured layer (bodice/doublet), bottoms (skirt/breeches), then drama (cloak, sleeves, hat).
Along the way, you’ll learn fitting tricks, budget-friendly hacks, and how to avoid the dreaded “Halloween aisle velvet cape” vibe.
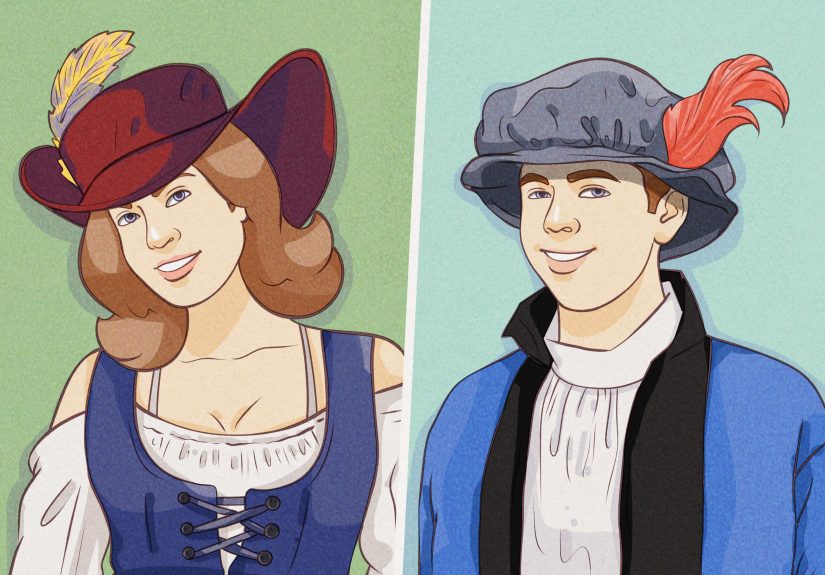
Step 1: Pick Your Renaissance “Character” (and Stop Here for 60 Seconds)
Before you cut a single piece of fabric, decide who you are in this story. Renaissance clothing varied by region, decade, and social class.
Your costume will come together faster if you pick a lane.
Quick character menu
- Village/peasant: simple layers, earthy colors, apron, sturdy belt pouch (aka “medieval pockets”).
- Merchant/artisan: cleaner lines, better fabric, a little trim, maybe detachable sleeves for flair.
- Gentry/noble: richer colors, more structure, fancier headwear, and a suspicious amount of decorative ribbon.
- Rogue/bard/pirate-adjacent: not strictly historical, but wildly popular at faireslean into leather accents, boots, and swagger.
This choice affects everything: fabric weight, color palette, how much sparkle is socially acceptable, and how many layers you’ll tolerate in July.
Step 2: Set Your Budget, Your Deadline, and Your “Heat Tolerance”
A DIY Renaissance costume can be as affordable or as extra as you want. Decide your limits now so you don’t end up panic-buying
brocade at 2 a.m. while whispering, “It’s an investment piece.”
- Budget build: thrifted base pieces + one handmade hero item (bodice or doublet) + accessories.
- Mid-range: make the core garments (chemise/shirt + bodice/doublet + skirt/breeches) and add a cloak.
- All-in: structured layers, nicer trims, hand-finished details, period-ish closures, and a hat that announces your presence.
Also consider weather. Renaissance fairs often mean sun, walking, and standing. Breathable fabrics and sensible footwear will save your spirit.
Your costume should feel like an outfit, not a portable sauna.
Step 3: Choose Fabrics That Look Right (and Won’t Roast You)
If you remember one thing, make it this: fabric choice is 50% of the Renaissance look. Natural fibers drape and wrinkle in a way
that reads “historical” on camera and in person. Synthetics often look shiny and trap heat.
Best fabric picks for a Renaissance fair outfit
- Linen: ideal for chemises/shirts and warm-weather layers. It wrinklescongratulations, that’s historically on-brand.
- Cotton: practical substitute for many pieces, especially for beginners (choose matte weaves like broadcloth, poplin, or twill).
- Wool or wool blends: great for outer layers in cooler weather; choose lighter weights if you’re not in “winter court” mode.
- Silk (or silk-like matte blends): best reserved for higher-status looks and accents, unless your budget says “peasants only.”
Color palette tip
Earth tones and muted shades feel believable for working-class looks. For nobles, jewel tones can be gorgeousjust keep them rich, not neon.
If your fabric screams “highlighter yellow,” it’s probably not a subtle Renaissance moment.
Step 4: Gather Tools and Notions (the Boring Stuff That Prevents Chaos)
You don’t need a professional studio, but you do need a few essentials. Think of this as packing for a questexcept your dragon is fraying.
- Measuring tape, ruler, fabric chalk/marker
- Scissors/rotary cutter, pins/clips
- Sewing machine (helpful) and hand-sewing needles (necessary)
- Thread that matches your fabric, plus a stronger thread for eyelets or stress points
- Iron + ironing board (yes, reallypressing is half of sewing)
- Interfacing or sturdy lining fabric for bodices/doublets
- Lacing cord or ribbon, plus an awl (or something pointy-but-safe-ish) for eyelet prep
If you plan to add lacing, closures, or structure, you’ll thank yourself later for buying quality notions now.
Step 5: Take Measurements and Choose Your Base Pattern Strategy
Renaissance costume making is much easier when you start with a patterncommercial, printable, or self-drafted from a simple block.
Patterns from major sewing brands often include “Renaissance,” “medieval,” or “historical costume” options that work as a strong starting point.
Measurements that matter most
- Bust/chest, underbust, waist, hips
- Shoulder width, back waist length
- Arm length and bicep circumference (especially if sleeves are fitted)
- Skirt length (waist to floor) while wearing your intended shoes
Pro move: make a quick test version (“mock-up”) of fitted pieces like a bodice or doublet using inexpensive fabric.
Adjusting fit on a practice version is faster and cheaper than crying into velvet.
Step 6: Sew the Base Layer (Chemise/Shift or Shirt)
The base layer is your comfort MVP. Historically inspired wardrobes often start with a linen chemise (for women) or a long-sleeved shirt/shift (for men).
At a Renaissance fair, this layer also protects your nicer pieces from sweat, sunscreen, and turkey grease diplomacy.
Simple chemise/shirt construction
- Use a loose, rectangular cut if you want an easy beginner build.
- Add a wide neckline (square or scoop reads very “Renaissance”), plus a drawstring if you want adjustability.
- For sleeves, aim for roomy so you can move, wave, and dramatically point at jesters.
Choose linen or a matte cotton. Finish seams neatly (French seams are lovely for lightweight fabrics) so the inside looks as good as the outside.
Your future self will appreciate it when you’re wearing this piece all day.
Step 7: Build the Structured Layer (Bodice/Corset or Doublet/Jerkin)
This is the “wow” piece that makes your outfit read as a real Renaissance costume instead of “white shirt + vibes.”
Women’s looks often feature a fitted bodice over the chemise; men’s looks often use a doublet or jerkin over the shirt.
For a bodice (Renaissance dress style)
- Use a pattern with princess seams or darts for shaping.
- Line it with a sturdy fabric; consider interfacing for extra structure.
- Front lacing is common for a fair-friendly bodice (easy to adjust).
For a doublet or jerkin (men’s Renaissance costume)
- Choose a close fit through the torso with room in the shoulders.
- Use a firmer fabric like twill, wool blend, or lined cotton.
- Add tabs, short “skirts,” or decorative seams for that period-inspired silhouette.
Take your time here. A well-fitted bodice or doublet instantly upgrades your costumelike going from “NPC” to “main character.”
Step 8: Add Bottoms (Skirt + Petticoat or Breeches + Hose)
Now we balance the silhouette. Renaissance outfits often rely on volumeespecially in skirts. For men, breeches or slops plus hose create a distinct shape.
Skirt route (common Renaissance fair costume choice)
- Make a gathered or pleated skirt with a sturdy waistband.
- Add an underskirt/petticoat for comfort and extra swish.
- Want extra drama? Make an overskirt that splits in front to show the layer underneath.
Breeches route
- Choose knee-length or fuller “pumpkin” breeches for a classic Renaissance feel.
- Pair with long socks/hose (modern substitutes work fine if the colors behave).
- Use ties, lacing, or buttons to keep things secureno one wants wardrobe betrayal mid-parade.
Keep fabrics matte and sturdy. If you’re planning to sit on hay bales or grass, darker colors hide the evidence of your adventures.
Step 9: Add Sleeves (Because Renaissance Fashion Loved Options)
Detachable sleeves are peak Renaissance: practical, customizable, and a little theatrical. They also let you adjust for weather.
Two sleeve strategies
- Attached sleeves: faster and simpler; sew them into the bodice/doublet like a standard garment.
- Detachable sleeves: add ties or points at the shoulder and along the arm; swap sleeve styles without remaking the whole outfit.
If you want that classic “chemise puff” look, leave openings or use slightly looser sleeve pieces so the base layer can peek through.
That peek of linen is basically Renaissance fashion saying, “Yes, I moisturize.”
Step 10: Make an Outer Layer (Overskirt, Gown, Surcoat, or Cloak)
Outer layers are where you can add instant presence. They also hide modern necessities like phone, keys, and existential dread.
Easy outer layer options
- Apron: perfect for peasant or artisan looks; adds authenticity and function.
- Overskirt or open-front gown: creates the layered Renaissance silhouette with minimal extra fitting.
- Cloak/cape: beginner-friendly geometry (circles and semicircles!) and maximum drama per stitch.
Cloaks are also excellent for “instant costume” upgrades. Throw one over a simple base outfit, and suddenly you look like you own a mysterious backstory.
Step 11: Choose Closures: Lacing, Hand-Sewn Eyelets, Buttons, and Hooks
Closures can make or break your DIY Renaissance costumeliterally. Lacing is adjustable and forgiving, which is why it’s beloved at faires.
Eyelets: the strong, tidy option
For bodices and doublets, eyelets take a lot of tension. Metal grommets can work, but sewn eyelets are often sturdier because the fabric threads are shifted
rather than aggressively punched out.
- Mark eyelet spacing evenly (often around 1 inch apart looks balanced).
- Reinforce the area with extra layers or interfacing.
- Use an awl to open the weave, then stitch around the opening with a tight buttonhole/blanket stitch.
Lacing tip
Use a firm cord or ribbon and test-lace your garment several times before the event. If it slips, frays, or behaves like an angry shoelace,
upgrade the cord nownot in the parking lot.
Step 12: Add Accessories That Sell the Look (Belt, Pouch, Hat, and Shoes)
Accessories are the cheat codes of Renaissance costume design. They add story, texture, and practicality.
If your garments are simple, accessories can still make your outfit feel intentional and “period-ish.”
High-impact accessories
- Belt + pouch: instantly functional and very faire-friendly (your phone vanishes like magic).
- Headwear: caps, coifs, wide straw hats, flower crowns, or structured hoodspick what matches your character.
- Jewelry: keep it modest for peasant looks; go bold for nobles (but maybe don’t “outdress the Queen”).
- Shoes/boots: choose comfort first. If the footwear looks vaguely rustic, you’re winning.
Optional but fun: a basket, tankard, book, or small prop tied to your persona. Just avoid anything sharp or prohibited by your event’s rules.
Step 13: Fit, Finish, and Faire-Proof Your Renaissance Costume
This step is the difference between “impressive” and “impressive for the first 12 minutes.”
Do a full dress rehearsal at home: wear every layer, lace everything up, walk around, sit down, reach up, bend over, and pretend to bow.
Checklist before you leave the house
- Reinforce stress points: lacing edges, shoulder seams, waistband closures.
- Finish raw edges to reduce fraying (zigzag, serge, binding, or turned hems).
- Add hidden safety pins or small snaps where fabric likes to wander.
- Pack an emergency kit: needle/thread, small scissors, safety pins, stain remover pen.
Comfort is also part of “accuracy.” If your outfit hurts, you’ll spend the day thinking about pain instead of jousting, dancing, or dramatically whispering,
“Good morrow.”
Conclusion: Your Costume, Your Rules (But Make It Layered)
You don’t need museum-level perfection to make a Renaissance costume that looks fantastic. If you nail the silhouette, pick believable fabrics,
build your outfit in layers, and add a few signature accessories, you’ll look right at homewhether you’re a humble baker, a bold mercenary,
or a suspiciously wealthy “merchant” who definitely owns at least one velvet something.
Start simple, focus on fit where it matters (bodice/doublet), and let accessories do the storytelling. The best Renaissance fair costumes aren’t just pretty
they’re wearable, durable, and designed for real human movement (including the very important sport of snack acquisition).
of Hard-Won Renaissance Costume Wisdom (So You Don’t Learn the Fun Way)
If you’ve never worn a layered Renaissance fair costume for a full day, here’s what tends to happen: the first hour feels magical,
the second hour feels like you should be knighted, and the fourth hour is when you discover which seam you “totally didn’t need to reinforce.”
The good news? Most costume problems are predictablelike weather, crowds, and the mysterious ability of a belt pouch to become a black hole.
First, comfort is not a betrayal of history; it’s a survival tactic. Beginners often make the outer layer gorgeous and forget the base layer entirely.
Then the day gets hot, the fabric sticks, and suddenly you’re negotiating with your own outfit like it’s a stubborn toddler. A breathable chemise or shirt
(linen is a hero here) prevents that sticky, overheated misery and helps everything sit correctly. Bonus: it keeps your nicer pieces cleaner, which matters
if you want to wear them again without performing laundry rites.
Second, your closures are your destiny. Lacing looks incredible until it’s done poorlythen it looks like your costume is trying to escape your body.
Even spacing, reinforced edges, and sturdy cords are the unglamorous keys to looking polished. Hand-sewn eyelets can feel slow, but they often handle
tension better than cheap grommets that pop out at the worst possible moment (usually right when someone asks to take your photo).
Third, do not underestimate the power of a belt and pouch. People try to carry phones in hands, shove wallets into bodices, or ask a friend to hold things
“for just a second” (which is how friendships end). A pouch lets you keep modern items discreet and your hands free for clapping, shopping, and gesturing
dramatically like you’re delivering an important message to the royal court. Also: bring cash if you can. Some vendors are wonderfully old-school.
Fourth, plan for movement. Skirts should let you stride, not shuffle. Breeches should let you sit without threatening to split. Sleeves should allow you to
lift your arms without summoning the fabric police. A quick at-home dress rehearsalwalk, sit, reach, bendreveals issues before you’re outside with no
sewing kit and a long line for lemonade.
Finally, the “perfect” Renaissance costume is the one you’ll happily wear all day. A slightly simpler outfit worn with confidence looks better than a
complicated one you’re constantly adjusting. Build smart, test everything, and remember: the Renaissance fair is not a museum exam. It’s a celebration.
Your goal is to feel awesome, look cohesive, and keep your outfit intact while you live your best vaguely-historical life.