Table of Contents >> Show >> Hide
- What You’ll Make (And Why It’s Worth It)
- Supplies and Materials
- Safety and “Please Don’t Paint Where Your Mouth Goes” Notes
- Before You Paint: Prep Like a Pro
- How to Make Stars and Stripes Wine Glasses (Step-by-Step)
- Curing and Making It Last (AKA: The Part People Skip and Regret)
- Care Instructions: Keep Your Glasses Cute Past One Party
- Fun Variations (Because One Set Is Never Enough)
- Troubleshooting: Fix the Stuff That Usually Goes Wrong
- Hosting a Wine Glass Painting Party (Optional, Extremely Fun)
- FAQ
- Maker Notes: Real-World Experiences That Save Your Sanity ()
- Conclusion
Want your drinkware to look like it’s ready to salute the flag and then immediately gossip about your potato salad? Enter: stars and stripes wine glassesthe easiest way to make your table scream “USA!” without setting off an actual firework in your living room.
This tutorial walks you through creating festive patriotic wine glasses with crisp stripes, clean stars, and a finish that holds up to real-life use (aka: somebody will absolutely “accidentally” use the rough side of a sponge). We’ll cover the best materials, the simplest techniques, curing methods, and the little tricks that separate “Pinterest-perfect” from “why does my stripe look like a snake.”
What You’ll Make (And Why It’s Worth It)
These DIY Fourth of July wine glasses are perfect for Independence Day, Memorial Day, Labor Day, backyard BBQs, parade watch parties, or anytime you want your table decor to feel extra celebratory. You’ll paint a classic red-and-white stripe pattern and add star detailseither with stencils, paint pens, or simple dot-and-drag brushwork.
Bonus: they double as party favors. Guests can take one home, and you’ll never again wonder which glass is yours (it’s the one with the slightly rebellious stripe. Always.)
Supplies and Materials
Glassware
- Wine glasses (stemmed or stemless). Thrift store finds are finejust inspect for chips and cracks.
- Optional: champagne flutes, tumblers, mason-jar mugs, or cocktail glasses for a matching set.
Paint and Decoration Options
- Enamel paint made for glass (often labeled “glass paint” or “enamel for glass/ceramic”). This is the most durable route.
- Paint pens/markers for glass (great for stars, outlines, and tiny details).
- Optional accents: metallic paint (gold or silver), glitter paint, or translucent “stained glass” style paint.
- Optional: dishwasher-safe decoupage sealer (for non-rim decorative areas or for adding paper/vinyl elements).
Tools That Make It Easier
- Painter’s tape (low-tack). Narrow tape is handy for thin stripes.
- Lint-free cloths or paper towels
- Rubbing alcohol (or white vinegar) for final wipe-down
- Foam brushes (great for stripes), small paintbrushes (for edges and stars)
- Star stencils or star stickers/vinyl decals (optional but sanity-saving)
- Toothpicks or cotton swabs (for touch-ups)
- Paper plate/palette, scrap paper for testing colors
Safety and “Please Don’t Paint Where Your Mouth Goes” Notes
For drinkware, keep paint and sealers on the outside of the glass and away from the rim. A good rule: leave at least 1–1.5 inches unpainted from the lip. Your design will still look great, and your guests won’t end up sipping patriotic acrylic.
If you’re using older/vintage painted glassware as your base, treat it cautiouslyespecially if it has raised paint or worn decorative areas. When in doubt, use vintage pieces as decorative party props rather than daily drinkware.
Before You Paint: Prep Like a Pro
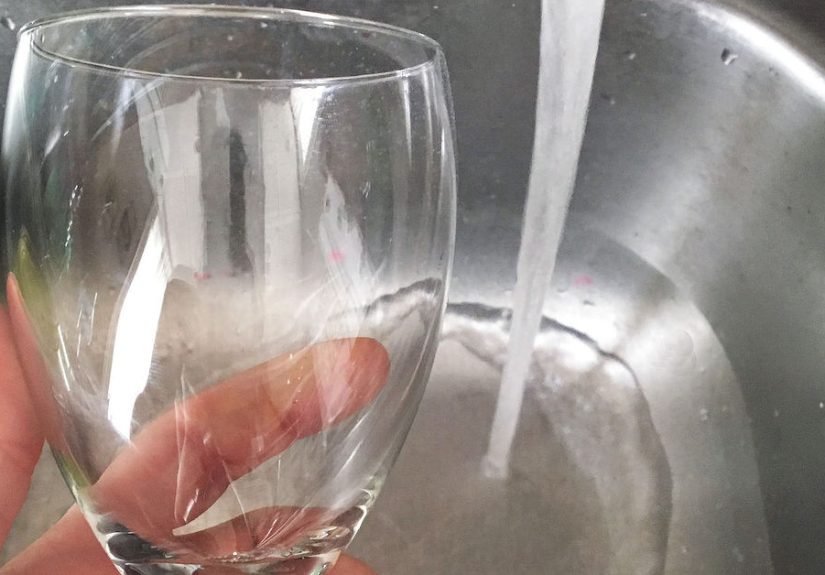
Step 1: Wash, Degrease, and Stop Touching the Glass
Wash each glass with dish soap and warm water. Dry completely. Then wipe the area you’ll paint with rubbing alcohol (or white vinegar) on a lint-free cloth to remove invisible oils. Oils are the #1 reason paint peels later. Once cleaned, hold the glass by the base or inside the bowlavoid touching the painting area with your fingers.
Step 2: Tape the Rim for a Clean, Safe “Drinking Zone”
Wrap painter’s tape around the rim and fold it slightly inward. This creates a neat edge and keeps paint away from the drinking area. It also makes the finished glass look professionally polishedlike you own an apron that says “Artisan,” even if you’re painting in pajamas.
Step 3: Choose a Layout (Quick Design Planning)
Here are three classic layouts that look intentional and festive:
- Classic Flag Vibe: red-and-white stripes around the bowl, white stars on a blue block (painted patch).
- Modern Minimal: stripes on the stem (or lower half), a few scattered stars up top.
- Party Set: each glass gets a different pattern (thin stripes, thick stripes, star cluster, star “confetti”) but the same color palette.
Tip: For symmetry, put the glass on the counter and step back a few feet to eyeball your spacing. Your eyes catch wonky stripes faster from a distancekind of like how mirrors reveal your posture and also your soul.
How to Make Stars and Stripes Wine Glasses (Step-by-Step)
Step 1: Mask Your Stripes
Decide where your stripes will live: around the bowl, on the stem, or wrapping the bottom half of a stemless glass. Apply painter’s tape to mark off the “white” stripes (or the stripes you want to remain clear).
- For crisp stripes, press down the tape edges firmly (burnish with a fingernail or a spoon).
- Keep tape lines parallel by rotating the glass as you apply tape instead of trying to “walk” the tape around.
- Want perfect spacing? Use a ruler and mark tiny guide dots with a washable marker (on the tape, not the glass).
Step 2: Paint the Red Stripes (Thin Coats Win)
Using a foam brush, paint red in the exposed areas between tape lines. Apply thin coats rather than one thick coat. Thick coats take forever to dry and are more likely to bleed under tape.
Let the first coat dry per your paint’s instructions, then apply a second coat if needed for opacity. If you see brush strokes, don’t panicmany enamel paints level out a bit as they dry.
Step 3: Add a Blue Section (Optional, But Very “Stars & Stripes”)
If you want a flag-inspired look, tape off a rectangle “patch” area on one side of the bowl and paint it blue. Keep it on the outside of the glass and below the rim tape.
Pro move: paint the blue section after the red stripes are dry enough to handle, so you don’t accidentally smear your stripes and create a modern art tribute to chaos.
Step 4: Stars Time (Choose Your Star Weapon)
Option A: Stencil Stars (Clean and Fast)
- Position a star stencil over the blue patch (or anywhere).
- Dab white paint with a nearly-dry sponge/brush (pouncing technique) to prevent bleeding under the stencil.
- Lift stencil straight up. Repeat.
Option B: Star Stickers as a Mask (Super Crisp)
- Stick stars where you want “clear glass” stars to appear.
- Paint over the area (blue or red), let dry to the touch, then peel the stickers to reveal star shapes.
- Seal carefully if desired (avoid the rim and interior).
Option C: Paint-Pen Stars (Best for Tiny Details)
- Use a glass paint pen to draw simple stars (or even just “sparkle” asterisks).
- Let fully dry before handling.
Not feeling star-shaped? You can swap stars for dots, mini fireworks, or a monogram in white. It’s still patriotic if it’s red, white, and bluethere’s no official law that says your glass must contain exactly 50 stars.
Step 5: Remove Tape at the Right Time
Peel painter’s tape slowly. If the paint is still very wet, it may smear. If it’s fully cured, tape removal can chip edges. A sweet spot is when paint is dry to the touch but not rock-hard. Pull the tape back on itself at a low angle for the cleanest edge.
If you get a little bleed, touch it up with a cotton swab dipped in rubbing alcohol (if your paint is still fresh) or carefully paint-correct with a tiny brush once everything is dry.
Curing and Making It Last (AKA: The Part People Skip and Regret)
Different glass paints cure differently. Always follow your specific product label. In general, many glass enamel paints offer either:
- Air-cure: set aside for several days to a few weeks for maximum durability.
- Heat-set: place glass in a cool oven, heat gradually, bake for a set time, then cool inside the oven.
A common best practice (when your paint brand allows heat-setting) is to put the painted glass into a cool oven (no preheating), warm it gradually, then let it cool down slowly in the oven after baking. This reduces the risk of thermal shock. Some brands use different baking temperatures (for example, certain glass paints specify lower heat than others), so let the label be your boss.
After curing, give your glasses a little “rest time” before usingmany paint systems recommend waiting a bit longer so the finish fully hardens. Yes, patience is annoying. Yes, it pays off.
Care Instructions: Keep Your Glasses Cute Past One Party
Washing
- Hand-wash is safest, especially for painted details.
- Use mild dish soap, warm water, and a soft spongeavoid abrasive scrubbers that can scratch paint.
- Dry with a lint-free towel to avoid water spots and reduce handling accidents.
- If your paint system explicitly claims “top-rack dishwasher safe,” still use a gentle cycle and avoid high-heat drying when possible.
Storage
- Don’t stack painted glasses directly against each otherplace a soft cloth between them if needed.
- Store upright to protect painted areas from rubbing.
Fun Variations (Because One Set Is Never Enough)
- Gold-Star Glam: add metallic star outlines or a thin gold stripe between red bands.
- Firework Burst: use a paint pen to draw little bursts around the bowl.
- Name Place-Glass: add guests’ names in white paint pen for a party favor + seating card in one.
- Ombre Stripes: fade red from dark to light across stripes for a modern look.
- Etched Stars: use glass-etching cream with star stencils for a frosted, elegant finish (follow product safety directions carefully).
Troubleshooting: Fix the Stuff That Usually Goes Wrong
“My paint is beading up like it’s afraid of the glass.”
That’s usually oil or residue. Clean again with rubbing alcohol and let dry completely. Also make sure you’re using paint formulated for glass.
“My stripes bled under the tape.”
Burnish tape edges harder and use thinner coats. For extra insurance, paint a thin coat of clear (or the base color) along the tape edge first; once that dries, paint your stripe colorthis can help “seal” the edge.
“My paint scratched off when I washed it.”
Either it wasn’t fully cured, the paint wasn’t meant for glass, or the washing method was too aggressive. Confirm cure time, use gentle hand-washing, and consider switching to a glass enamel line designed for durability.
“My stars look… suspiciously like flowers.”
Own it. Or use a stencil/paint pen next time. Stars are deceptively trickylike drawing hands, but with more patriotism.
Hosting a Wine Glass Painting Party (Optional, Extremely Fun)
If you’re making a bunch, turn it into a craft night:
- Set up stations: cleaning/taping, stripes, stars, and drying.
- Provide stencils and paint pens for beginners.
- Label a “dry zone” table so nobody picks up a wet glass and leaves fingerprint art.
- Do a quick demo of thin coats and stencil dabbing (it saves everyone from a smeary meltdown).
FAQ
Can I paint the inside of the glass?
It’s best to keep paint on the outside only and away from the rim. That’s safer, looks cleaner, and holds up better with washing.
How do I make them dishwasher safe?
Use a paint system that specifically supports heat-setting or dishwasher-safe curingand follow that brand’s curing directions exactly. Even then, top-rack + gentle cycle is the “treat your craft kindly” option.
Do I need a sealer?
If you’re using true glass/enamel paints designed for durability, you often don’t need an extra sealer. Sealers can help for certain techniques (like decoupage) but should be used carefully on drinkware and never on the rim or inside.
Maker Notes: Real-World Experiences That Save Your Sanity ()
Let’s talk about what actually happens when humans make stars and stripes wine glassesbecause real life is not a perfectly lit craft reel where everything dries in 11 seconds and nobody sneezes near wet paint.
First: stripes have opinions. You can measure, you can mark, you can whisper motivational speeches to your painter’s tape and one stripe will still try to drift uphill like it’s training for a marathon. The easiest “aha” moment most crafters have is realizing that rotating the glass (instead of stretching the tape around it) keeps lines straighter. Also, narrow painter’s tape is your friend for tighter curves on stemless glasses.
Second: the temptation to apply one thick coat is powerful. It feels productive. It looks bold. It also tends to create ridges, drips, and that one spot where paint pools like a tiny red lake. Thin coats feel slow, but they usually dry smoother, bleed less under tape, and end up looking more professional. If your first coat looks a bit translucent, that’s not failure that’s “layer one of a durable finish.”
Stars are a whole separate personality type. Freehand stars can go from “patriotic sparkle” to “confused snowflake” in half a second. That’s why stencils and paint pens are so popular for this project: they remove the hardest part (symmetry) and let you focus on spacing and style. A trick that shows up again and again in craft groups: if you’re stenciling, use less paint than you think. A nearly dry sponge dabbed straight up-and-down gives sharper points and fewer under-stencil smudges.
Then there’s the curing phasethe part everyone wants to skip because you made the thing and now you want to use the thing. The most common regret story is some version of: “I washed it too soon and the paint scratched.” Even paints made for glass need time to harden. Heat-setting helps when your paint brand allows it, but it still doesn’t mean “wash immediately and attack it with steel wool.” A gentle hand wash is basically the secret handshake of keeping painted glassware looking fresh.
Finally: expect one glass to become your practice child. Maybe it gets a slightly wobbly stripe. Maybe a star slides. Keep it anyway. That “imperfect” glass becomes the one you reach for every yearthe sentimental favorite that reminds you your table was made by a real person, not a decorating catalog. And honestly? That’s the vibe. Festive, a little chaotic, and absolutely worth making again.
Conclusion
Making festive patriotic stars and stripes wine glasses is one of those crafts that looks high-effort but is secretly all about smart prep, clean tape lines, and giving your paint enough time to cure. Whether you’re hosting a Fourth of July bash or just want your drinkware to look ready for fireworks, these glasses bring instant celebration to the tableand they’re way more fun than plain old cups that just sit there silently judging your beverage choices.
Make a set, mix patterns, personalize names, and don’t stress the tiny imperfections. If anyone critiques your stripes, hand them a paintbrush and tell them freedom isn’t freeand neither is your crafting labor.