Table of Contents >> Show >> Hide
- What Is an Egress Window, Really?
- Know the Rules First: Egress Window Code Basics
- Step 1: Decide Which Rooms Need Egress
- Step 2: Choose the Right Wall and Location
- Step 3: Pick Window Types and Materials
- Step 4: Design the Window Well and Drainage
- Step 5: Structure, Permits, and When to Call a Pro
- Step 6: Budgeting and Timeline
- Quick Planning Checklist
- Real-World Experiences and Lessons Learned
- Conclusion
If you’ve ever tried to sleep in a basement bedroom and thought, “If something
goes wrong, how do I get out of here?” congratulations you’re already
thinking like a building inspector. Egress windows aren’t just another
renovation buzzword; they’re the code-required escape hatches that can turn a
dark lower level into safe, legal, and surprisingly pleasant living space.
In this guide, we’ll walk through how to plan egress windows in your house,
especially in basements and bedrooms. We’ll cover code basics, sizing,
placement, window wells, drainage, permits, and real-world tips that seasoned
DIYers and pros have learned the hard way. By the end, you’ll know how to
sketch a solid plan before anyone touches a saw or shovel.
What Is an Egress Window, Really?
An egress window is a window that’s big enough and accessible enough for a
person to climb out (and for firefighters to climb in) during an emergency.
It’s officially known in the building code as an “emergency escape and rescue
opening,” and it must meet specific size and operation requirements to
qualify as egress not just “sort of big” or “I can squeeze through if I
really try.”
Egress windows serve three main purposes:
- Life safety: Provide a direct escape route in a fire or other emergency.
- Code compliance: Make bedrooms, basements, and habitable attics legal living spaces.
- Comfort & value: Add natural light, ventilation, and resale value to your home.
If you’re finishing a basement or converting a room into a bedroom in most
parts of the United States, a properly sized egress window isn’t optional
it’s mandatory.
Know the Rules First: Egress Window Code Basics
The International Residential Code (IRC), adopted in some form by most U.S.
jurisdictions, sets minimum standards for egress windows. Local codes may
tweak the details, so always check with your building department, but the
broad rules are consistent across the country.
Where Are Egress Windows Required?
- Every bedroom or sleeping room must have at least one egress window or door.
- Basements with habitable space generally need at least one egress window; if the basement has bedrooms, each bedroom needs its own.
- Habitable attics also usually require emergency escape and rescue openings.
Minimum Opening Size and Dimensions
Common IRC-based requirements include:
- Minimum net clear opening area: 5.7 sq. ft. (5.0 sq. ft. for grade-floor openings in many jurisdictions).
- Minimum clear opening height: 24 inches.
- Minimum clear opening width: 20 inches.
-
Maximum sill height: The bottom of the opening can be no
more than 44 inches above the finished floor.
“Net clear opening” means the actual open space you can crawl through when
the window is fully opened not the glass size, not the frame size, and
definitely not the overall rough opening. This is why casement windows are
popular for egress: the sash swings completely out of the way, providing more
clear space for a given rough opening.
Window Wells and Ladders
If your egress window is below grade, you’ll need a window well. Typical U.S.
code requirements for wells include:
-
Minimum horizontal area: At least 9 square feet with a
minimum of 36 inches in both width and projection from the wall. -
Depth and ladders: If the well is deeper than 44 inches,
it must have a permanent ladder or steps that don’t interfere with the
window opening. -
Clear space: The well must allow the window to open fully
and remain free of obstructions like snow, plants, or stored items.
Operation and Path to Safety
-
Egress windows must open from the inside without keys, tools, or
“special knowledge.” -
The exterior side must provide a clear path to a yard, court, or
public way, not a fenced-in maze that nobody can escape.
These are life-safety rules, not suggestions. Planning starts with treating
them as hard boundaries like gravity and taxes.
Step 1: Decide Which Rooms Need Egress
Before grabbing graph paper, list every area in your home that either is or
might become a sleeping or habitable space:
- Existing bedrooms without big enough windows.
- Basement rooms that are used as guest rooms or offices (that might officially become bedrooms later).
- Any planned basement remodel with a living area, playroom, or home theater.
Be honest about how you use your space. Calling a basement bedroom “storage”
doesn’t impress the inspector if there’s a bed, dresser, and a teenager
living in it. If someone sleeps there regularly or could in the future, plan
for egress nowbefore drywall goes up and furniture gets wedged in.
Step 2: Choose the Right Wall and Location
Once you know which rooms need egress windows, the next decision is where to
put them. A good location balances safety, structural sanity, and everyday
usability.
Think About How People Actually Escape
Ask yourself:
-
If there’s a fire near the stairs, where is the quickest path from the bed
to the window? - Can a child or older adult operate the window easily and climb into the well?
- Is there enough room on the exterior for a code-compliant well and clear path away from the house?
In many basements, the best location is along a wall that faces a yard with
decent access, not a narrow side yard crammed with AC units and downspouts.
Avoid Problem Areas
-
Heavy utilities: Steer clear of major gas lines, buried
electrical service, or big HVAC trunks that would be expensive to move. -
Dense landscaping: Those mature shrubs look pretty until
you have to cut through them with a reciprocating saw and a lot of regret. -
Driveways and patios: Cutting through a driveway slab or
complex hardscaping adds cost and complication.
Interior Layout Matters Too
On the inside, think about furniture placement and circulation. You don’t
want the only escape route blocked by a king-size bed or a giant entertainment
unit. A common strategy is to center the window on a wall where a bed can be
placed to one side, leaving a clear walkway to the opening.
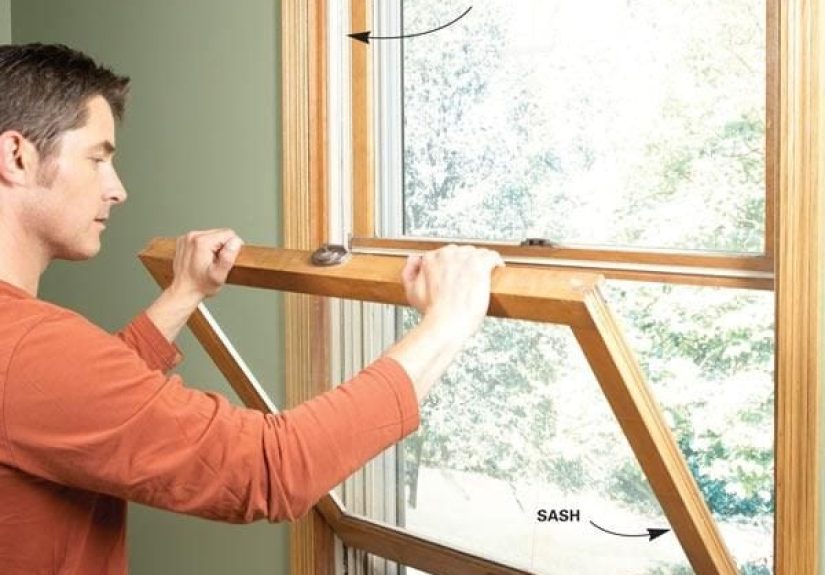
Step 3: Pick Window Types and Materials
Several window styles can meet egress requirements, but some do the job more
gracefully than others.
Popular Egress Window Types
-
Casement (hinged) windows: Swing open like a door and are
extremely efficient for providing large clear openings in modest rough
openings a favorite in basements. -
Slider windows: Can work for egress if sized correctly,
but you typically need a wider opening to achieve the required net clear
area. -
Single- or double-hung windows: Much less common for
basement egress because the upper sash always blocks part of the opening,
meaning you need a very tall unit to meet code.
Frame and Glazing Choices
For basement installations, durability and moisture resistance are key. Vinyl
and fiberglass frames are common because they stand up well to humidity and
require little maintenance. Insulated, low-E glass helps keep the room more
comfortable and improves energy efficiency.
Because egress windows often become major light sources in finished
basements, it can be worth upgrading to better glass or slightly larger
sizes (as long as you still meet code).
Step 4: Design the Window Well and Drainage
The egress window gets all the glory in real estate listings, but the well is
where many projects succeed or fail. A poorly designed well turns into a
leaf-filled bathtub and, eventually, a water problem.
Sizing and Shape
Most homeowners use prefabricated metal, fiberglass, or composite wells that
are specifically sized for egress. Look for:
- A minimum of 36 inches from the window to the front of the well.
- Enough width so the window can fully open and a person can turn and climb.
- Gently sloped or stepped sides, or a built-in ladder if the depth is more than 44 inches.
Rectangular wells are common, but curved designs can feel less claustrophobic
and let in more light. Some models include integrated steps or terraced
levels that can be lightly landscaped.
Drainage Strategy
Think of a window well as a mini basement around your window. If you don’t
plan for water, it will happily plan for you. At minimum:
-
Install a gravel base at the bottom of the well to promote
drainage. -
Tie the well into a perimeter drain or sump system if your
foundation already has one and your local code allows it. - Grade the surrounding soil so surface water flows away from the well.
-
Consider a clear polycarbonate cover designed for egress
wells one that can be opened easily from the inside in an emergency.
A properly drained well means your new egress window brings in sunshine, not
puddles.
Step 5: Structure, Permits, and When to Call a Pro
Planning an egress window isn’t just a decorating decision; it’s a structural
change. In most cases, you’re cutting a large opening in a load-bearing
foundation wall. That’s not something you want to improvise with a
rented saw and a strong sense of optimism.
Structural Support
Your plan should include:
- The size and location of the new opening.
- Dimensions and type of header or lintel needed to carry the load.
- Reinforcement details for the remaining wall sections.
Many jurisdictions require either engineered drawings or prescriptive details
from the code for foundation openings. If you’re not comfortable with
structural design, this is the moment to enlist an engineer or experienced
contractor.
Permits and Inspections
In most U.S. cities and suburbs, you’ll need a building permit for an egress
window, especially if you’re altering the foundation or changing a room’s
use to a bedroom. Expect to submit:
- A floor plan showing the room and window location.
- Details on window size, type, and well dimensions.
- Structural details for the opening and header.
- Drainage and grading notes for the well area.
Inspections typically cover the rough opening, structural support, and final
window and well installation. Good planning up front makes these visits go
smoothly and keeps you from having to redo expensive work.
Step 6: Budgeting and Timeline
Egress windows are one of those projects where the “small rectangle on the
plan” does not equal “small cost in real life.” Your budget will depend
on wall type, site access, window choice, and drainage complexity.
Cost Factors
-
Window unit: Typical egress-rated windows range from a few
hundred dollars for basic vinyl units to more for premium or custom sizes. -
Window well and cover: Prefab wells and code-compliant
covers can easily add several hundred dollars. -
Excavation: Hand-dug wells are cheaper but slow and hard
work; machine excavation is faster but may require access and repair of
landscaping or hardscaping. -
Structural work: Cutting a concrete or block wall and
adding a header is a major labor component and often where pros earn their
keep. -
Finishing: Interior trim, drywall repairs, exterior siding
or stucco, and painting all add up.
Professionally installed basement egress windows commonly run into the
thousands of dollars per opening. DIY can save money, but only if you fully
understand the scope and don’t have to pay later to fix mistakes.
Timeline
Planning should include time for:
- Design and getting quotes from contractors.
- Permit review and approval.
- Scheduling excavation and wall cutting (often weather-dependent).
- Installation, inspections, and interior/exterior finishing.
This isn’t usually a “knock it out in a Saturday afternoon” type of project.
A realistic schedule helps you avoid rushing the safety-critical details.
Quick Planning Checklist
- Confirm which rooms must have egress windows under your local code.
- Measure existing windows to see if any already meet egress requirements.
- Choose walls that offer a safe, direct escape path and exterior access.
- Verify that there’s enough room outside for a full-size window well.
- Select a window type that easily meets net clear opening requirements.
- Design the well with proper size, ladder/steps, and drainage.
- Plan structural details: header size, wall opening, and any engineering.
- Get permits and schedule inspections before work begins.
- Build a realistic budget and timeline, including finishing work.
Real-World Experiences and Lessons Learned
Reading code tables is great, but most homeowners really learn about egress
windows the first time they stand at the bottom of a freshly dug well and
think, “Wow, this is deeper than I imagined.” Here are some experience-based
lessons that rarely make it into the brochures.
1. Bigger Often Feels Better
Many people aim for the absolute minimum opening size to save money. On
paper, it works. In real life, it can feel tight, especially for taller or
less mobile family members. Homeowners who’ve gone through the process often
say they’re glad they upsized slightly not to the point of blowing the
budget, but enough that climbing in and out doesn’t feel like squeezing
through a dog door.
A slightly wider casement or a deeper well can make the difference between
“technically compliant” and “comfortably usable,” especially in an emergency
when adrenaline is high and fine motor skills are not at their peak.
2. Drainage Is Not Optional
Talk to anyone who skipped a gravel base or assumed “the soil drains fine,”
and you’ll hear the same story: heavy rain, a mini swimming pool in the well,
and a soggy basement. Experienced installers almost treat drainage as a
separate mini-project trenching to a perimeter drain, tying into a sump
system where allowed, and making sure downspouts don’t dump water right next
to the well.
A clear cover helps keep out leaves and snow, but it doesn’t eliminate the
need for drainage. Think of covers as umbrellas, not bathtubs.
3. Access for Equipment Can Make or Break the Job
On paper, digging a 4-foot-deep hole next to the foundation is no big deal.
In reality, if your only access is through a narrow side yard with air
conditioners, fences, and a lovingly planted hedge, bringing in a mini
excavator might be impossible. That means more hand digging, more labor, and
more time.
Many homeowners find it worthwhile to temporarily remove a fence panel or cut
back shrubs so equipment can get close to the dig site. It’s disruptive, but
it can cut days off the project and reduce the risk of sloppy excavation near
the foundation.
4. Think About Everyday Life, Not Just Emergencies
Egress windows don’t just sit there waiting for an emergency. They become
real windows in spaces you’ll use daily. People who love their finished
basements almost always mention how much difference the egress window made in
how the room feels. More daylight, a view of the yard, and the ability to
crack the window for fresh air all make the space feel less like a bunker.
When planning, consider how furniture will lay out around the window. You may
decide to orient the room so the egress window becomes a focal point, rather
than something you try to hide behind curtains and a giant sectional.
5. Kids Need a Practice Run
Homeowners with children often discover that kids are nervous about climbing
into a deep window well, even in broad daylight. One smart move is to make
“egress drills” part of a family safety plan. Once the well is finished and
safe, walk through what would happen in an emergency. Let kids practice
opening the window, stepping into the well, and climbing the ladder.
That practice builds confidence and reduces panic if you ever actually need
to use the window as an escape route. It also serves as a test for whether
the ladder rungs are comfortable, the well is free of hazards, and the path
away from the house is clear.
6. Communication With the Inspector Pays Off
Another common lesson from experienced homeowners is that early
communication with the inspector saves headaches later. A quick conversation
or pre-inspection can confirm that your planned window size, well, ladder,
and drainage meet local expectations. Inspectors typically appreciate being
asked up front and are much less enthusiastic about explaining the rules
after the concrete has been cut wrong.
Treat the inspector like part of the team, not an adversary. Everyone has the
same goal: making sure the space is safe for the people who use it.
7. In the End, It Really Does Feel Worth It
Cutting into a foundation wall and digging a crater next to your house can
feel intimidating. But homeowners who’ve done it often say the finished
result transformed their basement from “storage and spiders” into “actual
living space.” A bright bedroom, a legal guest suite, or a code-compliant
home office can make the whole house feel bigger and more livable.
When you plan carefully respecting the code, thinking through drainage,
and designing the well and window as part of the room an egress window is
more than a safety requirement. It’s a major upgrade to how your home works
and how safe it feels.
Conclusion
Planning egress windows is a mix of code compliance, structural know-how,
and practical common sense. Start by understanding the rules, then choose
locations and window types that work with your home’s layout. Design a
window well that is safe, drainable, and pleasant to look at. Bring in pros
when you’re dealing with structure or tricky drainage, and don’t skip the
permit process.
Done right, an egress window is one of the best investments you can make in
a basement or bedroom: it adds safety, light, fresh air, and resale value.
And while you hope you’ll never need it in an emergency, you’ll feel better
knowing that if something goes wrong, everyone has a clear way out.