Table of Contents >> Show >> Hide
- Quick Reality Check: “Black & White” Can Mean Two Different Things
- Way 1: Print Black & White for a Single Print Job (Fastest Option)
- Way 2: Set Black & White as the Default (So You Don’t Have to Remember Every Time)
- Why Your Epson Might Still Use Color Ink (Even When You Print Black Text)
- Make Black & White Look Better: Settings That Actually Matter
- App-Specific Tricks: When the Printer Setting Isn’t the Only Setting
- Mini Troubleshooting Checklist (Because Printers Love Drama)
- Conclusion: Two Ways, One GoalLess Ink Waste and Fewer Surprises
- Experiences: Real-World “Black & White Printing” Moments (and What They Teach You)
Printing in black and white should be the easiest thing in modern liferight up there with breathing and forgetting why you walked into a room.
And yet: Epson printer + “I just need a simple black-and-white page” can sometimes feel like negotiating with a tiny, stubborn robot.
The good news is you have two reliable paths to grayscale glory, and once you set them up, you’ll stop accidentally printing your grocery list in
“Full-Color Museum Poster” mode.
In this guide, you’ll learn two ways to print black and white on most Epson inkjet printers (EcoTank, Expression, WorkForce, and friends),
plus what to do when the printer insists on color ink anyway, how to make text look crisp, and how to avoid the classic “Why is my ‘black’ kinda… brown?”
moment.
Quick Reality Check: “Black & White” Can Mean Two Different Things
Before we hit the buttons, here’s the tiny detail that saves big frustration:
- Grayscale: Prints using shades of gray (best for documents with photos, charts, or gradients).
- Black ink only / Monochrome: Tries to use only black ink for text (best for plain text documents).
Depending on your Epson model and driver, you may see options labeled Black/Grayscale, Grayscale, Black Ink Only,
or sometimes just a checkbox that says Grayscale. Don’t worry if the wording differswhat matters is selecting a mode that tells the driver,
“Stop being colorful.”
Way 1: Print Black & White for a Single Print Job (Fastest Option)
Use this when you only need this one document in black and whitelike a shipping label, a permission slip, or that recipe you’ll definitely
follow exactly (sure).
Windows (11/10): Change Color Mode in Printer Preferences
- Open your document and press Ctrl + P (or go to File > Print).
- Select your Epson printer.
- Click Printer Properties / Properties / Preferences (the wording varies by app).
- Look for a Main tab (common on Epson drivers).
- Find the Color setting and choose Black/Grayscale (or Grayscale / Black Ink Only).
- Click OK, then Print.
Pro tip: If you’re printing something that’s basically just text, also set:
Paper Type to Plain Paper and Quality to Standard (or Draft)you’ll save ink and speed things up.
macOS: Use “Print Settings” (and Don’t Be Shy About Clicking “Show Details”)
- Open the document and choose File > Print.
- Click Show Details (if you see it).
- Open the drop-down menu in the middle of the print dialog (it may say Preview by default).
- Select Print Settings (or Quality & Media / Paper Type/Quality, depending on your setup).
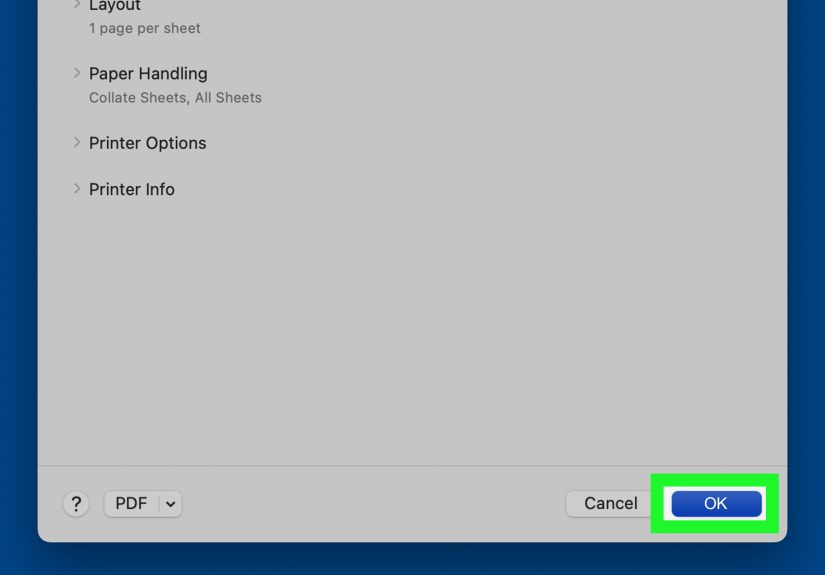
- Check Grayscale (or choose Black & White / Black Ink Only if available).
- Click Print.
If you print black and white often, macOS also lets you save the setting as a preset (we’ll use that in Way 2).
iPhone/iPad (AirPrint) and Android: Where the Setting Hides Depends on the App
Mobile printing is convenientuntil it’s not. Here’s the practical approach:
- If you’re using Epson’s app (like Epson iPrint or Epson Smart Panel):
look for a Color option in the print settings and switch to Black & White or Grayscale. - If you’re using the system print dialog (AirPrint on iOS):
tap Options or expand settings, then look for Black & White / Grayscale. Not every printer exposes it through AirPrint,
so if you don’t see it, use Epson’s app instead.
Example: If you’re printing a return label from your phone and it keeps wanting color, open the PDF in a print-friendly app,
choose Epson’s print option (not just the generic share-sheet print), and select Black & White.
Way 2: Set Black & White as the Default (So You Don’t Have to Remember Every Time)
If your life includes frequent printingschool forms, invoices, shipping labels, weekly schedulesWay 2 is the sanity upgrade.
Instead of choosing grayscale every time, you make black-and-white the default. Color becomes the special occasionlike fancy shoes.
Windows: Make Black/Grayscale the Default in Printing Preferences
- Open Settings > Bluetooth & devices > Printers & scanners (Windows 11), or Devices (Windows 10).
- Select your Epson printer.
- Click Printing preferences (sometimes under “Manage”).
- On the Epson driver window (often the Main tab), set Color to Black/Grayscale (or similar).
- Click Apply and OK.
Heads-up: Some apps remember their own print settings. So even after you set a default, a specific app may still insist on “Color”
because it’s clinging to an old preference like a toddler with a sticky lollipop. If that happens, use Way 1 inside that app once, then try again.
macOS: Save a Black & White Preset
- Go to File > Print and enable Grayscale (as shown in Way 1).
- Find the Presets drop-down near the top of the print dialog.
- Choose Save Current Settings as Preset.
- Name it something obvious like “Epson B&W”.
- Next time, select that preset before printing.
This is the Mac equivalent of meal-preppingexcept your leftovers are printer settings, and they don’t get weird in the back of the fridge.
Why Your Epson Might Still Use Color Ink (Even When You Print Black Text)
Here’s the part that surprises people: on many Epson inkjets, selecting grayscale doesn’t always mean “zero color ink, ever.”
Some models use small amounts of color ink for maintenance and printhead health. Also, many Epson printers won’t print at all if a cartridge is empty.
“My Color Ink Is Empty. Why Won’t It Print a Black-Only Page?”
Epson’s common explanation is that the printhead system needs all colors available to keep the printhead properly charged and prevent air from entering
the ink channels. Air bubbles can cause clogs or damage. Translation: the printer is trying to protect itself… in the most annoying way possible.
The Emergency Escape Hatch: Black Print Mode (Only on Some Models)
Some Epson models support a temporary “print with black ink only” feature when color ink is expended. You may see it called
Black Print Mode or Permit temporary black printing, and it may require very specific driver settings.
- If you see it: enable it and follow the on-screen prompts to continue with black-only printing temporarily.
- If you don’t see it: your model may not support it, and the printer may require replacing the empty cartridge before printing resumes.
Practical advice: If you print a lot of black text, keep at least one spare color set around (or refill EcoTank colors before they hit rock bottom).
It’s cheaper than the “I need this now” emergency run to the store.
Make Black & White Look Better: Settings That Actually Matter
If your black text looks washed out, gray, or slightly haunted, try these driver tweaks:
For Documents (Text, Forms, Shipping Labels)
- Paper Type: Plain Paper
- Quality: Standard (or Draft for internal use)
- Color Mode: Black/Grayscale or Black Ink Only
- Turn off photo enhancements: If you see “PhotoEnhance” or high-quality photo mode, don’t use it for text.
Example: Printing IRS forms? Choose Plain Paper + Standard + Black/Grayscale. Your text will look sharper and you won’t waste ink trying to
make a tax form look like art.
For Photos (If Your Epson Supports Advanced B&W Photo)
Some Epson photo-oriented printers offer an Advanced B&W Photo mode designed for better black-and-white photo output.
If you’re printing grayscale photos and they look “meh,” check the driver’s color controls or advanced options for a dedicated B&W photo setting.
Just remember: photo-quality black-and-white often uses more ink and may still involve multiple inks to create smooth tonal transitions.
App-Specific Tricks: When the Printer Setting Isn’t the Only Setting
Microsoft Word (and other Office apps)
Office apps often point you to Printer Properties inside the print screen. If your document has color elements but you want a monochrome printout,
open the print dialog, click Printer Properties, and select grayscale/black-and-white in the driver.
PDFs (Adobe Acrobat / Reader)
If you’re printing a PDF and it insists on color (or prints “black” as a weird mix), you have two levers:
- Printer driver: Use Way 1 or Way 2 and force grayscale in Epson preferences.
- Acrobat options (when available): Some versions of Acrobat provide grayscale and “print color as black” style options
that can force a simpler monochrome outputespecially helpful for line drawings or light-colored diagrams.
Browsers (Chrome/Edge): The “Why Did It Forget My Setting?” Problem
Browsers sometimes remember the last print choice separately from your system default. If Chrome keeps switching back to color, re-select grayscale in the
print dialog for that job, or set your Epson driver defaults (Way 2) and restart the browser. If you print a lot from the web, saving a “B&W preset”
(Mac) or setting driver defaults (Windows) is the long-term fix.
Mini Troubleshooting Checklist (Because Printers Love Drama)
- No grayscale option visible? Expand “More settings,” “Show Details,” or open “Printer Properties/Preferences.”
- Still printing color? Confirm you selected the Epson driver (not a generic/AirPrint queue if you’re on Mac).
- Refuses to print due to empty color? Check whether your model supports temporary black-only printing; otherwise you may need to replace the cartridge.
- Black looks faded? Use Plain Paper + Standard, and run a nozzle check if lines look broken.
- Streaks or missing lines? Do a nozzle check and only then a cleaning cyclerepeated cleanings can burn through ink fast.
Conclusion: Two Ways, One GoalLess Ink Waste and Fewer Surprises
If you remember nothing else, remember this:
- Way 1 is for the moment: set grayscale in the print dialog for a single job.
- Way 2 is for your future self: set grayscale as the default (Windows preferences or a macOS preset).
And if your Epson ever insists it needs color ink to print your black-only page, it’s not necessarily brokenit may be protecting the printhead system or
following model-specific rules. Once you know that, you can decide whether to use a temporary black-only feature (if available) or simply replace the cartridge
and keep your printing life peaceful.
Experiences: Real-World “Black & White Printing” Moments (and What They Teach You)
Let’s talk about what actually happens outside the neat world of step-by-step instructionsbecause printers don’t live in that world.
They live in the world where you’re late, your email attachment is a PDF, and the printer suddenly acts like it’s never met you before.
Experience #1: The Shipping Label Sprint.
You’re returning something you definitely didn’t impulse-buy at 2 a.m. The label is pure black text. You hit print. Epson goes,
“Cool story. Cyan is empty.” This is the moment you learn that black-and-white printing is sometimes a relationship, not a setting.
The practical takeaway: if you’re a frequent label-printer, keep color ink from hitting absolute zero (or refill EcoTank before it bottoms out).
That one habit prevents the emergency store run where you pay “today tax” for cartridges.
Experience #2: The “Why Is My Black Kind of Brown?” Mystery.
Sometimes grayscale prints look warm, muddy, or slightly tinted. Usually the culprit isn’t your fileit’s the combination of paper type,
quality settings, and how the driver decides to render gray. When you switch to Plain Paper and Standard quality,
text usually snaps back into crisp black. If it doesn’t, a nozzle check often reveals the truth: the black channel isn’t firing cleanly.
One gentle cleaning cycle can fix it; ten cleaning cycles can empty your ink faster than a teenager empties the fridge.
Experience #3: The Default Setting Saves Your Sanity.
If you print once a month, Way 1 is fine. If you print several times a week, Way 2 is life-changing.
The most common real-world “mistake” isn’t selecting the wrong buttonit’s forgetting to select the right one every time.
Setting a Windows default (or saving a Mac preset) prevents accidental color printing of boring documents like schedules, receipts, drafts, and forms.
It also prevents the classic scenario: you printed one photo in color three weeks ago, and your browser has decided that means
everything from now on should be printed like a wedding invitation.
Experience #4: The App That Thinks It’s the Boss.
Some programs (and browsers) store their own print preferences. That means you can set your Epson driver to default to black and white,
then Chrome strolls in and says, “That’s adorable. I’m doing color.” When that happens, treat the app like a guest in your house:
politely correct it once (Way 1 inside the app), then save your preset/default again. If it keeps happening,
a quick restart of the app (or the print spooler) can help.
Experience #5: Mobile PrintingConvenient, Until It Isn’t.
Printing from your phone feels magical… until you can’t find the grayscale option and you’re poking at menus like you’re trying to defuse a bomb.
In practice, Epson’s mobile apps often expose more printer-specific options than the generic system print dialog.
So if you print from iPhone or Android often, it’s worth using Epson’s app and learning where the “Color / Black & White” toggle lives.
The first time it saves you from printing a two-page label in full color, you’ll feel like you just found money in a jacket pocket.
The biggest lesson from all these experiences is simple:
black-and-white printing is easiest when you choose the right layer to control it.
For one-off prints, control it in the print dialog (Way 1). For everyday life, control it in defaults/presets (Way 2).
And when Epson demands color ink, it’s usually not spiteit’s design choices, printhead protection, or model limitations.
Annoying? Sometimes. Manageable? Absolutely.