Table of Contents >> Show >> Hide
- What a grading plan is (and why it matters more than your patio furniture)
- Start with the “map legend” stuff (before the numbers bully you)
- Elevation basics: contours, spot grades, and slope arrows
- Follow the water: how to “read” drainage behavior on the plan
- Yard drains on plans: what you’re actually looking at
- The quick-read method: audit a grading plan in 10 minutes
- Two worked examples (because numbers behave better with examples)
- Common grading-plan “gotchas” around yard drains
- Smart questions to ask your contractor or designer
- Conclusion: your new superpower is spotting water problems on paper
- Real-World Experiences and Lessons (Extra)
If you’ve ever stared at a grading plan and thought, “Cool, a treasure map… for dirt,” you’re not alone.
Grading plans are basically the script for how rainwater will behave on your propertywhere it will flow, where it will pool,
and whether it will politely exit the scene or crash your basement like it pays rent.
This guide breaks down how to read grading plans specifically when yard drains are involved.
You’ll learn the symbols, the numbers, the “water goes this way” clues, and how to spot problems before they become soggy,
expensive regrets. No engineering degree requiredjust curiosity and a willingness to do a little “rise over run” math.
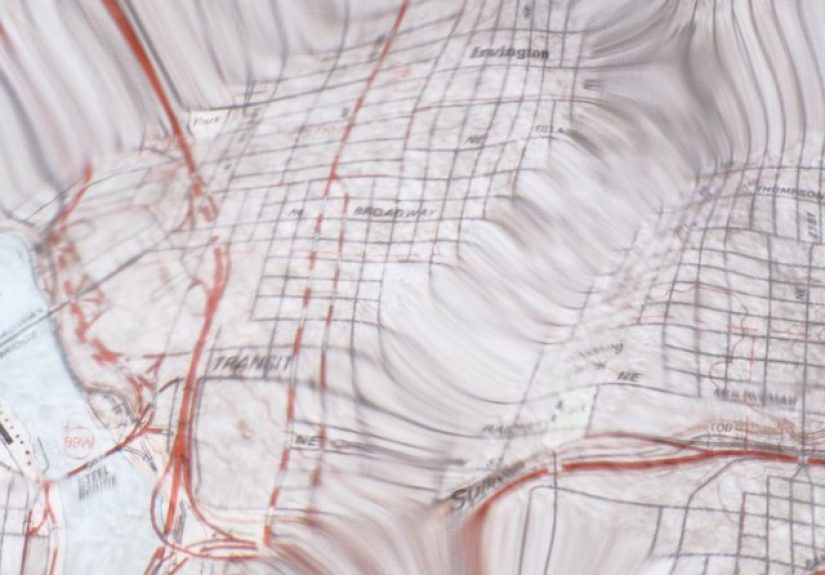
What a grading plan is (and why it matters more than your patio furniture)
A grading plan shows how the ground surface is shapedboth existing and proposedusing elevations, slopes, contour lines,
and drainage features like swales and yard drains. The plan’s job is simple: move surface water away from buildings and toward
an approved collection or discharge point.
Yard drains show up when grading alone can’t reliably handle runoff (think flat lots, clay soils, tight property lines,
or areas where water naturally wants to camp out). On paper, yard drains are the “assist” that keeps water from pooling,
eroding, or sneaking toward your foundation.
Start with the “map legend” stuff (before the numbers bully you)
Title block, scale, and north arrow
Find the sheet title and the scale first. A grading plan might be 1" = 10' or 1" = 20'that scale affects
how you estimate distances for slopes and drainage runs. The north arrow helps you orient the drawing to the actual yard.
(Nothing says “weekend project” like putting a drain where the driveway doesn’t exist.)
Benchmark and datum
Most grading plans reference a benchmark (BM) or a known elevation point used to measure everything else. If you see “BM=100.00”
or a note describing a nail, monument, or utility feature, that’s the plan’s grounding point. Treat it like the “zero” on a ruler
not something you guess.
Existing vs. proposed grades
Plans often show existing grades (what you have now) and proposed grades (what it will become). They may use different line styles
(solid vs dashed) or labels like “EG” (existing grade) and “FG” (finished grade). Your goal is to understand the after picture:
where will water go once the work is done?
Elevation basics: contours, spot grades, and slope arrows
Contour lines: the yard’s “elevation fingerprints”
Contour lines connect points of equal elevation. If a contour is labeled 102, every point on that contour line is at elevation 102.
Index contours are usually bolder and labeled, with lighter intermediate contours between them.
Here’s the trick: contour spacing tells you steepness.
Close lines = steep slope. Wide spacing = gentle slope. If contours pinch together near your house, that’s a clue that water might
move fast (erosion risk) or that grading transitions could be abrupt.
Spot elevations: the “pinpoint” grades that matter a lot
Spot elevations are specific elevation numbers at specific locationsoften marked with an “X,” dot, or small symbol.
These are commonly used at corners of the house, patios, driveway edges, drain grates, and low points.
When you’re checking whether a yard drain actually sits in the low spot, spot elevations are your best friend.
Slope indicators: the tiny symbols that tell water where to go
Many grading plans use little slope arrows (sometimes a “Y” shaped indicator) showing downhill direction.
They may include a slope value like “2%” or “1.5%.” Read them as: “the ground falls this way at about this rate.”
If the slope arrows point toward the house, that’s not “modern art”that’s a problem.
Follow the water: how to “read” drainage behavior on the plan
Find the highs and lows
Water goes downhill, which sounds obvious until you’re staring at 40 numbers and 19 line types.
Your job is to locate:
- High points (ridges/crowns): where water splits and flows away in two directions
- Low points (sumps): where water naturally collects and should be drained or regraded
- Flow paths: the likely “routes” water takes based on slope arrows and elevation changes
Positive drainage away from foundations (the non-negotiable part)
Most residential standards aim for ground sloping away from the foundation so water doesn’t pond at the base of walls.
A common code benchmark is a drop of at least 6 inches within the first 10 feet away from foundation walls, unless constrained
(in which case drains or swales are used to ensure drainage away from the structure).
Practically speaking: check the spot elevations around the house and compare them to nearby yard grades.
If the finished grade near the wall is higher than the grade 5–10 feet out, you’ve got negative drainage (water drifting toward the home).
Yard drains on plans: what you’re actually looking at
Area drains / yard inlets / catch basins
Yard drains are typically shown as small squares, circles, or grates, often labeled “YD,” “DI” (drop inlet),
“CB” (catch basin), or “INLET.” Next to the symbol you’ll usually see a callout box with key info such as:
- Rim (or grate) elevation: the elevation at the top of the drain where water enters
- Invert elevation: the elevation at the bottom of the pipe leaving the structure (or entering it)
- Structure type: yard box, inlet, catch basin, etc.
The rim matters for surface flow: if the rim is too high compared to surrounding grades, water will pond around the drain and not enter.
The invert matters for pipe performance: if the pipe doesn’t have sufficient fall, you risk slow flow, sediment buildup, and clogs.
Pipes: size, slope, direction, and materials
Pipe runs are usually shown as lines connecting drains to an outfall point.
Look for labels like “4" PVC @ 1.0%” or “6" HDPE” and arrows showing flow direction.
Key things to interpret:
- Diameter (e.g., 4" or 6"): larger pipes handle more flow and clog less easily
- Slope (percent): more slope generally means better self-cleaning flow
- Cleanouts: often labeled “CO” or shown as a small circleyour future self will thank you
- Connection points: wyes, tees, or junction boxes that combine multiple drains
Outfalls: where the water is supposed to go
Every drain system needs a discharge locationsometimes called an outfall.
Common outfalls on residential plans include:
- Daylight outlet: pipe exits at a slope and releases to a safe area (often protected with riprap)
- Pop-up emitter: opens under pressure during storms and closes to keep critters out
- Curb outlet / storm sewer tie-in: common in urban settings (usually requires approval)
- Dry well / infiltration feature: used where allowed and soils support infiltration
If you can’t clearly find the outfall on the plan, treat that as a red flag. A drain with no destination is just an expensive
underground suggestion.
Swales and berms: the “soft” drainage features that work with drains
A swale is a shallow, shaped channel that moves water across the surfacelike a gentle gutter made of grass.
Berms are raised areas that block or redirect water. On plans, swales may be shown with flow arrows, grading contours that “dip,”
or notes identifying the swale line.
Often, the best setup is a team effort:
swales move water toward a yard drain inlet, and pipes take it from there.
The quick-read method: audit a grading plan in 10 minutes
-
Circle the house and patios.
Check spot elevations at foundation corners and compare them to grades 5–10 feet away.
You’re looking for consistent fall away from the building. -
Locate low points.
Look for the lowest spot elevations and contour “bowls.”
That’s where water will collectand where drains should be if regrading isn’t enough. -
Confirm the yard drain rim elevation works.
Surrounding grades should slope toward the grate, not away from it. -
Trace the pipe to the outfall.
Ensure the system actually exits somewhere legal and sensible (not into a neighbor’s fence line). -
Check pipe slopes.
If slopes are missing, look for invert elevations at both ends and calculate it yourself. -
Identify overflow routes.
Good designs assume drains can be overwhelmed. Where does water go in a big storm?
A safe overflow path beats “surprise indoor water feature.”
Two worked examples (because numbers behave better with examples)
Example 1: Surface grade slope from spot elevations
Suppose the plan shows a spot elevation near the house at 100.50 and another spot elevation 20 feet away at 99.90.
The drop is 100.50 − 99.90 = 0.60 feet.
Slope percent = (drop ÷ run) × 100 = (0.60 ÷ 20) × 100 = 3%.
That means the ground falls about 0.36 inches per foot (since 0.60 feet = 7.2 inches over 20 feet).
Is 3% “good”? It can be, depending on context. Many designs aim for a noticeable fall away from the home, especially near foundations.
If your plan shows only a very gentle slope in a heavy-rain area or clay soil, that’s a good reason to see yard drains used as backup.
Example 2: Pipe slope using invert elevations
A yard drain callout shows:
Rim = 100.00, Invert Out = 98.20.
Downstream, the outfall structure shows Invert In = 97.80.
The plan indicates the pipe length is 50 feet.
Pipe fall = 98.20 − 97.80 = 0.40 feet (4.8 inches).
Pipe slope = (0.40 ÷ 50) × 100 = 0.8%.
That’s a modest slopeoften workable for storm drainage, but it increases the importance of good installation, cleanouts,
and keeping sediment out of the system.
Common grading-plan “gotchas” around yard drains
-
The drain is drawn in the low spot… but graded like it’s on a hill.
Always compare the rim elevation to nearby spot elevations and contours. A drain that isn’t the lowest point won’t collect water. -
Pipe slope is technically downhill but practically flat.
Low slopes can work, but they’re less forgiving. Debris, silt, or poor bedding can turn “drainage” into “decorative plumbing.” -
Outfall is vague or missing.
If you can’t trace the pipe to a clear discharge point, ask questions. Water needs a destination. -
Downspouts dump too close to the house.
Roof runoff is a major contributor to yard flooding. Plans may route downspouts to yard drain lines or redirect them to safe
discharge areasmake sure the details match what will be built. -
No overflow path.
In big storms, drains can be overwhelmed. A good plan still guides excess water away from the structure on the surface.
Smart questions to ask your contractor or designer
- “What’s the benchmark, and how are you verifying finished grades match the plan?”
- “Are the yard drain rims set below surrounding grades so water actually flows in?”
- “Where are the cleanouts, and can I access them without excavating my landscaping dreams?”
- “Where does the system discharge, and is that discharge approved?”
- “What happens during an extreme stormwhat’s the surface overflow route?”
Conclusion: your new superpower is spotting water problems on paper
Reading grading plans with yard drains is mostly about learning the “water story”:
elevations tell you where water wants to go, slope arrows confirm direction, and drain callouts tell you whether the system can actually
collect and carry runoff. If you can trace flow from the high points to the low points, confirm positive drainage near the house,
and verify the drain system’s rims, inverts, slopes, and outfallyou’re already ahead of most people who discover drainage issues
the hard way.
Real-World Experiences and Lessons (Extra)
Here are a few real-world scenarios homeowners, inspectors, and landscape contractors commonly run intobecause nothing teaches grading
faster than watching water ignore your plans and do its own thing.
1) The “It’s Only a Little Dip” Low Spot
A classic: the yard looks mostly flat, but after a storm there’s a stubborn puddle that returns like a sequel no one asked for.
On the grading plan, that puddle usually shows up as a tiny “bowl” in the contours or a handful of spot elevations that are a few tenths
of a foot lower than everything around them. The lesson is that small elevation differences matter. A low spot that’s only 0.20 feet
(about 2.4 inches) lower than the surrounding turf can still hold a surprising amount of waterespecially if the soil is clay and drains slowly.
When you see that bowl on the plan, you either regrade to remove it or place a yard drain where water naturally collects.
2) The Drain That Looked Right… Until the Sod Arrived
Another common one: the drain is installed, the yard is regraded, and everything looks gooduntil final landscaping. Fresh sod,
mulch, and edging can subtly change surface grades. If the drain grate ends up slightly higher than the surrounding finished grade,
water will pond around it instead of entering. On paper, the fix is simple: the drain rim must be set low enough relative to adjacent grades.
In the real world, it means coordinating installation timing and re-checking elevations right before final landscaping goes in.
Translation: don’t let “pretty” happen before “drains properly.”
3) Downspouts Connected to Yard Drains (and the Surprise Clog)
Routing downspouts into a yard drain system can be greatroof runoff is a major source of water near foundationsbut it also increases
the system’s workload. Leaves, roof grit, and small debris can travel into the line. If the plan doesn’t include cleanouts (or if cleanouts
are installed in inconvenient spots), maintenance becomes a nightmare. The lesson: when you read the plan, look for cleanouts and practical access.
A cleanout hidden under a shrub bed is basically a joke you won’t laugh at later.
4) The “Where Does This Pipe Go?” Mystery Outfall
Sometimes a plan shows a beautiful network of drains…and then the pipe line disappears at the edge of the sheet like it’s entering a portal.
In practice, this can happen when plan sets are incomplete, sheets are missing, or the outfall detail is buried elsewhere.
The risk is huge: without a clear, approved discharge point, water may be sent to the wrong area (causing erosion), toward a neighbor,
or into a location that backs up during storms. The lesson: always trace the pipe to the outfall on paper, and confirm it’s buildable and legal.
“It’ll figure itself out” is not a drainage strategy.
5) The Best Drainage System Still Needs an Overflow Plan
Even a well-designed yard drain system can be overwhelmed by extreme rainfall, clogged inlets, or unexpected debris.
The best projects treat yard drains as part of a layered approach: positive grading near the foundation, swales that guide surface flow,
and drains that collect in low points. Real-world success often comes from giving water two good optionssurface routes and subsurface piping
instead of forcing everything into one grate. When you read grading plans, hunt for that “belt and suspenders” thinking:
if the drain can’t keep up, does the surface still guide water safely away from the building?