Table of Contents >> Show >> Hide
- Before You Start: Safety First
- Step-by-Step: 9 Gentle Steps to Remove Steri-Strips
- 1. Confirm It’s the Right Time
- 2. Gather Your Supplies
- 3. Wash Your Hands Like a Pro
- 4. Soften the Adhesive (If Your Doctor Says It’s Okay)
- 5. Stabilize the Skin Around the Incision
- 6. Lift One End Slowly and Peel Toward the Incision
- 7. Work a Little at a Time
- 8. Check the Incision After Each Strip
- 9. Clean and Protect the Area
- Common Mistakes to Avoid When Removing Steri-Strips
- When to Call Your Doctor or Seek Urgent Care
- Post-Removal Care: Helping Your Scar Heal Well
- Real-Life Experiences: What Removing Steri-Strips Actually Feels Like
- Final Thoughts
Steri-Strips are those tiny, stubborn “paper bridges” holding your incision together after surgery or a cut repair.
They look harmless… right up until you realize it’s time to take them off and your brain screams, “What if I rip my scar open?!”
The good news: when it’s the right time and you follow a gentle routine, removing Steri-Strips is usually quick, simple, and way less scary than you think.
This guide walks you through how to remove Steri-Strips in 9 careful steps, plus what to do afterward to keep your incision happy and healing.
We’ll also cover when to leave them completely alone and when to call your doctor instead. Remember: this is general information and
never replaces your surgeon’s instructions. If your doctor’s advice differs from what you read here, their instructions always win.
Before You Start: Safety First
What Are Steri-Strips, Exactly?
Steri-Strips (sometimes called butterfly bandages or wound closure strips) are thin, porous adhesive strips used to pull the edges of a wound or incision together
so it can heal with minimal tension and scarring. They’re commonly used:
- After minor surgical procedures (like mole removal or small excisions).
- Over dissolvable stitches to support the incision.
- On small, straight cuts that don’t need deep sutures.
They’re designed to stay in place for several days to around two weeks. Often they simply curl up and fall off on their own as the adhesive weakens and the skin heals.
When Should Steri-Strips Be Removed?
There’s no one-size-fits-all rule, which is why talking with your surgeon or healthcare provider is essential. In many post-op instructions, you’ll see advice like:
- Keep Steri-Strips dry for the first 24–48 hours, then you may gently shower.
- Let Steri-Strips peel off on their own whenever possible.
- If they’re still hanging on after about 10–14 days, your provider may tell you to remove them.
Some surgeons want them removed earlier or kept on longer, especially over high-tension areas like knees, shoulders, or the abdomen.
Always follow the specific timing your doctor gave you on your discharge instructions.
Picture idea: Close-up illustration of an incision with neatly applied Steri-Strips running perpendicular to the wound line.
When Not to Remove Steri-Strips Yourself
Hit pause and call your healthcare provider first if you notice:
- Redness spreading away from the wound.
- Increasing pain, warmth, or swelling.
- Yellow/green drainage or a foul smell.
- Fever or feeling generally unwell.
- Gaps opening in the incision under or between the strips.
In those situations, removing Steri-Strips at home could make things worse or hide signs of infection. Get medical advice before you do anything.
Step-by-Step: 9 Gentle Steps to Remove Steri-Strips
Ready to go? These 9 steps outline a careful, skin-friendly way to remove Steri-Strips once your healthcare provider has told you it’s okay.
-
1. Confirm It’s the Right Time
Before you touch anything, double-check your instructions. Was there a specific day your surgeon said you could remove them?
Are you past that date? Has the wound been healing without new redness, bleeding, or drainage?If you’re not sure, call the office and ask. A 2-minute phone call is a lot better than stressing over “Am I doing this too soon?”
Picture idea: Person looking at a printed discharge sheet with the “remove Steri-Strips after ___ days” line highlighted.
-
2. Gather Your Supplies
Keep it simple. You’ll usually need:
- Soap and water (for handwashing and possibly for gentle soaking).
- A clean towel or paper towels.
- Optional: small, clean scissors for trimming curled edges.
- Optional: a clean washcloth or gauze pad warmed with water.
- Optional: non-fragranced moisturizer or petroleum jelly for the skin around (not on an open wound) if your provider says it’s okay.
You don’t need fancy products or harsh solvents unless your provider specifically recommended something for a very strong adhesive.
Picture idea: Flat lay of clean hands, scissors, washcloth, and a small towel next to a sink.
-
3. Wash Your Hands Like a Pro
This is not the moment for a “quick rinse.” Wash your hands with warm water and soap for at least 20 seconds,
making sure to clean under your nails and between your fingers. Dry with a clean towel. If you have hand sanitizer with at least 60% alcohol,
you can use that after washing, too.Clean hands help keep bacteria far away from that healing incision.
Picture idea: Hands lathered with soap under running water, close-up on fingers and nails.
-
4. Soften the Adhesive (If Your Doctor Says It’s Okay)
For many people, Steri-Strips loosen just from normal showering after the first couple of days. If yours are still very stuck but it’s time for them to come off,
gentle moisture can help:- Take a warm shower and let the water run over the strips for a few minutes, or
- Hold a warm, damp (not dripping) washcloth over the strips for 5–10 minutes.
Avoid soaking in a tub, hot tub, or pool unless your doctor has cleared you to do so, and don’t scrub the wound area.
Picture idea: Cross-section drawing showing warm water softening the edges of Steri-Strips.
-
5. Stabilize the Skin Around the Incision
Support is everything here. With one hand, gently place your fingers on each side of the incision next to the strip you’re working on.
This stabilizes the skin and reduces tension on the healing tissue.Think of it as holding the “stage” still while you slowly lift the tape “curtain.”
Picture idea: Hand bracing the skin on both sides of the strip while the other hand begins to lift a corner of the Steri-Strip.
-
6. Lift One End Slowly and Peel Toward the Incision
Using your other hand, gently lift one corner of the Steri-Strip. Go slowly if you feel pulling or pain, stop and let the area rest for a moment.
Now comes the key technique:
peel the strip back low and parallel to the skin, moving toward the incision line, not away from it.
This reduces tension and helps avoid pulling the wound edges apart.Never rip the entire strip off in one fast motion. “Quick like a bandage” is the opposite of what you want here.
Picture idea: Arrows showing the direction of gentle, horizontal peeling, pointing toward the incision line.
-
7. Work a Little at a Time
Continue peeling the strip back a few millimeters at a time, always staying close to the skin’s surface.
If you hit a stubborn spot that tugs, gently press the strip back down and re-soften with a warm, damp cloth.If the ends of several strips are already curled and loose, you can also:
- Trim just the lifted edges with small, clean scissors, or
- Remove one strip at a time, starting with the loosest one.
Be patient. Your scar will thank you for each extra second you spend going slowly.
Picture idea: Step-by-step diagram showing the strip being peeled halfway, then fully removed.
-
8. Check the Incision After Each Strip
After removing each strip, take a quick look at the skin underneath:
- Is the incision line closed or is there a gap?
- Any fresh bleeding, active oozing, or thick yellow/green drainage?
- Does the area look mildly pink (normal) or very red and angry (not normal)?
Mild pinkness and a thin, flat scab can be normal. Gaping, significant bleeding, or worsening redness are not.
If something looks off, cover the area with a clean bandage and contact your healthcare provider.Picture idea: Two simple line drawings: one of a normal, thin pink incision and one showing worrisome redness and separation.
-
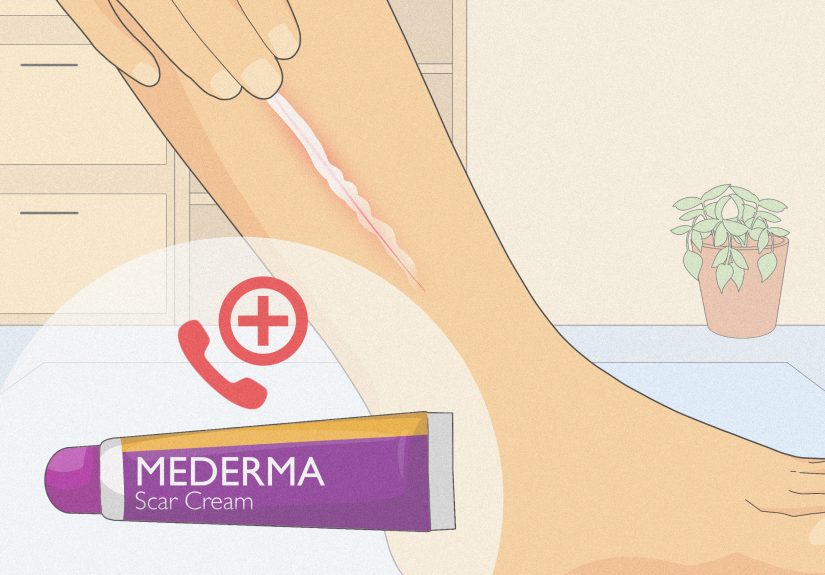
9. Clean and Protect the Area
Once all the Steri-Strips are off (or only the ones your provider told you to remove), you can usually:
- Gently wash around the area with mild soap and water no scrubbing.
- Pat dry with a clean towel; don’t rub.
- Apply a thin layer of an ointment or petroleum jelly only if your provider recommended it.
- Cover with a non-stick bandage if the area rubs against clothing.
Over the next few weeks, protecting the area from sun exposure with clothing or sunscreen (once the skin is fully closed) can help minimize long-term scarring.
Picture idea: Illustration of a healed incision with a light, non-stick bandage placed gently over it.
Common Mistakes to Avoid When Removing Steri-Strips
Even smart, careful people sometimes make these classic missteps. Try to avoid:
- Removing strips too early. If the wound isn’t strong enough yet, you can cause it to reopen.
- Pulling straight up. Lifting vertically puts direct stress on the incision.
- Ripping everything off at once. Fast removal equals high tension and more trauma to the skin.
- Using harsh chemicals or oils without guidance. Some products can irritate healing skin or trap bacteria.
- Ignoring signs of infection. More redness, pain, swelling, or pus-like drainage deserve a call to your provider.
When to Call Your Doctor or Seek Urgent Care
Reach out to your healthcare provider promptly if:
- The wound splits open or you see deeper tissue when a strip comes off.
- You notice swelling, warmth, or redness spreading away from the incision.
- There’s thick, yellow or green drainage, or a foul odor.
- You develop fever or chills.
- Bleeding doesn’t slow after a few minutes of gentle pressure.
If bleeding is heavy, you feel dizzy, or the wound is large and gaping, seek emergency care. It’s always better to be overly cautious with surgical wounds.
Post-Removal Care: Helping Your Scar Heal Well
Once Steri-Strips are gone and your incision is fully closed, your focus shifts from “don’t disturb it” to “help it heal as nicely as possible.”
- Keep the area clean and dry. Gentle daily washing is usually enough.
- Follow any scar-care advice from your surgeon. They may suggest silicone gel or silicone sheets once the skin is fully closed.
- Protect from friction. Clothing seams and waistbands can irritate new scars; use a soft barrier if needed.
- Limit sun exposure. New scars can darken if tanned; cover with clothing or approved sunscreen.
Scars change a lot over time. It’s common for them to look red or raised at first and gradually flatten and fade over months.
Real-Life Experiences: What Removing Steri-Strips Actually Feels Like
If you’ve never done this before, your imagination might be way scarier than reality. Here are some common experiences people share not medical rules,
but relatable snapshots of what the process can feel like.
“Shower Day Made All the Difference”
Many people find that removing Steri-Strips right after a warm shower is the easiest. The warm water gently softens the adhesive,
the skin is relaxed, and everything just feels less intimidating. One common strategy:
- Take a gentle shower (no scrubbing the wound).
- Dry off carefully and give the area a few minutes to cool down.
- Then start removing the strips while the adhesive is still pliable.
People often describe it as a “weird tugging” sensation rather than sharp pain more like peeling off a very sticky bandage in slow motion.
“Doing It With a Buddy Helped”
If your incision is in a hard-to-reach spot (like your back or shoulder), having a trusted friend or family member help can make things smoother.
They can:
- See the incision clearly without twisting your body.
- Hold the skin steady while peeling the strip back.
- Keep an eye out for any gaps or worrisome changes you might miss in a mirror.
Of course, whoever helps should have clean hands, good lighting, and enough patience not to rush the process.
“My Kid Was Nervous So We Turned It Into a Game”
For kids, Steri-Strip removal can look terrifying. Parents often find that a little creativity goes a long way:
- Let the child hold a favorite toy or watch a show during the process.
- Explain in simple terms: “We’re just taking off the little stickers that helped your skin close.”
- Count down for each strip: “3…2…1… okay, that strip is done!”
When parents go slowly, use warm water, and involve the child, the whole thing can feel more like a routine task than a medical drama.
“I Was Afraid I’d Rip the Scar But It Stayed Closed”
Fear of “ruining the surgery” is extremely common. Fortunately, by the time you’re officially cleared to remove Steri-Strips,
the deeper layers of the incision are usually already knitting together. The strips are mostly supporting the superficial layer of skin.
People are often surprised that:
- The incision line stays closed even after all the strips are gone.
- The scar might look red or bumpy at first but doesn’t open up.
- Any mild stinging tends to fade quickly once the strips are off.
That said, every surgery is different, which is why your surgeon’s timing and guidance are so important.
“I Learned to Trust the Process”
After going through Steri-Strip removal once, most people feel much more confident the next time. You start to recognize:
- What “normal healing” looks like for your body.
- The difference between mild tugging and real pain.
- How long scars take to settle down and fade.
The key lessons most people report: be patient, go slowly, don’t pull upward, and never be afraid to call your doctor if anything looks or feels wrong.
Final Thoughts
Removing Steri-Strips is a small but important milestone in your healing journey. With clean hands, a little warm water, a steady technique,
and your provider’s green light, you can usually take them off safely at home. Go slowly, keep an eye on the incision, and reach out for medical help
if anything seems off. Your job is not to be a perfect nurse it’s simply to protect your healing body and ask for help when you need it.