Table of Contents >> Show >> Hide
- Before You Start: Make Sure Your New Faucet Will Actually Fit
- Tools & Materials Checklist
- Step-by-Step: How to Replace a Kitchen Faucet
- Step 1: Clear the cabinet and set up your “no regrets” workspace
- Step 2: Turn off water (and power, if needed)
- Step 3: Disconnect the supply lines
- Step 4: Remove the old faucet mounting hardware
- Step 5: Lift out the old faucet and clean the surface
- Step 6: Install the deck plate (if needed)
- Step 7: Drop in the new faucet and secure it from below
- Step 8: Connect the sprayer hose and install the hose weight (pull-down faucets)
- Step 9: Connect water supply lines
- Step 10: Turn water back on and test for leaks
- Common Problems (and Fixes) After Replacing a Kitchen Faucet
- When It’s Smarter to Call a Plumber
- Optional Upgrades That Make Faucet Replacement Even Better
- Real-World Experiences: The Stuff Nobody Mentions Until You’re Under the Sink (About )
- Conclusion
Replacing a kitchen faucet sounds like the kind of job that requires a plumber, three specialty tools, and a minor
degree in contortion. In reality, it’s usually a straightforward DIY projectas long as you respect two universal
truths: (1) gravity is undefeated, and (2) whatever you drop under the sink will roll to the farthest corner
of the cabinet.
This guide walks you through how to replace a kitchen faucet step-by-step, from choosing a compatible model to
tightening the last connection and testing for leaks. You’ll also get practical tips for stubborn mounting nuts,
pull-down sprayer hoses, and the “why is this dripping when I swear I tightened it?” moment.
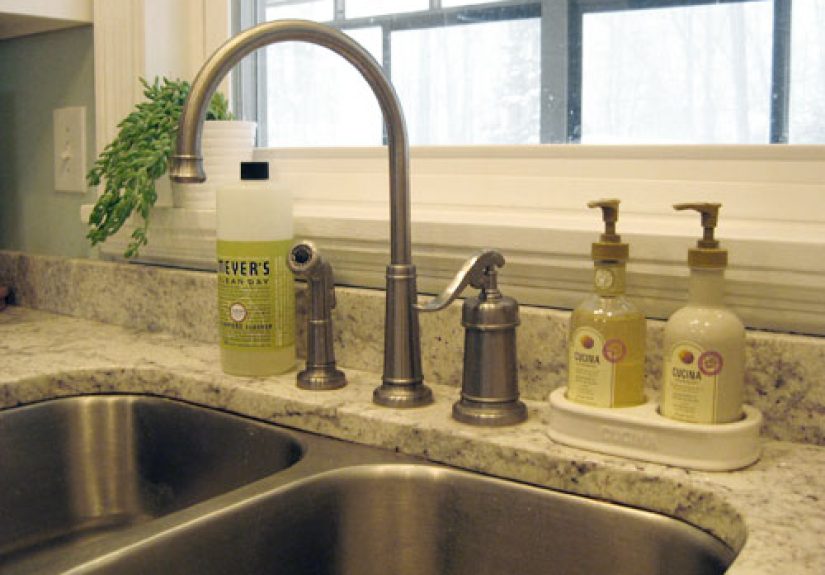
Before You Start: Make Sure Your New Faucet Will Actually Fit
1) Count sink holes (seriouslycount them)
Kitchen faucet replacement is easiest when the new faucet matches your existing hole setup. Many sinks are
configured with 1, 2, 3, or 4 holes. A single-handle faucet often uses one hole, while a two-handle faucet
typically needs three. Extra holes might be for a soap dispenser, side sprayer, air gap, or filtered water tap.
If your sink has more holes than your new faucet needs, you’ll usually use a deck plate (also called an escutcheon)
to cover them. If your new faucet needs more holes than your sink has, don’t plan on “just drilling one more”
unless you’re experienced and the sink material is appropriatethis is one of those times when a simple plan
becomes a dramatic weekend.
2) Check clearance above and below the sink
Above the sink: Make sure the spout height and handle swing won’t smack a backsplash, window ledge, or cabinet.
Below the sink: Pull-down faucets often need a clear area so the hose and weight can move freely without snagging
on bottles, pipes, or the cleaning supplies you swore you were going to organize last year.
3) Decide if you’re replacing supply lines too (hint: usually yes)
Many new faucets include integrated lines or quick-connect fittings; others require separate braided stainless-steel
supply lines. If your existing lines are old, kinked, corroded, or too short, replacing them during the faucet swap
is cheap insurance against future leaks.
Tools & Materials Checklist
Tools
- Basin wrench (the under-sink superhero)
- Adjustable wrench
- Channel-lock pliers or slip-joint pliers
- Screwdriver (often Phillips)
- Flashlight or headlamp
- Bucket + towels (you may not need them, but you’ll regret not having them)
- Utility knife or scraper (for old putty/gunk)
Materials
- New faucet (with any included deck plate and gaskets)
- New braided supply lines (if needed or recommended)
- Plumber’s tape (PTFE/Teflon tape) for threaded connections if instructed
- Plumber’s putty or silicone sealant only if your faucet/sink instructions call for it
- Penetrating oil (optional, for corroded mounting nuts)
Step-by-Step: How to Replace a Kitchen Faucet
Step 1: Clear the cabinet and set up your “no regrets” workspace
Remove everything under the sink so you can move your arms without performing advanced yoga. Put a towel down to
catch drips and place a bucket under the supply connections. A bright light makes the whole job faster.
Pro move: Take a quick photo of your under-sink setup before you disconnect anything. When it’s time to reconnect,
you’ll thank Past You for being responsible for once.
Step 2: Turn off water (and power, if needed)
Find the hot and cold shutoff valves under the sink and turn them clockwise until they stop. Then turn on the
faucet to relieve pressure and confirm the water is off. If you have a garbage disposal and you’ll be working near
its wiring or switch area, turn off power to it as an extra safety step.
If the shutoff valves are stuck or won’t fully close, you may need to shut off the main water supply to your home.
If you can’t confidently stop water flow, that’s a good sign to pause and call a pro before your cabinet becomes
an indoor pool.
Step 3: Disconnect the supply lines
Use an adjustable wrench to loosen the nuts connecting the supply lines to the shutoff valves. Keep the bucket
underneaththere’s almost always some water left in the lines. If your faucet has a pull-down sprayer hose with a
quick-connect fitting, disconnect it according to the manufacturer’s instructions (many systems release by pinching
tabs or squeezing the connector).
Tip: Hold the valve steady with a second wrench if needed so you don’t twist the valve or stress the plumbing.
Step 4: Remove the old faucet mounting hardware
Under the sink, locate the mounting nuts or bracket that secures the faucet to the sink. This is where the basin
wrench shinestight spaces are its whole personality. Turn counterclockwise to loosen and remove the nuts.
If things are corroded, spray a little penetrating oil on the threads and give it time to work. If the faucet still
won’t budge, check above the sink for hidden screws, trim rings, or a top-mounted fastener system.
Step 5: Lift out the old faucet and clean the surface
Once the mounting hardware is off, lift the faucet out from above the sink. If it’s stuck, gently wiggle it and
cut through old sealant with a utility knife. Then clean the sink surface thoroughlyremove old putty, grime, and
mineral buildup so the new faucet sits flat and seals properly.
Step 6: Install the deck plate (if needed)
If you’re covering extra holes, place the deck plate and its gasket per the faucet instructions. Some setups use a
foam or rubber gasket and don’t require additional sealant. If the manufacturer calls for plumber’s putty or
silicone, use only what’s recommendedand keep it neat. You’re installing a faucet, not icing a cake.
Important note: Plumber’s putty can stain or degrade certain materials (especially some stone surfaces and some
plastics). When in doubt, follow the faucet and sink manufacturer guidance.
Step 7: Drop in the new faucet and secure it from below
Feed the faucet shank(s) and any hoses through the sink hole(s), then position the faucet straight before you begin
tightening anything. From below, install the mounting bracket and nuts. Tighten by hand first to ensure threading
is smooth, then snug with a basin wrench or the tool provided with the faucet.
Don’t over-tighten. “Very tight” is great. “I have become one with this wrench” is how sinks get scratched and
fittings get damaged.
Step 8: Connect the sprayer hose and install the hose weight (pull-down faucets)
If you have a pull-down or pull-out faucet, connect the sprayer hose per instructions (often a quick-connect).
Then install the hose weight at the location specifiedtoo high or too low can affect retraction. Make sure there’s
a clear path for the hose to travel and that it won’t snag on the P-trap, shutoff valves, or the mountain of
cleaning supplies you will definitely reorganize someday.
Step 9: Connect water supply lines
Attach the faucet’s supply lines (or your new braided lines) to the shutoff valves. Many plumbers follow a simple
rule of thumb: thread connections by hand until snug, then tighten a bit more with a wrench. The goal is a secure
sealnot crushed threads.
If the connection is a threaded fitting and the manufacturer instructs it, wrap plumber’s tape around the threads
(typically in the direction you tighten the nut). Not every connection needs tapeespecially compression fittings
so follow the instructions for your specific faucet and supply lines.
Step 10: Turn water back on and test for leaks
Slowly open the shutoff valves under the sink (counterclockwise). Watch each connection as pressure returns.
Next, run the faucet on cold, then hot. Check underneath for drips.
Pro tip: Remove the aerator (the small screen at the tip of the spout) before your first full run. Let water flow
for 30–60 seconds to flush debris, then reinstall the aerator. This can prevent grit from clogging it right away
and helps keep water pressure strong.
Common Problems (and Fixes) After Replacing a Kitchen Faucet
Leak at the supply line connection
- Confirm the connection type (compression vs. threaded vs. quick-connect) and tighten appropriately.
- Make sure the supply line is seated correctly and not cross-threaded.
- If it’s threaded and allowed, reapply plumber’s tape and reconnect.
Faucet base feels loose or wobbly
- Re-check the mounting nut/bracket under the sink and tighten slightly.
- Make sure the faucet is aligned before final tightening.
Pull-down sprayer won’t retract smoothly
- Confirm the hose weight is installed at the recommended position.
- Clear space so the hose doesn’t snag on pipes or stored items.
- Make sure the hose forms a gentle loopnot a kink.
Low water pressure after installation
- Check that shutoff valves are fully open.
- Clean or reinstall the aerator (debris after install is common).
- Inspect supply lines for kinks.
When It’s Smarter to Call a Plumber
DIY faucet installation is very doable, but a few situations are worth handing off:
- Shutoff valves won’t close, are leaking, or look heavily corroded.
- You have rigid copper supply lines that need cutting and refitting.
- You discover rot, mold, or active leaks in the cabinet area.
- Your setup includes filtration systems, hot water dispensers, or unusual plumbing that complicates connections.
In other words: if replacing the faucet starts turning into “surprise plumbing renovation,” you’re allowed to tap
out and call in a pro. That’s not failureit’s strategy.
Optional Upgrades That Make Faucet Replacement Even Better
Replace old supply lines
New braided lines are inexpensive, easier to work with, and less likely to fail than older, stiff, or corroded
lines. If you’re already in there, it’s a good time to refresh them.
Consider water efficiency
If you’re shopping for a new faucet anyway, it’s worth checking flow rate and efficiency features. Many households
can reduce water use with efficient faucets or aerators while keeping good performance, especially if you choose a
model designed to balance flow with pressure.
Real-World Experiences: The Stuff Nobody Mentions Until You’re Under the Sink (About )
The first time I replaced a kitchen faucet, I thought the hardest part would be “plumbing knowledge.” Nope. The
hardest part was finding a body position that allowed one arm to reach the mounting nut, the other to hold a
flashlight, and my head to avoid the cabinet hingewhile also breathing like a normal person. Under-sink work has a
way of turning everyone into a reluctant gymnast.
Experience #1: The “Take a Photo” trick is not optional. I used to roll my eyes at the advice to
snap a picture of your plumbing before disconnecting lines. Then I forgot which line I moved around to reach the
mounting bracket, and suddenly I was playing a game called “Which Tube Goes Where?” with a dripping timer. Now I
take two photos: one wide shot and one close-up of the connections. It’s the simplest stress reducer you’ll ever
do.
Experience #2: Old mounting nuts are powered by spite. If your faucet has been there for a decade,
the mounting hardware may be crusty, corroded, or fused to the sink like it signed a long-term lease. A basin wrench
helps, but patience helps more. A little penetrating oil and a few minutes can turn an impossible nut into a
manageable one. I’ve also learned to keep my expectations realistic: “This will take 30 minutes” is how you end up
eating dinner off paper towels.
Experience #3: Deck plates are the unsung heroes of faucet aesthetics. The first time I swapped from
a bulky two-handle faucet to a sleek single-handle model, I didn’t think much about the extra holes. I thought,
“It’ll be fine.” It was not fine. Those uncovered holes looked like my sink was missing teeth. Using the right deck
plate (with the right gasket) made the whole install look intentionallike a grown-up kitchen upgrade instead of a
“close enough” DIY.
Experience #4: Pull-down hoses have opinions. The sprayer hose and weight need room to move. If you
store tall bottles under your sink (dish soap refills, cleaners, that mystery container you don’t trust), the hose
will catch on them. Then the sprayer won’t retract, and you’ll assume you installed it wrong. Most of the time,
nothing is “wrong”your under-sink storage is just interfering. Clearing an 8×8-ish zone under the faucet can make a
dramatic difference.
Experience #5: Leak checks deserve your full attention. The first time I turned the water back on,
I immediately celebrated and started cleaning up. That’s when a slow drip quietly formed at a connection. Now I do a
deliberate leak test: dry paper towel under each fitting, run water for a minute, then check the towel. If it stays
dry, you’re probably good. If not, you’ve caught the issue earlybefore it becomes cabinet damage.
The bottom line: replacing a kitchen faucet is one of those DIY wins that feels bigger than it is. You get a daily
upgrade in function and style, and you also earn the right to casually say, “Oh yeah, I installed that.” Just try
not to say it while still stuck under the sink.
Conclusion
If you can turn off water, loosen a few connections, and tighten mounting hardware in a cramped cabinet, you can
replace a kitchen faucet. Go slow, follow your faucet’s instructions, keep a bucket handy, and test carefully for
leaks. The reward is a smoother-running sink, better usability, and the deep satisfaction of upgrading your kitchen
without paying someone else to do the under-sink yoga.