Table of Contents >> Show >> Hide
- Step 1: Start With a Certified Motorcycle Training Course
- Step 2: Gear Up Like You Plan to Slide, Not Just Ride
- Step 3: Choose a Beginner-Friendly Motorcycle
- Step 4: Learn the Controls Before You Start the Engine
- Step 5: Do a Simple Pre-Ride Safety Check
- Step 6: Mount the Bike and Find a Safe Practice Area
- Step 7: Master the Friction Zone and Smooth Starts
- Step 8: Ride Straight at Low Speed and Practice Smooth Stops
- Step 9: Shift Up and Down Through the Gears
- Step 10: Learn Basic Turning and Look Where You Want to Go
- Step 11: Manage Space, Visibility, and Lane Position
- Step 12: Take It to Real Roads Slowly and Intentionally
- Step 13: Keep Practicing and Never Stop Learning
- Real-World Experiences and Extra Tips for New Riders
Learning how to ride a motorcycle is a mix of science, art, and trying not to fall over at walking speed.
The good news? With the right safety mindset, a structured approach, and a bit of patience, most people can
go from “I’ve only ridden a bicycle” to “confident new rider” far more quickly than they think.
This guide breaks riding down into 13 beginner-friendly steps. We’ll start with training and safety,
then move into controls, clutch work, riding, stopping, and building real-world skills. By the end,
you’ll know what to do before you ever twist the throttle and how to keep improving long after
your first ride.
Step 1: Start With a Certified Motorcycle Training Course
Before anything else, sign up for a beginner course such as the Motorcycle Safety Foundation (MSF)
Basic RiderCourse or an equivalent state-approved class. These courses provide classroom instruction,
structured range exercises, bikes to practice on, and trained coaches who know exactly how to work
with nervous beginners.
A formal course helps you:
- Learn proven techniques instead of guessing from random internet tips.
- Practice low-speed maneuvers in a controlled environment, not in traffic.
- Understand basic risk management, road awareness, and what “good habits” look like.
- Often qualify for a license waiver and insurance discounts, depending on your state.
Think of training as your “easy mode” introduction to riding. It’s cheaper than repairing a dropped bike
or paying an ER bill – and way more fun.
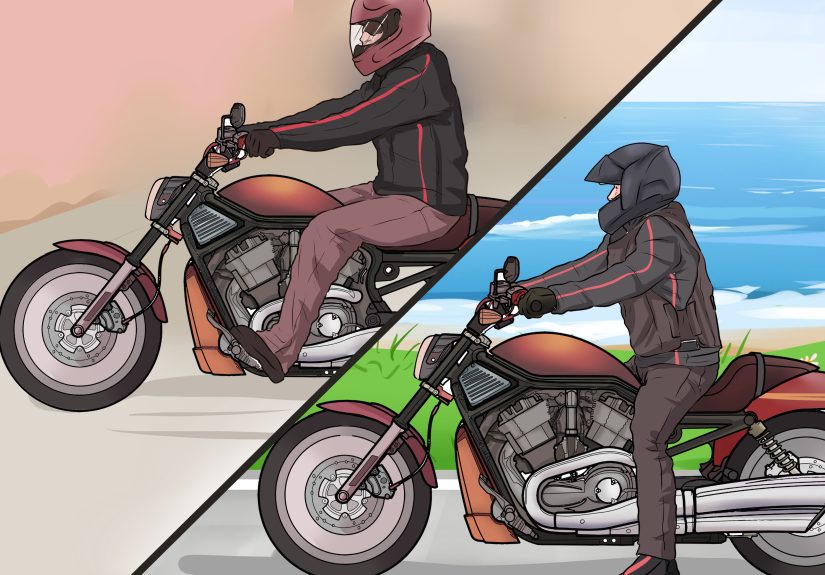
Step 2: Gear Up Like You Plan to Slide, Not Just Ride
If you’re on a motorcycle, you’re the crumple zone. That’s why safety organizations strongly recommend
full protective gear every time you ride: helmet, jacket, gloves, pants, and boots.
At a minimum, new riders should wear:
- A U.S. DOT–compliant full-face helmet for head and facial protection and to keep wind,
bugs, and debris out of your eyes. - A motorcycle-specific jacket (textile or leather) with armor at the shoulders, elbows, and ideally the back.
- Long, abrasion-resistant pants or riding jeans with built-in armor at the knees and hips.
- Over-the-ankle boots with sturdy soles and good ankle support.
- Full-fingered gloves with reinforced palms and knuckle protection.
High-visibility colors, reflective panels, and bright helmets help other drivers see you sooner, which is
a big part of staying upright and uncrashed.
Step 3: Choose a Beginner-Friendly Motorcycle
Yes, that 1000cc superbike looks cool. No, it’s not a great first date.
As a new rider, you want a machine that forgives clumsy clutch work and over-eager throttle hands.
Look for:
- Modest engine size – many beginners start in the 250–500cc range for standard and sport-style bikes.
- Manageable weight – a lighter bike is easier to balance, push, and pick up if you tip it over.
- Neutral riding position – standard or small adventure/naked bikes keep you upright and in control.
- Friendly power delivery – smooth, predictable throttle response instead of “on/off” rocket mode.
If possible, sit on several bikes at a dealership. You should be able to place at least the balls of both feet
firmly on the ground, reach the controls comfortably, and move the bike around without feeling like it’s walking you.
Step 4: Learn the Controls Before You Start the Engine
Before you even turn the key, stand or sit on the bike (engine off) and get familiar with the controls:
- Right hand: throttle (twist grip) and front brake lever.
- Left hand: clutch lever.
- Right foot: rear brake pedal.
- Left foot: gear shifter (one down for first, then up through the gears).
Also locate the turn signal switch, horn, kill switch, starter button, and high/low beam switch.
Practice the motions until you can reach them without looking down. Muscle memory is your friend;
the less you need to hunt for controls, the more you can focus on traffic and balance.
Step 5: Do a Simple Pre-Ride Safety Check
Every ride, do a quick inspection. Many riders use the “T-CLOCS” checklist (Tires, Controls, Lights,
Oil, Chassis, Stands). For beginners, keep it simple:
- Check tire condition and pressure.
- Test front and rear brakes at walking speed in the driveway or lot.
- Confirm headlights, tail/brake lights, and turn signals all work.
- Look for fluid leaks under the bike.
- Make sure mirrors are clean and adjusted.
It takes under two minutes and helps prevent nasty surprises like “no brake pressure” or
“headlight burned out at dusk.”
Step 6: Mount the Bike and Find a Safe Practice Area
Always practice your first rides in a wide, empty parking lot or similarly open space.
Avoid hills, traffic, and complicated intersections until you’re comfortable with the basics.
Mount the bike from the left side, hold the front brake as you swing your leg over, and sit squarely
in the seat. Keep the bike upright and balanced between your legs, not leaning heavily on the sidestand
or your arms.
Start in neutral, with the clutch pulled in, and get used to the sound and feel of the engine idling.
Take a breath. You’re not rushing a takeoff – you’re learning a new skill one tiny step at a time.
Step 7: Master the Friction Zone and Smooth Starts
The “friction zone” is the tiny range of clutch lever movement where power begins to transfer from the engine
to the rear wheel. It’s the heart of smooth starts, slow-speed control, and not stalling in front of your friends.
With the bike in first gear and both feet planted:
- Keep the clutch pulled in and give just a bit of throttle – no need to rev loudly.
- Slowly release the clutch until you feel the bike want to move forward.
- Hold the lever there and let the bike “creep” at walking speed without fully releasing the clutch.
Practice this several times, rolling a few feet and then pulling the clutch back in and braking to a stop.
When that feels easy, let the clutch all the way out while adding slightly more throttle to accelerate smoothly.
Expect to stall. Everyone stalls. Laugh, restart, and keep going – the friction zone becomes second nature
surprisingly quickly with repetition.
Step 8: Ride Straight at Low Speed and Practice Smooth Stops
Next, practice riding straight lines at slow speeds. From a stop in first gear:
- Use the friction zone and gentle throttle to move forward.
- Keep your eyes up, looking far ahead, not at the ground in front of the wheel.
- Relax your arms – your hands guide the bars; they don’t death-grip them.
After traveling a short distance, roll off the throttle, pull in the clutch, and apply both brakes
smoothly and progressively. Most of your stopping power comes from the front brake, but the rear brake
helps stabilize the bike and shorten stopping distance when used properly.
The goal here isn’t speed; it’s control. You’re training your brain to coordinate throttle, clutch,
and braking without panic.
Step 9: Shift Up and Down Through the Gears
Once you can start, ride straight, and stop smoothly, add shifting to the mix.
To shift up from first to second:
- Accelerate gently in first gear.
- Roll off the throttle, pull in the clutch, and lift the shifter firmly with your left foot.
- Ease the clutch out while rolling the throttle back on.
To downshift, reverse the process: roll off the throttle, clutch in, tap the shifter down,
then smoothly release the clutch. At low speeds, downshift early enough that the engine doesn’t lug or jerk.
Practice riding a loop around your lot, shifting up to second or third and then back down to first
as you slow. With time, the rhythm of “throttle off, clutch in, shift, clutch out, throttle on”
will feel automatic.
Step 10: Learn Basic Turning and Look Where You Want to Go
New riders often stare at the ground or fixate on obstacles. The motorcycle follows your eyes and body,
so this is a recipe for running wide or turning poorly.
Instead:
- Turn your head and look through the turn to the place you want to end up.
- Enter turns at a comfortable, modest speed – you should never feel rushed.
- Keep light, relaxed pressure on the handlebars; don’t fight the bike.
At speed, motorcycles turn primarily via countersteering: a slight push on the right handlebar
makes the bike lean right, and a push on the left bar makes it lean left. In a parking lot, you’ll mostly
feel this as gentle handlebar input rather than dramatic steering movements.
Start with large, easy circles and figure-eights. As you get comfortable, you can gradually tighten
the radius and work on slower, more precise turns.
Step 11: Manage Space, Visibility, and Lane Position
Riding a motorcycle isn’t just about operating the machine; it’s about constantly managing space and visibility
in traffic. New riders should be obsessed with three things: being seen, having an escape route, and
maintaining a safety cushion.
Practical habits include:
- Keeping a generous following distance so you have time to react.
- Positioning yourself in the lane where you’re most visible to drivers and have the best view ahead.
- Using your headlight, signals, and brake light proactively.
- Wearing bright gear and reflective elements to stand out, even during the day.
Assume other drivers don’t see you until they prove they do. Defensive riding is not paranoia;
it’s self-preservation.
Step 12: Take It to Real Roads Slowly and Intentionally
After several solid practice sessions in a lot, you can begin venturing onto quiet neighborhood streets
or low-speed roads. Don’t jump straight onto high-speed highways or dense city traffic.
Start with:
- Short rides on familiar roads during daylight and good weather.
- Simple routes with minimal traffic and few complex intersections.
- Planned stops where you can take a break and decompress.
As your confidence grows, you can gradually introduce more complex situations: higher speeds, light traffic,
then multi-lane roads, and eventually highways when you’re truly ready. Think of it as “leveling up”
instead of flipping straight to “expert mode.”
Step 13: Keep Practicing and Never Stop Learning
Motorcycling is a skill that improves with focused practice, not just miles. Many riders plateau because
they ride but don’t deliberately work on cornering, braking, or slow-speed control.
To keep growing:
- Revisit low-speed drills and figure-eights on a regular basis.
- Practice quick stops and emergency braking in a safe area.
- Consider an intermediate or advanced riding course after your first season.
- Ride with experienced, safety-minded riders who are willing to coach, not show off.
The aim isn’t to ride the fastest; it’s to ride the longest, with skill and confidence.
Real-World Experiences and Extra Tips for New Riders
Ask a group of experienced riders about their early days, and you’ll hear the same themes over and over:
“I was terrified of stalling,” “I forgot to cancel my turn signal constantly,” “Parking lots felt harder
than highways.” That’s normal. Almost no one feels smooth on day one.
One common beginner story goes like this: a new rider nails the basics in class, passes the test, and
then takes their first solo ride home. Suddenly everything feels louder and faster. Cars seem closer,
traffic feels unpredictable, and the bike feels heavier than it did on the training range.
The lesson? Expect your first real-world rides to feel mentally intense – and plan accordingly.
Keep your early trips short and purposeful. Instead of a two-hour scenic loop, ride ten minutes to a coffee
shop in a quiet area, take a break, then ride home. That pattern gives you time to process what went well,
what felt shaky, and what you want to practice next.
Another big milestone is the first time you ride with a passenger. Most instructors recommend waiting until
you’re truly comfortable riding solo, and for good reason. A passenger changes the bike’s balance, braking,
and acceleration. When you do reach that point, treat it as a fresh learning step: practice starts and stops
in a lot, communicate clearly with your passenger (“no sudden movements, no leaning on your own”), and
keep those first two-up rides very conservative.
Weather is another teacher. Many new riders start in perfect conditions: dry roads, blue skies, mild temperatures.
Over time, you’ll encounter wind, cooler temps, and maybe light rain. Smart riders don’t rush into challenging
conditions – they build up slowly. For example, you might begin by riding on a cool, slightly breezy day to feel
how wind affects your balance and lane position. Later, a very light drizzle at low speed in a familiar area
can help you experience how much gentler you must be with braking and throttle on wet pavement.
You’ll also discover that mental state matters as much as technique. Riding while angry, rushed, or distracted
is a bad combination. Many riders develop a ritual: they take a moment before rolling out to check their gear,
visualize the route, and mentally “arrive” on the bike. That small pause helps shift your brain from everyday
noise into a focused, present riding mindset.
Finally, almost every long-time rider can point to a moment when their skills “clicked” – a day when cornering
felt smooth instead of tense, or when low-speed U-turns stopped being terrifying. That moment doesn’t arrive
on a schedule. It comes from stacking all the little habits described in these 13 steps: good training,
solid gear, disciplined practice, and a healthy respect for risk. If you treat motorcycling as a craft to be
learned rather than a stunt to show off, you dramatically increase your odds of enjoying it for many years.
So be patient with yourself, celebrate small wins – your first no-stall ride, your first clean shift through
all the gears, your first perfectly smooth stop – and remember: every expert once wobbled through a parking lot
just like you.