Table of Contents >> Show >> Hide
- What Is the Layer by Layer Method?
- Before You Start: Learn the Cube Notation
- Understand the Pieces Before You Solve
- Step 1: Make the Daisy, Then the White Cross
- Step 2: Solve the White Corners to Finish the First Layer
- Step 3: Solve the Middle Layer Edges
- Step 4: Make the Yellow Cross on the Top
- Step 5: Turn the Yellow Face Completely Yellow
- Step 6: Position the Yellow Corners Correctly
- Step 7: Position the Final Yellow Edges
- Common Beginner Mistakes
- How to Practice the Layer by Layer Method Faster
- What Learning This Method Actually Feels Like
- Conclusion
If a Rubik’s Cube has ever stared back at you like a tiny plastic villain, welcome. You are among friends. This famous puzzle has been twisting brains since the 1970s, and yes, it still has a special talent for making otherwise confident adults mutter, “I definitely had this a second ago.” The good news is that solving it is not magic, wizardry, or a personality test. It is a process.
The layer by layer method, often shortened to LBL, is one of the best beginner-friendly ways to learn how to solve a Rubik’s Cube. Instead of trying to understand the whole cube at once, you solve it in logical chunks: the first layer, the middle layer, and then the last layer. That means less panic, fewer random twists, and a much lower chance of launching the cube onto the couch in betrayal.
In this guide, you’ll learn the beginner Rubik’s Cube layer by layer method step by step, including the basic notation, the essential algorithms, common mistakes, and the best ways to practice without feeling like your hands are taking a pop quiz. By the end, you’ll understand not just what to do, but why it works.
What Is the Layer by Layer Method?
The layer by layer method solves the cube in stages. First, you complete one face and its surrounding layer. Then you solve the middle layer. Finally, you fix the last layer by orienting and permuting the remaining pieces. In plain English: build the bottom floor, install the middle floor, then stop screaming and finish the roof.
This method is popular for beginners because it teaches you the structure of the puzzle without forcing you to memorize a giant wall of algorithms right away. You only need a handful of move sequences, and many of them repeat throughout the solve. Once you get comfortable with LBL, you can later move on to faster methods such as CFOP. But for a first real solve, this is the sweet spot between “too simple” and “my cube now lives in a drawer forever.”
Before You Start: Learn the Cube Notation
To follow any Rubik’s Cube tutorial for beginners, you need to understand basic move notation. Every move refers to turning one face of the cube:
- R = right face clockwise
- L = left face clockwise
- U = upper face clockwise
- D = down face clockwise
- F = front face clockwise
- B = back face clockwise
If a move has an apostrophe, like R’, turn that face counterclockwise. If a move has a 2, like U2, turn it twice for a 180-degree turn.
One important detail: the center pieces do not change position relative to one another. They define the color of each face. On a standard cube, white is opposite yellow, red is opposite orange, and blue is opposite green. That means the centers are your map. If the cube feels chaotic, the centers are the calm adults in the room.
Understand the Pieces Before You Solve
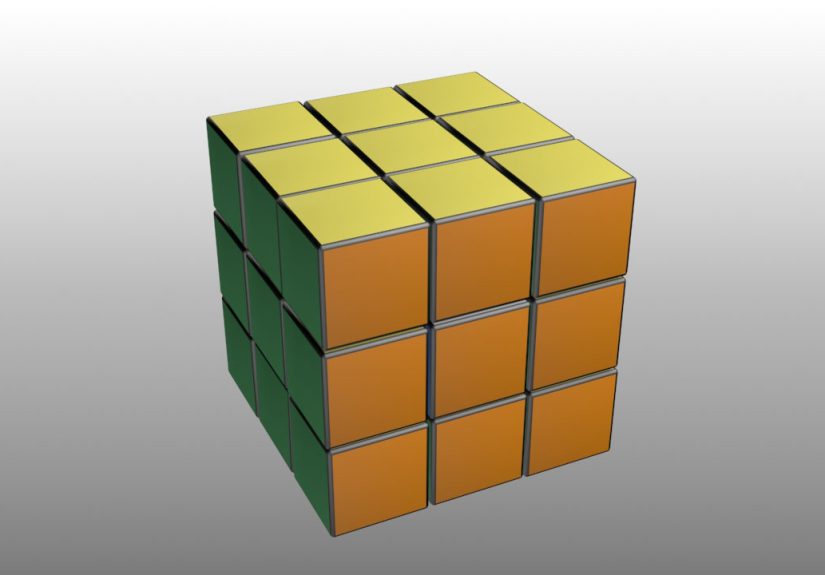
A standard 3×3 Rubik’s Cube has three types of visible pieces:
- Centers: one color each, fixed in relation to one another
- Edges: two colors each
- Corners: three colors each
Your goal is not just to get the colors looking nice from one angle. You need every piece to be in the correct position and orientation. That is why a face can look almost solved but still be wrong. The cube is sneaky like that.
Step 1: Make the Daisy, Then the White Cross
Many beginner guides start with the daisy. This is a temporary pattern where you place the four white edge pieces around the yellow center on the top face. It helps you build the white cross correctly without needing advanced intuition right away.
How to make the daisy
Find all four white edge pieces and move them so they surround the yellow center. Do not worry about matching side colors yet. Just build the flower.
Turn the daisy into the white cross
Now look at the side color on one white edge. Rotate the top layer until that side color matches its center on the side face. Once it matches, turn that face 180 degrees so the white edge moves from the top to the bottom. Repeat for all four white edges.
When you finish, you should have a white cross on the bottom, and the side colors of those edges should line up with their matching centers. This matters. A messy cross is like building a house on roller skates.
Step 2: Solve the White Corners to Finish the First Layer
Now you’ll place the four white corner pieces to complete the first layer.
Look for a white corner in the top layer. Identify the three colors on that corner, then rotate the top so the corner sits above the place where it belongs. If the corner needs to go into the right side, use:
R U R’
This is often called the right trigger. If the corner belongs on the left side, use:
L’ U’ L
This is the left trigger.
If the white sticker is on top and not facing out, you may need to repeat the trigger more than once to insert it correctly. If the wrong white corner is stuck in the bottom layer, bring it back to the top with the same trigger, then try again.
After all four white corners are in place, the entire first layer should be solved. Take a moment to admire it. This is the point where many beginners realize the cube is, in fact, a teachable object and not a cursed household item.
Step 3: Solve the Middle Layer Edges
Next, solve the four edges in the middle layer. Look at the top layer for an edge piece that does not contain yellow. Match the front color of that edge with its center. Then look at the top color of that edge to see whether it should go left or right.
If the edge needs to go to the right
U R U’ R’ U’ F’ U F
If the edge needs to go to the left
U’ L’ U L U F U’ F’
These algorithms move the edge into the middle layer while preserving the first layer. If you do not see any usable non-yellow edge on top, but the middle layer is still wrong, take a bad middle-layer edge out by using one of the above algorithms. That will kick a better candidate up to the top.
When this step is complete, the first two layers should be solved. This is a huge milestone. From here on out, you are no longer “trying stuff.” You are officially solving the cube.
Step 4: Make the Yellow Cross on the Top
Now we move to the last layer. The first goal is to orient the top edges so you form a yellow cross.
Use this algorithm:
F U R U’ R’ F’
You may see one of several cases on the top face:
- Dot: no yellow edges oriented correctly
- L shape: two yellow edges form a corner
- Line: two yellow edges form a straight line
If you have the L shape, hold it so the yellow pieces sit like a backward L in the upper-left area. If you have the line, hold it horizontally across the face. Then perform the algorithm. You may need to do it more than once. Eventually, you’ll get the yellow cross.
At this stage, do not worry if the yellow edges are not in the correct side positions yet. You are only making the yellow cross on top, not finishing the cube. The cube loves partial victories. That is part of its brand.
Step 5: Turn the Yellow Face Completely Yellow
With the yellow cross done, the next step is to orient the yellow corners so the whole top face turns yellow.
Use this algorithm:
R U R’ U R U2 R’
You’ll often hear cubers call this a variation of the “Sune” algorithm. If one yellow corner is already facing up, rotate the top layer until the cube looks like a little fish shape with the “head” pointing down-left from your viewpoint, then perform the algorithm. If you have zero or two yellow corners facing up, hold the cube according to the case and repeat as needed.
Eventually, the entire top face will be yellow. The cube may still be unsolved, but now the chaos is organized chaos, which is much more polite.
Step 6: Position the Yellow Corners Correctly
Now you need to place the yellow corners in their correct locations, even if they are already twisted the right way.
Use this algorithm:
L’ U R U’ L U R’ R U R’ U R U2 R’
This swaps corner positions. Check which corners already belong where they are. A corner is in the correct spot if its three colors match the three surrounding centers, regardless of orientation. If one corner is correct, hold it in the proper position and perform the algorithm. If none are correct, perform the algorithm once, then reassess.
You may need to do this more than once. That is normal. The cube is not mocking you. Probably.
Step 7: Position the Final Yellow Edges
This is the last step of the Rubik’s Cube layer by layer method. You will cycle the final edge pieces into place.
Clockwise edge cycle
F2 U R’ L F2 L’ R U F2
Counterclockwise edge cycle
F2 U’ R’ L F2 L’ R U’ F2
If one side is already correct, hold that solved side at the back and choose the algorithm that cycles the other three edges in the right direction. If all four edges seem wrong, perform the counterclockwise version once, then reassess and finish from there.
When the final edges click into place, congratulations: you have solved the cube. Feel free to raise it dramatically like you just completed a quest in an ’80s fantasy movie.
Common Beginner Mistakes
- Ignoring the side colors on the white cross: The cross must match the centers, not just look white from the bottom.
- Using an algorithm from the wrong angle: Face orientation matters. A correct algorithm from the wrong viewpoint can wreck progress.
- Trying to force pieces: If a piece seems impossible, it usually means the setup is wrong, not that the cube is broken.
- Panicking during the last layer: The cube often looks worse before it looks solved. Stay the course.
- Memorizing without understanding: Learn what each step is trying to do, and the algorithms will stick much faster.
How to Practice the Layer by Layer Method Faster
If you want to get better at solving a Rubik’s Cube for beginners, practice in short sessions. Focus on one stage at a time. Spend a few solves just making an efficient white cross. Then practice first-layer corners. Then middle-layer insertions. Once each part feels familiar, the full solve gets much smoother.
It also helps to say the moves out loud at first. “R U R’” may sound like you are summoning a tiny cube demon, but it works. Muscle memory develops quickly when your brain and hands cooperate. Another great trick is to scramble, solve, and repeat instead of waiting days between attempts. Consistency beats heroic effort every time.
And no, your first few solves do not need to be fast. Most beginners start out in the several-minute range. That is completely normal. Accuracy first, speed second, cube-induced swagger third.
What Learning This Method Actually Feels Like
Learning how to solve a Rubik’s Cube with the layer by layer method is a funny little journey because it messes with your emotions in the most specific way possible. At first, the cube feels random. You turn one side, something good happens. You turn another side, and now three good things have mysteriously become seven bad things. It can feel like the puzzle is gaslighting you with colors.
Then something shifts. Usually it happens around the white cross. You stop seeing the cube as a wall of stickers and start noticing patterns. You spot edge pieces. You recognize where a corner belongs. You realize that the centers are fixed, which is one of those facts that somehow feels both obvious and life-changing. Suddenly, the cube is not a mess. It is a system.
The first layer is where confidence begins. You insert a corner using R U R’, and instead of ruining everything, it actually works. That moment is weirdly satisfying. It feels like opening a locked door in your own brain. You may still need to repeat the move six times while whispering, “No, no, no, yes,” but progress is progress.
The middle layer is often where beginners either level up or briefly consider a new hobby. The insertions are not hard once you get them, but they demand patience. You have to match colors, think about left versus right, and resist the urge to freestyle your way into disaster. When you finally solve the first two layers cleanly, though, it feels incredible. The cube starts looking less like a puzzle and more like a conversation you finally understand.
The last layer is the drama department. The yellow cross appears and disappears. A fish shape shows up. Corners look solved but are somehow not solved. Algorithms that felt impossible ten minutes ago start sounding familiar. This is where most people learn an important cubing truth: a solve can look worse right before it gets better. That is not failure. That is just the cube being theatrical.
There is also a very specific joy in your first full solve. It is not just the relief of finishing. It is the realization that you can now do something that once looked impossible. You begin to understand why people keep cubing even after they know the method. The puzzle becomes less about beating the cube and more about improving your own thinking, efficiency, and calm under pressure. Which is a surprisingly noble outcome for something that also lives next to pens and loose batteries.
After a few days of practice, the layer by layer method starts feeling natural. Your hands move more confidently. The algorithms stop being random letters and start feeling like tiny tools. You may even find yourself picking up the cube absentmindedly while watching TV, solving the first layer without really thinking. That is when you know it has gotten into your system.
And maybe that is the best part of learning the LBL method: it turns confusion into structure. It proves that a hard-looking problem can become manageable when you break it into layers, learn a few reliable patterns, and keep going even when the middle looks messy. Honestly, that is not bad life advice either.
Conclusion
If you want a practical, beginner-friendly way to learn how to solve a Rubik’s Cube, the layer by layer method is one of the best places to start. It teaches you the cube’s structure, gives you a small set of useful algorithms, and breaks the solve into manageable stages: white cross, first layer, middle layer, yellow cross, yellow face, corners, and edges.
The first few solves may feel slow, clunky, and mildly personal. That is normal. But once you understand the logic behind each step, the cube stops feeling random and starts feeling beatable. Stick with it, trust the process, and before long you will go from “I have no idea what I’m doing” to “Please hand me that cube, I have a system.”