Table of Contents >> Show >> Hide
- Why Use Balsamic Vinegar as a Wood Stain?
- Supplies You’ll Need
- How the Balsamic Vinegar & Steel Wool Stain Works
- Step-by-Step: How to Stain Wood With Balsamic Vinegar
- How Different Woods React to Balsamic Vinegar Stain
- Sealing and Finishing Your Vinegar-Stained Wood
- Safety Tips & Common Mistakes
- Project Ideas Inspired by Hometalk-Style DIYs
- Real-World Experiences & Extra Tips for Balsamic Vinegar Wood Stain
- Conclusion
If you’ve ever opened your pantry and thought, “This balsamic vinegar would look amazing… on my coffee table,” you’re in exactly the right place. Staining wood with balsamic vinegar is one of those delightfully weird DIY tricks that actually works. It’s budget-friendly, surprisingly durable when sealed, and gives raw wood a warm, lived-in, slightly rustic finish that looks like you spent a lot more than a couple of dollars and some waiting time.
Instead of using traditional store-bought wood stain, you’ll be using a simple chemistry experiment: balsamic vinegar plus steel wool. Together, they create a natural stain that reacts with the tannins in the wood and transforms the color from pale and plain to rich and character-filled. Think of it as eco-friendlier stain with a side of “I made this myself” bragging rights.
In this guide, inspired by project-based tutorials you might see on Hometalk-style DIY boards, we’ll walk through exactly how to stain wood with balsamic vinegar, what supplies you need, how to avoid blotchy disaster, and how to get the best color on different types of wood. We’ll wrap up with real-world experiences and pro-level tips so your first attempt already feels like your third or fourth.
Why Use Balsamic Vinegar as a Wood Stain?
So why balsamic instead of plain white vinegar? All vinegar contains acetic acid, which reacts with iron from steel wool to form an iron-rich solution (iron acetate). When that iron solution hits woodespecially wood with decent tannin contentit darkens, ages, and adds depth to the grain.
Balsamic vinegar has a few extra perks:
- Deeper color: Balsamic starts out dark and syrupy, so the resulting stain tends to give warmer gray-brown tones compared to the cooler look of white vinegar.
- Soft, aged look: On lighter woods like pine, balsamic can create a warm gray with subtle golden undertones rather than a flat, muddy brown.
- Natural and low-cost: It’s an easy, low-VOC alternative to many synthetic stains when paired with a proper topcoat.
- Customizable: By changing how long the mixture sits, or layering it over tea or coffee, you can fine-tune the final color.
No, your finished project won’t smell like salad dressing forever. Once the stain cures and you seal the wood, the vinegar scent fades out.
Supplies You’ll Need
Before diving into your DIY balsamic stain, gather your materials. Most of these are things you either already own or can easily find at a grocery or hardware store.
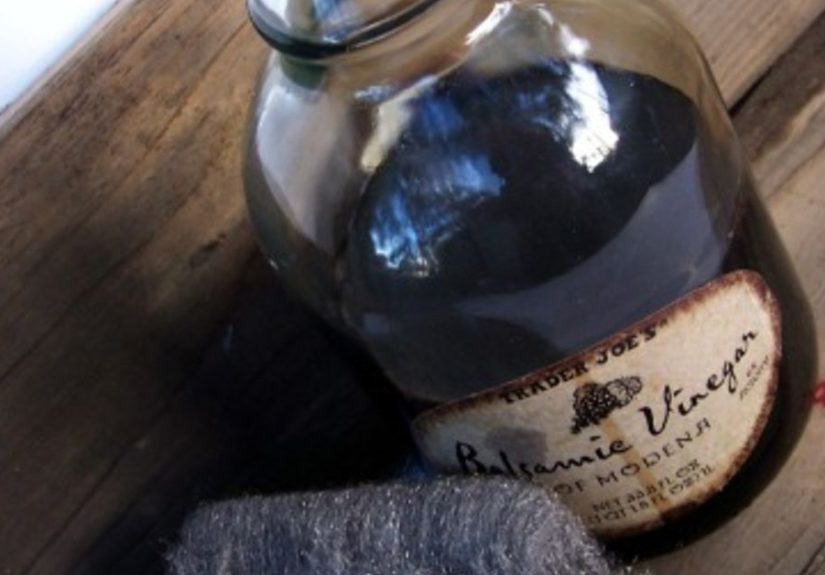
- Balsamic vinegar: About 1 cup for a small batch. Any inexpensive balsamic works.
- Water: About 1 cup to dilute the vinegar and soften the reaction.
- Real steel wool: 0000 (super fine) grade is ideal for dissolving and giving a smoother solution.
- Glass jar with a loose lid: A mason jar or recycled glass jar that you don’t mind dedicating to stain.
- Gloves and old clothes: The stain can discolor skin and fabric.
- Paintbrush or foam brush: For applying the stain.
- Sandpaper: Grits 120, 180, and 220 for smoothing the wood.
- Tack cloth or clean rag: To remove dust before staining.
- Scrap wood or inconspicuous test area: To preview the color.
- Optional: Strong black tea or brewed coffee to boost tannins on low-tannin woods like pine.
- Topcoat: Clear polyurethane, water-based poly, oil finish, or furniture wax to protect the stain once it’s dry.
How the Balsamic Vinegar & Steel Wool Stain Works
The magic behind this DIY stain is simple chemistry. When steel wool sits in vinegar, the acetic acid reacts with the iron, slowly creating a solution of iron acetate. When you brush that solution onto wood, it reacts with natural tannins and darkens the surface.
Balsamic vinegar adds its own color, so your stain isn’t just the iron reactionit’s a combination of the vinegar’s natural pigments and the iron-tannin reaction. On pine, for example, balsamic often gives a soft grayish tone with warm, almost antique-looking undertones. On tannin-rich woods like oak or walnut, the same mixture can look much darker and more dramatic.
Because this is a reactive stain, not a pigment stain, the final color will vary depending on the wood species, sanding level, and how long your mixture sits. That unpredictability is part of the charmjust make sure you always test first.
Step-by-Step: How to Stain Wood With Balsamic Vinegar
Step 1: Mix the Balsamic Vinegar Stain
- Prep the steel wool. Tear one pad of 0000 steel wool into smaller pieces. This increases the surface area and speeds up the reaction.
- Add steel wool to the jar. Place the torn steel wool in a clean glass jar.
- Pour in the vinegar and water. Add about 1 cup balsamic vinegar and 1 cup water. Make sure the steel wool is fully submerged.
- Leave the lid loose. Cover the jar, but don’t tighten the lid. The reaction can release gases and you don’t want pressure building up.
- Let it sit. Allow the mixture to react for at least 24 hours, and up to 3–4 days for a deeper, darker stain. Shake gently once or twice a day.
- Strain before use. When the liquid looks darker and the steel wool is partially dissolved, strain the mixture through a coffee filter or fine mesh into a clean container. This removes metal bits that could scratch your wood.
Pro tip: Make a few small test batches with different “aging” times (24 hours, 48 hours, 72 hours). Label each jar. You’ll quickly see which timeline gives the depth of color you like best.
Step 2: Prep the Wood Surface
No stain can fix rough, dirty, or glossy wood. Surface prep is what separates the “Pinterest win” from the “why does this look like it lived in a garage for 40 years… in a bad way?”
- Sand the wood. Start with 120 grit to level the surface and remove mill marks, then move up to 180 and finish with 220 grit for a smooth feel. Always sand with the grain.
- Remove existing finish. If you’re working on previously finished furniture, sand or strip off the old varnish, paint, or sealer. The stain needs bare wood to react.
- Clean off dust. Use a vacuum and then a tack cloth or slightly damp rag to remove sanding dust. Any leftover dust can cause blotchy patches.
- Optional tannin boost. If you’re working on pine, spruce, or another softwood, brush on strong black tea or coffee and let it dry fully before staining. The extra tannins help the iron solution give a richer, more even color.
Step 3: Test the Stain
Before you go all-in on your tabletop or shelves, always do a test run.
- Apply the balsamic stain to a scrap piece of the same wood or the underside/back of your project.
- Let it sit and dry for at least 30–60 minutes. The color will usually deepen as it oxidizes.
- Check how it looks in natural light and indoor light. Adjust by diluting with water if it’s too dark, or letting the solution sit longer if it’s too light.
Once you’re happy with the test, you’re ready for the main event.
Step 4: Apply the Balsamic Vinegar Stain
- Stir the solution. The stain may settle a bit. Gently stir before using, but don’t shake vigorouslyyou don’t want bubbles.
- Brush with the grain. Using a foam brush or standard paintbrush, apply the stain along the grain in smooth, overlapping strokes. Keep a “wet edge” so you don’t get obvious lap marks.
- Don’t panic at first. Initially, the wood may look lighter or uneven. As it dries, the reaction deepens and the color shifts. Give it time.
- Wipe off excess if needed. If you see puddles or heavy spots, lightly wipe with a clean rag in the direction of the grain.
- Let it dry completely. Drying time can vary with temperature and humidity, but expect at least 1–2 hours before judging the final color.
Step 5: Layer, Adjust, and Let Cure
- For darker color: Apply a second coat after the first is fully dry. Each coat typically deepens the tone.
- For softer color: If it’s too dark or intense, lightly sand the surface with 220 grit to soften and even out the shade.
- Let it cure overnight. Before adding any topcoat, let the stained wood sit at least overnight so the chemical reaction stabilizes and any residual vinegar smell dissipates.
How Different Woods React to Balsamic Vinegar Stain
The same jar of balsamic vinegar stain can look radically different on different species of wood. Here’s a general idea of what to expect:
- Pine and other softwoods: Often show a warm gray or soft weathered brown. Because pine has uneven density, pre-treating with tea or coffee can help reduce blotchiness.
- Oak: Its high tannin content means the stain often turns a deeper brown-gray with dramatic grain contrastgreat for rustic or farmhouse looks.
- Maple and birch: These close-grained hardwoods can be more subtle and sometimes resist the stain. Tea or coffee pretreatment is especially helpful here.
- Walnut and darker hardwoods: You’ll see less dramatic transformation, but the stain can deepen existing tones and add an aged, slightly smoky cast.
Because of this variation, never skip the test board stepwhat looked like a dreamy weathered gray on pine might look nearly black on oak.
Sealing and Finishing Your Vinegar-Stained Wood
Once your balsamic vinegar stain has dried and cured, you’ll want to protect it. Reactive stains sit inside the wood fibers, but they still need a protective finish to stand up to everyday life.
- Water-based polyurethane: Dries quickly, has low odor, and tends to keep the color closer to what you see once the stain is dry. Great for indoor furniture and decor.
- Oil-based poly or wipe-on varnish: Adds a warm, slightly amber tone. Beautiful on rustic pieces, but expect the color to deepen.
- Furniture wax: Works well on small decor pieces, trays, and frames that don’t get heavy wear.
- Outdoor sealer: For outdoor projects, use a clear exterior-grade sealer rated for UV and moisture protection.
Always test your topcoat on the same test board you used for the stain. Some finishes will shift the color more than others.
Safety Tips & Common Mistakes
Even though this method uses common household ingredients, there are still a few safety and practical points to keep in mind:
- Work in a ventilated area. Vinegar fumes and any topcoat products can be irritating in a closed room.
- Wear gloves. The stain can leave stubborn marks on your hands and under nails.
- Dispose of steel wool safely. Used steel wool and vinegar-soaked rags should be laid flat to dry fully before disposal to reduce any risk of heat build-up.
- Don’t use on priceless antiques. This is fantastic for raw lumber, thrift finds, and DIY buildsnot delicate heirlooms.
- Watch for scratches. Very coarse or loose steel wool on bare wood can leave tiny scratches. Use 0000 grade and strain your solution well.
- Avoid glossy, sealed surfaces. The stain won’t penetrate through existing finish; it needs bare wood.
Project Ideas Inspired by Hometalk-Style DIYs
Once you’ve mixed a successful batch of balsamic stain, you’re probably not going to want to stop at one board. Good newsyou don’t have to. Here are some project ideas that show off this natural, aged finish:
- Rustic wall art or signs: Stain pallet boards or inexpensive common boards, then add painted or stenciled lettering.
- Floating shelves: Use balsamic stain on simple bracketed shelves to give them an “old barn wood” feel without the barn.
- Crates and boxes: Stain unfinished crates for storage that blends with farmhouse, industrial, or coastal decor.
- Headboards or accent panels: Create a feature wall or headboard from stained planks in slightly varied tones for a reclaimed look.
- Picture frames and small decor: Perfect low-risk projects if you’re testing the method for the first time.
Because DIY communities like Hometalk are full of creative variations, don’t be afraid to tweak your recipetry balsamic on some boards, apple cider vinegar on others, or layer your balsamic stain over coffee for richer, darker tones.
Real-World Experiences & Extra Tips for Balsamic Vinegar Wood Stain
After you’ve played with balsamic vinegar stain once or twice, you’ll notice that it behaves more like a living recipe than a fixed formula. Here are some experience-based tips and scenarios to help you get better results with fewer surprises.
Dialing in the Color: Time vs. Ratio
Two main variables control your final stain color: how long the steel wool sits in the vinegar, and how much water you add. A less diluted mix that sits for 3–4 days will usually give a much darker, more dramatic stain. A more diluted mix or one that’s only aged 24 hours tends to stay lighter and more subtle.
If you’re going for a faint weathered wash on pale pine, try a 1:1 mix of balsamic and water, with steel wool soaked for around 24 hours. If you want a rich, moody gray-brown for a rustic tabletop, you might let the steel wool sit in mostly balsamic vinegar (little or no water) for 3 days before straining.
Managing Blotchiness on Softwoods
Softwoods like pine are notorious for soaking up stain unevenly. With balsamic vinegar, you may see some boards turn beautifully even while others get patchy near knots or grain changes.
To reduce blotchiness:
- Sand carefully and consistentlydon’t leave some areas at 120 grit and others at 220.
- Use a tea or coffee wash before staining to “prime” the wood with tannins.
- Work quickly in manageable sections so you don’t have stain sitting too long in one spot.
- If an area gets too dark, lightly sand that spot and blend with another thin coat.
Controlling the Smell
Yes, your workshop or kitchen will smell like vinegar while you’re working. That’s part of the deal. The good news is that once the stain dries and you apply a topcoat, the scent fades dramatically.
- Keep windows open or use a fan while applying the stain.
- Allow pieces to dry in a well-ventilated space for several hours before bringing them into living areas.
- Once sealed with polyurethane or wax, any lingering vinegar smell is usually barely noticeable.
Making Test Boards Your Secret Weapon
One of the best “pro moves” is to always make a dedicated test board with the exact same wood as your project. Divide it into sections and label them: one coat, two coats, with coffee pretreat, without pretreat, different aging times of the stain, and so on.
Not only does this help you make decisions for the current project, but you can hang onto the test board as a reference for future builds. Over time you’ll build your own personal color chart of balsamic, apple cider, and white vinegar stains on different woods.
Handling Unexpected Results
Sometimes the stain comes out darker than you expected, or a board takes on a stronger gray tone than you envisioned. All is not lost.
- Too dark? Lightly sand the surface with 220 grit to remove some of the surface reaction and soften the color.
- Too gray? A slightly amber topcoat (like oil-based polyurethane) can warm up a cool gray finish.
- Too subtle? Add another coat or remake the stain with a longer steel-wool soaking time.
When Balsamic Vinegar Stain Shines the Most
While you can use balsamic vinegar stain on many pieces, it really shines in certain scenarios:
- When you want a weathered, reclaimed look without buying pricey barn wood.
- On decor pieces and accent furniture where a slightly uneven, hand-finished character looks charming.
- For DIYers who prefer lower-VOC finishes and love experimenting with natural methods.
- On layered finishes, where you might combine a balsamic stain base with dry brushing or whitewashing for a complex, textured appearance.
Once you’ve tried it, balsamic vinegar stain becomes one more handy trick in your DIY toolboxright next to leftover paint samples, random screws, and that one tape measure you swear disappears every time you actually need it.
Conclusion
Staining wood with balsamic vinegar is one of those wonderfully simple ideas that looks like a hack but behaves like a legitimate finish when done right. With a jar, some steel wool, basic sanding, and a bit of patience, you can turn raw lumber or thrifted finds into pieces that feel custom, cozy, and unique.
Whether you’re making rustic shelves, framing art, or giving a small side table a second life, this natural stain method lets you experiment with color and character without a cart full of specialty products. Test on scrap, adjust the recipe to your taste, seal it welland enjoy the fact that your pantry just helped you pull off a very stylish DIY.