Table of Contents >> Show >> Hide
- Why a Worm Farm Can Be Profitable
- Step 1: Choose Your Business Model Before You Buy a Single Worm
- Step 2: Pick the Right Worm Species and Start at the Right Scale
- Step 3: Build a Worm System That Is Easy to Manage and Easy to Scale
- Step 4: Master Bedding, Moisture, Feeding, and Temperature
- Step 5: Harvest Castings and Multiply Your Worm Population
- Step 6: Package, Price, and Sell Like a Real Business
- Step 7: Track Costs, Watch Compliance, and Scale Only When the Numbers Make Sense
- Common Mistakes That Kill Profit
- Final Thoughts
- Experience Notes: What New Worm Farmers Usually Learn the Hard Way
Starting a worm farm for profit sounds a little odd until you remember one important fact: gardening people will happily discuss soil at parties. And once you understand the market, worm farming starts to look less like a quirky hobby and more like a lean, low-space business with multiple revenue streams. You are not just raising worms. You are producing worm castings, breeding starter stock, reducing organic waste, and creating a product that home gardeners, nurseries, and small growers actually use.
The best part is that a small-scale vermiculture business does not require a giant barn, a tractor, or a dramatic reality-show narrator. It requires the right worms, the right system, disciplined feeding, and a plan to sell what you produce. If you skip the planning and jump straight to buying a bucket of red wigglers, you may end up with a damp box of disappointment. If you do it right, you can build a tidy side business that grows steadily over time.
This guide breaks the process into seven practical steps so you can launch a worm farm that is efficient, scalable, and actually aimed at profit instead of random compost chaos.
Why a Worm Farm Can Be Profitable
A worm farm business can make money in more than one way. That matters because the most reliable small businesses usually do not rely on a single product. In worm farming, your possible income streams may include bagged worm castings, bulk vermicompost for local gardeners, live worms for other composters or bait buyers, starter kits, workshops, and even simple consulting for schools, community gardens, or beginner growers.
That said, this is not a get-rich-quick miracle involving heroic annelids. Profit comes from matching the right production model to the right market. Some operations focus on breeding worms. Others focus on processing organic material into castings. The smartest beginner usually starts with one core offer, tests demand locally, and expands only after learning what customers actually buy.
If you want a practical first goal, make it this: build a small, repeatable system that produces healthy worms and clean, marketable castings on a consistent schedule. Fancy logos can wait. Healthy worms cannot.
Step 1: Choose Your Business Model Before You Buy a Single Worm
The phrase worm farm for profit can mean different things, and your setup should reflect that from day one. There are two main models:
Vermiculture
This model focuses on breeding worms for resale. Your customers may include home composters, bait buyers, educators, pet or feed markets, and gardeners who want to start their own bins. If your priority is worm reproduction, you will optimize for worm health, cocoon production, and population growth.
Vermicomposting
This model focuses on turning organic matter into worm castings and finished vermicompost. Your customers may include home gardeners, plant shops, local nurseries, landscaping clients, and growers looking for a premium soil amendment. If your priority is castings, your system is designed to process feedstock efficiently and harvest finished product on schedule.
For most beginners, the best option is a hybrid approach with a strong emphasis on castings. Why? Because castings are easier to brand locally, easier to bundle with potting blends or starter kits, and often less fussy to sell than live worms. Later, as your worm population expands, you can add live worm sales without reinventing the whole operation.
Before moving on, write down your first three target buyers. Examples include:
- Local gardeners who want premium soil amendments
- Nearby nurseries or plant stores that can stock small bags
- Beginner composters who need red wigglers and a starter kit
If you cannot name likely customers yet, do not scale yet. A worm farm is still a business, even if the employees are dramatically underdressed.
Step 2: Pick the Right Worm Species and Start at the Right Scale
The worm species matters more than beginners think. Regular garden worms and nightcrawlers are not the stars of this show. The standard choice for a profitable worm composting setup is the red wiggler, often listed as Eisenia fetida. These worms thrive in rich organic matter, tolerate confinement, reproduce quickly, and handle food scraps better than common soil-dwelling worms.
For a small startup, begin with healthy stock from a reputable domestic seller, local worm farm, or trusted bait source. Do not buy mystery worms from a random listing with blurry photos and an energy that screams “good luck.” Quality starter stock saves time, losses, and frustration.
How many worms should you start with? That depends on your feed supply and system size, but a modest beginner setup often starts with 2 to 5 pounds of worms across multiple bins rather than one giant all-or-nothing system. Multiple bins reduce risk. If one goes sour from overfeeding or bad moisture, your entire business does not collapse into a swampy cautionary tale.
Think of your first stage as a pilot program. Your goal is not to look big. Your goal is to become good.
Step 3: Build a Worm System That Is Easy to Manage and Easy to Scale
You can buy a commercial worm tower, build wooden bins, or retrofit opaque plastic totes. All three can work. For profit, the best system is usually the one you can clean, monitor, repeat, and expand without drama.
What a good worm bin needs
- Shallow depth, usually about 1 foot
- Good airflow
- Drainage or moisture control
- Darkness and protection from heat
- Enough surface area for feeding
- Easy harvesting access
A classic beginner-friendly size is around 2 feet by 3 feet and 1 foot deep. That size gives you room to manage food, bedding, and worm movement without building a monster bin that is hard to correct if something goes wrong. Untreated wood and dark plastic totes are both common choices. Avoid clear plastic bins and treated lumber. Worms like darkness, and chemicals are not exactly a premium feature.
Place your bins where temperatures stay fairly stable. A garage, basement, shed, or shaded outbuilding can work well. Indoor systems are often easier to control than outdoor systems, especially in places with extreme summer heat or winter cold.
If you want to grow, create a standardized bin design now. When every unit is the same size and managed the same way, feeding schedules, labor, and harvest timing become much easier. Standardization is not glamorous, but neither is losing money because Bin Number Four was built like a medieval chest for no reason.
Step 4: Master Bedding, Moisture, Feeding, and Temperature
This is the step that separates a profitable worm farm from a smelly hobby experiment. Worms are simple creatures, but they do expect you to maintain decent working conditions. In return, they accept payment in vegetable scraps and shredded paper, which is honestly a bargain.
Bedding
Use bedding that holds moisture while staying airy. Shredded newspaper, corrugated cardboard, paper bags, egg cartons, coconut coir, and dry leaves are common options. The bedding should feel like a wrung-out sponge, not like soup and not like a desert. Add a little soil or finely crushed eggshells to provide grit and help buffer acidity.
Food
Good feed includes fruit and vegetable scraps, coffee grounds, tea bags, and small amounts of bread or grain-based leftovers. Skip meat, oily foods, dairy, heavily salted items, pet waste, and anything likely to rot into a biohazard audition. Some growers also go easy on citrus, onions, and hot peppers because they can push conditions in an irritating direction for worms.
Feeding routine
Feed lightly at first and increase only when the previous food has mostly disappeared. Always bury or cover the food with bedding to reduce odor, fruit flies, and fungal gnat invasions. Rotate where you place food instead of dumping everything in one corner like you are feeding a tiny landfill. A consistent system works better.
Temperature and moisture
Red wigglers generally do best in moderate temperatures, with the sweet spot around typical indoor conditions. Too much heat slows them down or kills them. Too much cold slows reproduction and processing. Too much moisture leads to odor, low oxygen, and unhappy worms trying to stage a prison break up the sides of the bin.
A healthy bin smells earthy, looks crumbly in mature areas, and shows active worms where food is available. A bad bin smells rotten, pools liquid, and attracts pests. If that happens, feed less, add dry bedding, improve airflow, and stop pretending it will fix itself.
Step 5: Harvest Castings and Multiply Your Worm Population
Your money is made when product leaves the bin in a sellable form. That means you need a repeatable harvesting method. In many small systems, castings are ready in roughly a few months, depending on temperature, feeding rate, bin size, and worm density.
Simple side-migration harvest
One of the easiest methods is to push finished material to one side of the bin, then place fresh bedding and food on the other side. Over the next couple of weeks, the worms move to the new side, and you can collect the finished castings from the old side. It is low-tech, low-cost, and beginner-friendly.
Light sorting for worm separation
Another option is to dump material under bright light and gradually scrape away the top layers as worms move downward. It works, but it is more labor-intensive. Use it when you need to separate worms more precisely for resale.
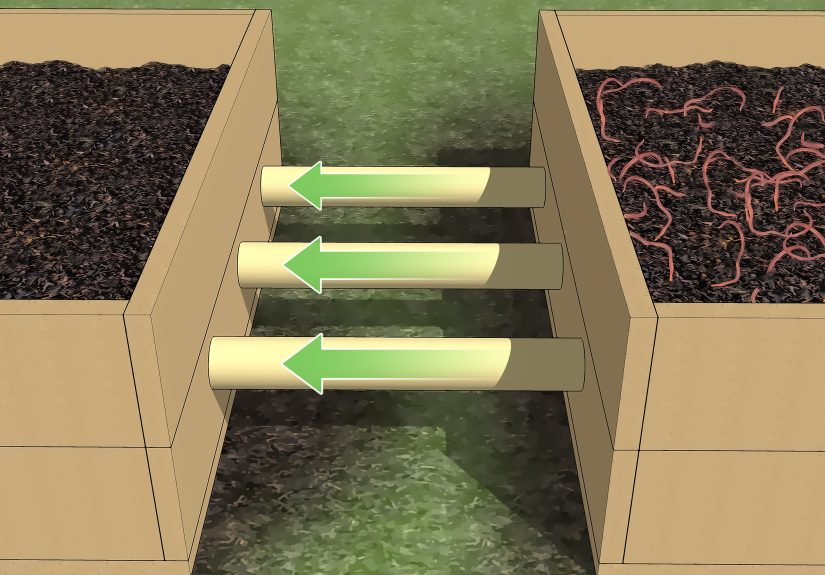
As your population grows, divide thriving bins to start new ones. This is where scaling becomes affordable. Instead of constantly buying more worms, you use healthy reproduction to expand your production base. That is one reason experienced growers often recommend starting small and running the system well rather than starting large and running it badly.
Keep notes on harvest dates, output volume, worm losses, and customer feedback. If one feed mix produces cleaner castings and faster growth, that is not a random observation. That is business data wearing a compost costume.
Step 6: Package, Price, and Sell Like a Real Business
A profitable vermiculture business is not built only in the bin. It is built at the moment a shopper understands what your product is, why it matters, and why yours is worth paying for.
What to sell
- Bagged worm castings for houseplants and gardens
- Bulk castings for growers, landscapers, and garden clubs
- Live red wigglers by count or weight
- Starter worm bins or “worm farm kits”
- Worm tea accessories or educational workshops
Best early sales channels
- Farmers markets
- Garden centers and nurseries
- Plant shops and urban gardening stores
- Facebook groups, local gardening communities, and neighborhood marketplaces
- School gardens and community compost projects
Start local. Fresh, local, small-batch castings are easier to explain and easier to sell when customers can see the product and ask questions. Your packaging should be clean and clear. Explain what the product is, how to use it, and who it is for. Houseplant owners and raised-bed gardeners are especially strong beginner markets because they like measurable improvements and manageable bag sizes.
Do not race to the bottom on price. A premium soil amendment should not look like mystery dust in a sandwich bag. Use professional labels, standard sizes, and simple usage directions. For example, sell one-pound sample bags, five-pound refill bags, and starter bundles with castings plus worms.
One smart tactic is to build product ladders. A first-time customer buys a small bag of castings. Later, they buy a refill. Then they buy a worm starter kit. Then they tell a friend who is dangerously obsessed with tomatoes. That is how word-of-mouth starts to work for you.
Step 7: Track Costs, Watch Compliance, and Scale Only When the Numbers Make Sense
If you want to start a worm farm for profit, act like profit matters from the beginning. Track your input costs, labor time, bin yields, packaging costs, shipping losses, and customer acquisition channels. A lot of beginner worm farms feel productive but are not profitable because the owner never does the math.
Basic costs to track
- Starter worms
- Bins, shelving, trays, and tools
- Bedding materials
- Packaging and labels
- Market booth fees or delivery costs
- Labor time for feeding, harvest, screening, and customer service
You also need to respect regulations. Rules vary by state, especially if you are selling bagged castings as a fertilizer or soil amendment, making nutrient claims, or marketing to certified organic growers. Labeling and registration requirements can apply. If you are selling to food growers, understand the safety expectations around inputs and handling. In plain English: know the rules before you print a giant label that promises miracles.
Scale only after you can answer these questions clearly:
- Which product sells fastest?
- Which product has the best margin?
- Which feedstocks are consistent and safe?
- How many bins can you manage well each week?
- Can your local market absorb more product without cutting prices?
The smartest expansion is usually boring. You add more of what already works. You do not suddenly build thirty bins because one person at a market said, “Cool worms.” Compliments are nice. Repeat customers are better.
Common Mistakes That Kill Profit
- Buying the wrong worms: Composting worms are not the same as garden earthworms.
- Starting too big: Large systems multiply mistakes faster than revenue.
- Overfeeding: This causes odor, pests, and soggy bins.
- Poor moisture control: Too wet or too dry means poor reproduction and weak output.
- No market plan: A pile of castings is not a business until someone buys it.
- Undervaluing packaging and branding: Customers judge quality before they test results.
- Ignoring compliance: Claims on labels can trigger requirements you did not expect.
Final Thoughts
A worm farm business works best when it is approached with the mindset of a grower and the discipline of a shop owner. You need healthy biology, efficient systems, clear products, and actual customers. The seven steps are simple, but not optional: choose the right model, use the right worm, build the right system, master the environment, harvest on purpose, sell professionally, and scale based on numbers instead of optimism.
In other words, success in vermiculture is not about finding magical worms. It is about building a repeatable process that turns organic waste into something useful and marketable. Do that well, and your worm farm can become a practical side hustle or a serious small business. Also, you will forever be the only person in the room who can say, with dignity, “My inventory is reproducing.”
Experience Notes: What New Worm Farmers Usually Learn the Hard Way
One of the most common experiences new worm farmers talk about is how quickly the business becomes a lesson in patience. At first, the setup feels almost too easy. You shred cardboard, moisten bedding, add red wigglers, toss in a few kitchen scraps, and wait for profit to happen. Then reality strolls in wearing muddy boots. The worms are fine, but the business side takes more attention than expected. A beginner often discovers that the hard part is not keeping worms alive. The hard part is producing a clean, consistent product while building a customer base at the same time.
Another frequent experience is the surprise that small mistakes show up fast. Overfeed for a week and the bin may smell off. Ignore airflow and moisture, and suddenly the bedding feels like wet lasagna. Keep feeding the same spot and you get a soggy corner instead of a balanced system. These early setbacks are frustrating, but they teach an important lesson: worm farming rewards routine more than enthusiasm. People who succeed usually develop a calm weekly rhythm for feeding, checking moisture, rotating food zones, and recording what changed.
Beginners also tend to underestimate how important presentation is. The first time someone tries to sell worm castings, they often imagine customers will be won over by the pure power of soil biology. But customers usually need help understanding what the product does, how to use it, and why it is different from ordinary compost. A neat label, simple usage directions, and a clean bag go a long way. Many small sellers realize that they are not just selling castings. They are selling confidence to gardeners who want healthier plants without confusion.
There is also a practical emotional shift that happens after the first successful harvest. Until then, the worm farm feels experimental. Once you separate a dark, crumbly batch of finished castings and see your worm population thriving, the project starts to feel real. That moment matters because it changes your mindset from “I hope this works” to “I can repeat this.” Repeatability is where confidence, better pricing, and better customer conversations begin.
Finally, experienced beginners often say the most useful thing they learned was to grow slowly. The urge to scale comes early, especially after a few sales or compliments at a market. But the growers who last are usually the ones who expand only after their system is stable. They know how much feed each bin can handle, how long harvest really takes, which products customers reorder, and how much labor hides inside a “simple” business. In that sense, worm farming teaches a surprisingly valuable business principle: sustainable growth is not glamorous, but it keeps the whole operation alive. And in a worm farm, alive is a very good KPI.