Table of Contents >> Show >> Hide
- Before You Even Think About Getting a Tattoo
- Step 1: Plan the Tattoo (With Your Artist)
- Step 2: Choose a Safe, Professional Studio
- Step 3: What Happens on Tattoo Day (with Picture Ideas)
- Step 4: Tattoo Aftercare – How to Help Your Ink Heal
- When to See a Doctor About Your Tattoo
- Real-World Tattoo Experiences: 500-Word Deep Dive
- Conclusion: Your Tattoo, Your Responsibility
- SEO Summary
Big news: a tattoo is not like trying a new hairstyle. Hair grows back. Ink? Not so much.
This guide will walk you through how tattoos are professionally done so you know what to expect, how to choose a safe studio, and how to care for your new ink like a pro. It’s meant for education and planning, not to teach you how to tattoo yourself or friends in your kitchen. Real tattooing is a mildly surgical procedure that belongs in a licensed, hygienic studio with trained artists.
Think of this as your “behind-the-scenes tour” of the tattoo process, with notes on where pictures, diagrams, and step-by-step visuals would go to help readers understand each phase.
Before You Even Think About Getting a Tattoo
What a Tattoo Actually Is
A tattoo isn’t just ink drawn on the skin like a marker. A professional tattoo machine uses needles to create thousands of tiny punctures in the skin, delivering pigment into the dermis (the layer under the surface). That’s why tattoos last: the pigment sits in a stable layer of tissue that doesn’t constantly shed like the top layer of skin does.

Know the Risks (So You Can Reduce Them)
Because tattooing breaks the skin, there are real medical risks if it’s done in an unsafe way or if aftercare is ignored. These can include:
- Skin infections: redness, warmth, pus, and pain around the tattoo can signal infection.
- Allergic reactions: some people react to certain ink pigments with itching, rash, or bumps.
- Scarring and keloids: if the tattoo doesn’t heal well (or is overworked), you can end up with raised or thickened scars.
- Bloodborne diseases: if equipment isn’t sterile, there’s a risk of transmitting serious infections through blood.
Reputable studios manage these risks by using single-use needles, medical-grade sterilization, and strict hygiene routines. You manage them by choosing a good studio and following aftercare instructions carefully.
Why DIY Tattooing Is a Bad Idea
Tattooing at home with random needles, reused ink caps, or “my friend has a machine” setups is a recipe for trouble. Without training in skin anatomy, needle depth, sterilization, cross-contamination, and wound care, you can cause permanent scarring, infection, or worse.
Bottom line: if you want a tattoo, your safest “how to tattoo” plan is: learn the process, then book a licensed professional. If you want to become a tattoo artist, seek a formal apprenticeship, not a YouTube crash course on someone’s couch.
Step 1: Plan the Tattoo (With Your Artist)
Choose a Design You’ll Still Love Later
Trends come and go, but that tiny meme from 2024 might not be hilarious in 2034. Before you ever sit in the chair:
- Think about meaning (or at least long-term appeal).
- Consider your personal style: bold and graphic, minimal and fine-line, realistic, traditional, watercolor, etc.
- Gather reference images to show your artist. These are inspiration, not something to copy exactly without permission.

Pick the Placement
Placement affects pain level, visibility, and how the tattoo ages. Some general trends:
- Lower pain: outer upper arm, calf, forearm.
- Moderate pain: shoulder, outer thigh, back.
- Higher pain: ribs, feet, hands, spine, inner bicep, neck.
Also consider your lifestyle. Do you need to hide tattoos at work or formal events? Areas that rub (like waistband zones, finger sides, or shoe lines) can fade faster.
Check Your Health First
If you have conditions like diabetes, immune disorders, clotting problems, or severe allergies, or if you’re pregnant, talk to a healthcare professional before getting tattooed. A quick check-in now can prevent complications later.
Step 2: Choose a Safe, Professional Studio
This is where “how to tattoo” really starts: with who does it. A good studio is at least as important as the design itself.
Safety and Hygiene Checklist
When you visit a studio (in person or via photos/tours on their website or social media), look for:
- Licensing: Artists and studios should comply with local health regulations.
- Clean environment: No cluttered workstations or stained surfaces. It should look more “clinic” than “basement hangout.”
- Single-use equipment: Needles, ink caps, razors, and gloves should be opened fresh for each client.
- Sterilization: Reusable equipment (if any) should be sterilized in an autoclave and stored properly.
- Barrier protection: Artists should wear gloves and use plastic barriers on machines, clip cords, and work surfaces.
- Clear aftercare instructions: They should send you home with written guidance, not just “you’ll be fine.”

Review Portfolios and Style
Most artists specialize. One might be fantastic at photorealistic portraits but just okay at bright neo-traditional work. Look for:
- Clean, consistent line work.
- Smooth shading and even color packing.
- Healed tattoo photos (not just fresh ones that are red and shiny).
- Work that is similar to what you want.
Step 3: What Happens on Tattoo Day (with Picture Ideas)
Check-In, Consent, and Stencil
When you arrive, you’ll usually fill out paperwork and talk through your design one more time. The artist will size and place a stencil so you can see how the design sits on your body.

You’ll get a chance to stand, move, and look in the mirror. Don’t be shy about asking for small adjustmentsthis is the moment to fix placement, not after the first line goes in.
Equipment Setup (The Safe Way)
Behind the scenes, your artist will:
- Wash their hands thoroughly.
- Put on fresh disposable gloves.
- Open new, single-use needles and ink caps.
- Cover the work area, machine, and cords with disposable barriers.
- Pour ink into small cups (ink caps) for your tattoo only.

As a client, you don’t need to know machine settings or needle configurationsthat’s professional training territory. What you do need to see is that everything looks clean, organized, and freshly set up.
The Actual Tattooing Process
Once everything’s ready:
- Your artist will clean and possibly shave the area.
- They’ll apply the stencil and let it dry so it doesn’t smudge easily.
- They start tattooingusually outlining first, then shading, then color and detail.
The sensation varies from person to person: some describe it as scratching or burning; others call it annoying but manageable. Breathing steadily, staying hydrated, and not staring at the needle the whole time all help.

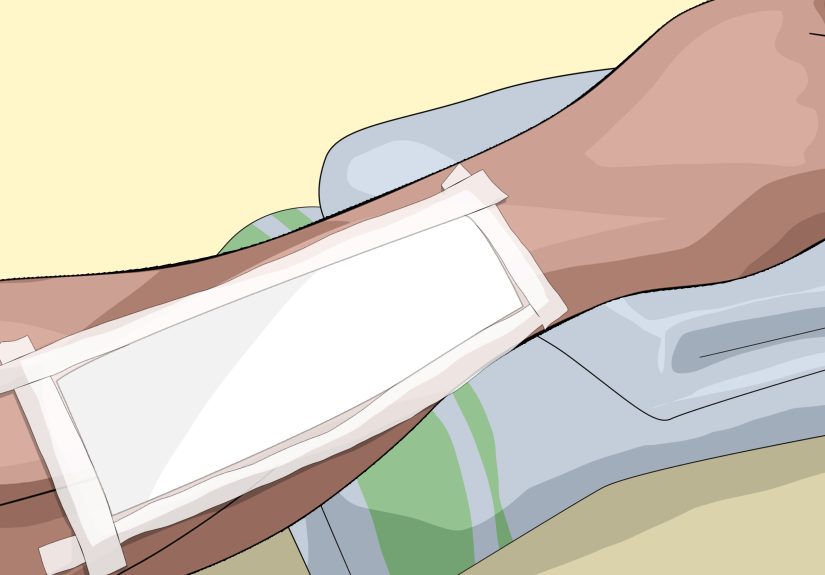
Wrapping and Immediate Aftercare
When the tattoo is finished, your artist will clean it, apply ointment, and cover it with a bandage or special tattoo film. They’ll walk you through the aftercare instructions and tell you when to remove the wrap.
Step 4: Tattoo Aftercare – How to Help Your Ink Heal
Aftercare is where you become the main character. A fresh tattoo is basically an open wound, and how you treat it affects how it looks for the rest of your life.
Days 1–3: Gentle and Clean
- Leave the bandage or film on for the time your artist recommends.
- When it’s time to remove it, wash your hands first.
- Gently wash the tattoo with lukewarm water and mild, fragrance-free soap.
- Pat dry with a clean paper towel or very soft clothno rubbing.
- Apply a thin layer of recommended ointment or a tattoo-safe healing product if advised by your artist.
Days 4–14: Peeling, Itching, and Staying Strong
This is the “snake-shedding” part of the process. Flakes and tiny scabs are normal.
- Switch to a light, fragrance-free moisturizer as your artist recommends.
- Do not scratch, pick, or peel scabs, no matter how tempting.
- Avoid soaking (no baths, pools, hot tubs, lakes, or oceans).
- Keep the tattoo out of direct sun; cover it with loose clothing when outside.
Weeks 3–4 and Beyond: Long-Term Care
Your tattoo may look “healed” on the surface before the deeper layers are fully recovered. Keep up the good habits:
- Continue moisturizing daily.
- Once healed, use a broad-spectrum sunscreen (SPF 30 or higher) on the tattoo whenever it’s exposed.
- Avoid tanning beds, which can fade ink and damage skin.

When to See a Doctor About Your Tattoo
Call a healthcare professional if you notice:
- Spreading redness or red streaks beyond the tattoo.
- Intense swelling, warmth, or severe pain.
- Yellow or green pus, foul odor, or fever.
- Hives or widespread rash that might signal an allergic reaction.
A little redness, tenderness, and clear oozing early on can be normal. Anything that looks dramatically worse over time instead of better deserves prompt medical attention.
Real-World Tattoo Experiences: 500-Word Deep Dive
Reading step-by-step guides is helpful, but hearing what people actually experience fills in the gaps. Here are some common “I wish I’d known this before my tattoo” moments that come up again and again.
The Noise and the Vibe
First-timers are often surprised by the sound of the machine. It’s more of a constant buzzing or humming than the dramatic whine you hear in movies. Some people find it oddly soothing; others get tense at first and then relax as they realize, “Oh, this is it? Okay, I can handle this.”
The studio vibe matters, too. A calm, professional environmentwith music, normal conversation, and artists focused on their crafthelps keep your nerves in check. If you feel rushed, judged, or uncomfortable, that’s a sign to reconsider or reschedule with someone else.
Pain Expectations vs. Reality
Most people report that tattoo pain is more “annoying” than unbearable, especially on areas with more muscle or fat. The big surprise is that pain isn’t constantit comes in waves. Outlining can feel sharper, while shading sometimes feels more like a dull, hot scraping sensation. Breaks help, and so does honest communication. Saying, “Hey, can we pause for a minute?” is completely normal.
People also underestimate how long a session can feel. A three-hour tattoo doesn’t sound like much until you’ve been sitting in the same position, holding still, while a needle buzzes away at your skin. Planning snacks, water, and comfy clothing can make a huge difference.
Healing: The Un-Instagrammed Phase
Fresh tattoos look amazing in photoscrisp lines, deep colors, and a glossy finish. But a week later, they can look dull, cloudy, or flaky. Many people panic and think something went wrong, when in reality this is just part of the healing process.
The “ugly phase” usually involves peeling, light itching, and a slightly milky or ashy look to the tattoo. As long as you’re following aftercare instructions and don’t see signs of infection, this stage passes. Underneath, new skin is forming, and the tattoo gradually brightens over the next few weeks.
Regret, Touch-Ups, and Cover-Ups
Another common experience: realizing that the tattoo you chose at 19 doesn’t quite match your life at 35. Good news: modern tattooing offers options like touch-ups to refresh faded ink, reworking old designs, and cover-ups that turn a past choice into something you’re proud to show off.
Still, those procedures are more complex and often more expensive than getting it right the first time. That’s why thoughtful design, careful placement, and a reputable artist are the real secret “how to tattoo” steps people wish they’d focused on earlier.
For Aspiring Artists: The Apprenticeship Reality Check
If your interest in “how to tattoo” comes from wanting to become an artist, real-world experiences almost always involve a formal apprenticeship. That typically means months (or years) of learning hygiene protocols, drawing constantly, practicing on artificial skin, assisting in the studio, and mastering safety before ever tattooing a person.
Artists often describe their first real tattoo on a client as a mix of terror and pridesimilar to a new driver merging onto a busy freeway for the first time, but with permanent art and someone else’s body involved. Respect for the process and a deep commitment to safety are the hallmarks of professionals who last in the industry.
In short, the people with the best tattoo stories usually did the boring stuff first: research, studio visits, consultations, and careful aftercare. That’s not as flashy as a dramatic before-and-after photo, but it’s the difference between “I love this tattoo” and “I’m googling laser removal now.”
Conclusion: Your Tattoo, Your Responsibility
Learning how tattoos are donefrom design and studio selection to aftercare and long-term maintenancegives you more control over the final result. You don’t need to know how to set up a machine or run needles; you do need to know how to pick a trained artist, recognize safe practices, and care for your healing skin.
A thoughtful approach now means your tattoo can stay vibrant, healthy, and meaningful for decades. Treat the process with respect, and your future self will thank you every time you catch a glimpse of your ink in the mirror.
SEO Summary
sapo: Thinking about getting a tattoo? This in-depth guide walks you through how tattoos are professionally donefrom choosing a design and picking a safe, licensed studio to understanding the tattooing process and mastering aftercare. Learn what really happens on tattoo day, what the healing “ugly phase” looks like, and how to keep your ink vibrant for years. Whether it’s your first tattoo or your fifth, you’ll get practical, experience-backed tips to stay safe, avoid regret, and love the art you wear forever.