Table of Contents >> Show >> Hide
- First, a quick reality check: SNAP is federal, but your state runs it
- Why you’re being asked to upload documents
- Before you upload: a 5-minute prep that can save days of delays
- Where you can upload SNAP documents
- Step-by-step: Upload documents through your state’s online portal
- Step-by-step: Upload documents using a mobile app
- Uploading without an account: guest, quick, or “anonymous” upload options
- After you upload: what happens next
- Common upload problems (and the quickest fixes)
- Security and privacy: how to upload safely
- If uploading isn’t working, you still have options
- A quick example: what a “good” upload package looks like
- Conclusion: upload smarter, stress less
- Real-world upload experiences (the kind nobody tells you about) plus what works
- Experience #1: “My pay stubs are on my employer portal, not on paper”
- Experience #2: “I uploaded everything… then got a notice asking for the same stuff”
- Experience #3: “My documents are readable on my phone, but the portal says they’re not”
- Experience #4: “I’m self-employed, and my income doesn’t look like a pay stub”
- Experience #5: “I don’t have a printer/scanner, and I’m doing this on a borrowed phone”
Uploading documents for SNAP (the Supplemental Nutrition Assistance Program) sounds simpleuntil you’re staring at your phone like it just asked you to
solve a riddle: “Please upload verification documents.” Which documents? Uploaded where? And why does the website suddenly move slower than a grocery cart
with one wobbly wheel?
Don’t worry. This guide walks you through the process in plain English, with practical tips (and zero judgment if your “scanner” is just your phone camera
plus hopeful vibes). Because getting food assistance shouldn’t require a second full-time job in document management.
First, a quick reality check: SNAP is federal, but your state runs it
SNAP is a national program, but each state (and sometimes counties) runs the application process, interviews, and document collection. That’s why your
upload steps may look different depending on where you live. The good news: the overall flow is pretty similar everywherecreate or access your case, find
the upload tool, submit your proof, and keep confirmation.
Why you’re being asked to upload documents
SNAP offices usually need “verification” to confirm what you put on your application is accurate. Think of it like checking your receipt before you leave
the storeexcept the receipt is your pay stub, and you definitely can’t return it for store credit.
Common documents SNAP may request
- Proof of identity: driver’s license, state ID, passport, or another approved ID document
- Proof you live where you say you live: lease, mortgage statement, utility bill, official mail, or similar
- Income proof: pay stubs, employer letter, benefits award letter, unemployment documentation, or self-employment records
- Expenses that can affect your benefit amount: rent/mortgage, utilities, childcare costs, medical expenses (especially for older adults or people with disabilities)
- Household details: child support paid, school enrollment letters, immigration/citizenship documents (if applicable), and more
Your caseworker or portal notice will usually list what’s needed. If the request is vague, look for a “Notices,” “Tasks,” “Verifications,” or “Items We
Need” section inside your online account.
Before you upload: a 5-minute prep that can save days of delays
Most upload problems are not “you problems.” They’re “blurry photo + wrong file type + portal time-out” problems. Here’s how to avoid the greatest hits.
1) Take clear photos (your phone is totally fine)
- Use bright light (near a window is great). Avoid shadows from your hands.
- Place the paper on a flat, dark surface so edges show clearly.
- Keep the full page visibledon’t cut off names, dates, or totals.
- Hold steady and tap the screen to focus before snapping the photo.
- If it’s a multi-page document, take one photo per page.
2) Use common file types
Many portals accept JPG/JPEG, PNG, and PDF. If the system rejects your upload, it may be because the
file is in a format like HEIC (common on iPhones), or the file is too large.
3) Rename files so you can tell what’s what
You don’t have to do this, but it makes life easierespecially if you’re uploading multiple items.
Examples: PayStub_Jan2026.pdf, Lease_2025-2026.jpg, UtilityBill_Electric_Feb2026.jpg.
4) Don’t “beautify” your documents
Basic cropping is fine. Heavy edits (filters, scribbles, big black boxes) can cause problems if they cover needed details. If you’re worried about privacy,
upload only what’s requested and avoid extra pages when possiblebut keep the information the agency needs to verify your situation.
Where you can upload SNAP documents
Depending on your state, you may have one or more of these options:
- State benefits website/portal (most common)
- Mobile app linked to your benefits account
- Guest/anonymous upload tool (some states offer this)
- Email, fax, or mail (still widely used)
- In-person drop-off at a local office or kiosk (varies by location)
If you’re unsure what your state uses, start at your state or local SNAP office webpage (USA.gov also points you to the correct place). The portal will
usually be listed under “Apply,” “Manage your case,” or “Submit verification.”
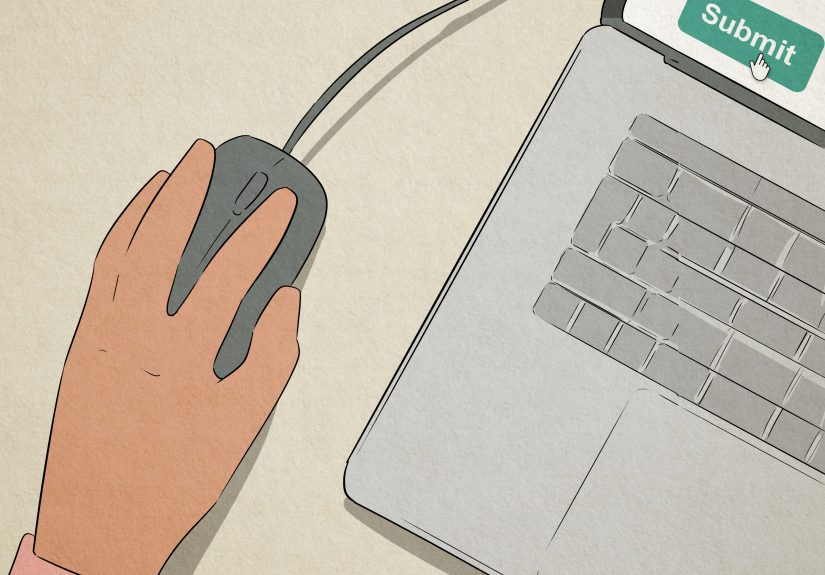
Step-by-step: Upload documents through your state’s online portal
Most state systems follow this general pattern. The button labels might differ, but the steps are surprisingly consistent.
Step 1: Log in (or create an account if you need one)
If you already applied, you may have a case number or application number. Some states allow document upload without a full login, but many will ask you to
sign in to connect files to your case.
Step 2: Find the upload area
Look for one of these sections:
- Upload Documents
- Submit Verification
- Verifications / Proof Needed
- Tasks / Items We Need
- Document Center
Step 3: Choose your case (if prompted)
If you have multiple programs (like Medicaid + SNAP), the portal may ask which program the document is for. If you’re not sure, pick the closest match
(or the specific “SNAP” option).
Step 4: Select the document type
Many systems ask you to label what you’re uploading (example: “Income,” “Identity,” “Residence,” “Shelter Costs”). This helps the office route your
document to the right checklistso it’s worth the extra click.
Step 5: Attach files and upload
- Attach the photo/PDF(s).
- Upload one document at a time if the portal says it prefers that.
- If it fails, try fewer files per upload (or convert to PDF and compress).
Step 6: Save proof you uploaded
This is the step people skipand then regret later when they get a letter that says, “We still need your documents.”
Save a screenshot, confirmation page, upload receipt, or upload history entry. If the portal has an “Upload Successful” screen, capture it.
Step-by-step: Upload documents using a mobile app
Many states have mobile-friendly portals or apps that let you snap a photo and upload it directly. This can be the fastest option if you’re working with
paper documents.
Mobile upload tips that actually matter
- Use your phone’s “Files” or “Share” options if the portal needs you to pick a file instead of taking a new photo.
- Convert iPhone HEIC photos to JPG if the portal won’t accept HEIC (a quick workaround is taking a screenshot of the photo and uploading the screenshot).
- Don’t rely on one giant upload if the app is pickyupload smaller batches.
- Keep notifications on for updates about missing items, interviews, or renewals.
Uploading without an account: guest, quick, or “anonymous” upload options
Some states offer an upload tool that doesn’t require a full login. You’ll typically enter identifying info (like an application number, case number, name,
birthdate, or other details) so the system can match documents to your record.
This option can be a lifesaver if:
- You forgot your password and need to upload ASAP
- You’re helping someone else upload documents
- You don’t have reliable access to the full portal
Just be careful to enter the identifying information correctlyone wrong digit can send your document into the “mystery file” universe.
After you upload: what happens next
Uploading doesn’t always mean your caseworker reviews it instantly. Documents generally enter a queue, get indexed to your case, and then checked against
your verification list.
How to check if your upload was received
- Look for an upload confirmation or upload history page.
- Check the “Tasks/To-Do” list to see if the item changed from “Needed” to “Submitted.”
- Watch for portal messages or mailed notices acknowledging receipt (varies by state).
- If the deadline is close, follow up using the contact method listed on your notice.
Don’t forget the interview (if required)
Many SNAP applications include an interview step (often by phone). Uploading documents early can make the interview smoother, because the worker can focus
on clarifying details instead of waiting on paperwork.
Common upload problems (and the quickest fixes)
Problem: “File type not supported”
- Fix: Use JPG/JPEG, PNG, or PDF.
- Fix: If your photo is HEIC, convert it (email it to yourself as a JPG, change camera settings to “Most Compatible,” or upload a screenshot).
Problem: “File too large”
- Fix: Upload fewer pages at once.
- Fix: Convert to PDF and compress (many phones do this automatically through print/share options).
- Fix: Take a new photo with slightly lower resolution if your camera is set to ultra-high quality.
Problem: “The website keeps timing out”
- Fix: Try a different browser (Chrome, Edge, Safari) or use the mobile site/app.
- Fix: Upload during off-peak times (early morning or later evening).
- Fix: Prepare files first, then log in and upload quickly.
Problem: “I uploaded it, but they say they didn’t get it”
- Fix: Check your upload history and save proof of submission.
- Fix: Re-upload under the correct document type/category if you used “Other” by accident.
- Fix: Call and ask if the document is indexed to your case yet (sometimes it’s received but not matched immediately).
Problem: “I don’t have all the documents”
This is common. If you can’t get a specific document, upload what you do have and contact your SNAP office to ask what alternatives are acceptable.
For example, if you don’t have a formal lease, some places may accept a written statement plus proof of paymentbut requirements vary.
Security and privacy: how to upload safely
You’re sharing personal information, so it’s smart to be cautious (without going overboard and accidentally hiding the info they need to verify).
- Use the official portal or official app for your state or county.
- Avoid public Wi-Fi if possible; use your mobile data or a trusted network.
- Log out when you’re done on shared devices.
- Keep copies of what you submitted and when.
- Watch for scams: SNAP agencies won’t demand documents through random social media messages.
If uploading isn’t working, you still have options
Portals are convenient, but they’re not the only path. Many states still accept documents by mail, fax, and in-person drop-off (and some list multiple
submission methods on your notice).
When alternate methods can be smarter
- You have a large stack of papers and the upload limit is tiny
- Your phone storage is full and your camera refuses to cooperate
- Your portal account is locked and you can’t reset it quickly
- You need a date-stamped receipt and the portal isn’t giving one
If you mail or fax, include your name, case number (if you have it), and a cover sheet if recommended. And keep proofcertified mail receipts, fax
confirmations, or a dated copybecause “I definitely sent it” is not a tracking number.
A quick example: what a “good” upload package looks like
Let’s say you got a request that says: “Provide proof of income and shelter costs.”
Here’s a clean, easy-to-review upload set:
- Income: last 4 weekly pay stubs (one file per stub or one combined PDF labeled clearly)
- Shelter costs: lease agreement (key pages showing names, address, rent amount, and dates)
- Utilities (if asked): most recent electric bill showing service address
Upload each category under its matching document type, then save the confirmation screenshots. If the portal offers “Upload History,” check that your files
appear there.
Conclusion: upload smarter, stress less
Uploading SNAP documents doesn’t have to be a technical obstacle course. The winning formula is simple:
use the correct official upload method for your state, submit clear images, label documents properly, and keep proof.
If something goes wrong, it’s usually fixable with a format change, smaller upload batch, or a quick follow-up.
And remember: you’re not “behind” because you needed help with document upload. You’re doing what you’re supposed to doproviding what the program needs
so your household can get support. That’s responsible, not embarrassing. (Also, portals glitch. Frequently. You’re not alone.)
Real-world upload experiences (the kind nobody tells you about) plus what works
The official instructions make uploading SNAP documents sound like a calm, three-click journey. In real life, it’s more like: click, sigh, re-click,
realize your camera saved the photo as a weird file type, and then negotiate with your phone like it’s a tiny stubborn coworker.
Here are some common experiences people run intoand the practical moves that tend to save the day.
Experience #1: “My pay stubs are on my employer portal, not on paper”
This is extremely common. People log into their payroll app, find the pay stub, and then discover there’s no obvious download button. The easiest fix is
often a screenshotbut only if the screenshot shows your name, pay period dates, and gross/net pay clearly. If your portal splits pay info
across multiple tabs, take multiple screenshots and upload them in order. Another option: many payroll sites let you “print” the pay stub; on phones and
computers, “Print” often includes “Save as PDF.” That PDF is usually accepted and cleaner than a chain of images.
Experience #2: “I uploaded everything… then got a notice asking for the same stuff”
This is where confirmation screenshots become your best friend. Sometimes documents are received but not yet matched to your case checklist. Other times,
a document was uploaded under “Other” when the system wanted “Income,” so it didn’t auto-clear the task. If you get a repeat request, don’t panic.
Compare the notice to what you sent:
- Did you upload all pages (front and back, or every page of a multi-page letter)?
- Did the document show the dates the agency asked for (example: “last 30 days”)?
- Was the upload assigned to the correct document type?
If it matches, follow up with your proof of upload. If it doesn’t match, it’s usually faster to upload the missing item immediately rather than debating
what “should” have been enough.
Experience #3: “My documents are readable on my phone, but the portal says they’re not”
Phone screens can trick you. A photo that looks crisp on a 6-inch screen can be blurry when zoomed in on a caseworker’s monitor. The fix is boring but
effective: retake photos in brighter light, keep the camera perfectly parallel to the page, and zoom with your feet (move closer) instead of
digital zoom. If your phone has a “Document Scan” mode in Notes or Files, use itit often sharpens text automatically and saves as PDF.
Experience #4: “I’m self-employed, and my income doesn’t look like a pay stub”
Gig work, freelancing, cash jobs, and small businesses don’t come with tidy stubs. People often worry they’re “doing it wrong,” but self-employment
verification is normal. What tends to help is providing a simple, organized snapshot:
- A basic income-and-expense summary for the requested period (even a neat spreadsheet or written log)
- Supporting proof like invoices, payment screenshots, bank deposit history, or platform earnings statements
- Any business-related receipts if expenses matter for your net income
The key is clarity: label what the document shows and keep the timeline aligned with what the office requested.
Experience #5: “I don’t have a printer/scanner, and I’m doing this on a borrowed phone”
This happens more than people admit. If you’re borrowing a device, prioritize security: log out, don’t save documents to the photo gallery if you can
avoid it, and delete files after you confirm submission. If you can’t stay logged in long, prep your photos/files first, then upload quickly. And if
uploading just isn’t possible, remember: mail, fax, and office drop-offs still exist in many areas. The “best” method is the one you can actually use
reliably.
Bottom line: uploading SNAP documents is a skill you shouldn’t have needed to learnbut once you know the steps (and the common traps), it gets much
easier. Clear images, correct categories, saved confirmations, and a quick follow-up when needed can prevent the most frustrating delays.