Table of Contents >> Show >> Hide
- Why Repainting Garden Decorations Works So Well
- Before You Paint: Figure Out What You Are Working With
- Safety First, Especially with Truly Old Pieces
- How to Paint Old Garden Decorations Step by Step
- Best Paint Approaches by Decoration Type
- Color Ideas That Instantly Upgrade Old Garden Décor
- Common Mistakes to Avoid
- How Long Will a Repainted Decoration Last?
- Experience: What Repainting Old Garden Decorations Really Feels Like
- Conclusion
Old garden decorations have a special talent for aging like dramatic movie stars. One minute they are “rustic,” the next they are “why is that frog missing half its face?” The good news is that most tired garden décor can be brought back to life with the right paint, a little prep, and enough patience to resist slapping on a thick coat and calling it art. Whether you are refreshing metal plant stands, faded concrete statues, chipped terracotta pots, or sun-beaten wooden ornaments, repainting can make your yard look intentional instead of accidentally haunted.
The trick is simple: do not start with color. Start with the surface. Paint fails outdoors when dirt, chalk, rust, moisture, loose paint, or mildew are still hanging around like unwanted party guests. Once you clean, sand, repair, prime, and choose the right finish for the material, old garden decorations can look fresh, charming, and surprisingly expensive. Your neighbors may even assume you bought something new, which is the highest form of budget-DIY praise.
Why Repainting Garden Decorations Works So Well
Outdoor décor takes a beating. Sun fades color, rain sneaks into tiny cracks, temperature swings make coatings expand and contract, and damp conditions invite mildew or corrosion. Repainting solves more than an appearance problem. A good finish can help slow further weather damage, cover repaired spots, and protect the underlying material from moisture and UV exposure.
It is also one of the cheapest ways to update a yard. Instead of replacing an old birdbath, statue, planter, or decorative trellis, you can refresh it to match a new color palette. Matte black adds a modern look. Soft white feels cottage-garden sweet. Aged bronze creates vintage charm. Bright turquoise says, “Yes, I absolutely buy too many plants, and no, I have no regrets.”
Before You Paint: Figure Out What You Are Working With
Metal
Metal decorations, such as wrought iron stakes, wire plant stands, lantern holders, and ornamental fencing pieces, usually need the most prep. If rust is visible, remove loose corrosion and use a rust-inhibiting primer before applying finish paint. Intricate metal shapes often look best with spray paint because it reaches curls, cutouts, and scrollwork more evenly than a brush.
Concrete, Cement, Stone, or Cast Materials
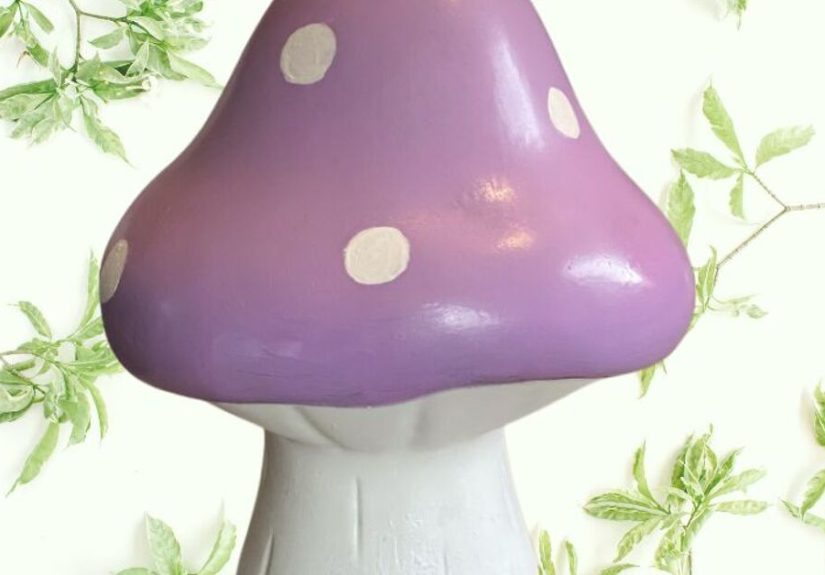
Garden statues, birdbaths, and decorative mushrooms are often porous. That means they hold dust and moisture like a sponge that has seen things. These pieces need to be fully dry before painting. If you repaired chips with fresh masonry material, allow that patch to cure before coating. Porous surfaces may also benefit from a masonry-friendly primer or sealer so the finish coat does not soak in unevenly.
Terracotta and Clay
Terracotta pots and clay ornaments are easy to paint, but they still need cleaning and drying first. If you rush paint onto a dusty or damp pot, the finish may peel or look blotchy. Terracotta also loves absorbing moisture, so many DIYers finish with a clear protective sealer if the piece will stay outdoors.
Wood
Wooden yard signs, decorative crates, and carved ornaments need loose paint removed, edges feather-sanded, and any mildew addressed before repainting. Exterior-grade acrylic paint is usually the practical choice for most decorative wood pieces because it handles outdoor movement better than many brittle coatings.
Plastic or Resin
Some modern garden decorations are resin or plastic. These are not impossible to paint, but they are picky. Use a coating specifically labeled for plastic or a bonding primer designed for slick surfaces. Otherwise, your lovely makeover may peel off like a sunburned vacation memory.
Safety First, Especially with Truly Old Pieces
If your garden decoration is genuinely old and still has layers of mystery paint, treat it carefully. Salvaged décor from older homes or vintage architectural pieces may have lead-based paint, especially if the coating dates back decades. Avoid aggressive dry sanding, uncontrolled scraping, or turning old paint into dust. If the piece feels historically valuable, hand-painted, or artist-made, use a gentler approach and do not over-restore it into something that looks like it was born yesterday. A little character is charming. Total erasure is not always the goal.
How to Paint Old Garden Decorations Step by Step
1. Clean Like You Mean It
Every successful paint job starts with a boring but noble chore: cleaning. Brush off loose dirt, cobwebs, leaf bits, and anything that looks like it moved in rent-free. Wash the item with mild soap and water or a surface cleaner appropriate for the material. If mildew is present, treat it before painting. Then rinse and allow the piece to dry completely.
This step matters because paint sticks to the surface beneath it, not to grime. If the decoration feels chalky, greasy, dusty, or slimy, the new finish has no reason to stay loyal.
2. Remove Loose Paint, Rust, and Flaking Areas
Next, scrape or sand away peeling paint, rust scale, or crumbling surface material. You do not need to strip every piece back to bare material unless the existing finish is failing everywhere. The goal is to remove anything unstable and feather the edges so the new finish does not telegraph every old paint ridge underneath.
On metal, use a wire brush, sandpaper, or a rust-removal tool for loose corrosion. On wood, sand rough edges and flaking spots until the transition feels smooth. On concrete décor, knock off friable material gently and avoid turning decorative details into modern abstract sculpture by accident.
3. Repair Damage Before the Pretty Part
Now is the time to patch cracks, fill chips, tighten screws, or glue broken decorative sections if the piece is repairable. Let all repairs cure fully according to the product directions. Paint is not a magical cover-up cape. If the surface underneath is cracked, moving, damp, or powdery, the finish will reveal that truth sooner rather than later.
4. Prime for the Surface, Not Your Optimism
Primer is where many quick DIY projects go off the rails. Use the right one:
- Rust-inhibiting primer for iron and steel
- Bonding or metal-specific primer for aluminum or mixed metals
- Masonry or concrete primer for porous cementitious décor
- Exterior wood primer where bare wood or stains are exposed
- Plastic-bonding primer or plastic-rated paint for resin and plastic items
Prime bare spots at minimum, and fully prime when the surface is patchy, the color change is dramatic, or the old finish is questionable. One extra can of primer is usually cheaper than redoing the whole project after one rainy season.
5. Choose the Right Paint Finish
For most garden decorations, exterior acrylic paint or an outdoor-rated spray paint is the safe bet. Spray paint is fantastic for ornate surfaces and curved pieces because it lays down evenly and reaches recesses. Brushing works better for broad surfaces, touch-ups, or multicolor details.
Want a smart shortcut? Match the sheen to the mood. Flat and matte finishes hide surface flaws. Satin looks clean without being shiny. Gloss makes colors pop but also highlights imperfections, including that lumpy repair you hoped no one would notice.
6. Paint in Good Weather, Not in a Drama Storm
Outdoor painting loves moderate temperatures, low humidity, and dry surfaces. If the item is damp, the air is muggy, or rain is looming, wait. Thin coats are better than thick coats. Apply light, even passes, let each coat dry as directed, and resist the universal DIY urge to “just add a little more right here” until drips happen.
If you are spraying, keep the can moving and follow the recommended distance. If you are brushing, use smooth strokes and avoid overworking partially dry paint. The decoration is not cake batter. Stop stirring it.
7. Seal Only When It Makes Sense
Not every painted decoration needs a clear topcoat, but some do benefit from it. Clay pots, hand-painted details, and porous concrete accents often hold up better with a compatible clear sealer. Make sure the paint underneath is fully cured before sealing. Also use a finish that matches the topcoat chemistry. Mixing products without checking compatibility is how projects become sticky science experiments.
Best Paint Approaches by Decoration Type
Rusty Metal Frog, Trellis, or Plant Stand
Clean it, remove loose rust, spot-prime rusty sections, then apply exterior metal paint or direct-to-metal paint. Black, bronze, forest green, and hammered finishes work especially well because they disguise minor pitting and future touch-up spots.
Concrete Statue or Birdbath
Wash thoroughly, let dry deeply, patch chips if needed, prime porous spots, then use a masonry-friendly or exterior acrylic finish. If the piece holds water, be extra careful with product choice and cure time. Decorative finishes like dry brushing or antiquing can add detail once the base coat cures.
Terracotta Pots and Clay Decorations
Clean, dry, and paint with outdoor-rated acrylic or spray paint. For a handmade look, combine a sprayed base color with brush-painted stripes, dots, or botanical patterns. A clear sealer helps preserve detail if the item stays exposed year-round.
Wooden Signs or Yard Art
Sand loose areas, clean mildew, prime bare wood, and finish with exterior acrylic paint. If you want a weathered cottage look, use two colors and lightly distress edges after curing. If you want a crisp modern style, skip distressing and go for solid, high-contrast color blocks.
Plastic Gnomes, Resin Animals, or Lightweight Décor
Clean carefully, scuff lightly if appropriate, then use plastic-compatible paint. Several light coats are much safer than one heavy one. Resin and plastic often look best when you avoid super-thick finishes that obscure molded details.
Color Ideas That Instantly Upgrade Old Garden Décor
- Matte black: timeless, modern, and forgiving on metal
- Soft white or cream: cottage garden charm
- Aged bronze or copper tones: classic and slightly fancy
- Sage green: blends beautifully with foliage
- Terracotta, clay, and sand shades: warm and natural
- Bold blue, coral, or yellow: cheerful accents for pots and whimsical décor
If the garden already has a lot going on, choose one or two repeating accent colors so the décor feels coordinated instead of caffeinated.
Common Mistakes to Avoid
- Painting over dirt, mildew, or chalky residue
- Skipping primer on rusty, porous, or slick surfaces
- Painting when the item is still damp inside cracks or pores
- Using interior craft paint alone on outdoor pieces expected to stay outside
- Applying thick coats that sag, wrinkle, or cure unevenly
- Ignoring cure time and putting the item back into rain too soon
- Trying to make an antique-looking piece look factory-new
How Long Will a Repainted Decoration Last?
That depends on the material, weather exposure, and prep quality. A well-cleaned, properly primed, and correctly painted decoration can look good for years, especially if it is partly sheltered from standing water and harsh afternoon sun. A badly prepped one may start peeling by the time you finish bragging about it.
To stretch the life of the finish, store small items during extreme weather, elevate pots and statues off constantly wet soil when possible, and touch up chips before they spread. Maintenance is not glamorous, but neither is repainting the same rooster every spring because you got impatient the first time.
Experience: What Repainting Old Garden Decorations Really Feels Like
Here is the honest part no one tells you. Repainting old garden decorations is rarely a one-hour miracle. It starts with optimism and maybe a coffee. You pull out a sad-looking planter, a rusted metal heron, or a concrete rabbit that has clearly survived at least three administrations, and you think, “This will be easy.” Then you touch it and realize it is filthy, flaky, and somehow sticky. Suddenly you are not painting yet. You are cleaning. And scrubbing. And questioning your life choices while a spider watches from a strategic angle.
But then something shifts. Once the dirt comes off, you begin to see the shape again. The piece stops looking like yard clutter and starts looking like potential. The old details come back into view: the lines on a leaf, the curl of a metal tail, the little face on a garden statue that you forgot was actually adorable and not just vaguely alarming. Prep work is annoying, yes, but it is also the part where you reconnect with the object. You realize why you kept it in the first place.
The painting stage is where the fun finally shows up. The first coat always looks a little suspicious. It is patchy, streaky, and emotionally unconvincing. The second coat is when you start getting smug. Color deepens, surfaces even out, and suddenly the whole thing looks intentional. That old wire plant stand becomes elegant in matte black. The chipped birdbath becomes charming in soft stone gray with a lightly antiqued rim. A boring terracotta pot turns into a cheerful accent piece that looks custom instead of store-bought.
There is also something deeply satisfying about choosing a style that fits your garden now, not the version of your yard you had five years ago. Maybe you used to love bright colors and now want quieter earth tones. Maybe your patio is heading toward modern, cottagecore, desert-inspired, or “whatever survives my watering schedule.” Repainting lets old decorations catch up with your taste without forcing you to replace everything.
And yes, there will be mistakes. A drip may appear exactly where you can see it forever. A gust of wind may add one leaf to your wet paint as a commemorative gift from nature. You may forget to turn the piece around and discover an unpainted back side after the front is perfect. This is normal. In fact, it is almost part of the tradition. Garden décor is not gallery art under museum lights. It lives outside with dirt, rain, pollen, and squirrels. Perfection is not the assignment. Charm is.
That is why repainting old garden decorations is worth doing. It is practical, affordable, creative, and oddly comforting. You rescue something worn, give it fresh protection, and place it back in the garden with a little more presence than before. The result is not just a prettier yard. It is a yard that looks cared for. And that feeling, more than any specific color, is what makes the whole project work.
Conclusion
If you want old garden décor to look better and last longer, the formula is simple: clean thoroughly, remove anything loose or unstable, use the right primer, pick an exterior-grade paint suited to the material, and work in good weather with light coats and proper drying time. Do that, and even the saddest planter, statue, or metal ornament can make a stylish comeback. Your garden does not need all new decorations. It just needs the old ones to stop looking like they lost a fight with the forecast.