Table of Contents >> Show >> Hide
- Why Plastic Storage Gets a Bad Rap (And Why It Deserves a Comeback Tour)
- Choose the Right Plastic Storage for the Job
- Make Plastic Look Intentional: The “Uniform + Label” Rule
- Design Tricks That Make Plastic Storage Feel High-End
- Room-by-Room: Where Plastic Storage Can Look Surprisingly Chic
- Maintenance: Keep Plastic From Looking… Like Plastic
- A Quick “Don’t Do This” List
- Conclusion
- Extra: Real-World Experiences (What Actually Happens When You Try This)
- SEO (JSON)
Plastic storage has a reputation. You know the one: a leaning tower of mystery bins in the closet, lids that vanished into a parallel universe,
and that one container that smells faintly like spaghetti night… from 2019.
But here’s the plot twist: plastic storage can look genuinely good. Not “good for plastic,” not “good if you squint,” but
“Waitwhy does your pantry look like a magazine spread?” good. With a few smart choices (and a tiny bit of restraint),
plastic can be your home’s most practical and most polished storage material.
Why Plastic Storage Gets a Bad Rap (And Why It Deserves a Comeback Tour)
Plastic isn’t the villain. Random plastic is.
When every bin is a different shape, color, and vibeyour storage doesn’t look organized, it looks like it’s auditioning for a reality show called
“Hoarders: The Remix.”
The good news is that “ugly” is usually a systems problem, not a materials problem.
Plastic becomes attractive when it’s:
- Uniform (matching silhouettes = instant calm)
- Intentional (bins chosen for a purpose, not because they were on sale at 11:58 p.m.)
- Maintained (clean, clear, and not haunted by tomato sauce)
Choose the Right Plastic Storage for the Job
The fastest way to make plastic storage look elevated is to stop asking one bin to do every job.
A pantry bin is not a garage tote. An under-bed box is not a fridge organizer. And a tiny drawer bin cannot carry the emotional weight of your entire junk drawer.
Clear vs. Opaque: Pick Your “Look” and Your Lifestyle
Clear containers are perfect when you want quick visual inventory: pantries, fridges, craft supplies, daily-use closets.
You’ll see what you have, notice what’s missing, and stop buying your fourth bottle of cinnamon because the first three were hiding behind a cereal box.
Opaque containers are your best friend when you want rooms to look serene: open shelving, kids’ spaces, entryway drop zones.
They hide visual clutter (and frankly, some of us deserve that kind of mercy).
Lids, Handles, and Stackability: The “Don’t Make Me Hate You” Checklist
- Lids that actually lock or latch (especially for garages, basements, and under-bed storage)
- Flat lids if you plan to stackdomed lids are cute until your stack becomes modern art
- Built-in handles for bins you’ll pull out often (pantry, linen closet, toy storage)
- Modular sizing (bins designed to “play nicely” together create cleaner lines)
Acrylic, Polypropylene, and “Food Safe” Labels
In style-forward spaces, you’ll often see clear acrylic-style organizers (great for pantries, makeup, office supplies) because they read “boutique”
instead of “basement.” For heavier-duty, everyday storage, many practical bins are made from common food-contact plastics like polypropylene (#5),
which is widely used for containers.
If you’re using plastic with food, look for products marked BPA-free and follow manufacturer care instructions.
For reheating, many experts recommend using glass or ceramic to reduce exposure to heat-related wear on plastic over time.
(Plastic’s superpower is storagenot starring roles in your microwave.)
Make Plastic Look Intentional: The “Uniform + Label” Rule
If you only steal one strategy from the organizing pros of the world, make it this:
matching bins + consistent labels turns plastic from “stuff holder” into “system.”
Step 1: Create Zones Before You Buy a Single Bin
Start by grouping items into categories: snacks, baking, breakfast, cleaning, pet supplies, etc. In closets: workout gear, winter accessories,
travel stuff, linens. Your bins should support categoriesnot replace them.
Pro tip: measure shelf depth and height. (Buying bins without measuring is how you end up with “perfect bins” that live on the floor forever, out of spite.)
Step 2: Use One “Bin Family” Per Visible Area
Pick one style line for each area you’ll see often:
a pantry might use clear, stackable bins; a linen closet might use uniform lidded boxes; an office might use matching drawer organizers.
Your home doesn’t need one bin to rule them allbut it does need fewer random characters in the cast.
Step 3: Labels That Look Like Decor (Not a Shipping Department)
Labels are functional, but they’re also visual. Make them consistent:
- Same font style across a zone
- Same placement (centered, bottom-rightpick one)
- Short names (“Snacks,” “Baking,” “Pasta,” not “Assorted Crunchy Happiness Options”)
If you hate the look of labels, go with clear bins and keep categories simple and visible. But if multiple people share the space,
labels are basically relationship counseling in sticker form.
Design Tricks That Make Plastic Storage Feel High-End
1) Add Texture Outside the Bin
Plastic can look sleek, but it can also feel clinical. Balance it with texture:
woven baskets on open shelves, fabric liners in drawers, wood risers in pantries.
The contrast makes the plastic look purposeful instead of plasticky.
2) Use “Front-Facing” Beauty and “Back-Shelf” Utility
Here’s a designer secret you can use without buying a single throw pillow:
keep the pretty containers in the front and the workhorse bins in the back.
On open shelves, use attractive matching bins and turn packaging sideways so labels face forward.
In deep cabinets, use pull-out bins with handles so function wins.
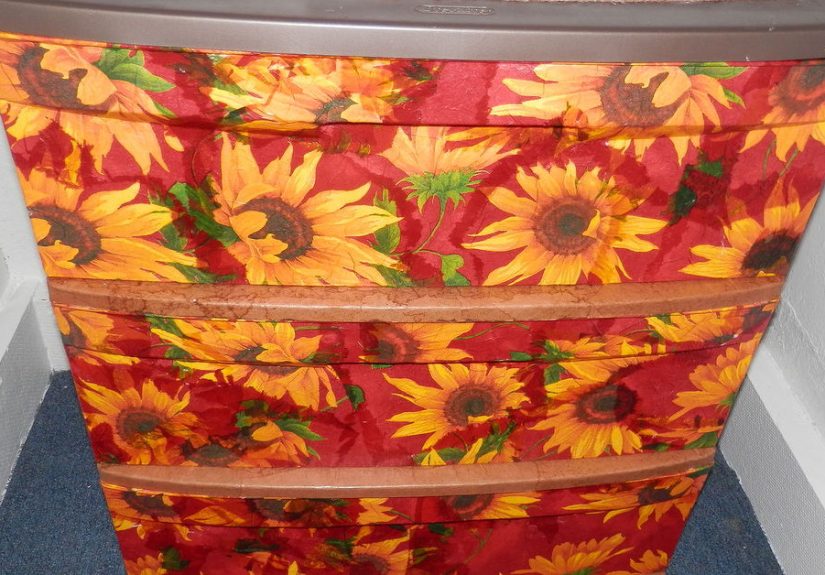
3) Upgrade Budget Bins (Yes, Really)
If your bins are structurally good but visually sad, you can improve them:
choose a consistent neutral palette, add clean labels, or use removable wraps/sleeves.
Some people even use specialty spray paint designed for plastic on non-food storage bins to mimic metal or matte finishes,
then add matching labels for a “custom” look on a budget.
4) The “One-In, One-Out” Lid Policy
Half of plastic storage ugliness is just lid chaos.
Pick bins with lids that attach, nest, or belong unmistakably to one bin style.
And if you’ve got a pile of “orphan lids,” it’s time to stop hoping and start recycling.
(They’re not coming back. They moved away. They have a new life now.)
Room-by-Room: Where Plastic Storage Can Look Surprisingly Chic
Pantry
Clear bins shine here because they maximize visibility and vertical space. Use deep bins for categories (snacks, breakfast, baking),
stack where possible, and decant messy packaging (like granola bars or chip bags) into uniform bins.
Add a lazy Susan for sauces and oils, and consider risers for cans so everything is visible.
If you want the “picture-perfect” look without the “I now own 47 matching jars” commitment,
decant only the frequent offenders: flour, sugar, rice, oats, and snacks that come in floppy bags.
Fridge and Freezer
Fridge bins work best when they create zones: yogurt, cheese sticks, lunch items, produce, condiments.
In the freezer, sturdy bins help prevent the dreaded “avalanche of frozen peas” event.
Keep labels simple so you can maintain the system during a busy week.
Closets and Under-Bed Storage
For bedrooms, choose storage that matches the room’s tone:
low-profile under-bed containers for off-season clothing, clear-top fabric bins for sweaters, or uniform lidded boxes for accessories.
If you’re storing clothes long-term, avoid sealing anything that isn’t fully dry and freshly cleaned.
Add a small sachet or moisture absorber in humid climates.
Bathroom
Bathrooms love small bins: one for hair products, one for skincare backups, one for first aid.
Use drawer organizers to separate categories so your “quick grab” morning doesn’t turn into a scavenger hunt.
A matching set of containers can make even a basic under-sink cabinet feel like a fancy hotelminus the tiny shampoo you can never open.
Garage and Basement
This is where durable, latching plastic totes earn their keep.
Clear bins help you find what you need quickly, and sturdy lids keep out dust and pests.
Label boldly, store heavy items low, and keep frequently used gear accessible.
Bonus points for putting like-items together: camping, sports, holiday décor, tools, car care.
Maintenance: Keep Plastic From Looking… Like Plastic
Stop the Cloudy Look
Plastic can get hazy from mineral deposits, dishwashing residue, or micro-scratches.
Prevention helps: avoid abrasive scrubbers, and follow care instructions.
If you’ve got cloudy plastic, a gentle wash routine and occasional soak (depending on the item and what it stored) can help
but if the plastic is deeply scratched, it may never look perfectly new again.
How to De-Stink Plastic Containers (So They Stop Smelling Like Regret)
Odors love plastic because oils and strong smells can cling to surfaces.
A classic fix is a baking soda soak: fill the container with warm water, add baking soda, let it sit, then wash as usual.
For stubborn smells, a baking soda paste applied inside can help before rinsing and washing.
If your lids are the main offenders, treat them toosmells hide in grooves like they pay rent.
Heat and Wear: A Practical (Not Paranoid) Approach
Plastic is most likely to degrade when it’s repeatedly heated, scratched, or used beyond its intended purpose.
If you want a simple, low-stress rule:
store in plastic, reheat in glass or ceramic.
And if a container is heavily scratched, warped, or permanently cloudy, retire it from food use.
A Quick “Don’t Do This” List
- Don’t store irreplaceable documents or photos in random plastic bins in hot/humid areasuse archival or fire-rated storage instead.
- Don’t trap moisture in sealed bins (especially with textiles). Dry items fully and add moisture control if needed.
- Don’t store heat-sensitive items (candles, crayons) in places that get very hot.
- Don’t buy bins first and hope categories magically appear. Categorize first, then contain.
Conclusion
Plastic storage doesn’t have to be uglyit just has to be intentional.
Choose the right container for the right job, stick to a consistent “bin family” in each space,
label like you want your future self to find things without sighing dramatically,
and maintain containers so they stay clean, clear, and odor-free.
The goal isn’t a showroom. The goal is a home that worksand looks good doing it.
Because you deserve storage that feels less like “stuff shoved somewhere” and more like “I am an organized adult,”
even if you still eat cereal for dinner sometimes.
Extra: Real-World Experiences (What Actually Happens When You Try This)
Let’s talk about the part no one tells you when you’re looking at perfectly styled pantry photos online:
real homes are messy. Real homes have families, jobs, pets, hobbies, and at least one drawer full of batteries that may or may not work.
So what does “plastic storage that isn’t ugly” look like in real life?
Experience #1: The Pantry Glow-Up That Starts With One Shelf.
Most people don’t redo an entire pantry in one heroic Saturday. They start with one shelfusually the snack shelf,
because that’s where the chaos is loudest. The first thing you notice after switching to two or three matching clear bins?
Grocery restocking becomes faster. Instead of playing “Where do I shove this?” you just refill the correct bin.
The second thing you notice? Your household starts asking fewer questions. Kids and partners can actually find things,
and surprisingly, they can put things back in the right place when the label is obvious.
It’s not magicjust clarity.
Experience #2: The “I Bought Fewer Duplicates” Moment.
Clear storage has a humble superpower: it exposes your accidental hoarding.
When you can see three open bags of rice or six half-used boxes of pasta, your brain finally stops insisting you’re “out.”
Many people find they waste less food and spend less money because they stop double-buying items that were simply hiding.
It’s not glamorous, but it feels like getting a small raise from your own pantry.
Experience #3: The Under-Bed Zone That Stops Being a Black Hole.
Under-bed storage often starts as a dumping ground and ends as a personal mystery.
Switching to low-profile containers (especially ones with clear tops or clear sides) changes how the space functions.
Suddenly you don’t have to pull out three bins to find one pair of boots.
The “real-life” upgrade is labeling the ends of the bins so you can read them from the side of the bed.
That’s the difference between “stored” and “accessible.”
Experience #4: The Bathroom That Feels Bigger Without Remodeling.
Bathrooms are tiny kingdoms with too many rulers: skincare, hair tools, first aid, cleaning supplies, backups.
When people switch to small matching bins under the sink (one category per bin), it stops the daily topple-and-dig routine.
A surprising side effect: it becomes easier to clean. You can pull out one bin, wipe the shelf, and put it back.
The space looks calmer because the visual clutter is containedeven if what’s inside is a chaotic collection of half-used
products you keep “just in case.”
Experience #5: The Garage That Stays Organized Longer Than Two Weeks.
The garage is where organization goes to fight for its life.
People who succeed long-term tend to do two things: use durable latching totes and label in a way that’s visible from a few feet away.
The bins don’t have to be pretty in the garage, but they do have to be consistent.
When the shapes stack well and the labels are readable, it becomes easier to maintain the system after a weekend project.
The real victory isn’t that the garage looks perfectit’s that you can find the camping stove without staging a full archaeological dig.
The overall pattern is simple: plastic storage looks good when it reduces friction.
If the system is easy to use, people use it. If it’s hard to use, the bins become expensive clutter containers.
So aim for “effortless,” not “Instagram.” Your home will look better, function better, and you’ll spend less time
wrestling with lids like they’re in a grudge match.