Table of Contents >> Show >> Hide
- Why Repurpose Instead of Replace?
- Step 1: Decide What You’re Working With
- Step 2: Pick a New Job for Your Old Unit
- 9 High-Impact Repurpose Ideas (With Mini How-To Plans)
- 1) Coffee Bar Cabinet (The Morning MVP)
- 2) Home Bar / Beverage Center (Because You’re an Adult)
- 3) Pantry Cabinet (Small Kitchen, Big Win)
- 4) Mudroom Locker / Entryway Drop Zone
- 5) Craft Armoire / Hobby Headquarters
- 6) Toy Storage + “Close the Doors and Pretend” System
- 7) Linen Cabinet / Bathroom Storage
- 8) Hidden Home Office / Charging Station
- 9) Record Player Console + Media Library
- Step 3: Prep Like You Mean It (Especially for Laminate)
- Step 4: Make It Look “Built for This,” Not “Formerly a TV Shrine”
- Example Makeover Plans (So You Can Picture Yours)
- Common Mistakes (And How to Avoid Them)
- Neat Finish Tips That Make Pros Nod
- Conclusion: Give It a Second Life (And Reclaim Your Space)
- Field Notes: of Real-World Repurposing Experience
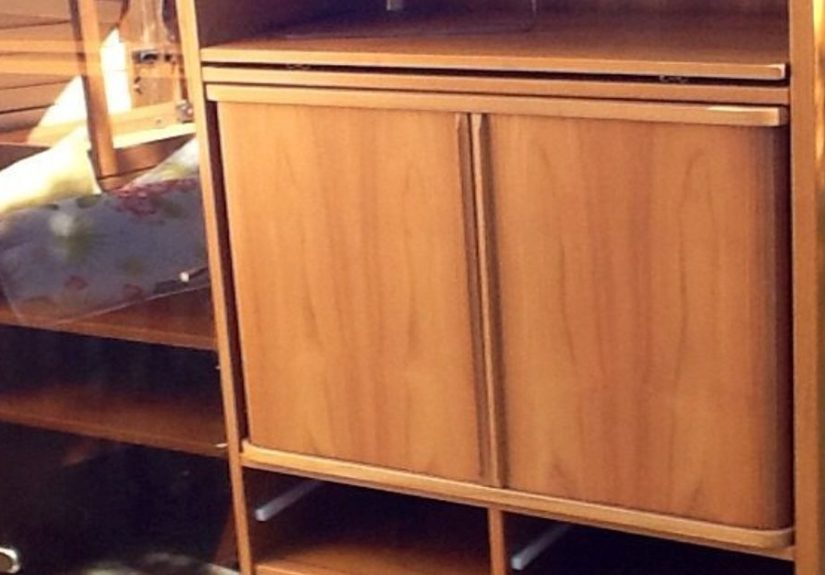
Somewhere in America, a chunky oak entertainment unit is still doing its best impression of “1998: The Home Theater Years.”
It has a big TV hole (for a television shaped like a microwave), a maze of shelves sized for VHS tapes, and enough visual weight
to have its own ZIP code. And yet… it’s also a sturdy, pre-built storage tower with doors, cubbies, and potential.
This article is your permission slip to stop calling it “that old thing” and start calling it “a custom storage solution.”
We’ll walk through how to repurpose an outdated entertainment unit into something modern, useful, and honestly kind of impressive
without turning your weekend into a three-month saga.
Why Repurpose Instead of Replace?
Repurposing an old entertainment center isn’t just a Pinterest flex. It’s practical. These units were often built to hold heavy TVs,
meaning the frames can be sturdier than many new flat-pack cabinets. Plus, they’re tall, roomy, and already engineered for storage
they’re just configured for a world where “streaming” meant rewinding.
- Save money: A little paint and hardware can beat buying a brand-new storage cabinet.
- Reduce waste: Upcycling furniture keeps bulky pieces out of landfills.
- Get exactly what you need: Pantry? Coffee bar? Mudroom locker? You decide.
- Instant character: Even a basic makeover can look built-in and intentional.
Step 1: Decide What You’re Working With
Before you pick a new purpose, figure out what kind of entertainment unit you actually have. The makeover plan changes depending on
materials and construction.
Quick “What Is This Made Of?” Check
- Solid wood: Heavier, often worth the effort. Sands and refinishes well.
- Veneer: Real wood layer over a substrate. Sand lightlydon’t get overconfident.
- Laminate/melamine: Smooth, non-porous, and paint can peel if you skip prep. Still totally doable with the right steps.
- Particleboard/MDF: Common in later units. Fine for indoor projects, but avoid water exposure and reinforce shelves.
Structural Red Flags (a.k.a. “Don’t Build a Bar on That”)
- Shelves bowing like a sad hammock
- Swollen edges (often from water damage)
- Loose side panels or wobbly base
- Delaminating surfaces (paint won’t fix “peeling like sunburn”)
If it’s mostly solid and just cosmetically dated, you’re golden. If it’s falling apart, repurpose it into firewood… emotionally, not literally.
Step 2: Pick a New Job for Your Old Unit
The easiest way to repurpose an outdated entertainment unit is to lean into what it already does well:
vertical storage with compartments. Below are smart conversions that look modern and function like you bought them on purpose.
9 High-Impact Repurpose Ideas (With Mini How-To Plans)
1) Coffee Bar Cabinet (The Morning MVP)
Turn the old TV cavity into a coffee station with mugs, pods/beans, syrups, and the kind of snack stash that makes you “popular” with yourself.
This is one of the most satisfying entertainment center upcycle projects because the shelves are already begging to be organized.
- Remove the back panel (or cut a clean outlet access hole) for cords.
- Add a power strip inside (mounted neatly, not dangling like a jungle vine).
- Install a shelf at counter height for the coffee maker.
- Use baskets or bins for pods, filters, and tea supplies.
- Optional upgrade: stick-on LED puck lights for a “boutique café” glow.
2) Home Bar / Beverage Center (Because You’re an Adult)
Entertainment unit becomes entertainment unit againjust the fun kind. Add stemware racks, bottle storage, and maybe a little wallpaper on the back
to make it feel like a fancy speakeasy (minus the secret password and questionable bathtub gin).
- Inside-door storage: Mount shallow racks for bitters, mixers, or wine.
- Glassware: Add under-shelf stemware holders.
- Bottle stability: Use a simple rail or dowel across shelves so bottles don’t topple.
- Finishing touch: Replace dated brass pulls with modern hardware.
3) Pantry Cabinet (Small Kitchen, Big Win)
If your kitchen storage is “a vibe” (and the vibe is chaos), an old entertainment unit can become a pantry cabinet with adjustable shelves,
labeled bins, and door storage. This is especially great for renters or older homes with limited built-in pantry space.
- Add shelf pins or cleats to create adjustable shelves.
- Use clear containers for dry goods (less mess, faster inventory).
- Install door racks for spices, wraps, or snacks.
- Consider magnetic latches if doors don’t close neatly.
4) Mudroom Locker / Entryway Drop Zone
Shoes, backpacks, jackets, dog leashesyour entryway collects them like it’s running a lost-and-found. Convert the unit into a mudroom station
with hooks, cubbies, and a bench area so your front door stops looking like a garage sale.
- Add heavy-duty hooks for coats and bags.
- Create a “shoe shelf” at the bottom using slats or wire racks.
- Make a bench by reinforcing a lower shelf with brackets or cleats.
- Label bins per person (yes, even adults need assigned storage).
5) Craft Armoire / Hobby Headquarters
Craft supplies multiply when you’re not looking. An entertainment unit is perfect for a craft cabinet: wide shelves for machines,
doors to hide mess, and enough compartments for the tiny items that love escaping.
- Add pegboard to the inside of doors for tools and ribbons.
- Install small drawers or organizers for beads, notions, and batteries (the mystery batteries, too).
- Create a fold-down work surface if there’s a large center opening.
6) Toy Storage + “Close the Doors and Pretend” System
Kids’ stuff looks adorable for about twelve secondsthen it becomes a tripping hazard. Repurpose the unit into toy storage with bins and labels so cleanup
doesn’t require a motivational speech.
- Remove fragile glass doors (if any) and swap for solid panels or baskets.
- Use cube bins for categories: blocks, cars, dolls, art supplies.
- Add soft-close hinges if you value your fingers and sanity.
7) Linen Cabinet / Bathroom Storage
If your bathroom is short on storage, a tall entertainment unit can become a linen cabinet for towels, toiletries, and backup supplies.
Just keep it away from direct shower steam and consider a moisture-resistant topcoat.
- Use baskets for toilet paper rolls and smaller items.
- Add a shallow pull-out tray for hair tools.
- Install a small hook rail on the side for robes or hair towels.
8) Hidden Home Office / Charging Station
The “TV space” can become your laptop nook. Close the doors at the end of the day and reclaim your living room from spreadsheets.
Bonus: an entertainment unit is basically pre-designed for cable management.
- Add a grommet for cords and a mounted power strip.
- Install a pull-out keyboard tray or a slim shelf for a laptop.
- Use file boxes on lower shelves for paperwork.
9) Record Player Console + Media Library
Vinyl is back, and your old unit has the shelf space to prove it was always ready for this moment. Add ventilation if you’re housing electronics,
and consider reinforcing shelves if you’ll stack records (they’re heavier than they look).
- Reinforce shelves with a center support or cleats.
- Add felt pads or a mat where the turntable sits.
- Use vertical dividers to keep records upright and easy to flip through.
Step 3: Prep Like You Mean It (Especially for Laminate)
The difference between “wow, you upcycled that?” and “oh no, it’s peeling” is prep. If your unit has laminate or glossy surfaces,
you need to help paint stickno shortcuts, no magical unicorn paint that defies physics.
Prep Checklist
- Empty it completely: Remove shelves, doors, and hardware.
- Clean thoroughly: Degrease. Kitchens and living rooms both leave invisible grime.
- Scuff sand: Light sanding (often around 120–220 grit) to dull the sheen, not obliterate the surface.
- Dust removal: Vacuum and wipe down. Dust is paint’s worst enemy.
- Bonding primer: Use a primer made for slick surfaces (this is not the time to “wing it”).
- Paint in thin coats: More coats, less drama. Let it dry properly between coats.
A Quick Safety Note (Not the Fun Part, But the Important Part)
If you’re sanding older painted surfacesespecially in older homesbe cautious about lead dust. Use a mask/respirator rated for dust,
contain the area, and clean up thoroughly. If you suspect lead-based paint, take lead-safe precautions before sanding or scraping.
Step 4: Make It Look “Built for This,” Not “Formerly a TV Shrine”
The best repurposed entertainment center makeovers don’t just change functionthey change the vibe. These upgrades instantly modernize the look:
High-Impact Style Moves
- Swap hardware: Matte black, brushed nickel, or modern pulls are a cheap transformation.
- Add a new back: Beadboard, shiplap-style panels, wallpaper, or painted backing turns the interior into a feature.
- Trim simplification: Removing chunky trim can shift it from “formal” to “clean-lined.”
- Feet or a base: Adding legs can make a heavy unit feel lighter and more modern.
- Lighting: LED strips or puck lights make bars and cabinets feel custom.
Cabinet Math That Saves Your Project
- Saggy shelves? Add a center support, or install a front edge band/trim as a stiffener.
- Doors won’t align? New hinges (or adjustable hinges) can fix a shocking amount of “crooked.”
- Weird TV hole? Add shelves, a faux panel, or convert it into a niche (like a coffee machine bay).
Example Makeover Plans (So You Can Picture Yours)
Example A: The 90s Oak Unit → Modern Coffee Bar
You remove the center doors, add a shelf at countertop height, line the back with a peel-and-stick pattern, and paint the exterior a warm off-white.
Swap brass pulls for modern bar pulls. Add baskets below for mugs and snacks. Total spend is often far less than buying a coffee bar cabinet new,
and the result looks like a deliberate “station,” not an afterthought.
Example B: The Big TV Armoire → Craft Closet
Take out the bulky TV shelf, add adjustable shelving, mount pegboard on the inside doors, and add labeled bins. Suddenly the mess disappears behind doors,
and your craft supplies stop migrating across the house like they’re looking for a better school district.
Example C: The Wall Unit → Entryway Organizer
Cut down overly tall sections if needed, reinforce the lower shelf for a bench, add hooks and cubbies, and paint it a durable satin enamel.
The payoff: shoes live somewhere other than the middle of the walkway, and backpacks stop “resting” on your floor forever.
Common Mistakes (And How to Avoid Them)
- Skipping primer on laminate: Looks fine… until it doesn’t. Use bonding primer.
- Painting before cleaning: Oils and residue cause adhesion failure. Degrease first.
- Rushing dry times: Paint needs time to cure, not just “feel dry.” Be patient.
- Over-sanding veneer: You can sand through it fast. Light pressure only.
- Ignoring load limits: Records, appliances, and bottles get heavy. Reinforce shelves.
Neat Finish Tips That Make Pros Nod
- Use a foam roller for large flat areas to reduce brush marks.
- Label your hardware in bags so reassembly doesn’t become a guessing game.
- Do a “scratch test” after primer dries before committing to paint coats.
- Seal high-traffic surfaces (especially shelves) with a compatible topcoat if needed.
Conclusion: Give It a Second Life (And Reclaim Your Space)
Repurposing an outdated entertainment unit is one of the most satisfying DIY furniture makeover projects because the “before” is so clearly over,
and the “after” can be genuinely useful. Whether you turn it into a pantry cabinet, a coffee bar, a mudroom locker, or a sleek storage console,
you’re trading dead space for organized life.
And the best part? Once it’s repurposed, it stops being “that old entertainment center” and starts being “the cabinet everyone compliments.”
Which is the DIY equivalent of a standing ovationminus the awkward bow.
Field Notes: of Real-World Repurposing Experience
If you’ve never repurposed a big furniture piece before, an outdated entertainment unit is a surprisingly forgiving place to startmostly because
it’s already a box of boxes. Still, it has its own personality, and by “personality” I mean “it will reveal every shortcut you try to take.”
The first time I tackled one, I assumed paint was a simple “apply and enjoy” situation. The unit disagreed. Within days, the finish started
scuffing in the spots where hands naturally grab doors. That was my crash course in laminate reality: slick surfaces need scuff sanding,
serious cleaning, and a bonding primer that’s actually designed to hold on for dear life. The second time around, I prepped properly,
and the difference was night and daysame paint, wildly different outcome.
Another lesson: shelves lie. They look flat, but once you load them with coffee gear, records, or bottles, you find out if they’re strong or just
optimistic. Reinforcing a shelf sounds dramatic, but it can be as simple as adding wood cleats along the sides or installing a discreet center support.
It’s the kind of invisible upgrade that prevents the visible tragedy of a shelf sagging like it’s exhausted from holding your adulthood.
I’ve also learned that “remove the back panel” is a cheat code for modern function. Entertainment units were built for cords, but older ones often have
tiny cutouts or awkward openings. Taking off the back (or replacing it with a cleaner panel) makes room for power strips, ventilation, and neat cable
routingespecially if you’re converting it into a charging station or bar cabinet with lighting. It’s the difference between “organized” and
“organized with a secret spaghetti monster behind it.”
Design-wise, the fastest way to make a repurposed entertainment center look intentional is to change two things: hardware and the interior backdrop.
Swapping dated pulls instantly updates the decade, and adding a painted or patterned back panel makes the inside feel finished. If the piece has a big
“TV cave,” lining the back with a contrasting color or a simple wallpaper turns that awkward void into a feature niche.
Finally: plan your new purpose around your habits, not your fantasies. If you want a coffee bar, place it near an outlet and where you’ll actually
use it. If you want a pantry cabinet, design shelves for what you buy (tall cereal boxes, snack bins, small appliances). The best upcycle isn’t the
most photogenicit’s the one that makes daily life easier. When you nail that, your old unit stops feeling outdated and starts feeling like it was
custom-built for your home all along.