Table of Contents >> Show >> Hide
- Before You Cut Anything: Pick the Right Door Plan
- Tools and Materials Checklist
- Step 1: Measure the Opening Like You Mean It
- Step 2: Build a Door That Won’t Sag
- Step 3: Prepare the Opening, Jamb, and Threshold
- Step 4: Install Hinges and Hang the Door
- Step 5: Latches, Locks, and Hardware That Actually Works
- Step 6: Weatherproofing (Because Tools Hate Baths)
- Troubleshooting: Quick Fixes for Common Shed Door Problems
- Maintenance: Keep It Working for Years
- Conclusion
- Experience Add-On: Real-World Lessons From Building Shed Doors (About )
A shed door looks like a simple rectangle until it becomes a “modern art” parallelogram that only opens if you lift it like you’re deadlifting for a personal record. The good news: most shed-door problems come from three fixable issuesbad measuring, weak bracing, or sloppy hanging. This guide walks you through measuring, building, and installing a shed door that swings cleanly, shuts tight, and stays that way through heat, cold, and the occasional shoulder-check.
Before You Cut Anything: Pick the Right Door Plan
There are two smart ways to get a solid shed entry: (1) build a custom door slab to fit your opening, or (2) install a prehung exterior door like you would on a house (great if you want better weather sealing). Either option works. The “best” choice depends on what you store and how fancy you want to get.
Common shed door styles (and when to use them)
- Single hinged door: simplest for openings up to about 36 inches wide. Great for most garden sheds.
- Double doors: ideal for riding mowers, wheelbarrows, and anything you don’t want to “rotate diagonally while whispering apologies.”
- Prehung exterior door: best for high-value storage, harsh weather, or if you want a threshold and weatherstripping without reinventing the wheel.
- Sliding/barn-style door: handy when swing space is tight, but requires straight walls and good hardware alignment.
Tools and Materials Checklist
You don’t need a full woodshop. You do need straight lumber, exterior fasteners, and the patience to check “square” more than once.
Tools
- Tape measure, pencil, speed square
- 4-foot level (or the longest you own), shims
- Circular saw or miter saw; jigsaw for notches (optional)
- Drill/driver + bits; countersink bit (recommended)
- Clamps (helpful) and a flat work surface
Materials (typical DIY slab door)
- Framing lumber for the door: straight 2×3 or 2×4 (kiln-dried is easier to keep flat)
- Door skin: exterior plywood (common) or tongue-and-groove/board-and-batten boards (classic look)
- Exterior-grade screws (or structural screws where needed), exterior wood glue
- Three hinges for tall/heavy doors (strap or T-hinges are popular for sheds)
- Latch/hasp + padlock (optional), handle
- Weatherproofing: drip cap or Z-flashing, door sweep, weatherstripping, caulk
Step 1: Measure the Opening Like You Mean It
Shed doors fail at the “measure once, cut… and then measure again because you’re now emotionally invested” stage. Do this instead:
1) Measure width and height in multiple spots
- Measure the opening width at the top, middle, and bottom. Use the smallest number.
- Measure the opening height at the left, center, and right. Use the smallest number.
2) Check for square (it matters more than you want)
Measure diagonally from corner to corner both ways. If the two diagonal measurements match, your opening is square. If they don’t, your door can still workbut you’ll build for the “smallest, safest” dimensions and shim intelligently.
3) Decide your clearances (the tiny gaps that save your sanity)
- Sides and top: aim for a consistent small gap so the door won’t bind when wood swells.
- Bottom: leave enough space for a sweep or to clear a slightly uneven threshold/floor.
If your shed floor is a slab or skids and isn’t perfectly level (welcome to Earth), plan the bottom gap accordingly. Too tight = seasonal sticking. Too big = wind, water, and the neighborhood spider union will move in.
Example measurement (single door)
Let’s say your finished opening measures 36 inches wide and 72 inches tall at its smallest points. You might build a door slab slightly smaller so it has consistent reveals and can swing freelyeven after a rainy week. If you’re installing a prehung door, you’ll frame the rough opening larger than the unit so you have room to shim it plumb and square.
Step 2: Build a Door That Won’t Sag
The #1 shed door complaint is sagging: the latch-side top corner drops, the door rubs, and your “quick project” turns into a long-term relationship. The fix is structure: a stiff frame, a proper brace, and fastening that doesn’t rely on hopes and drywall screws.
Option A: Framed door with plywood skin (strong, fast, and flat)
- Build the perimeter frame. Cut two vertical stiles and two horizontal rails. Dry-fit on a flat surface and check for square by comparing diagonals.
- Add a middle rail (recommended). This stiffens the door and gives you a solid area for a handle/lock.
- Add the diagonal brace. Here’s the rule that prevents sag: the diagonal should be oriented so it helps transfer load back toward the hinge side. For a typical hinged door, that means the brace “pushes” from the latch side down toward the lower hinge area.
- Skin it. Attach exterior plywood with exterior screws and glue. If you want extra stiffness, skin both sides (like a torsion box) and your door will feel surprisingly premium.
- Seal every edge. Prime/paint all faces and edgesespecially the bottom edgebecause water loves end grain like a cat loves pushing objects off tables.
Option B: Board-and-batten (classic shed look, needs good bracing)
If you love the rustic style, go for board-and-batten or tongue-and-groove. The key is preventing boards from cupping and keeping the assembly tight: you’ll use horizontal battens/ledges plus diagonal bracing on the back.
- Lay the vertical boards face-down, edges tight and aligned.
- Add horizontal ledges (top, middle, bottom) across the back.
- Add a diagonal brace oriented to resist sag (same principle as above).
- Fasten with exterior-rated screws; predrill near board edges to reduce splitting.
- Finish with trim on the face if you want a cleaner look and better edge protection.
Pro tips that dramatically reduce sagging
- Use three hinges on tall or heavy doors. A third hinge is cheaper than therapy.
- Use long screws into framing (not just the jamb/trim) to keep hinge-side movement under control.
- Keep the door light when you can. Overbuilding is fun until you’re hanging a door that weighs as much as a small canoe.
- Build on a flat surface and check diagonal measurements before you lock in fasteners.
Step 3: Prepare the Opening, Jamb, and Threshold
Your shed door is only as good as the hole it lives in. If the opening is out of square or the sill isn’t level, you can still winbut you’ll win with shims, not with wishful thinking.
If you’re installing a prehung exterior door
- Confirm the rough opening is sized to allow shimming space.
- Make sure the sill area is solid, clean, and as level as possible.
- Plan water management: flashing/drip cap above, sealant where appropriate, and a threshold that won’t trap water.
If you’re hanging a custom slab door in a shed opening
- Add a simple jamb/stop: a straight, sturdy frame for hinges and a stop strip so the door closes in the same place every time.
- If your shed gets wind-driven rain, install a drip cap or Z-flashing above the door and consider trim that overlaps the door edges slightly.
- For nicer sealing, plan for weatherstripping along the stop and a sweep/threshold at the bottom.
Step 4: Install Hinges and Hang the Door
Hanging a shed door is basically an exercise in geometry: plumb, level, and consistent gaps. The trick is to secure the hinge side first, then “steer” the rest with shims and adjustments.
Hinge placement basics
- Top hinge: near the top for leverage against sagging
- Bottom hinge: near the bottom for stability
- Middle hinge: centered (or slightly above center) for heavy doors
Hanging steps (custom slab)
- Set the door in the opening on temporary spacers so you get your intended bottom gap.
- Shim behind the hinge locations as needed so the hinge-side jamb stays straight and supported.
- Attach hinges to the door first, then mark and fasten to the jamb.
- Check swing and reveals (the gaps). Adjust with shims until the door opens smoothly and the gap looks even.
- Drive long screws through at least one hinge leaf into the framing for strength.
Hanging steps (prehung unit)
The general workflow is: set the unit, level the sill/threshold, plumb the hinge jamb, shim at hinge points, confirm even gaps between door and frame, then shim and fasten the latch side. Don’t rush thismost “my door won’t close” stories begin with “I eyeballed it.”
Step 5: Latches, Locks, and Hardware That Actually Works
Shed door hardware isn’t just about convenienceit’s about keeping the door aligned and closed when wind shows up with opinions.
Single door hardware
- Gate latch + pull handle: simple and effective for everyday sheds.
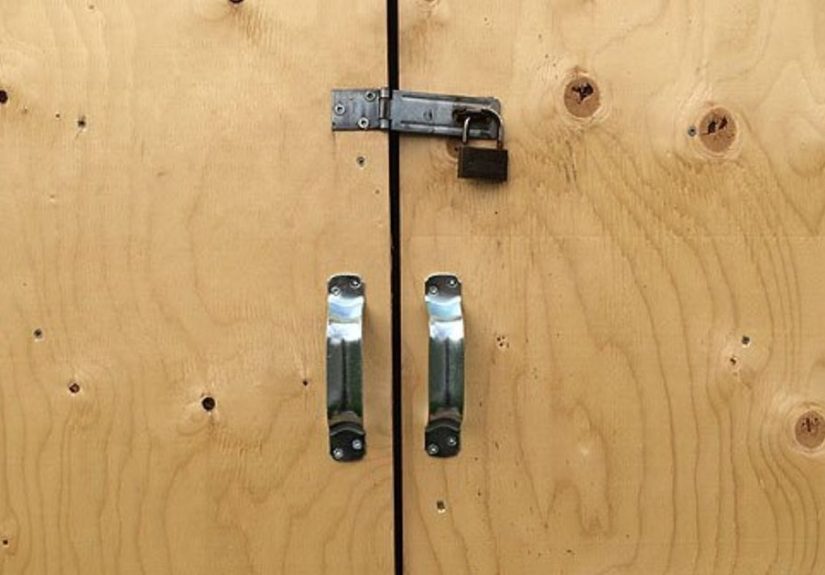
- Hasp + padlock: better security, especially for tools.
- Barrel bolt: useful as a secondary keeper (top or bottom).
Double door hardware
- Surface bolts on the “inactive” door (top and bottom) to lock it into the frame/floor.
- Astragal (overlap strip) or a center stop to reduce the gap where doors meet.
- Latch/lock on the active door.
Hinge choices for sheds
- Strap/T-hinges: spread load and look “shed-appropriate.” Great for wood doors.
- Butt hinges: clean look, often used on prehung doors or more finished builds.
Step 6: Weatherproofing (Because Tools Hate Baths)
Even a small gap can invite water, drafts, insects, and that one leaf that always finds a way inside. Weatherproofing is a mix of sealing, shedding water, and allowing movement without binding.
Best-bang-for-buck weatherproof upgrades
- Drip cap or Z-flashing above the door to kick water away from the top edge and trim.
- Weatherstripping on the stops to reduce side/top gaps.
- Door sweep to seal the bottom while still clearing an uneven floor.
- Threshold if you want a more finished seal (especially on concrete slabs).
- Exterior caulk where trim meets siding (not where the door needs to move).
Troubleshooting: Quick Fixes for Common Shed Door Problems
The door rubs at the top latch corner
- Check for sag: tighten hinge screws and replace one screw per hinge with a longer screw into framing.
- Add or adjust shims behind hinge locations to bring the door back into alignment.
- If the frame is racked, re-square the opening if possible (sometimes the shed itself needs bracing).
Big gap at the top, tight at the bottom (or vice versa)
- This usually means the jamb isn’t plumb or the threshold/floor isn’t level.
- Shim strategically and re-check with a level.
Latch won’t catch consistently
- Confirm the door closes to the same stop each time.
- Move the strike/latch slightly, or add an adjustable latch/keeper.
Water sneaks in at the bottom
- Add/adjust a sweep so it contacts the threshold lightly.
- Install a threshold or build up the sill area so water can’t run straight under the door.
Maintenance: Keep It Working for Years
- Recoat exposed edges when paint/finish wears thinespecially the bottom edge.
- Lubricate hinges if they squeak (your shed shouldn’t sound haunted).
- Check fasteners seasonally; wood movement is normal, loose screws are optional.
- Replace weatherstripping when it compresses permanently or tears.
Conclusion
A good shed door is a small project with big consequences: it protects tools, keeps out weather, and saves you from daily door-wrestling. Measure carefully, build square on a flat surface, brace the door so it resists sagging, and install it with attention to plumb and consistent gaps. Finish with the right hinges, a latch that holds under wind load, and simple weatherproofingand you’ll have a shed door that behaves like a grown-up.
Experience Add-On: Real-World Lessons From Building Shed Doors (About )
The first shed door I ever “built” was mostly confidence held together by screws. It looked fantasticfrom about 20 feet away, in low light, with the door closed. The moment I opened it, gravity introduced itself and the latch-side corner sagged like it had a long day at work. That’s when I learned the difference between “a rectangle made of wood” and “a door.”
The biggest upgrade wasn’t fancy hardware or a designer handle. It was building on a flat surface and refusing to move on until the diagonals matched. Squareness is the boring hero of door building. If your frame starts out racked, every later step becomes a negotiation. Hinges won’t sit right, the latch will be moody, and weatherstripping becomes a comedy routine where the punchline is drafts.
Second lesson: brace direction matters, but fastener strategy matters even more. A diagonal brace helps transfer load back toward the hinge side, but only if it’s firmly connected at the ends and along its length. If you attach it with a couple of token screws like you’re pinning a note to a corkboard, the brace becomes decorative. When I started predrilling, using exterior screws, and making sure the brace had solid contact at the joints, sagging dropped dramatically.
Third: sheds move. They settle, they rack a little in wind, and they expand and contract like they’re breathing. That means you should plan small, consistent gaps and expect seasonal changes. The goal isn’t “zero gap”that’s how you get a door that works in April and becomes a welded shut sculpture in August. I began leaving a sensible clearance, then using weatherstripping and a sweep to seal rather than forcing the wood to do the sealing job.
Fourth: the bottom edge is where doors go to die. It gets splash-back, sits in damp air, and loves to wick water. Painting only the face is like wearing a raincoat but leaving your shoes in a puddle. Once I started sealing the bottom edge thoroughly (and adding a drip cap above the door), the door stopped swelling and sticking. If you want a shed door that lasts, treat the edges like they’re the main characterbecause they are.
Finally: don’t underestimate “good enough” upgrades. A third hinge, one long screw into framing, a simple threshold, and a proper latch alignment can turn an annoying shed into a genuinely pleasant daily-use space. The best shed door isn’t the fanciest. It’s the one that opens with one hand while you’re holding a bag of soil in the other, and closes with a satisfying click instead of a shoulder-check.